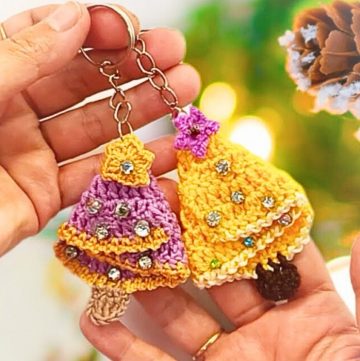
Here’s a textured crochet Christmas tree ornament with a crisp triangle shape, fluffy Jasmine stitches, a tiny trunk, and a five-point star for hanging or gifting.

Bring a little handmade texture to your Christmas decorating with this crochet tree ornament. The puff-stitch fabric creates a thick, dimensional triangle that already feels substantial without stuffing, while the brown trunk and white star give the finished crochet piece its familiar holiday shape.
Working from the bottom upward, the crochet tree gradually narrows from seven puff-stitch stars to one at the top. You’ll learn the special puff clusters first, then follow the decreasing rows, add the simple border and trunk, and finish with a small five-point star. At about 4 to 5 inches tall, it is also easy to personalize with different colors, tiny decorations, or your preferred hanging loop.
Credit Molina DIY
The Stitch That Gives the Tree Its Shape
The main fabric uses puff-stitch clusters rather than ordinary rows of single or double crochet. Each cluster forms a raised star-like center, and the number of star centers decreases by one on each row. That gradual reduction is what creates the triangular tree shape.
Before beginning the tree, it helps to practice the closing motion once. The loops are deliberately kept long, so avoid pulling them tight while forming the puff. Keeping your working yarn controlled with your thumb also makes it easier to pull through the entire group of loops cleanly.
Jasmine Stitch Guide
Single Puff Stitch: Pull your working loop a little longer. Work (yarn over, insert hook into the indicated space, pull up a long loop) 3 times, giving you 7 loops on the hook. Hold the working yarn with your thumb, yarn over, and pull through all loops. Insert the hook into the space created by the held yarn, yarn over and pull up a loop, yarn over and pull through both loops.
Unclosed Puff Stitch: Pull the working loop longer. Work (yarn over, insert hook into the indicated space, pull up a loop) 3 times, leaving all the resulting loops on your hook.
2-Puff Cluster: Make 1 unclosed puff stitch in the first space and hold its loops with your middle finger. Yarn over, insert the hook into the next space, and make another unclosed puff stitch. Hold the working yarn with your thumb, yarn over, and pull through all loops on the hook. Insert the hook into the held-yarn space, yarn over and pull up a loop, yarn over and pull through both loops.
3-Puff Cluster: Make 1 unclosed puff stitch in the top space, or “eye,” of the previous cluster. Make a second unclosed puff stitch in the bottom/base space, then a third unclosed puff stitch in the next space along the row. Hold the working yarn, yarn over and pull through all loops. Insert the hook into the held-yarn space, pull up a loop, yarn over and pull through both loops.
Choose the Look Before You Begin
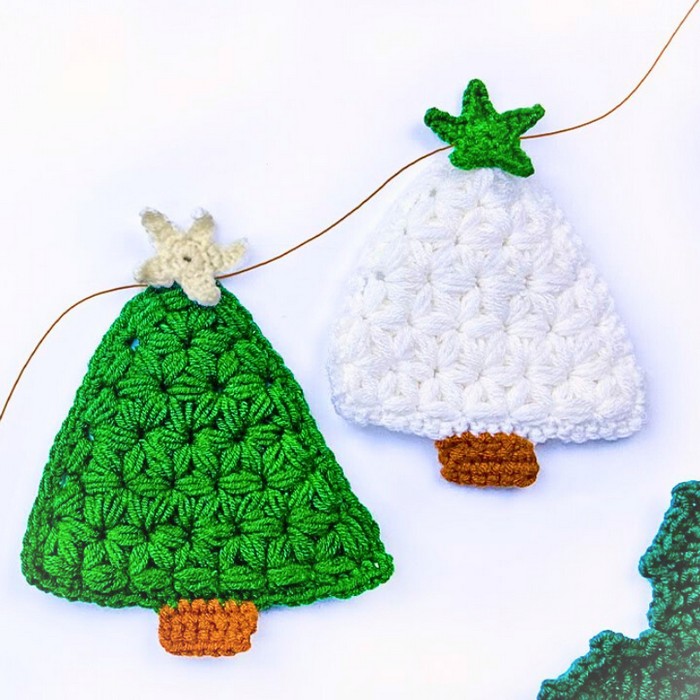
The finished ornament measures approximately 4 to 5 inches tall. Green with a white star gives you the traditional Christmas-tree look, while a snowy white tree with a green star creates a different winter feel.
For extra decoration, small colorful beads, sequins, or French knots can be sewn onto the finished tree as ornaments. If you want it ready for the Christmas tree, add a loop made from festive ribbon, twine, or a short crocheted chain to the top star.
Materials & Tools
- Milk Cotton Yarn (50g) in green and brown, or white and brown for a snowy tree
- Small amount of white yarn for the star
- 2.5 mm crochet hook
- Scissors
- Tapestry/sewing needle for assembly and weaving in ends
Abbreviations
- C = Crochet
- Ch = Chain
- SC = Single Crochet
- DC = Double Crochet
- HDC = Half Double Crochet
- Dec = Decrease
- Inc = Increase Crochet
- Sl = Slip
- St/Sts = Stitch/Stitches
- Sl St = Slip Stitch
- Rev = Reverse
Crochet the Tree Body
The tree is worked from the bottom upward. The foundation begins with 7 puff stitches, then each new row contains one fewer star center, naturally narrowing the fabric toward the top.
Foundation Row: Make a slip knot and Ch 1; make 1 Single Puff Stitch in the first Ch; continue making 1 Single Puff Stitch into the top eye of the previous puff until you have a straight chain of 7 Puff Stitches.
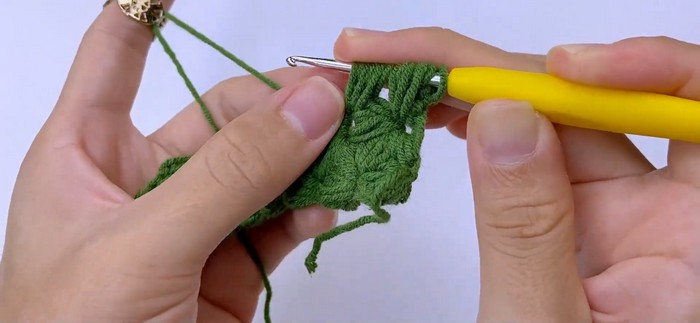
Row 1 - 6 Stars: Make 1 Unclosed Puff Stitch in the top of the 7th puff, then another Unclosed Puff Stitch in the next space down between the 6th and 7th puffs; close these together to form a 2-Puff Cluster; work a 3-Puff Cluster with one puff in the top space, one in the base space, and one in the next space along the foundation; repeat 3-Puff Clusters to the end, giving you 6 star centers.
Row 2 - 5 Stars: Turn your work; begin with a 2-Puff Cluster using one unclosed puff in the first space and one in the next space, then close them together; work 3-Puff Clusters across to the end for 5 star centers.
Row 3 - 4 Stars: Turn; start with a 2-Puff Cluster, then work 3-Puff Clusters across the row for 4 stars.
Row 4 - 3 Stars: Turn; start with a 2-Puff Cluster, then work 3-Puff Clusters across the row for 3 stars.
Row 5 - 2 Stars: Turn; start with a 2-Puff Cluster, then work 3-Puff Clusters across the row for 2 stars.
Row 6 - 1 Star: Turn; start with a 2-Puff Cluster, then work exactly one 3-Puff Cluster to leave 1 star at the top point; Ch 1, cut the yarn, and pull through to fasten off.
At this stage, the decreasing pattern should be easy to see: the widest edge is at the bottom, and each row steps inward toward the single top star. If the triangle looks uneven, check that each row has decreased to the stated number of star centers before continuing.
Give the Triangle a Clean Border
The border adds definition to the puff-stitch edges and creates clear spaces for the trunk and star.
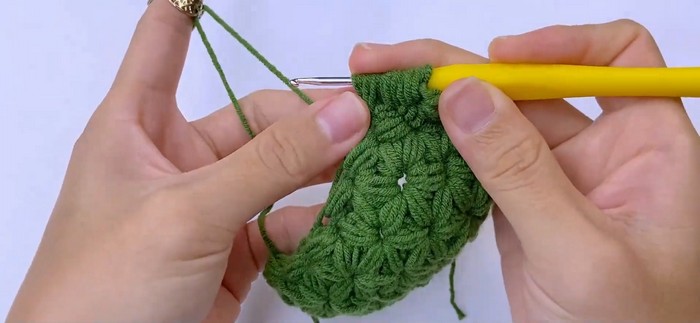
Tree Border: Join green yarn at the bottom right corner space; Ch 1, work 2 SC in each star-center space along the right-angled side; work 3 SC in the very top point space; work 2 SC in each star-center space down the left angled side; work 3 SC in the bottom left corner space; work 2 SC in each space across the flat bottom edge; work 3 SC in the starting bottom right corner space; Sl St into the first SC to join, fasten off, and weave in the ends.
The three-SC corner groups help the border turn without pulling the triangle out of shape. Keep the side stitches even as you travel around rather than tightening them against the thick puff stitches.
Add the Brown Trunk
The trunk is intentionally small and centered along the flat bottom edge, so find the middle before attaching the brown yarn.
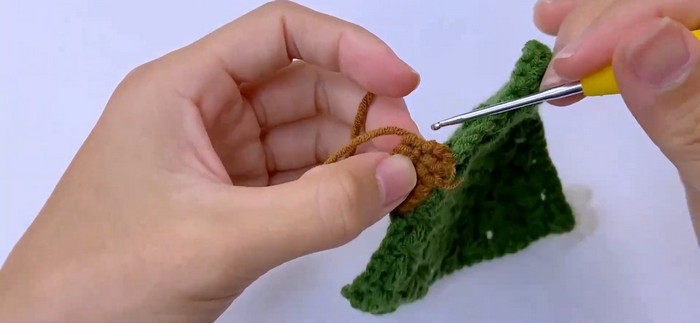
Row 1: Identify the center of the bottom edge; join brown yarn in the center, Ch 1, work 4 SC evenly across the middle stitches, then turn.
Row 2: Ch 1, work 1 SC in each of the 4 sts across, then turn.
Row 3: Ch 1, work 1 SC in each of the 4 sts across.
Fasten off, cut the yarn, and weave in the loose ends.
Make the Five-Point Star
The star is worked separately in white yarn and sewn onto the top of the tree. Its small size makes it useful to keep the chain loops loose enough for the points to form clearly.
Round 1: Make a slip knot, Ch 4, and Sl St into the first Ch to form a ring.
Star Point 1: Ch 1, SC into the ring, Ch 3, Sl St into the 2nd Ch from the hook, SC into the 3rd Ch, then Sl St back into the center ring.
Star Points 2–5: SC into the ring, Ch 3, Sl St into the 2nd Ch, SC into the 3rd Ch, Sl St back into the ring. Repeat this sequence 4 times until you have 5 points.
Fasten off, leaving a long tail for sewing. Tie the two loose yarn tails together tightly at the back of the star to help secure its shape.
Put the Star in Place
Thread the long white tail onto your tapestry needle and position the star directly over the top point of the tree, sitting across the 3 SC corner stitches. Sew it securely into place, tie a knot at the back, and weave the remaining ends into the thicker puff-stitch fabric where they can stay hidden.
For a finished ornament, add a loop of festive ribbon, twine, or crocheted chain to the top star. The thick Jasmine-stitch body does not require stuffing, so the ornament remains lightweight while keeping its textured triangular form.
Easy Holiday Variations
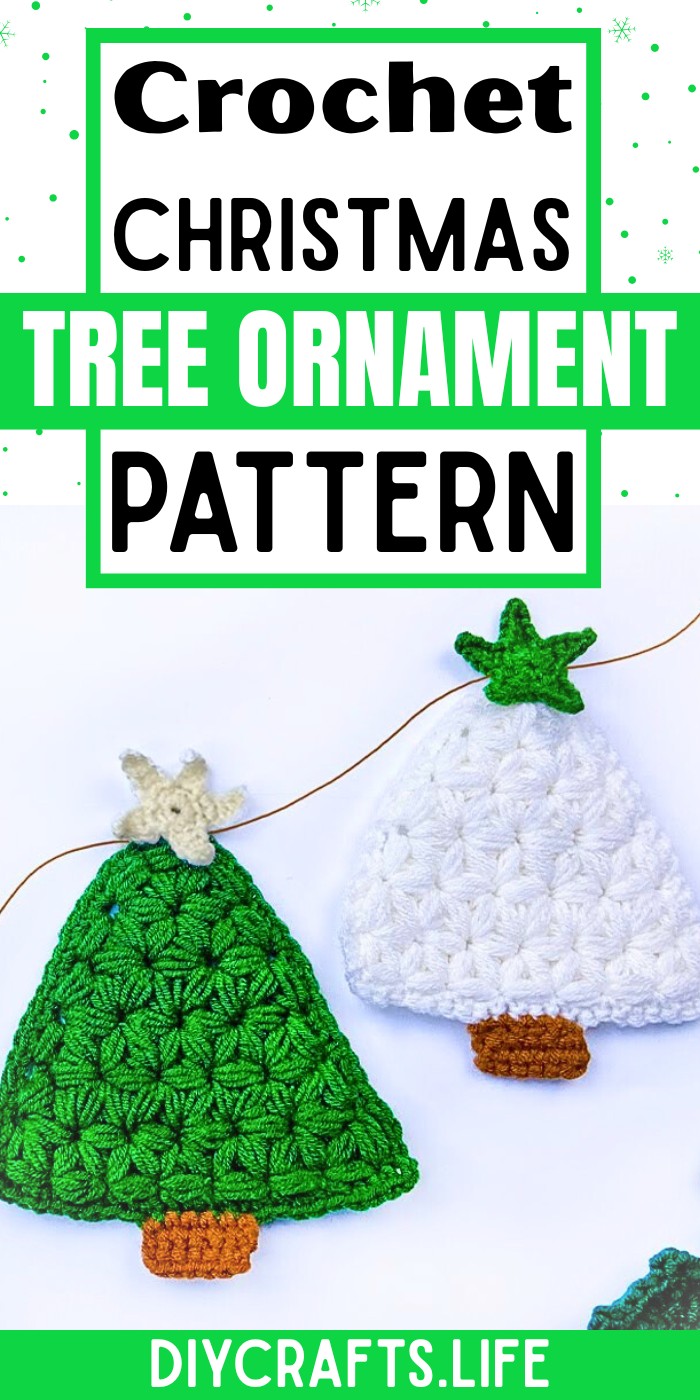
- Use green yarn with a white star for a traditional Christmas palette.
- Switch the tree to white and use green for the star for a snowy version.
- Sew on tiny beads, sequins, or French knots as miniature baubles.
- Make several trees in different color combinations for a coordinated handmade ornament set.