Create a festive and charming Kirby-themed crochet project that’s perfect for holiday décor or gifting! This adorable design combines beauty, versatility, and functionality, making it a standout in your crochet collection. It's a wonderful way to brighten up Christmas celebrations.

This crochet Kirby makes for a heartwarming decoration, gift, or playful accent. Durable and carefully designed, it captures holiday cheer with its cheerful vibe. Its compact and lightweight design ensures usability and lasting appeal for all ages and home settings.
Crochet Kirby Christmas
Crafting this crochet Kirby is a fun, beginner-friendly project that offers room for personal touches. Its customizable nature lets you adapt colors or add unique details. Whether you’re new to crochet or experienced, this pattern is a creative and rewarding way to enjoy the holiday season.
Credit Nhi Art Handmade - Lem'n Do
Materials and Preparation:
To create this adorable Kirby Christmas crochet project, you will need the following materials:
- Yarn Type: Choose soft acrylic yarn in the following colors: pink for Kirby, red for the Santa hat, white for the trim, and yellow for the star.
- Hook Size: Use a 4mm (G-6) crochet hook or size appropriate for your yarn.
- Additional Tools: Scissors, yarn needle, stitch markers, and stuffing material (polyester fiberfill).
- Yarn Weight Requirements: Medium weight (4) yarn is recommended to achieve a well-defined structure.
Abbreviations and Notes:
To follow the pattern efficiently, familiarize yourself with the crochet abbreviations used:
- SC: Single Crochet
- HDC: Half Double Crochet
- DC: Double Crochet
- SS: Slip Stitch
- INC: Increase (2 SC in one stitch)
- DEC: Decrease (single crochet 2 stitches together)
- CH: Chain
- ST: Stitch

Here are a few tips before starting:
- Maintain consistent tension throughout the project for uniformity.
- Use stitch markers to keep track of rounds and important spots in the pattern.
- Stuff Kirby and the hat firmly for a fuller look.
Gauge, Approximate Size, and Pattern Notes:
- Gauge: Gauge is not critical for this project, but maintain even stitches for best results.
- Approximate Size: The finished Kirby character will measure approximately 6 inches tall, including the Santa hat.
- Special Techniques: Employ the seamless join method for attaching the parts, and consider surface crochet for facial details. No gauge swatch necessary.
Step-by-Step Pattern:
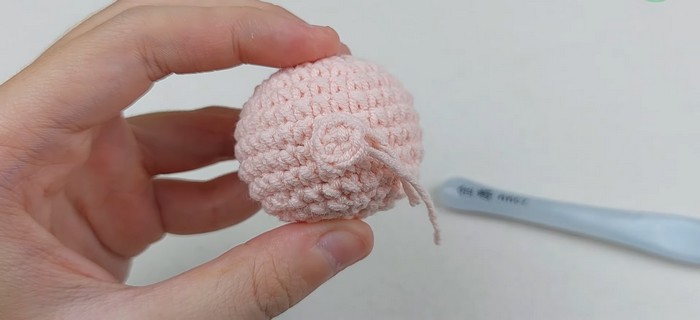
Kirby’s Body:
- Foundation/Base:
- Start with a magic ring.
- Round 1: SC 6 into the magic ring. (6)
- Round 2: INC in each ST around. (12)
- Round 3: [SC, INC] around. (18)
- Round 4: [SC 2, INC] around. (24)
- Round 5: [SC 3, INC] around. (30)
- Round 6-12: SC in each ST around. (30)
- Shaping and Stuffing:
- Round 13: [SC 3, DEC] around. (24)
- Round 14: [SC 2, DEC] around. (18)
- Begin stuffing firmly with polyester fiberfill.
- Round 15: [SC, DEC] around. (12)
- Round 16: DEC around, SS to join, and fasten off. Secure and hide the end.

Kirby’s Arms (make 2):
- Start with a magic ring.
- Round 1: SC 6 into the magic ring. (6)
- Round 2: [SC, INC] around. (9)
- Round 3-4: SC in each ST around. (9)
- SS to join and fasten off, leaving a long tail for sewing.
Kirby’s Feet (make 2):
- Start with red yarn and a magic ring.
- Round 1: SC 6 into the magic ring. (6)
- Round 2: INC in each ST around. (12)
- Round 3-8: SC in each ST. Fasten off leaving a long tail for sewing.

Kirby's Santa Hat:
- Start with a magic ring using red yarn.
- Round 1: SC 6 into the magic ring. (6)
- Round 2: SC in each ST around. (6)
- Round 3: [SC, INC] around. (9)
- Round 4: SC in each ST around. (9)
- Continue increasing evenly while maintaining SC rows in between until you reach the desired size.
- Trim:
- Attach white yarn and SC around the base of the hat.
- Optionally, add a white pompom at the top of the hat.

Assembly and Finishing Touches:
- Attach the arms and feet using yarn needles. Seam securely.
- Sew the hat onto Kirby’s head, ensuring it is positioned correctly.
- Facial details: Embroider eyes and mouth using black and white yarn or felt for added detail.

Pattern Question:
Question: Can I adjust the size of the Kirby pattern?
Answer: Yes, you can easily adjust the size by using different yarn thicknesses or hook sizes to make a smaller or larger version.
Conclusion:
The Crochet Kirby Christmas project is a delightful way to bring holiday joy to your home or loved ones. Simple, fun, and equally charming, it’s a must-try for crocheters looking to spread creativity and festive cheer.


