Bring autumn vibes to your home with this adorable crochet pumpkin tutorial! Perfect for beginners and quick to make, these pumpkins are both stylish and versatile. Customize the colors, sizes, and shapes to suit your space while adding a handmade touch of charm to your seasonal decor.
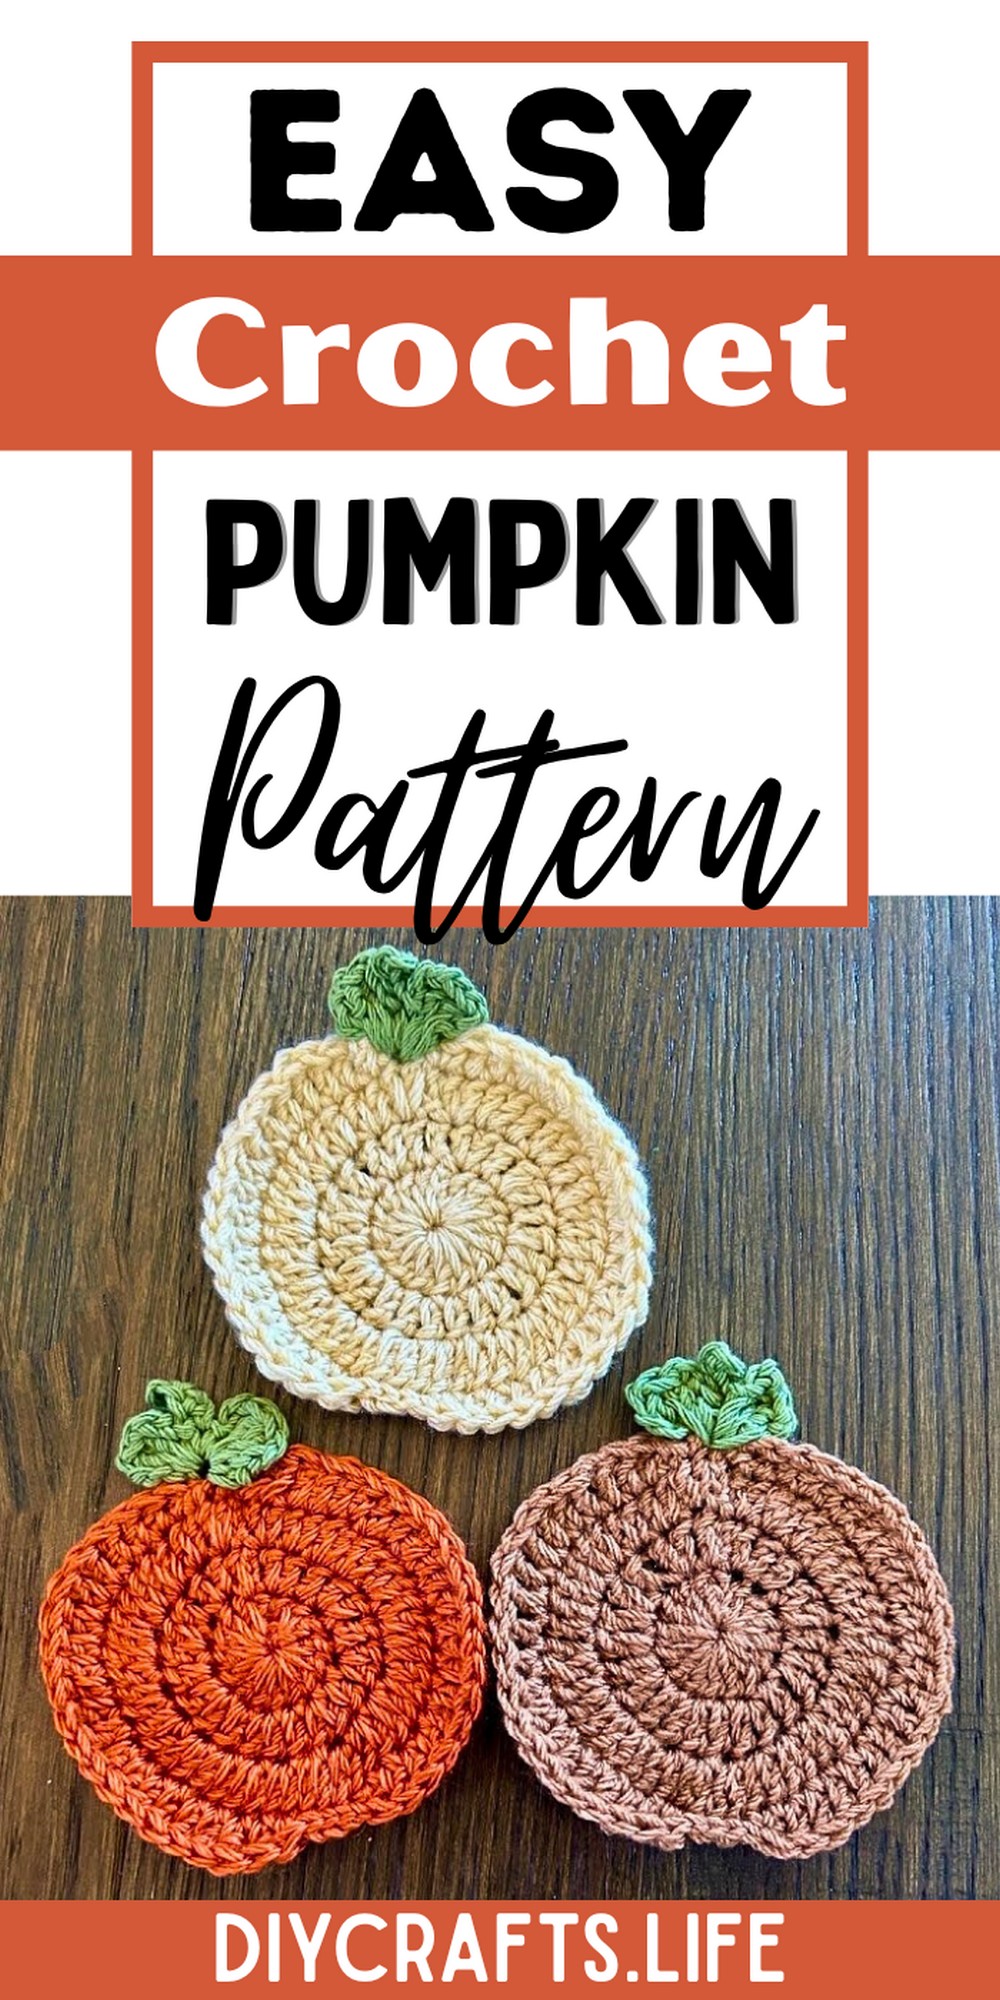
These crochet pumpkins are durable, reusable, and ideal for fall decor. Use them as coasters, table accents, or even unique seasonal gifts. Their sturdy design and customization make them visually appealing and functional, blending creativity with utility for any autumn setup.
Crochet a Pumpkin
This project is beginner-friendly, manageable, and fun to create! Following this easy step-by-step process, you can craft pumpkins in any color or size. With plenty of room for customization, it's a perfect way to showcase your creativity and enjoy crocheting, whether you're new or experienced.
Materials and Preparation
To crochet this adorable pumpkin, you will need:
- Yarn: Two colors of yarn:
- Main color – approximately 50g of yarn.
- Accent color – scrap yarn is sufficient.
- Hook Size: A 4mm to 5mm crochet hook (tutorial uses a 4.25mm hook).
- Additional Tools:
- Scissors.
- Tapestry needle (optional, for weaving in ends).
- Yarn Weight: Medium-weight yarn is ideal (also known as worsted weight or category 4 yarn).
Abbreviations and Notes
-
Abbreviations:
- CH: Chain.
- SC: Single Crochet.
- DC: Double Crochet.
- SS: Slip Stitch.
-
Pattern Notes:
- The pattern starts with a small circle used as the base. All stitches are worked into this circle for the foundation round.
- Chains at the beginning of rounds do not count as stitches.
- For the "leaf stems" decoration, use the second yarn color.

Gauge, Approximate Size, and Pattern Notes
- Gauge: Gauge is not mentioned in the tutorial and is not critical for this pattern.
- Approximate Size: The finished pumpkin fits in your palm and is ideal for fall decorations or coasters.
- Special Techniques: No advanced techniques are required; only foundational stitches (DC, SC) are used.
- Gauge Swatch: A gauge swatch is not required, as the pumpkin's size is flexible and adjustable.
Step-by-Step Pattern
Round 1: Create the Foundation Circle
- Start with a slip knot.
- CH 4, SS into the first chain to create a circle.
- CH 3 (does not count as a stitch).
- Insert 16 DC into the circle.
- Tip: Weave the yarn tail while working to tighten the circle later.
- SS to the top of the first DC to close the round.

Round 2: Increase Stitches
- CH 3 (does not count as a stitch).
- In the first stitch, insert 2 DC.
- In the next stitch, insert 1 DC.
- Repeat the pattern of 2 DC, 1 DC in every stitch around.
- SS to the top of the first DC to close the round.

Round 3: Further Increases
- CH 3 (does not count as a stitch).
- Insert 2 DC into every stitch around.
- SS to the top of the first DC to close the round.
Round 4: Create Body Segments
- CH 1.
- Insert 21 DC into the first 21 stitches.
- SS into the next 4 stitches to create the "dividers" (slip stitches).
- Repeat: Insert 21 DC into the next segment of stitches.
- SS into the remaining stitches at the end of the round.

Round 5: Final Body Shape
- CH 1.
- Insert 21 DC again into the next segment of stitches.
- Work 4 SS into the divider stitches.
- Finish with 21 DC again.
- Close the round by SS into the starting chain.
Leaf Decoration (Optional)
- Switch to your second color yarn.
- Tip: Insert your hook into the front loop of a slip stitch, which may feel tight but ensures stability.
- CH 3, then insert 2 DC into the same stitch.
- CH 3, insert a SC into the same stitch to create a "leaf."
- CH 4, skip 1 chain, and work SC in the next 3 chains.
- SS back into the base stitch to secure the stem.
- Repeat the process for a second leaf if desired.

Finishing Touches
- Cut your yarn and weave in the ends using a tapestry needle or your hook.
- Adjust the pumpkin's shape by pulling the yarn tight where needed.
Pattern Question:
Question: Can I use a different yarn weight than suggested in the tutorial?
Answer: Yes, you can use different yarn weights, but be sure to match the hook size appropriately. This will affect the pumpkin's size and texture, allowing for even more customization!
Conclusion:
Crocheting a pumpkin combines simplicity, creativity, and functionality. Whether decorating for fall or crafting as gifts, this project stands out for its charm and usefulness. With step-by-step guidance, it’s an enjoyable activity you’ll love trying again and again.