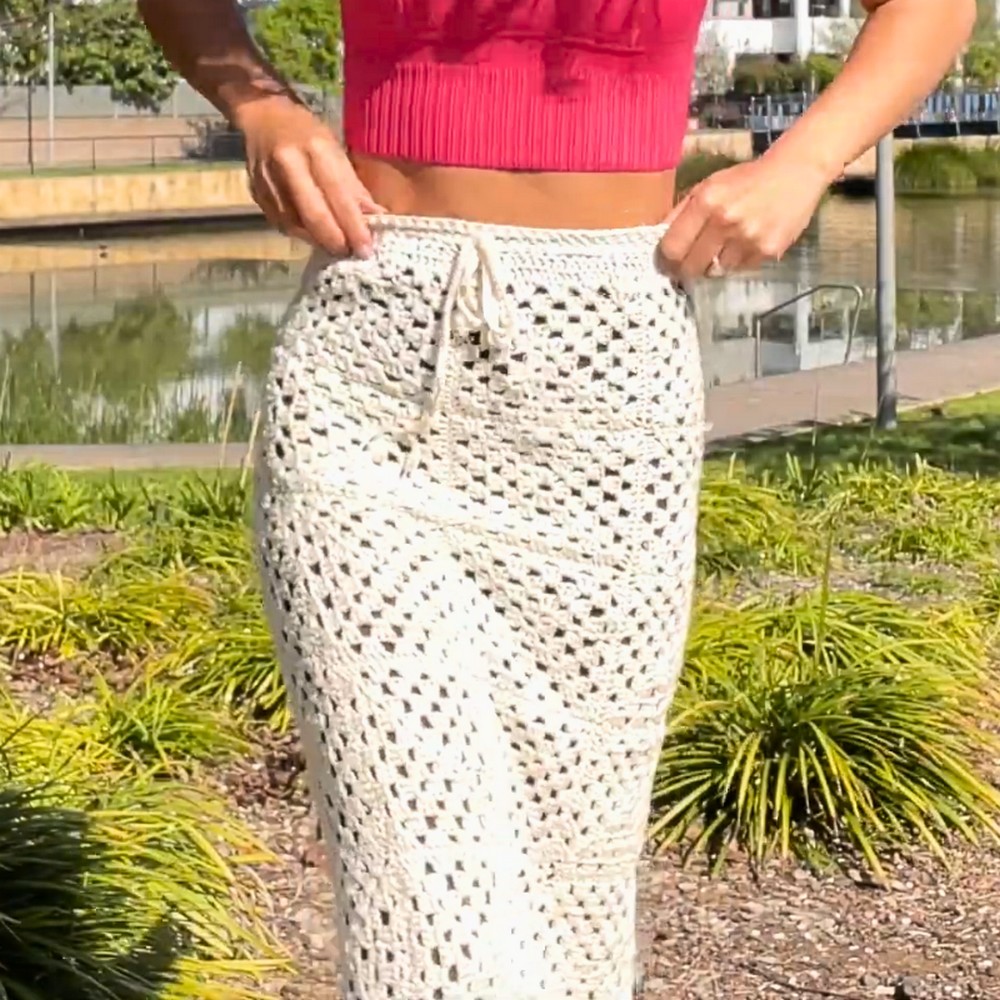
Add a touch of timeless charm to your wardrobe with this Long Crochet Granny Square Skirt. This vibrant and thoughtfully designed piece exudes vintage beauty while being effortlessly modern. Perfect for casual outings or special occasions, this skirt is where creativity meets elegance.

Crochet Granny Square Skirt
What makes this Crochet skirt truly outstanding is its use of classic granny squares arranged into a flowing, flattering silhouette. Its length not only enhances its stylish appeal but also provides comfort and versatility. Whether you opt for bold, contrasting colors or soft, subtle tones, this pattern allows full customization to match your style. The intricate yet approachable design makes it a satisfying project and a standout addition to any outfit.
Credit Emma Warrender
Materials & Tools Needed
- Yarn:
- Medium weight yarn (Size 4) is recommended for structure and durability.
- Cotton yarn is a great option for a breathable skirt; acrylic is less breathable but works well for vibrant colors.
- Choose multiple colors for granny squares or keep it monochrome for a unified design.
- Crochet Hook:
- Use a 5.0 mm (H/8) hook, or adjust based on your yarn weight and tension preferences.
- Scissors:
- Needed for clean cuts when finishing squares and edges.
- Tapestry Needle:
- Helpful for sewing granny squares together and weaving in loose ends.
- Stitch Markers:
- Optional, but can help you mark sections for joining or keeping track of your work, especially on skirt edges.
Finished Size & Customization Ideas
- Approximate Size Details:
- The tutorial demonstrates creating a skirt for a standard adult size (e.g., S/M).
- The finished size depends on the number of granny squares used, their individual dimensions, and any additional joining rows.
- Example size:
- Waist: Approx. 28–34 inches (elastic band adjustable).
- Length: 36–40 inches, depending on the number of square rows used.
- Customization Ideas:
- Adjusting Size:
- For larger sizes, make more granny squares or adjust the size of each square.
- Add extra rows between squares for a longer skirt or fewer rows for a mini skirt.
- Different Yarn Weights:
- Use bulky yarn for a quicker project and more structured skirt, or lightweight yarn for a flowy and airy result.
- Adjust the hook size to match the yarn weight.
- Color Changes:
- Create a checkerboard effect by alternating colors for squares.
- Use ombre or gradient yarn for seamless color transitions.
- Adding Details:
- Edge the hem of the skirt with decorative stitches like scallops or picots for a feminine touch.
- Consider adding beads along the edges or incorporating metallic yarn for flair.
- Strap Style:
- Instead of an elastic waistband, use crocheted ties or ribbons threaded through the band for customization.
- Adjusting Size:
Step-by-Step Detailed Crochet Instructions
This skirt is composed of granny squares joined together and finished with a structured waistband. Here's the breakdown:
1. Creating Granny Squares
Step 1: Foundation Chain
- Create a slip knot and chain 4.
- Join the chain into a ring using a slip stitch.

Step 2: Round 1
- Chain 3 (counts as the first dc) and create 2 dc into the ring.
- Chain 2, then work 3 dc into the ring.
- Repeat (3 dc, ch 2) three more times for a total of 4 "clusters".
- Join with a slip stitch into the top of the first chain 3.
Step 3: Round 2
- Chain 3, work 2 dc into the first corner space (ch-2 space).
- Chain 2, then work 3 dc back into that same corner space.
- Work 3 dc into the next space, chain 2, and 3 dc into the same corner space.
- Repeat this around to form the second round of the square.
- Join with a slip stitch into the top of the first chain 3.
Step 4: Rounds 3–5 (or Desired Size)
- Continue adding rounds to your square using the same method:
- Working clusters of 3 dc into the spaces, chaining 2 between clusters, and 1 chain between stitches on the sides.
- The tutorial recommends 5 rounds per square for a standard skirt. Adjust based on your desired square size.
2. Joining the Squares
Step 1:
- Crochet or sew the squares together. You can use a slip stitch join or a whip stitch with a tapestry needle.
Step 2:
- Form a long strip that matches your waist measurement for the waistband portion of the skirt.
Step 3:
- Sew additional rows of granny squares underneath the waistband strip to create the full skirt length.
Step 4:
- For a seamless join, align the stitches carefully and use a contrasting yarn for a decorative join or matching yarn for an invisible join.

3. Waistband
Step 1: Adding Elastic or Band
- To create the waistband, crochet a row of single crochet along the top edge of the granny squares.
- Measure elastic to fit your waist snugly, sew the elastic ends together to create a loop, and thread it through the single crochet row.
Step 2: Reinforce Waistband
- Add one or two additional rows of single crochet over the elastic for durability.
4. Edging & Hem Finishing
Step 1:
- Work a decorative edge along the bottom hem. Examples:
- Scallop Edge: (Skip 1 st, 5 dc in next st, sk 1 st, sl st).
- Picot Stitch: (sc, ch 3, sl st in first chain from hook, sc).
Step 2:
- Optional: Add beads, fringe, or tassels for more movement and style.

5. Final Touches
Step 1:
- Block the skirt if necessary. Pin it to a flat surface and steam or wet it to shape evenly and relax the stitches.
Step 2:
- Weave in all loose yarn ends using a tapestry needle.

Final Notes
This Long Crochet Granny Square Skirt is a timeless and highly customizable project. The granny square design allows for endless color and styling possibilities, making it suitable for beginners looking to experiment or advanced crocheters wanting to showcase their creativity.