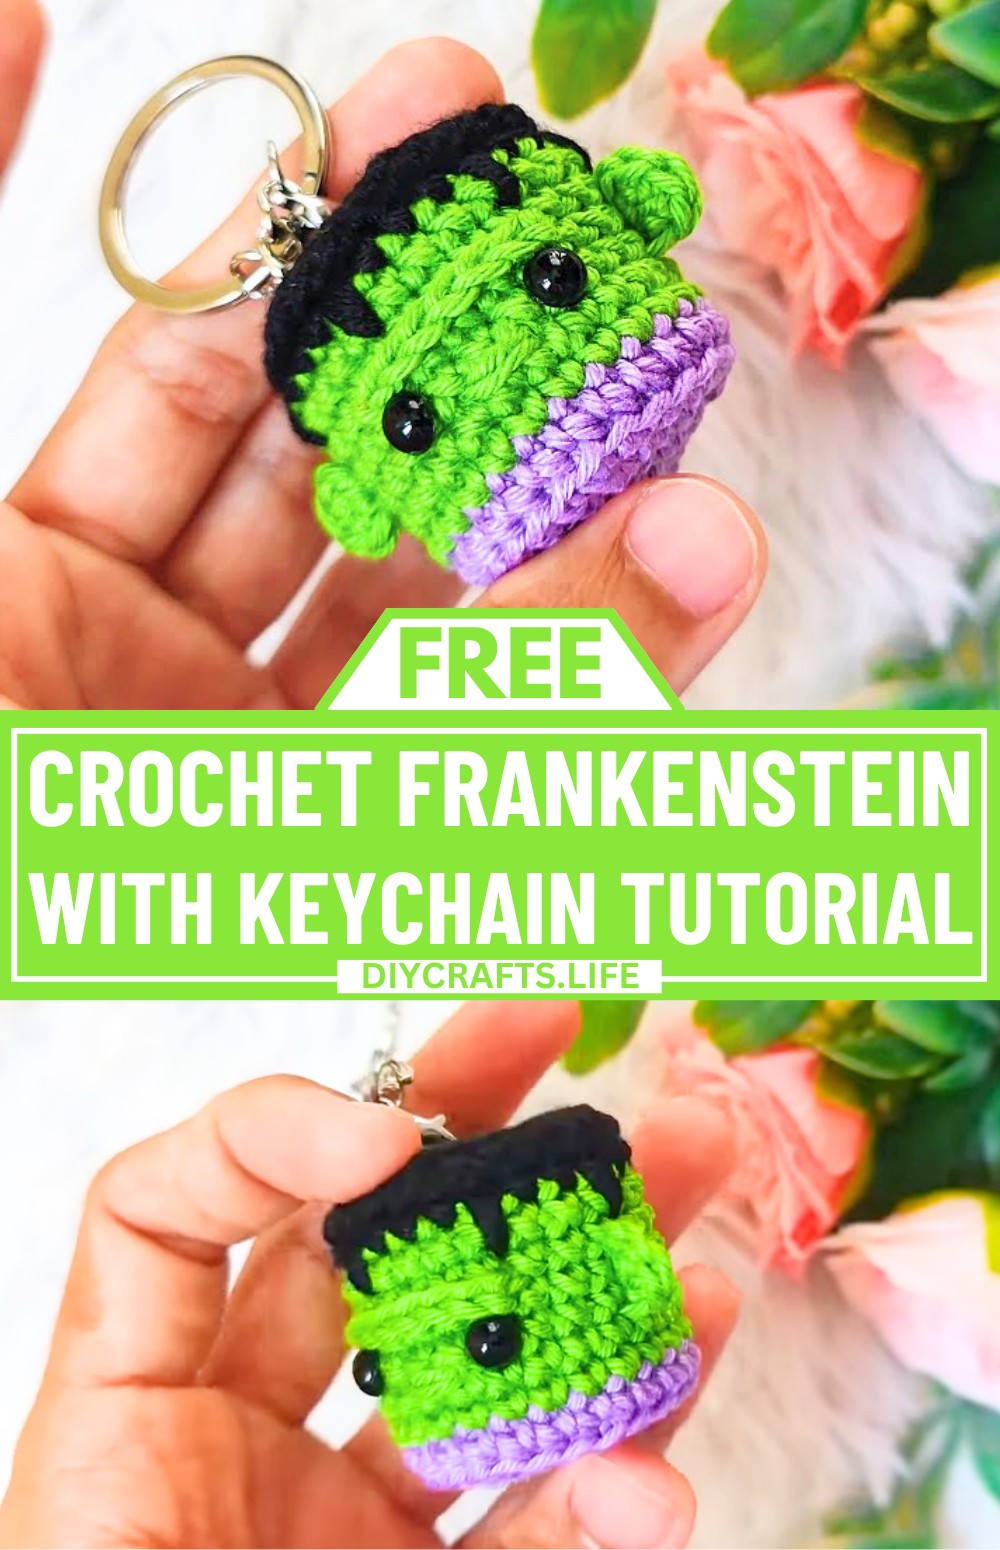
This adorable Frankenstein keychain is a fun and creative way to add a touch of personality to your belongings. Perfect for Halloween, kids, or anyone who loves cute decorations, it works as a playful accessory for your keys and bags. It’s a keychain miniature version of the iconic monster, made entirely of crochet, showcasing vibrant color changes and thoughtful details like ears, eyebrows, and bold black stitching.
Crochet Frankenstein Keychain Tutorial

This keychain design uses simple crochet techniques and materials like cotton yarn, a bottle cap for structure, and a few finishing touches. The creative steps, like switching yarn colors for Frankenstein’s signature look and embroidering tiny details like the nose and eyebrows, make this process both simple and enjoyable. Beginners will find it welcoming, and experienced crocheters will love its fun design.
Credit Aquele Crochet
Materials and Tools Needed
- Yarn: 2mm thick 100% cotton yarn in green and black
- Crochet Hook: 2mm crochet hook
- Additional Materials:
- Plastic bottle cap (for structure inside the keychain)
- Scissors
- Tapestry needle
- Small amount of silicone-coated synthetic fiber (for stuffing)
- Silicone glue (optional, for securing the interior)
- Jump rings (for turning it into a keychain)
- Sewing thread (to attach eyes and other details)
Finished Size
- Approximate Size: Fits comfortably in your hand. The size is determined by the 2mm yarn and hook combination.
- Customization Ideas:
- Use different yarn colors for creative Frankenstein designs.
- Add tiny embellishments like scars, stitches, or hair variations for personality.
- Swap out the plastic bottle cap with other small items for different shapes or firmness.
Pattern Abbreviations & Terminology
- MR: Magic Ring
- SC: Single Crochet
- INC: Increase (2 SC in the same stitch)
- BLO: Back Loop Only
- SLST: Slip Stitch
- CH: Chain
- ESC: Elongated Single Crochet (insert hook into the row below and pull up a longer loop, then yarn over and complete as a single crochet)
Note: The pattern uses U.S. crochet terminology.

Step-by-Step Crochet Instructions
Main Body of Frankenstein
- Foundation
- Start with a Magic Ring (MR).
- Inside the ring, make 6 SCs. (6 stitches in total)
- Pull the ring closed and join with an SLST to the first SC.
- Round 2: Increases
- Chain 1 (CH 1).
- Make 2 SCs in each stitch of the previous round. (12 stitches)
- Join with an SLST to the first SC.
- Round 3: One SC, One Increase
- CH 1, then make:
- 1 SC in the first stitch.
- INC (2 SCs in the same stitch) in the next stitch.
- Repeat [1 SC, INC] all around. (18 stitches)
- Join with an SLST to the first SC.
- CH 1, then make:
- Round 4: Two SCs, One Increase
- CH 1, then make:
- 1 SC in each of the first 2 stitches.
- INC in the next stitch.
- Repeat [2 SCs, INC] all around. (24 stitches total)
- Join with an SLST to the first SC.
- CH 1, then make:
- Round 5: Back Loop Only (BLO)
- CH 1.
- In each stitch of the round, work 1 SC into the BACK LOOP ONLY (BLO). (24 stitches)
- Before completing this round, switch from black to green yarn (for the face).
- Join with a SLST, chain 1, and finish off the unused black yarn.
- Rounds 6 to 11: Green Yarn For the Face
- Using green yarn, make:
- 1 SC into both loops per stitch for each of the 6 rounds. (Each round will have 24 stitches.)
- Join with an SLST to the first SC at the end of each round.
- Using green yarn, make:
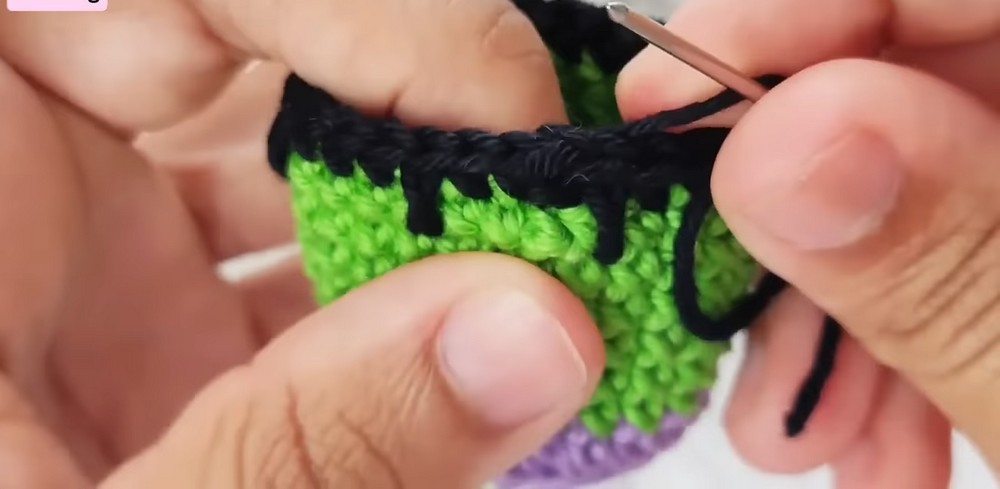
- Round 12: Hair Detailing
- Switch to black yarn for the hair.
- Work as follows:
- SC in the first 2 stitches.
- 1 Elongated Single Crochet (ESC) into the row below.
- Repeat [3 SC, 1 ESC] all the way around.
- Join and fasten off the yarn, leaving the end inside the piece.
- Stuffing and Interior
- Insert the plastic bottle cap into the piece.
- Apply silicone-coated synthetic fiber around the plastic cap, evenly stuffing the body.
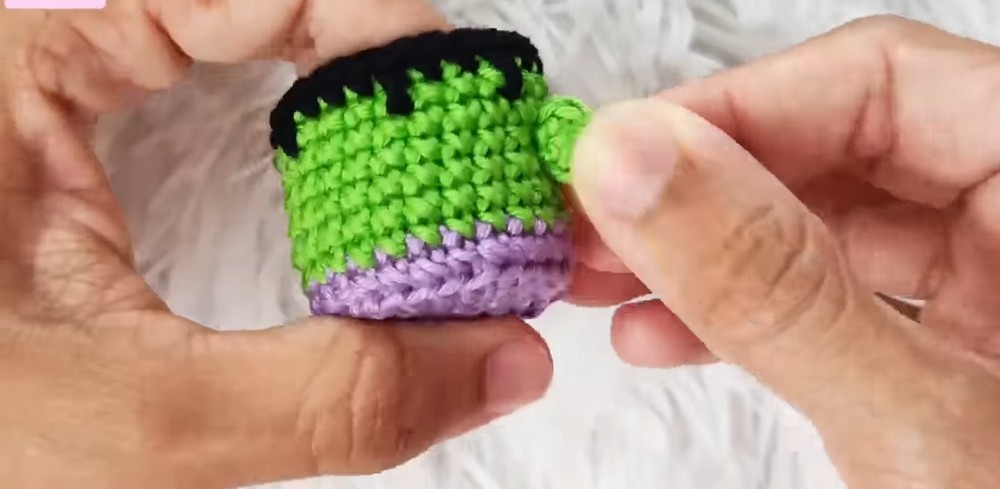
Ears
- Start with a Magic Ring (MR).
- Inside the MR, make 4 SCs.
- Cut the yarn, leaving a long tail for sewing. Secure and fasten off.
- Repeat to make a second ear.
Eyebrows
- Using green yarn, make a slip knot and CH 7.
- Cut the yarn, leaving enough length for sewing.

Final Assembly
- Attach Ears:
- Position the ears on either side of the head, starting around the second row of the green section.
- Use the long yarn tails to sew the ears securely into place. Knot and hide tails inside the piece.
- Add Eyes and Eyebrows:
- Skip 3–4 stitches near the top of the head to attach the eyes (use safety eyes or stitch black circles for eyes).
- Attach the crocheted eyebrows a row above the eyes.
- Embroider Nose:
- Using a small piece of green yarn, embroider a small "dash" for the nose.
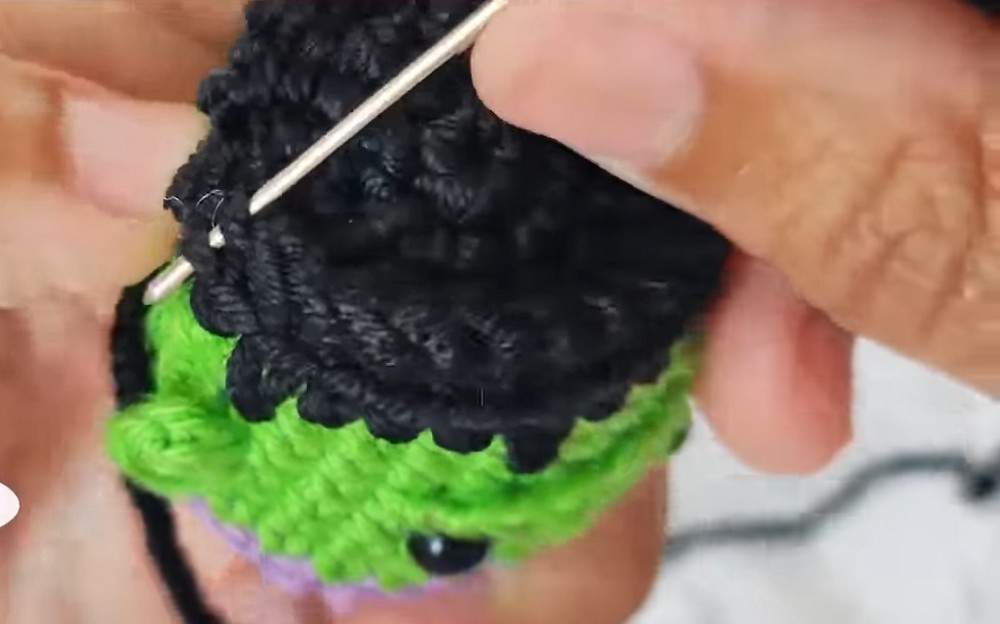
- Base Cover:
- Make another flat circle (similar to the starting rounds) with 24 stitches, using black yarn.
- Sew the base to the bottom of the body using a tapestry needle, working through the outer loops of the base and the body.
Finishing Touches
- Insert a jump ring at the top of the head for the keychain attachment.
- Double-check that all yarn ends are securely finished and tucked inside.
- Optionally, apply a bit of silicone glue to hold all internal components together.