• Skip to primary navigation
  • Skip to main content
  • Skip to primary sidebar
DIY Crafts logo
  • Home
  • Crochet Patterns
  • DIY Projects
  • DIY Crafts
    • Free Sewing Patterns
  • Drawing Ideas
menu icon
go to homepage
search icon
Homepage link
  • DIY Projects
  • Crochet
  • DIY Crafts
  • Sewing
  • Solar Projects
  • Drawing Ideas
×
Free Crochet Patterns

Crochet Santa Drawstring Pouch Pattern Free

Published: Sep 13, 2026 by Saimar · This blog generates income via ads

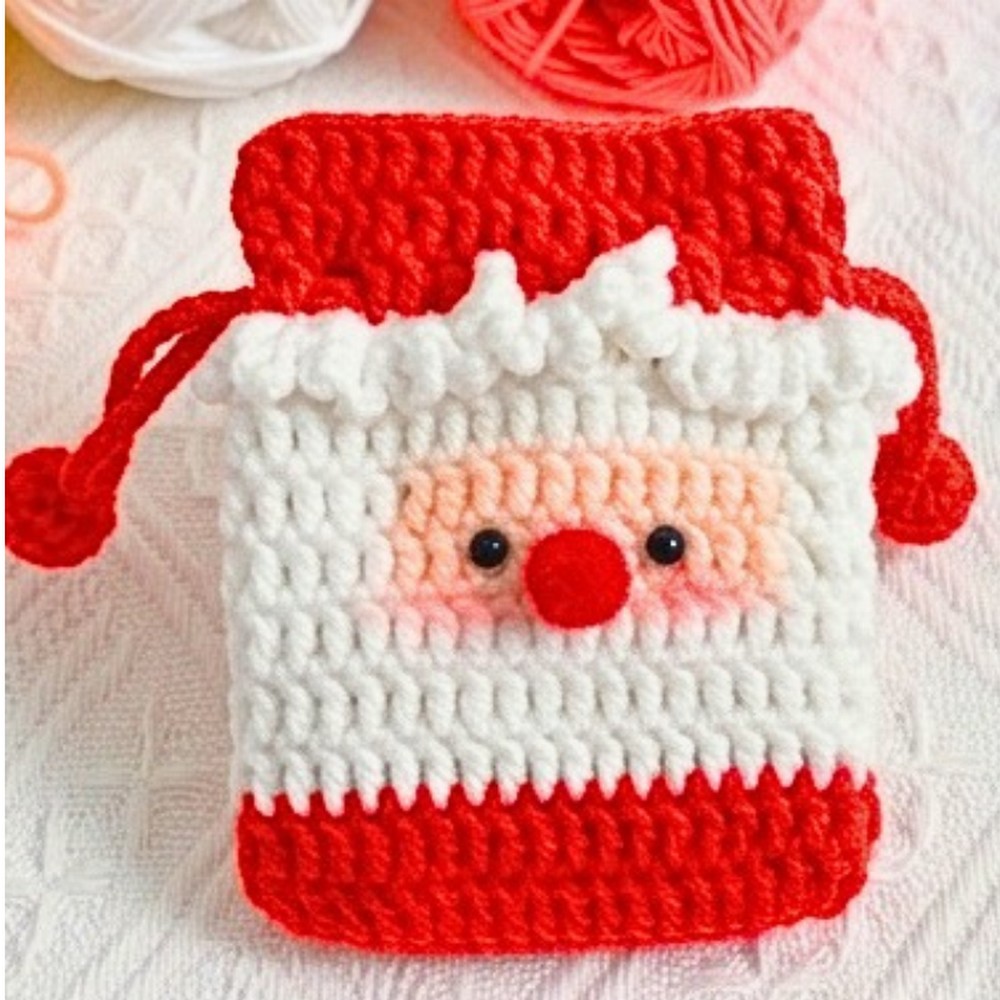
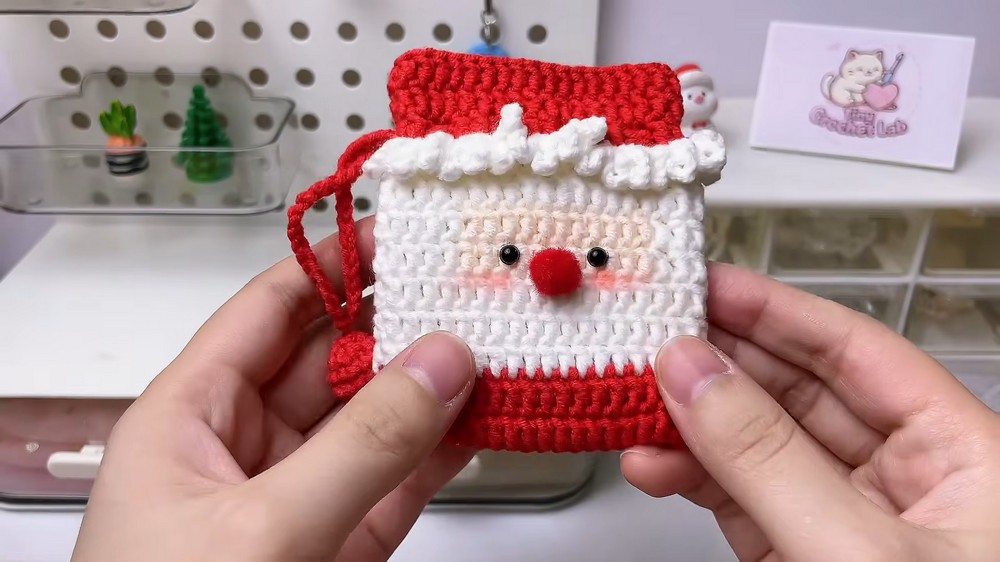
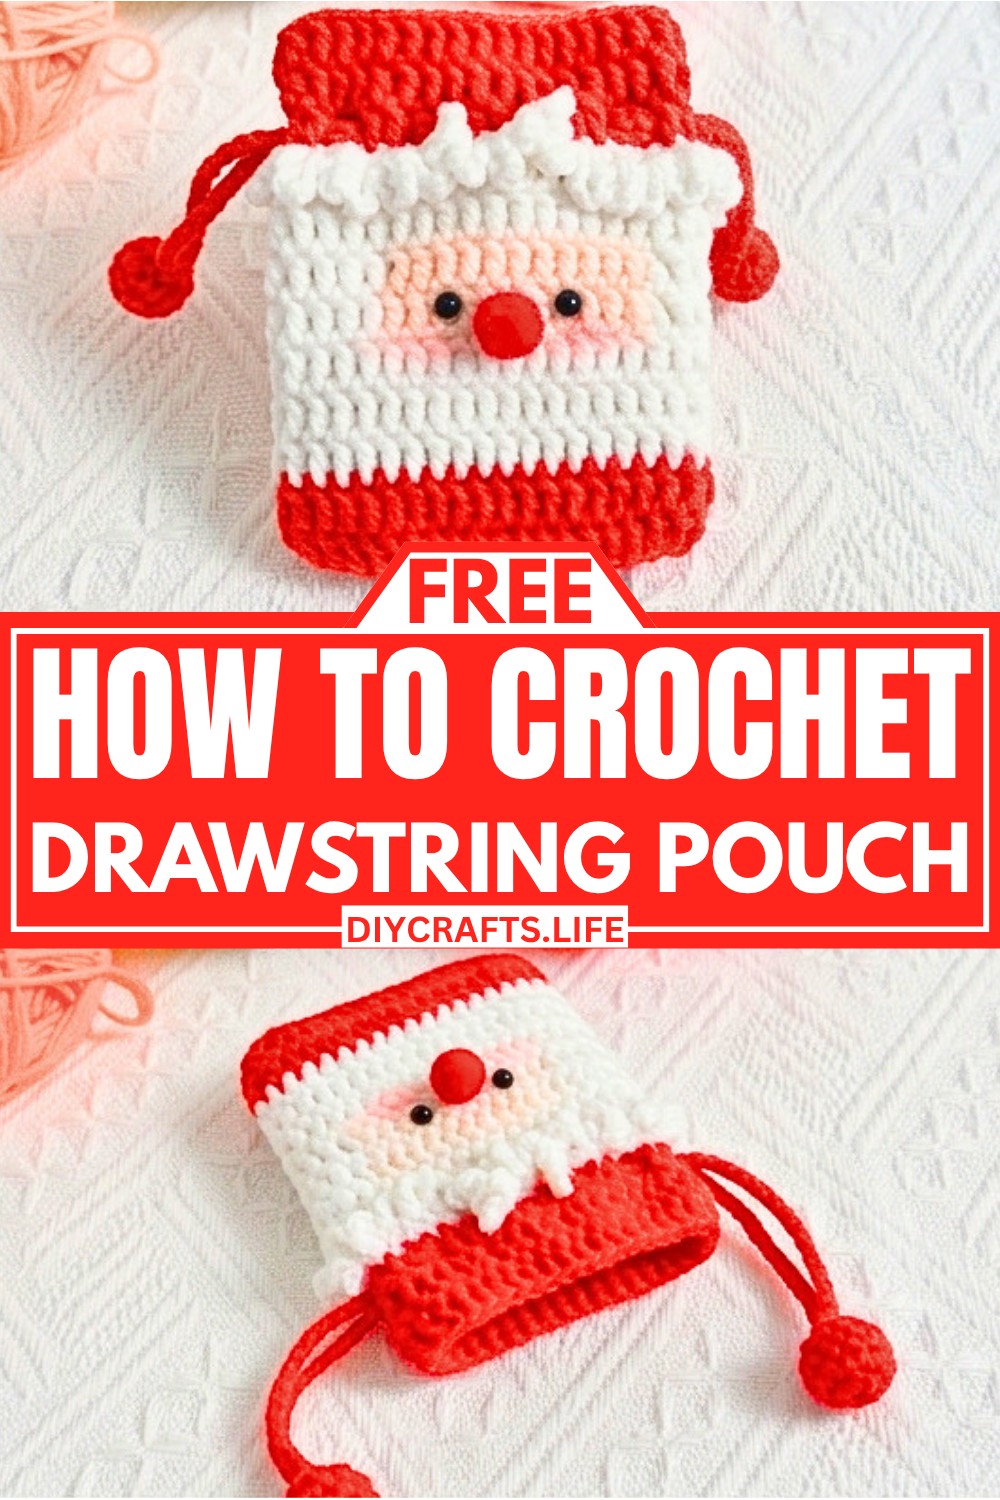
A festive crochet piece can make even the smallest Christmas surprise feel extra special. This Santa drawstring pouch captures the charm of Santa’s classic outfit while offering a practical way to package holiday treats and tiny gifts. Its cheerful design adds a handmade touch to Christmas celebrations and looks just as delightful hanging on the tree as it does beneath it. Every finished crochet piece brings warmth, color, and festive character to the season.
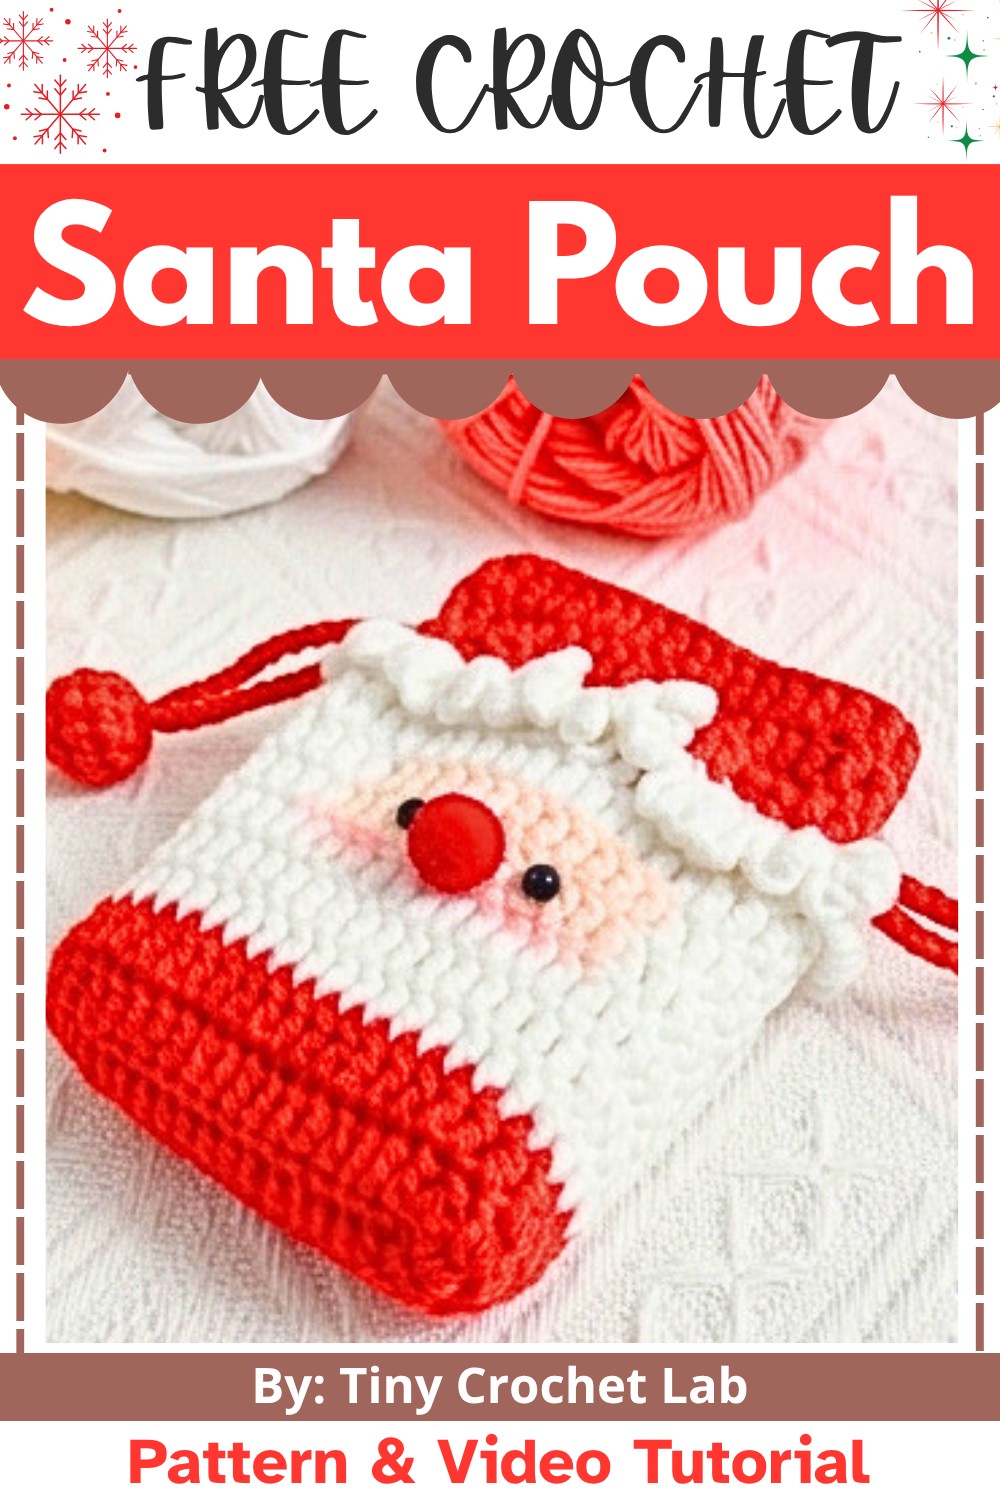
Easy Crochet Santa Drawstring Pouch Foe Festive Holiday Save

Holiday gift packaging becomes far more memorable when it is handmade, and this crochet Santa pouch is a wonderful choice. The finished item is perfect for holding candies, small presents, jewelry, or other little treasures with festive style. Its compact design is enjoyable to create and useful long after the holidays begin. Whether shared as a thoughtful gift or kept as part of your Christmas décor, this charming crochet piece spreads seasonal joy wherever it goes.

Credit Tiny Crochet Lab

Materials & Tools Needed

  • 4-Ply Cotton Yarn:
    • Red
    • White
    • Skin color (peach/light beige)
  • Crochet Hook: 2.0 mm – 3.0 mm
  • Facial Features:
    • 2 Small Black Safety Eyes (or beads)
    • 1 Small Red Pom-Pom or Plush Bead (for the nose)
  • Notions:
    • Tapestry needle
    • Scissors
    • Stitch markers
    • Fabric glue (optional)
    • Pink blush or makeup (optional, for cheeks)

Finished Size

  • Approximate Size: ~8–10 cm wide × 10–12 cm tall (perfect as a compact gift/treat pouch).

Customization Ideas

  1. Adjust Size:
    Adjust the initial chain length (foundation chain) to make a wider or narrower pouch.
  2. Add Texture:
    Use velvet or bouclé yarn for Santa’s white ruffle trim to give it a more textured, fluffy appearance.
  3. Convert to Accessories:
    • Attach a keyring or tassel to convert the pouch into an ornament or bag charm.
    • Add a sparkly yarn strand or glitter yarn to make it extra festive.

Pattern Construction Notes

  • Work Style: The pouch is worked in joined rounds from the bottom up. Join each round with a slip stitch (sl st) into the top of the first stitch.
  • Color Switching: Execute the final yarn-over of the last stitch in the preceding color using the new color yarn.
  • Loop Techniques:
    • BLO: Back Loop Only.
    • FLO: Front Loop Only.
Easy Crochet Santa Drawstring Pouch Foe Festive Holiday
Save
Easy Crochet Santa Drawstring Pouch Foe Festive Holiday

Pattern Abbreviations

  • ch: Chain
  • sl st: Slip stitch
  • sc: Single crochet
  • dc: Double crochet
  • dc inc: Double crochet increase (2 dc in the same stitch)
  • dc w: Double crochet 3-stitch cluster/increase (3 dc in the same stitch)
  • dec: Single crochet decrease
  • BLO: Back Loop Only
  • st(s): Stitch(es)

Preparation Tips

1. Maintain Consistent Tension

  • Why It Matters: Irregular tension can lead to an uneven or misshaped pouch.
  • How To Achieve:
    • Pay attention to how tightly you’re holding the yarn. Keep a relaxed but firm grip.
    • Ensure each double crochet stitch (dc) is pulled through consistently—don’t tug too tightly or leave the loops too loose.
    • Check your work periodically to ensure the body of the pouch is symmetrical and evenly stitched.

2. Neat Color Transitions

  • Key Steps for Rounds 6–7:
    • When changing colors, leave the unused yarn running loosely behind your stitches.
    • Choose a method to handle color changes, like dropping the yarn or carrying it along the back side (depending on your project’s design).
    • Ensure that the transition stitches are tight enough to avoid visible gaps but not so tight that the carried yarn puckers your work.

3. Loop Placement for Edging (BLO and FLO in Round 10)

  • BLO & FLO Definitions:
    • BLO (Back Loop Only): Work stitches into the back loop of the stitch, leaving the front loop untouched.
    • FLO (Front Loop Only): The unused front loop will later be picked up to create the ruffle edging.
  • Reminder: When working Round 10 in BLO, be mindful of leaving the FLO intact for later ruffle work. This ensures a clean and sturdy base for decorative edging.

Additional Tips

  1. Count Your Stitches: Always count the total stitches at the end of each round to ensure you haven’t accidentally added or skipped stitches.
  2. Use Stitch Markers: Place markers at certain points (e.g., the beginning of each round or pattern repeat) to track progress and avoid errors.
  3. Blocking (Optional): If the pouch seems uneven after completion, consider blocking it to shape it properly.
  4. Focus on Finishing Touches: Ensure your starting and ending yarn tails are woven in neatly to keep the overall appearance clean.

Step-by-Step Instructions

1. Main Pouch Body

Base & Lower Body (Red Yarn)

  • Round 1:
    • Ch 19.
    • Starting from the 3rd chain from the hook, work back along the foundation chain:
      • 17 dc
      • 1 dc w (work 3 dc into the last chain stitch)
    • Turn to work along the opposite side of the chain:
      • 16 dc
      • 1 dc inc (work 2 dc into the last stitch).
    • Join with a sl st to finish the round.
    • Total: 38 sts

Save

  • Round 2:
    • Ch 2, work 38 dc around.
    • On the 38th stitch, switch to white yarn during the final yarn-over.
    • Join with a sl st.
    • Total: 38 sts

Middle Body & Face Area

  1. Rounds 3–5 (White Yarn):
    • Ch 2, work 38 dc around.
    • Join with a sl st at the end of each round.
    • Total: 38 sts per round.
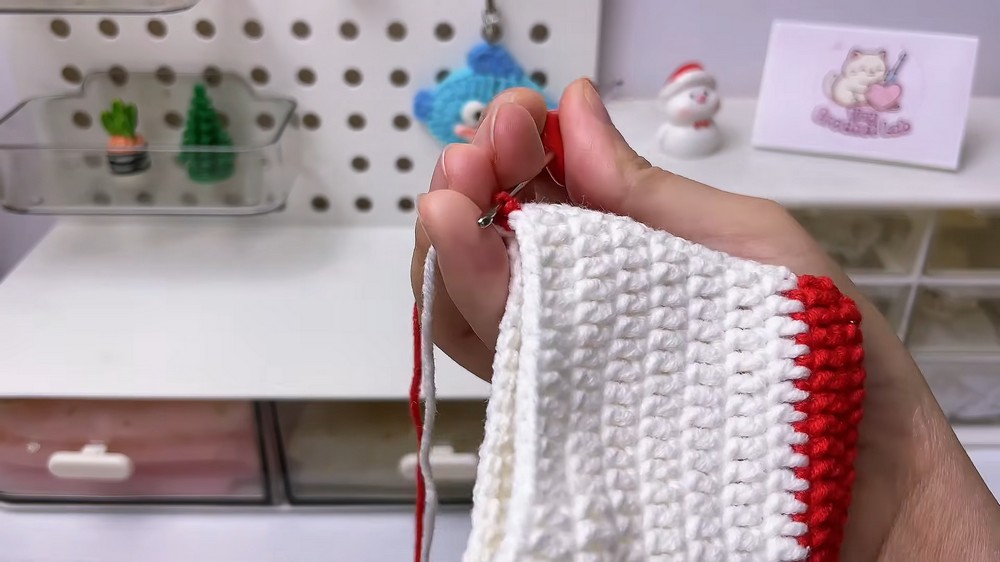
  2. Rounds 6–7 (White & Skin Color Yarn):
    • Work 22 dc in White, 11 dc in Skin Color, and 5 dc in White.
    • Carry yarn neatly across color changes.
    • Join with a sl st.
    • Total: 38 sts per round.
  3. Rounds 8–9 (White Yarn):
    • Ch 2, work 38 dc around in White.
    • Switch to Red yarn on the last stitch of Round 9 during the final yarn-over.
    • Join with a sl st.
    • Total: 38 sts per round.

Save

Top Collar & Drawstring Casing (Red Yarn)

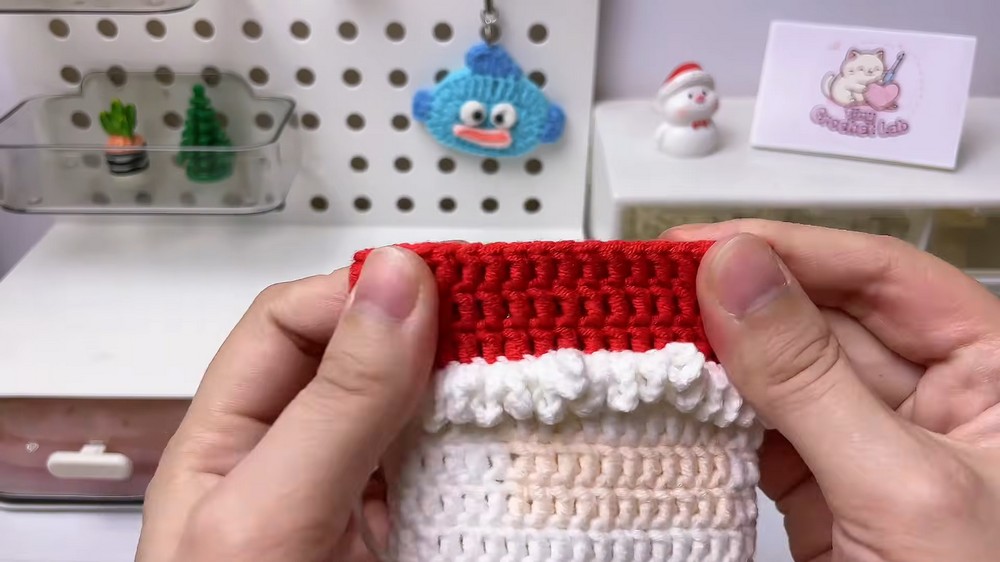
  1. Round 10 (BLO):
    • Ch 2, work 38 dc in BLO around.
    • Join with a sl st.
    • Total: 38 sts
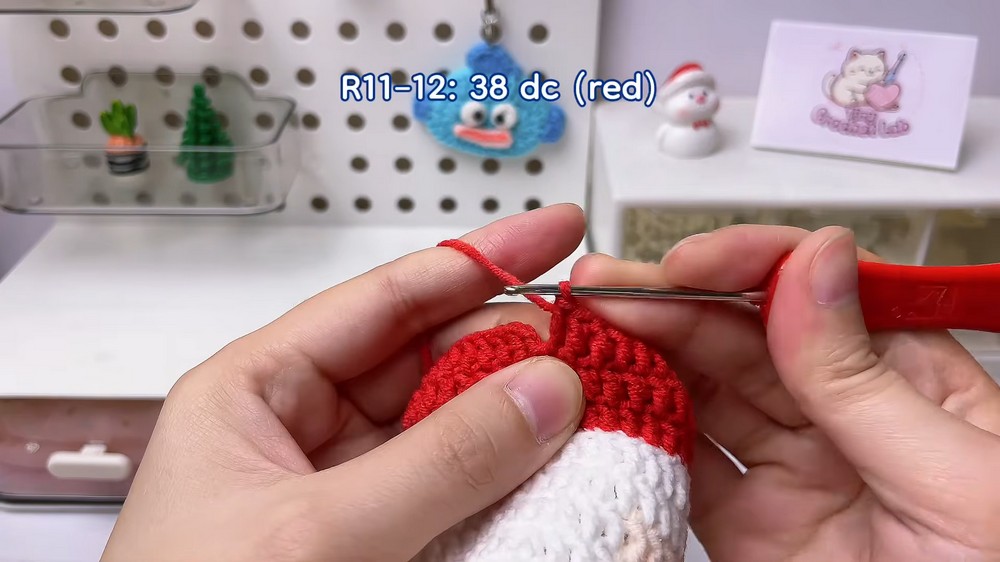
  2. Rounds 11–12:
    • Ch 2, work 38 dc through both loops around.
    • Join with a sl st. Fasten off and weave in ends.
    • Total: 38 sts per round.

Save

2. Bag Ruffle Edging (Santa’s Beard/Trim)

  • Step 1: Join White yarn to the unused Front Loops (FLO) left unworked from Round 10.
  • Step 2: Repeat the following pattern along the pouch perimeter:
    • (Ch 5, 1 sc in next front loop)
  • Fasten off, pull yarn through, and securely weave in ends.

3. Drawstring Cords (Make 2)

  • Using Red yarn, chain 70.
  • Fasten off, leaving a short tail.

4. Drawstring End Balls (Make 2)

  1. Round 1: Work 6 sc into a magic ring. (6 sts)
  2. Round 2: Work 6 inc (2 sc in each stitch). (12 sts)
  3. Rounds 3–4: Work 12 sc evenly around. (12 sts per round)
  4. Round 5: Work 6 × (1 sc, 1 dec) around. (6 sts)
  • Leave a tail for sewing, cut yarn, and set aside.

Save

Final Assembly

Weave the Drawstrings

  1. Take the first drawstring cord and weave it in and out through the dc stitches of Round 11 from left to right.
  2. Repeat with the second drawstring cord, starting from the opposite side.

Attach Drawstring Balls

  1. Thread the open end of a drawstring cord through the open hole of a red ball.
  2. Securely knot the end, stuff the tail inside the ball, and cinch it closed using the yarn tail and tapestry needle.
  3. Repeat for the other drawstring cord and ball.

Save

6. Face Details

  1. Attach two black safety eyes or beads onto the skin-colored section (Rounds 6–7).
  2. Add a small red pom-pom to the center between the eyes for the nose.
  3. Lightly apply pink blush to the cheeks below the eyes.

Save

Final Step

Pull both drawstrings to cinch the pouch closed. Your Santa pouch is ready to use—whether as an ornament, candy holder, or holiday gift bag!

Easy Crochet Santa Drawstring Pouch Foe Festive Holiday Save

Pin
0 Shares

More Free Crochet Patterns

  • Easy Crochet Christmas Owl Ornament Pattern For Decor
    Crochet Christmas Owl Ornament Pattern For Decor
  • Crochet a Snowman Applique Perfect for Winter Decor
    Crochet a Snowman Applique Perfect for Winter Decor
  • Easy No Sew Crochet Fingerless Gloves Pattern
    Easy No Sew Crochet Fingerless Gloves Pattern
  • Step-by-Step Pattern For Crochet Christmas Tree Ornament
    Step-by-Step Pattern For Crochet Christmas Tree Ornament

Primary Sidebar


Latest Post

  • Beautiful Crochet Santa Ornament For Christmas Decor
    Beautiful Crochet Santa Ornament For Christmas Decor
  • Woven Crochet Christmas Heart Ornament Pattern
    Woven Crochet Christmas Heart Ornament Pattern Free
  • Crochet Christmas Tree Ornament Pattern with Popcorn Stitch
    Crochet Christmas Tree Ornament Pattern with Popcorn Stitch
  • Easy Crochet Christmas Tree Ornament Pattern
    Easy Crochet Christmas Tree Ornament Pattern

Footer

↑ back to top

DIY Crafts

Making something by hand, especially for yourself or a loved one, is a great feeling. From wooden pieces to handmade jewelry, there are so many handmade gifts you can give without ever leaving your home. At diycrafts.life we feature all types of easy projects from woodworking, cross-stitching and more - Our goal is to inspire you to use your hands and create something beautiful today!

Copyright © 2025

Privacy Policy | About Us | Contact