Need a festive crochet heart with a twist? Make this small woven Christmas heart from two colorful pieces, then turn it into an ornament or garland.

Two flat crochet pieces are all you need to create this unusual heart. Each crochet piece is worked in just three rounds with basic stitches, then the increases help the shapes fold naturally into the curved U-like forms needed for weaving.
The most important part comes after crocheting: the two pieces are interlaced so their colors alternate across the heart. Once the woven shape is secure, you can add a hanging loop sized for your Christmas tree or join several hearts together for a festive garland.
Credit Crochet Patterns Free
Materials & Tools Needed
- Crochet hook: 3.5 mm
- Yarn: 3-ply yarn in two colors, such as White and Green
- Scissors
- Glue: For attaching the hanging loop
Finished Size & Ways to Use It
This pattern creates a small, palm-sized heart that works well as a Christmas tree ornament or as part of a bunting garland.
The hanging chain is completely adjustable. Make it shorter for an individual ornament or longer when you want to string several hearts together.
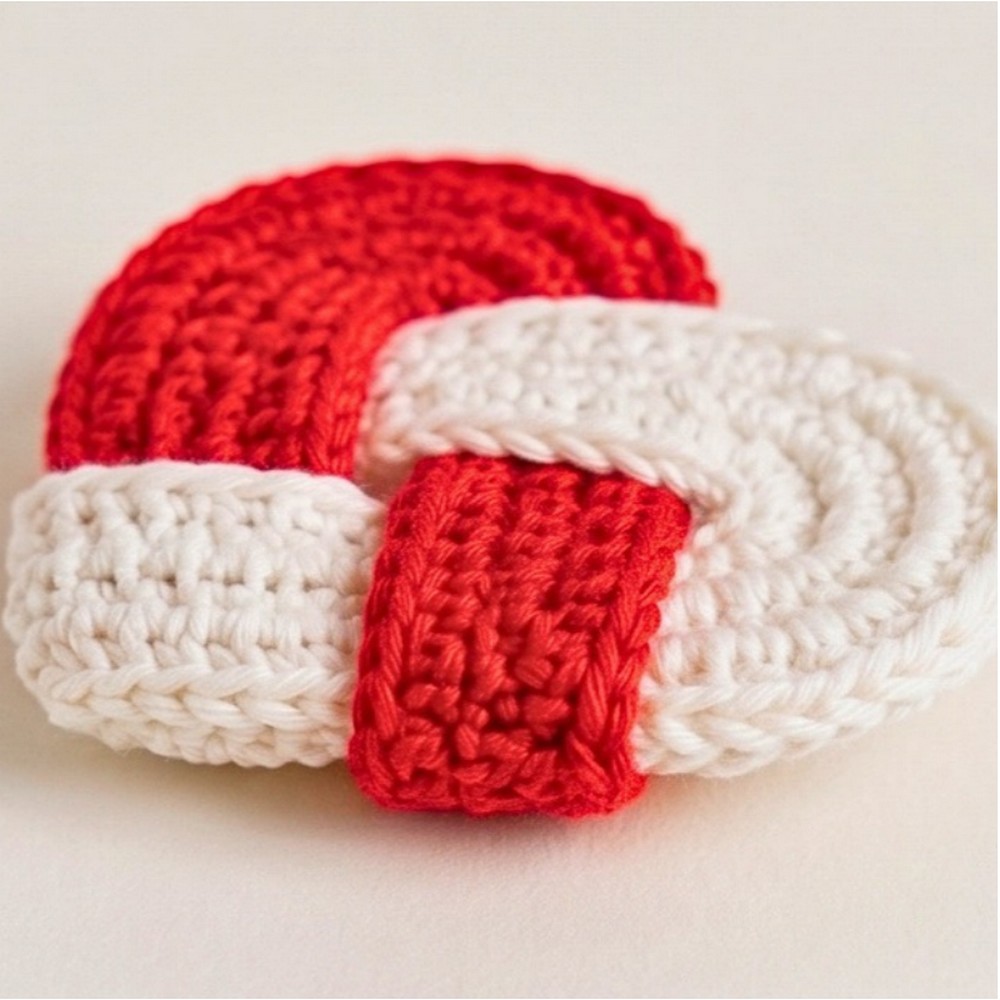
For a different seasonal look, try traditional red and white instead of green and white for a candy-cane-inspired color combination.
Pattern Abbreviations & Terminology
- ch: Chain
- sc: Single Crochet
- slst: Slip Stitch
- st(s): Stitch(es)
- nxt: Next
- clr: Color
- R1, R2, R3: Round 1, Round 2, Round 3
Crochet the First Heart Piece
You will make two identical flat oval/U-shaped pieces, one in each color. The first three rounds create the shape that will later fold and interlock with the second piece.
Foundation: Make 36 chains, then join with a slip stitch (slst) to form a ring.
Before starting Round 1: Make sure the chain is not twisted when you join it. The completed ring needs to sit flat enough for the first round to work evenly around it.
R1: Ch 1, 1 sc in the first stitch, 4 sc in the next same stitch, 1 sc in each of the next 16 stitches, 4 sc in the next same stitch, 1 sc in each of the next 15 stitches, slst to close the round.
Shape check: The groups of 4 sc create the increases at the two curved ends of the oval. Keep those groups in their specified stitches because they are what begin shaping the piece for the later fold.
R2: Ch 1, 1 sc, 2 sc in each of the next 4 stitches, 1 sc in each of the next 16 stitches, 2 sc in each of the next 4 stitches, 1 sc in each of the next 15 stitches, slst to close the round.
The increases are now worked across the curved sections created in Round 1. The long sections of single crochet between them keep the piece stretched into its elongated shape.
R3: Ch 1, 1 sc, 2 sc in each of the next 8 stitches, 1 sc in each of the next 16 stitches, 2 sc in each of the next 8 stitches, 1 sc in each of the next 15 stitches, fasten off.
This completes the first piece.
Look at the shape: The repeated increases should make the two curved sections more pronounced. This is important because the piece will naturally want to fold into a U shape once both sides have been worked.

Make the Second Piece
Repeat the exact same three rounds using the second yarn color.
Second Piece: Make the foundation and work R1, R2, and R3 exactly as you did for the first piece, then fasten off.
You should now have two matching flat pieces in contrasting colors. Keeping their shapes and sizes consistent will make the weaving much easier.

Weave the Two Pieces Into a Heart
This is where the flat crochet pieces become the finished heart shape. Because of the increases, each piece naturally folds in half into a U-like form.
Fold the Pieces
Take both completed pieces and fold each loop in half.
Before interlacing: Check that both U shapes are oriented in the same general direction and that the two colors will alternate as you weave them together.
Interlace the Colors
Take the ends of the green U and interlace them tightly through the opening flaps of the white U. Then do the same in the opposite direction so the two pieces alternate in a woven, checkered pattern.
Why this step matters: The heart does not get its final appearance from another crochet round. Its shape comes from the way the two completed pieces are interlocked. Work through the openings carefully rather than pulling the pieces randomly, so the alternating color pattern remains visible.
Shape check: As you tighten the interlacing, look at the outer edges of the heart. The two colors should form an alternating woven effect, with the upper curves meeting to create the recognizable heart shape.

Add the Hanging Loop
Once the heart is woven, make a separate chain for hanging.
Hanging Loop: Crochet a chain string to the length you need, then fasten off.
A shorter chain works well when the heart will hang by itself on a Christmas tree. For a garland, make the chain longer or use the hearts along a longer strand as desired.

Attach the Loop
Bring the two ends of the chain together to form a loop.
Apply glue to the ends and attach them securely to the top-center back of the assembled woven heart.
Let the attachment settle: Make sure the glued ends are positioned at the back center rather than the front, so the loop remains discreet when the heart is hanging.
The finished heart can now be used individually as a Christmas ornament, or you can repeat the same process with several color combinations and arrange the hearts along a longer chain for a cheerful woven Christmas garland.