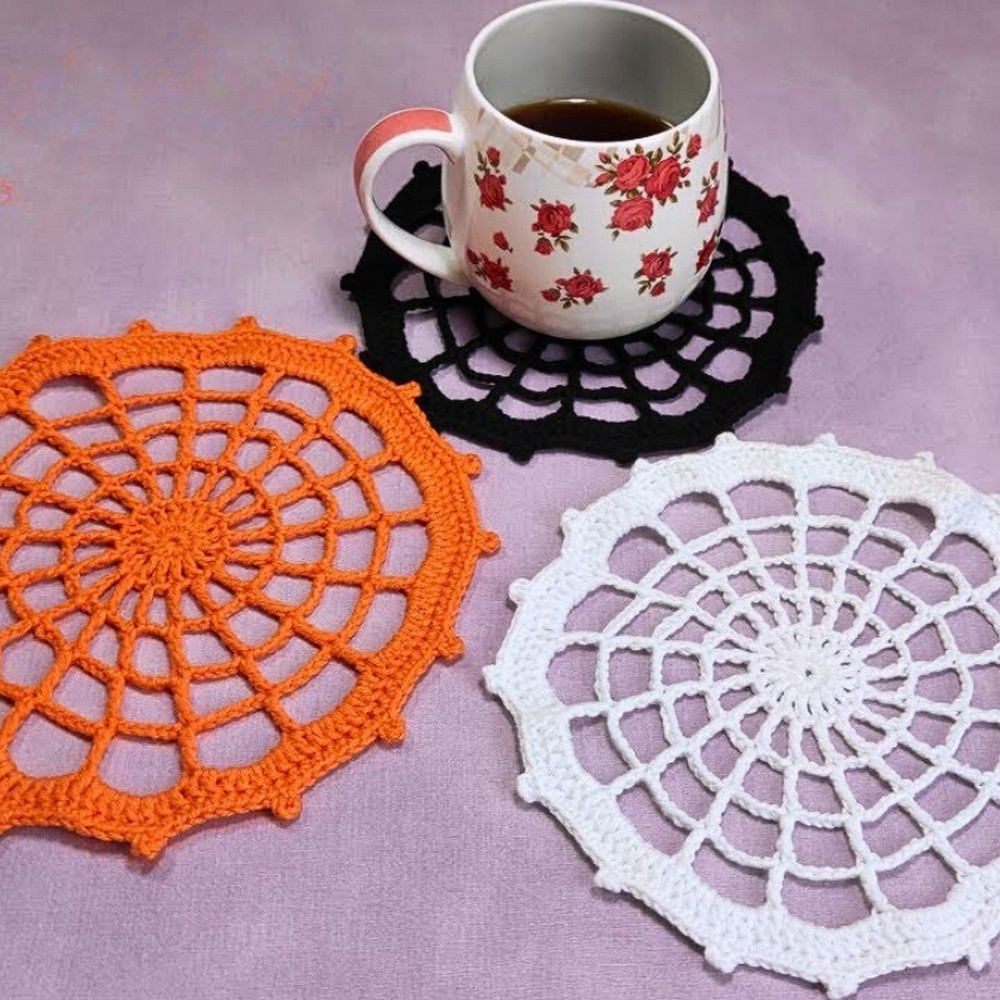
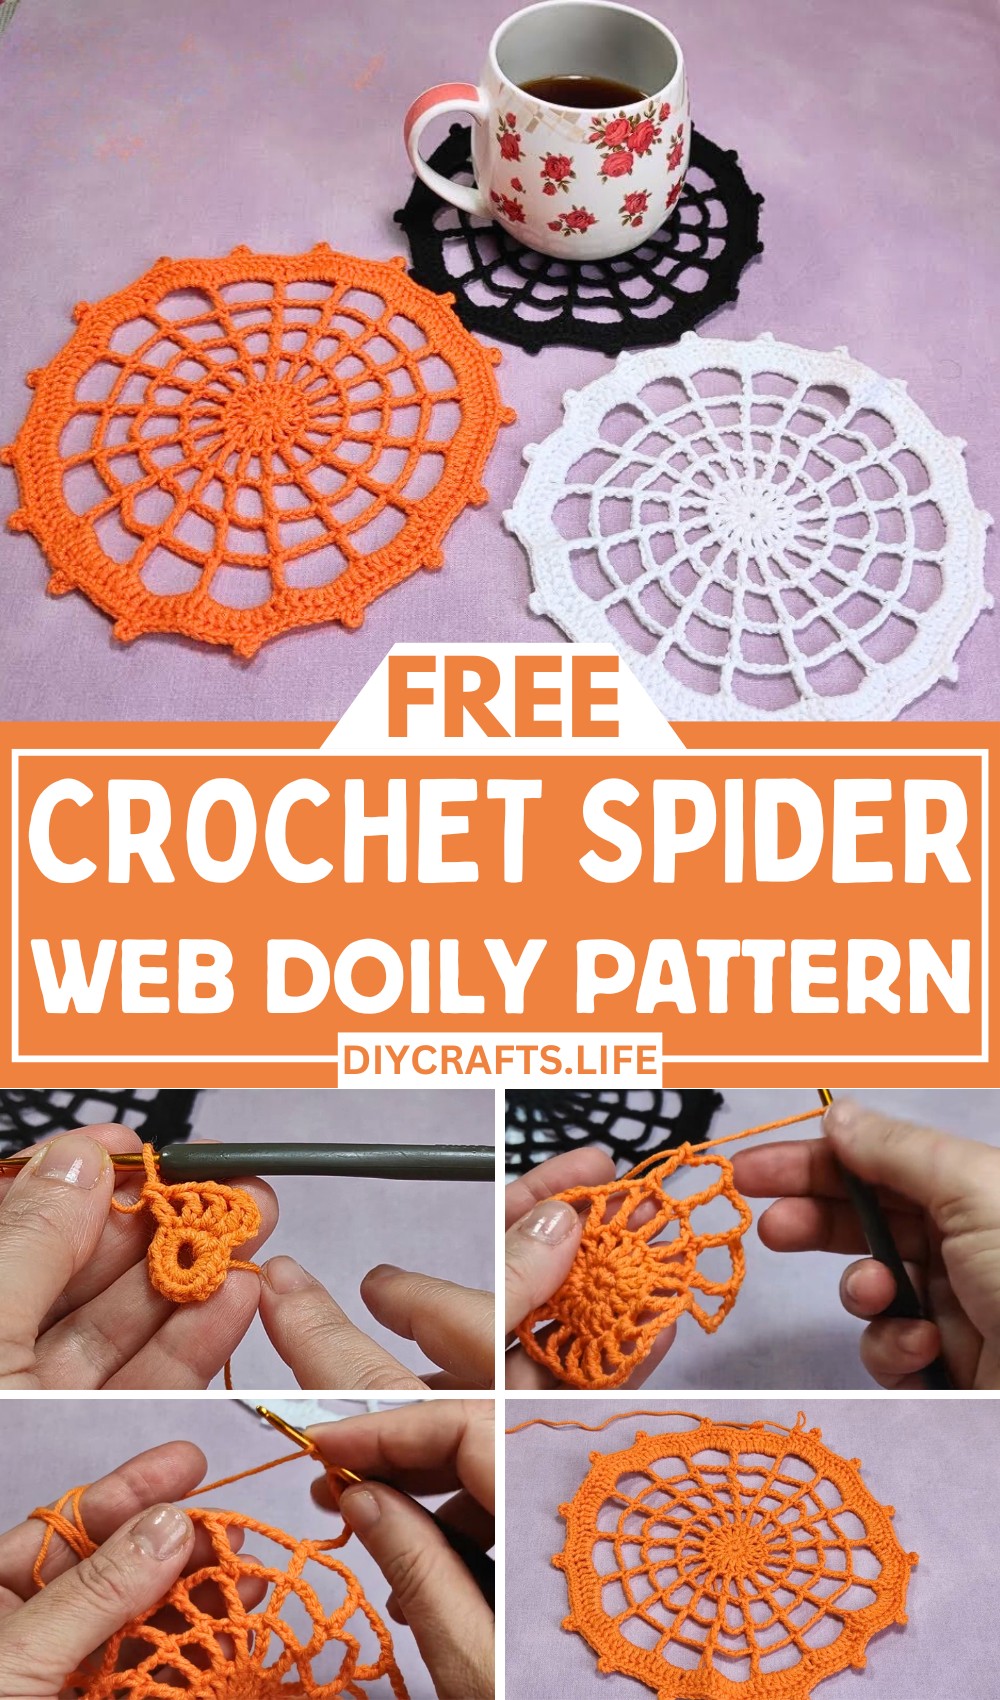
Create a beautiful crochet spider web doily—a stunning handmade decoration perfect for Halloween or anytime. Its intricate design and elegant style make it a versatile addition to your home. Whether used as coasters or decorative ornaments, this doily is both functional and eye-catching.

This crochet spider web doily is durable and stylish. Its unique shape makes it ideal for Halloween decorations, table settings, or garden ornaments. It can be softened or hardened depending on your preference, ensuring it fits your needs while adding charm to your home decor.
Crochet Spider Web Doily
Crafting this spider web doily is simple and enjoyable. With clear instructions, it’s suitable for beginners and experienced crocheters. Customize it with colors and sizes to match your style, and revel in its creative potential for seasonal or everyday home accents.
Materials and Preparation
To create this spooky yet elegant crochet spider web doily, gather the following supplies:
- Yarn: Cotton thread or lightweight yarn suitable for doilies (e.g., orange, white, black for Halloween or other preferred colors).
- Hook Size: 3mm crochet hook (or size suitable for the chosen yarn).
- Additional Tools:
- Scissors
- Darning needle for weaving in ends
- Blocking materials (optional) – pins, a foam board, or an ironing board
- Steam iron for blocking and shaping (optional)
- Other Requirements: Patience, precision, and attention to detail for creating an intricate pattern.
Abbreviations and Notes
Abbreviations:
- CH: Chain
- SC: Single Crochet
- DC: Double Crochet
- TR: Triple Crochet
- SL ST: Slip Stitch
- YO: Yarn Over
- ST: Stitch
- R: Row/Round
- PICO (Picot Stitch): Create as follows: CH 4, insert your hook through the front loops of the first of the four chains, YO, pull through to form a slip stitch.
Key Notes:
- This pattern involves repeating rows with increases to achieve a spider web look.
- Use contrasting yarn colors (like black and orange) for a festive pop or stick to one color for a uniform look.
- Beginners: Watch the video or read the pattern fully before starting to ensure you understand the technical steps (like working in magic ring and making triple crochet stitches).
Gauge, Approximate Size, and Pattern Notes
- Gauge: Not essential for this project. You can use lighter or thicker yarn but adjust your hook size accordingly.
- Finished Approximate Size: Around 6-8 inches, depending on yarn and hook used.
- Pattern Notes:
- Ensure your magic ring is tight to avoid gaps in the center.
- Blocking is essential after finishing to achieve the doily’s flat and clean web-like appearance.
- For a hardened effect, apply fabric starch during the blocking process for more structure.
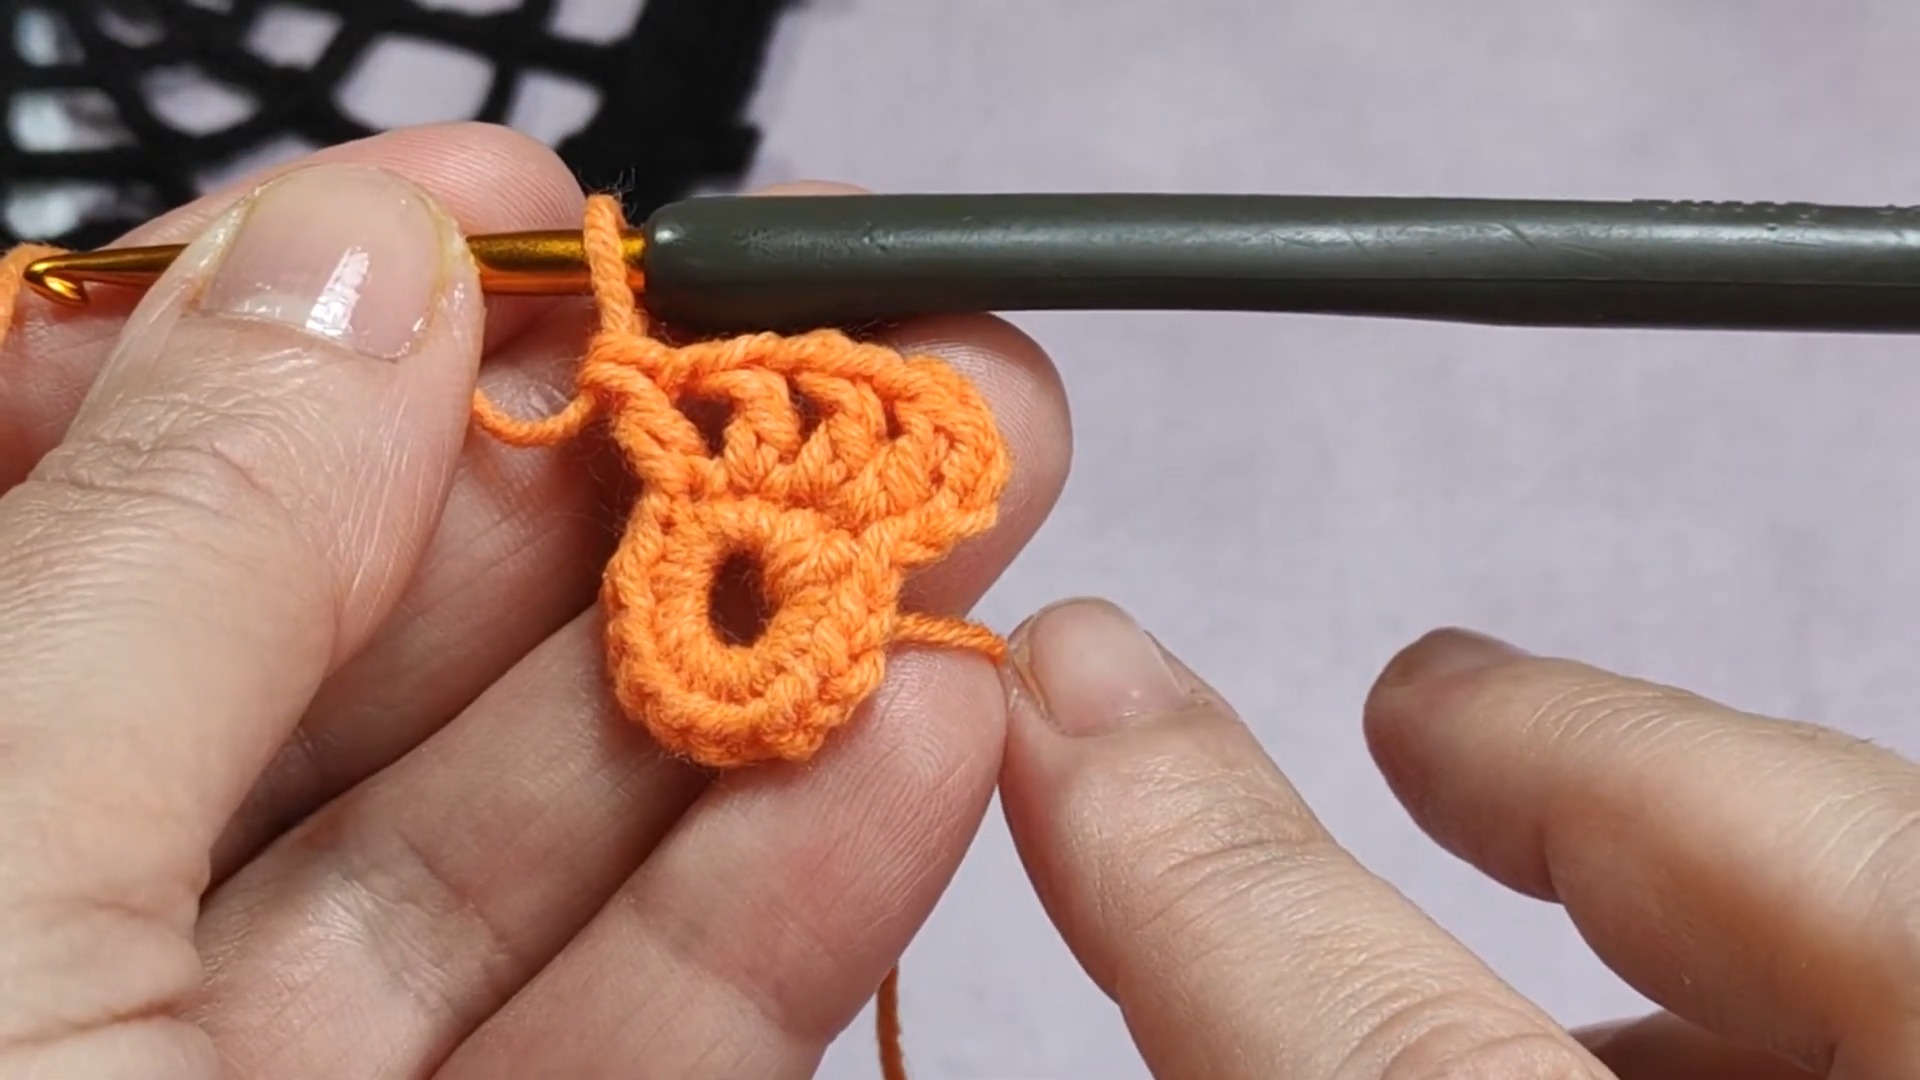
Step-by-Step Pattern
Foundation (R1): Magic Ring and Single Crochets
- Create a magic ring.
- Work 16 SC into the ring.
- Pull the yarn tail tightly to close the center.
- Join with a SL ST to the top of the first SC to complete the round.
R2: Double Crochet and Chains
- CH 3 (counts as the first DC).
- Work 1 DC into the next stitch.
- CH 1, skip 1 stitch, and DC into the next stitch.
- Repeat this sequence: (1 DC, CH 1) all around the round.
- Join with a SL ST to the top of the initial CH 3.
R3: Triple Crochets and Chains
- CH 6 (3 CH counts as a TR; the remaining 3 make the space between TRs).
- YO twice and make a TR in the next DC from the previous round.
- CH 3, skip to the next DC, and work a TR.
- Repeat this sequence: (TR, CH 3) all around the round.
- Join with a SL ST to the third CH of the initial 6.
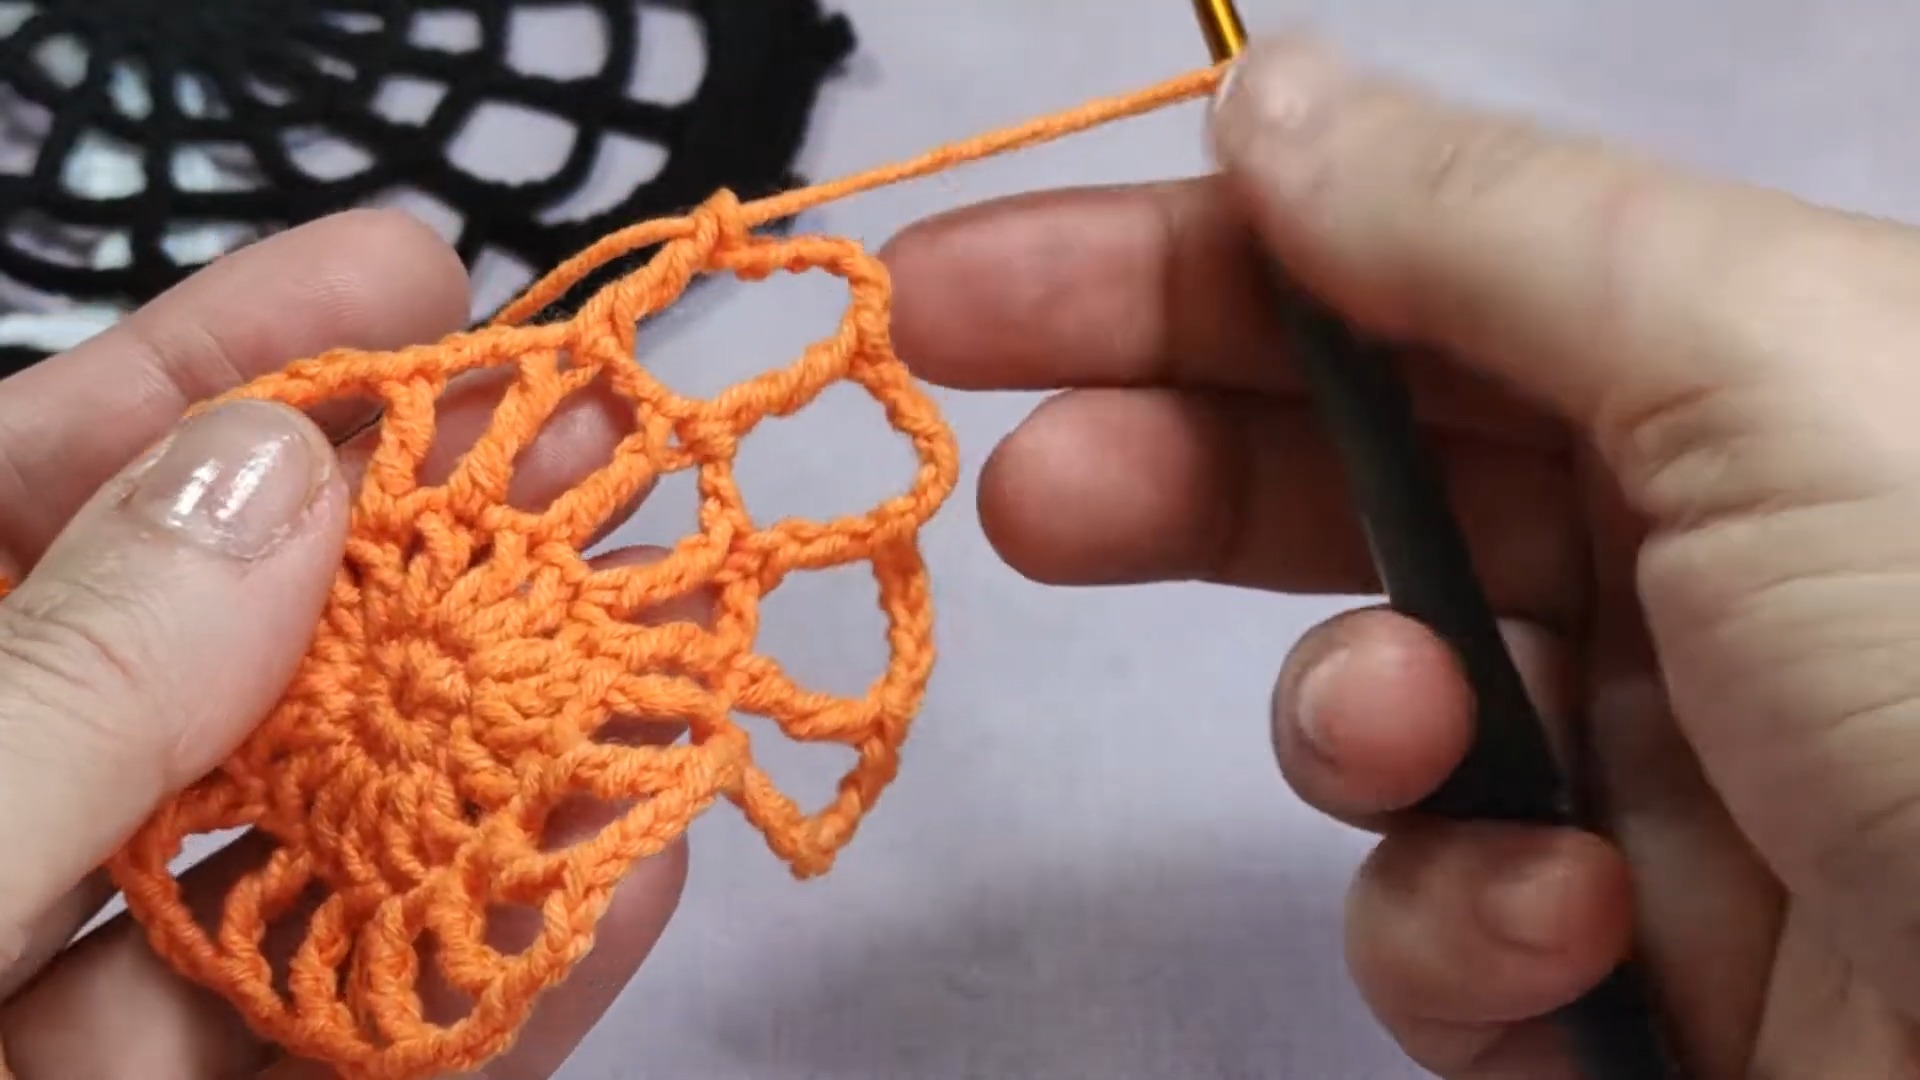
R4: Building the Web (Triple Crochets and Expanding Chains)
- CH 8 (3 CH count as a TR; the remaining 5 make the chain between TRs).
- YO twice and make a TR in the next TR from the previous row.
- CH 5, skip to the next TR, and work a TR.
- Repeat this sequence: (TR, CH 5) all around the round.
- Join with a SL ST to the third CH of the initial 8.
R5: Expanding the Web (Triple Crochets and Chains)
- CH 10 (3 CH count as a TR; the remaining 7 make the chain between TRs).
- YO twice and work a TR in the next TR from the previous row.
- CH 7, skip to the next TR, and work a TR.
- Repeat this all around: (TR, CH 7).
- Join with a SL ST to the third CH of the initial 10.
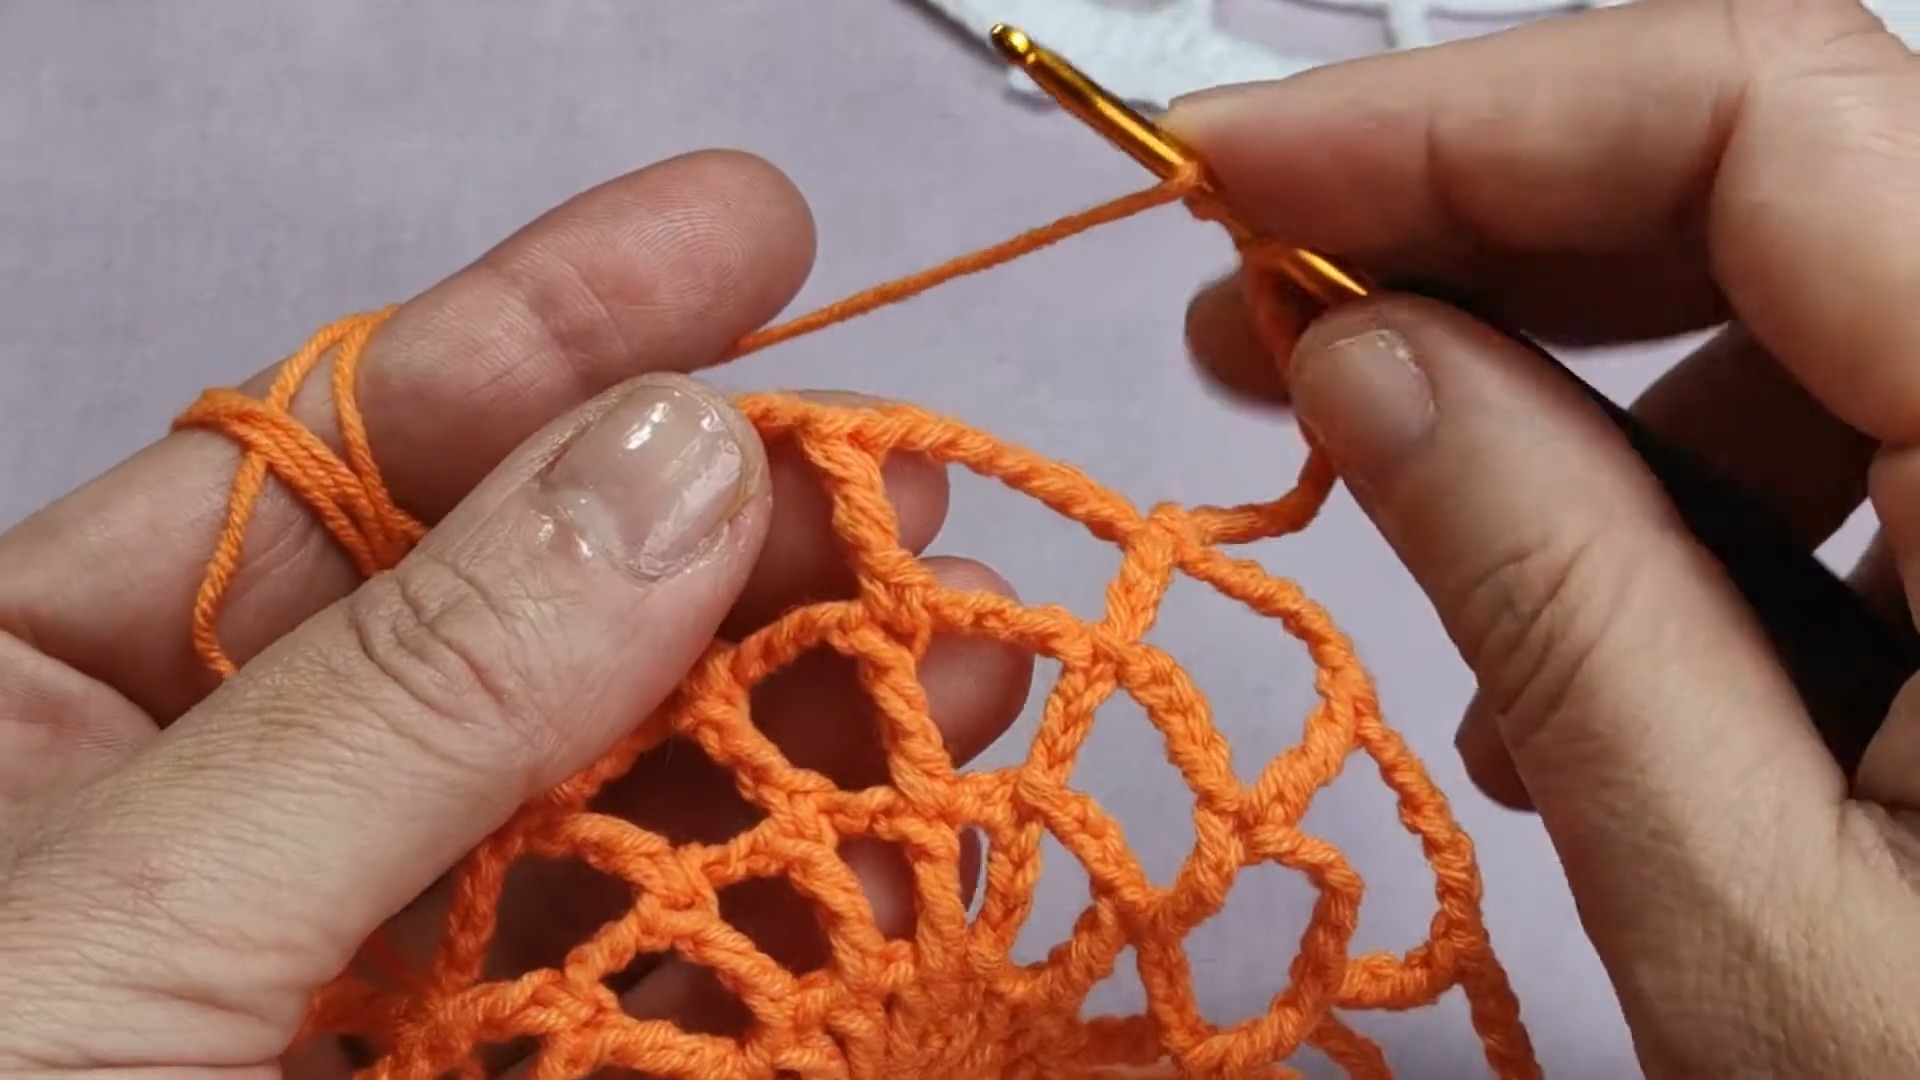
R6: Filling Spaces with Double Crochets
- CH 3 (counts as the first DC).
- Work 7 DC into the large chain space created in the previous row.
- DC on top of the next TR.
- Repeat this sequence: (7 DC in the space, 1 DC on top of TR).
- Join with a SL ST to the top of the first CH 3.
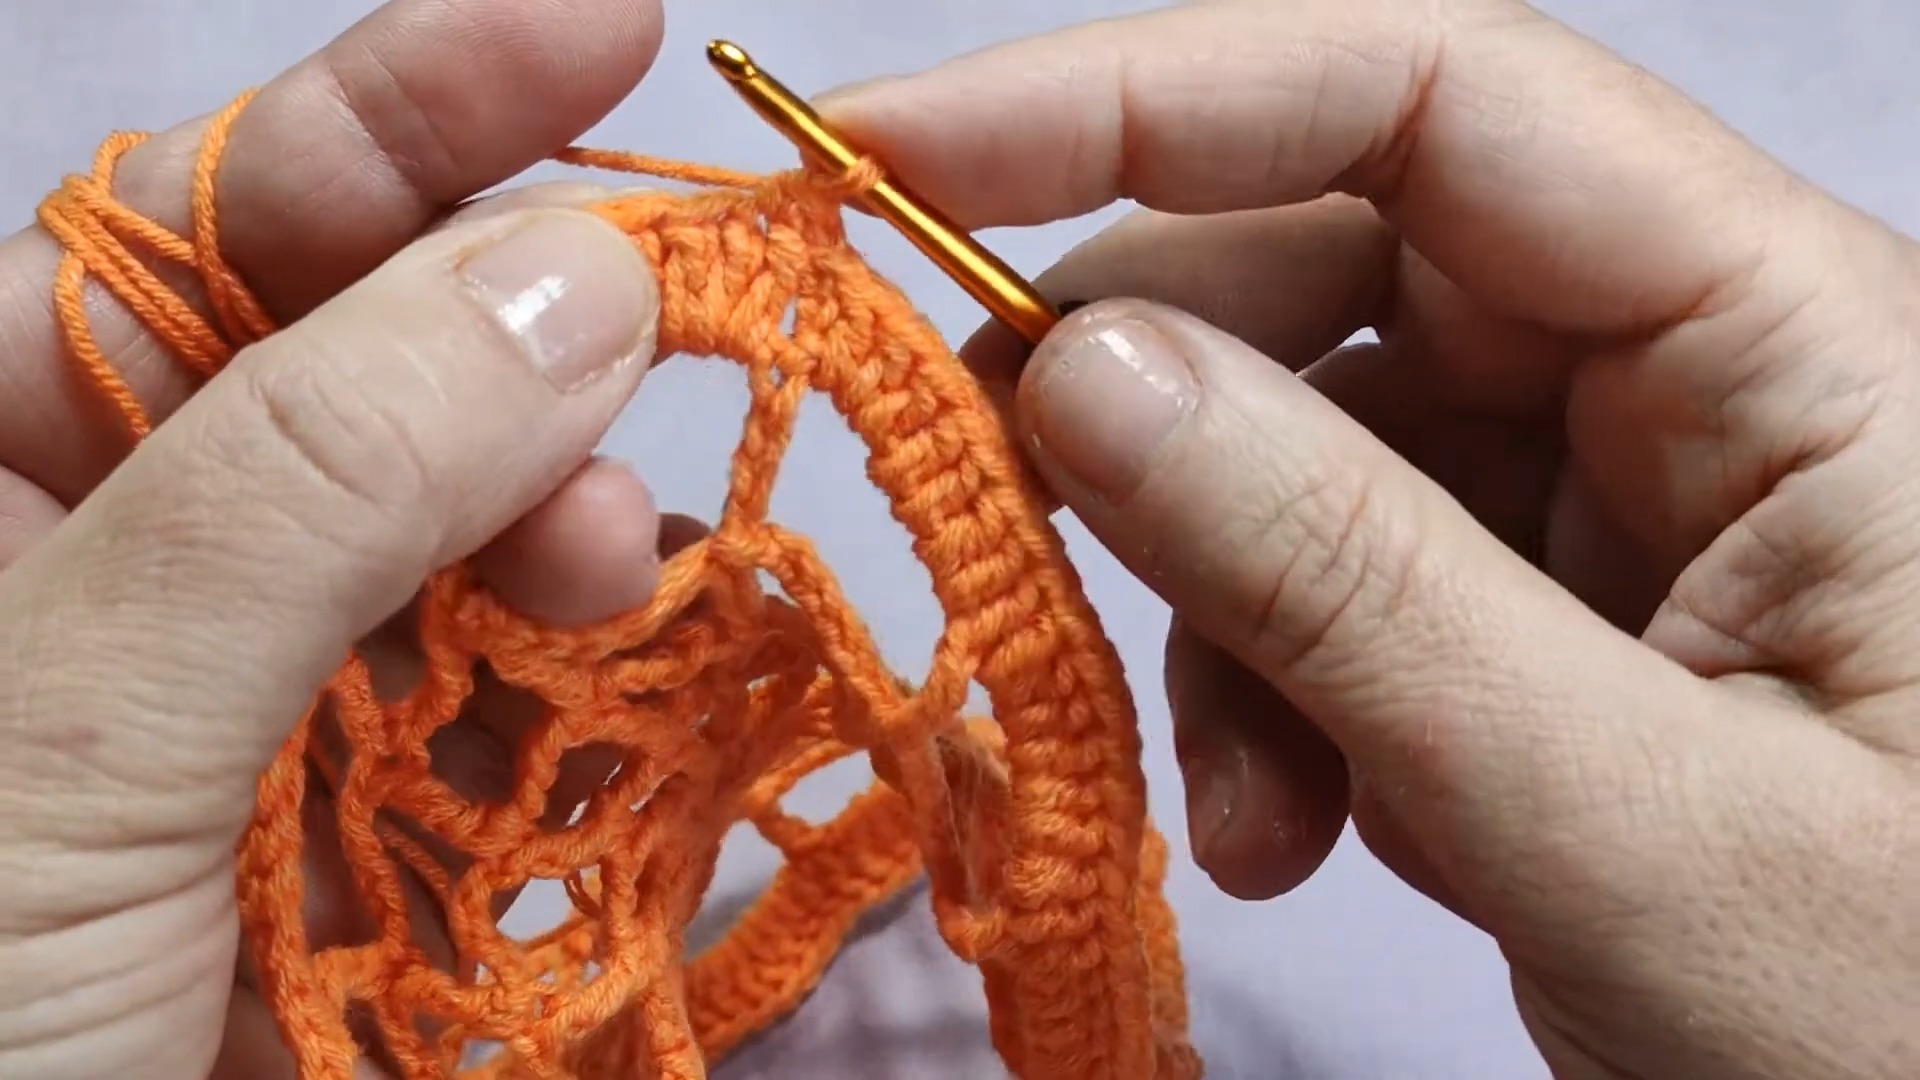
R7 (Final Round): Single Crochets with Picots
- SC into each of the first 3 DCs.
- On the 4th DC of each space, make a PICO stitch (CH 4, SL ST into the front loops of the first chain).
- Continue with SC in the remaining 3 stitches of each space.
- Work a SC on top of the previous TRs.
- Repeat this sequence across the row until complete.
- Join with a SL ST, secure the yarn, and fasten it off.

Finishing Steps
- Use the darning needle to weave in all loose ends to the back of the work.
- If desired, block the doily to shape it properly:
- Turn the doily to the wrong side and lightly steam it with an iron over a clean cloth.
- Adjust the pattern into place and pin it down evenly to maintain the web design.
- Add starch to stiffen the doily if using it for heavier decorative purposes.
Pattern Question
Question: Can I use a different yarn thickness for this pattern?
Answer: Yes, but keep in mind that thicker yarn may create a larger, less delicate web design, while thinner yarn gives a finer finish. Adjust your hook size accordingly.
Conclusion
This crochet spider web doily is a fun and rewarding project, combining creativity with functionality. Its simple yet stunning design makes it an enjoyable craft and a versatile decoration worth adding to your home.