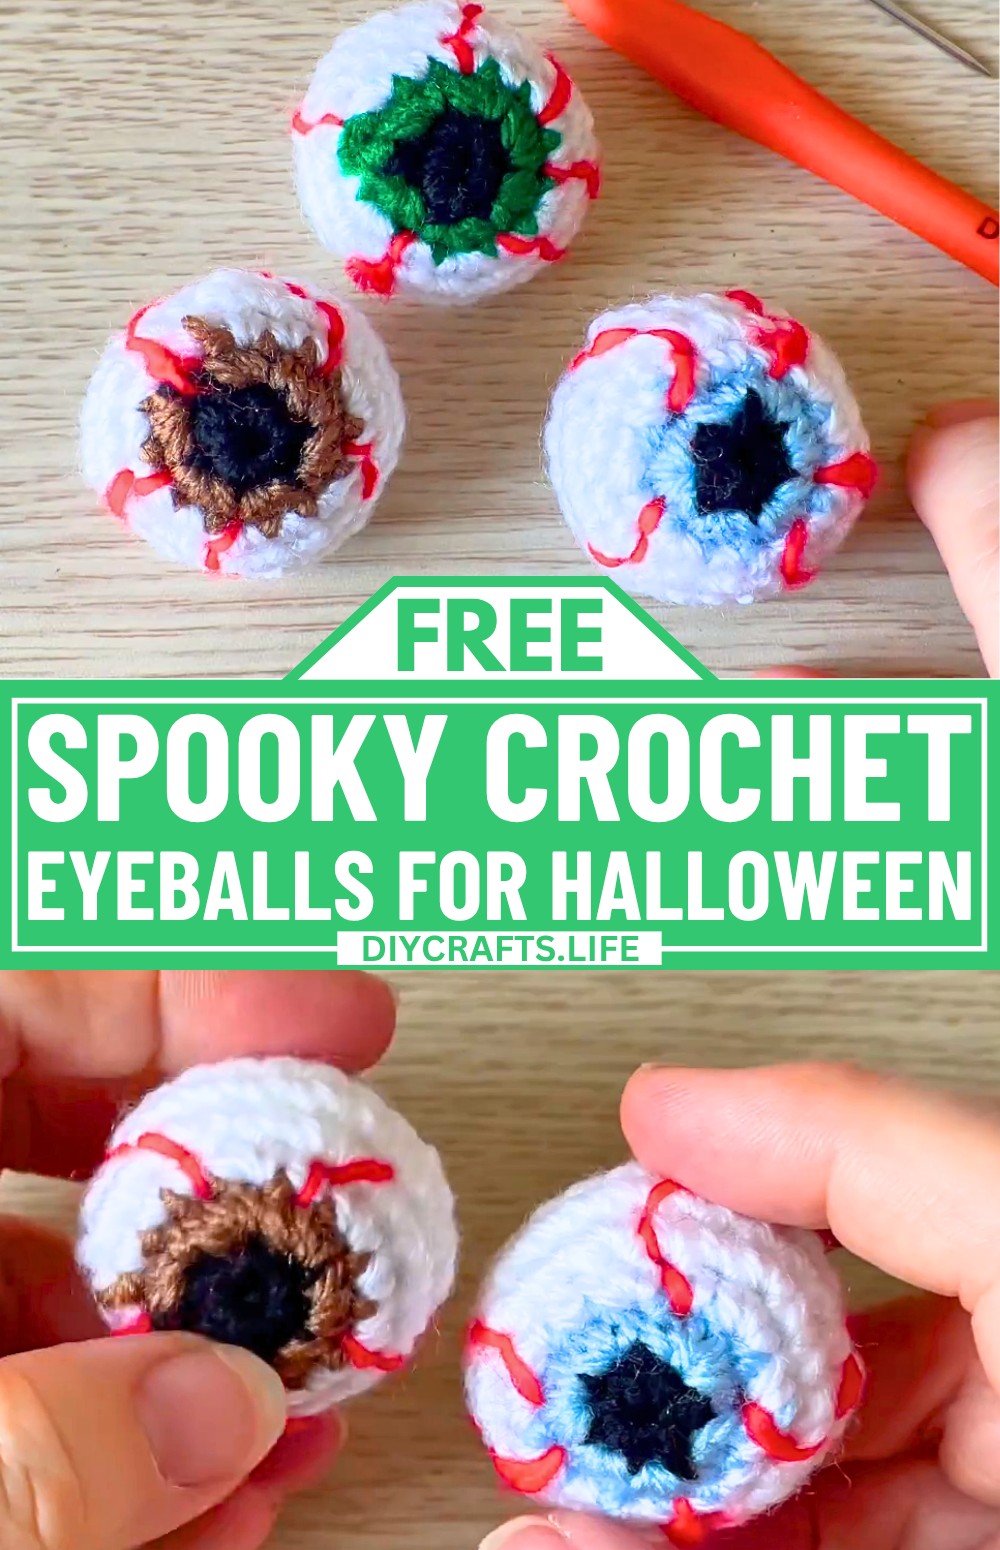
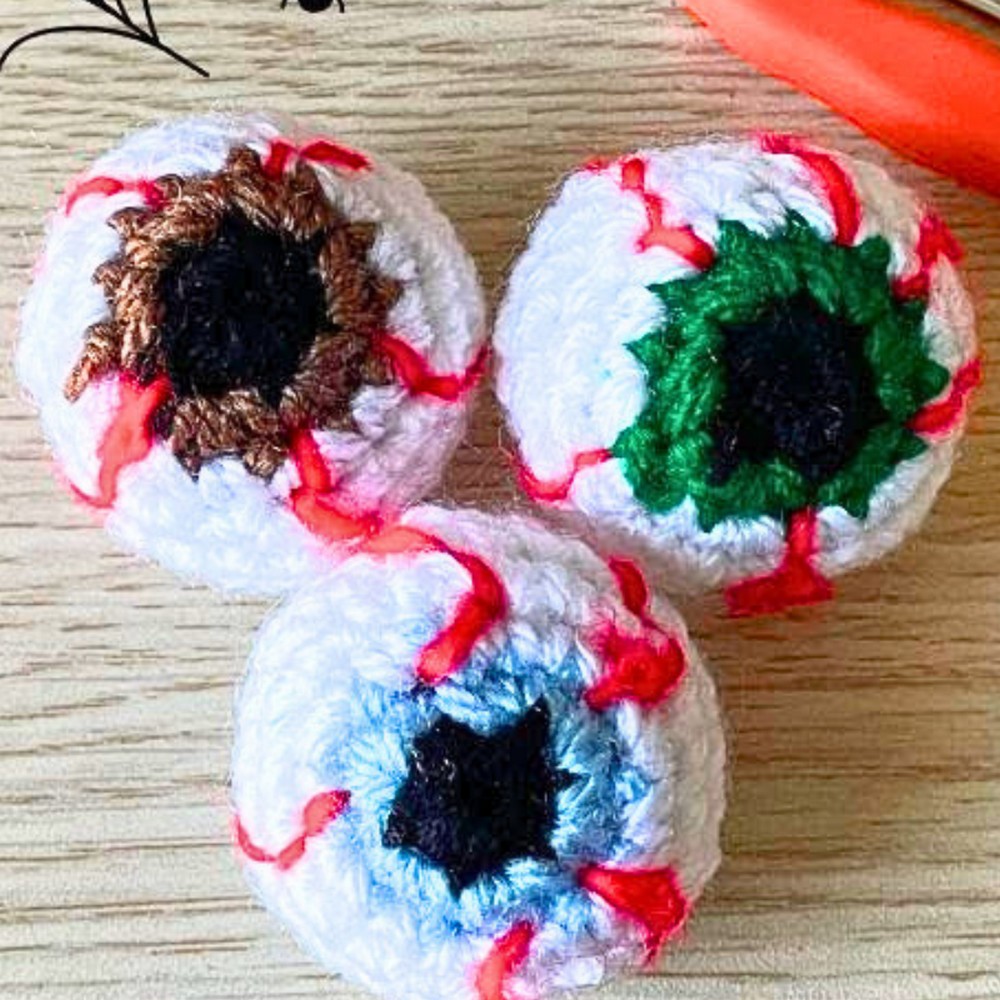
What if the smallest crochet piece could become the most eye-catching part of your Halloween decor? These crocheted eyeballs combine seasonal character with handcrafted detail, making them a standout addition to festive settings. They work beautifully in decorative bowls, table centrepieces, hanging displays, party favors, or themed gifts for friends and family. Their compact design, bold colour contrasts, and distinctive appearance show how a few leftover strands of yarn can be transformed into decorations that capture attention throughout the season. The elements that give each eyeball its distinctive look come together through a process that is far more approachable than it first appears.
Crochet Eyeballs for Halloween
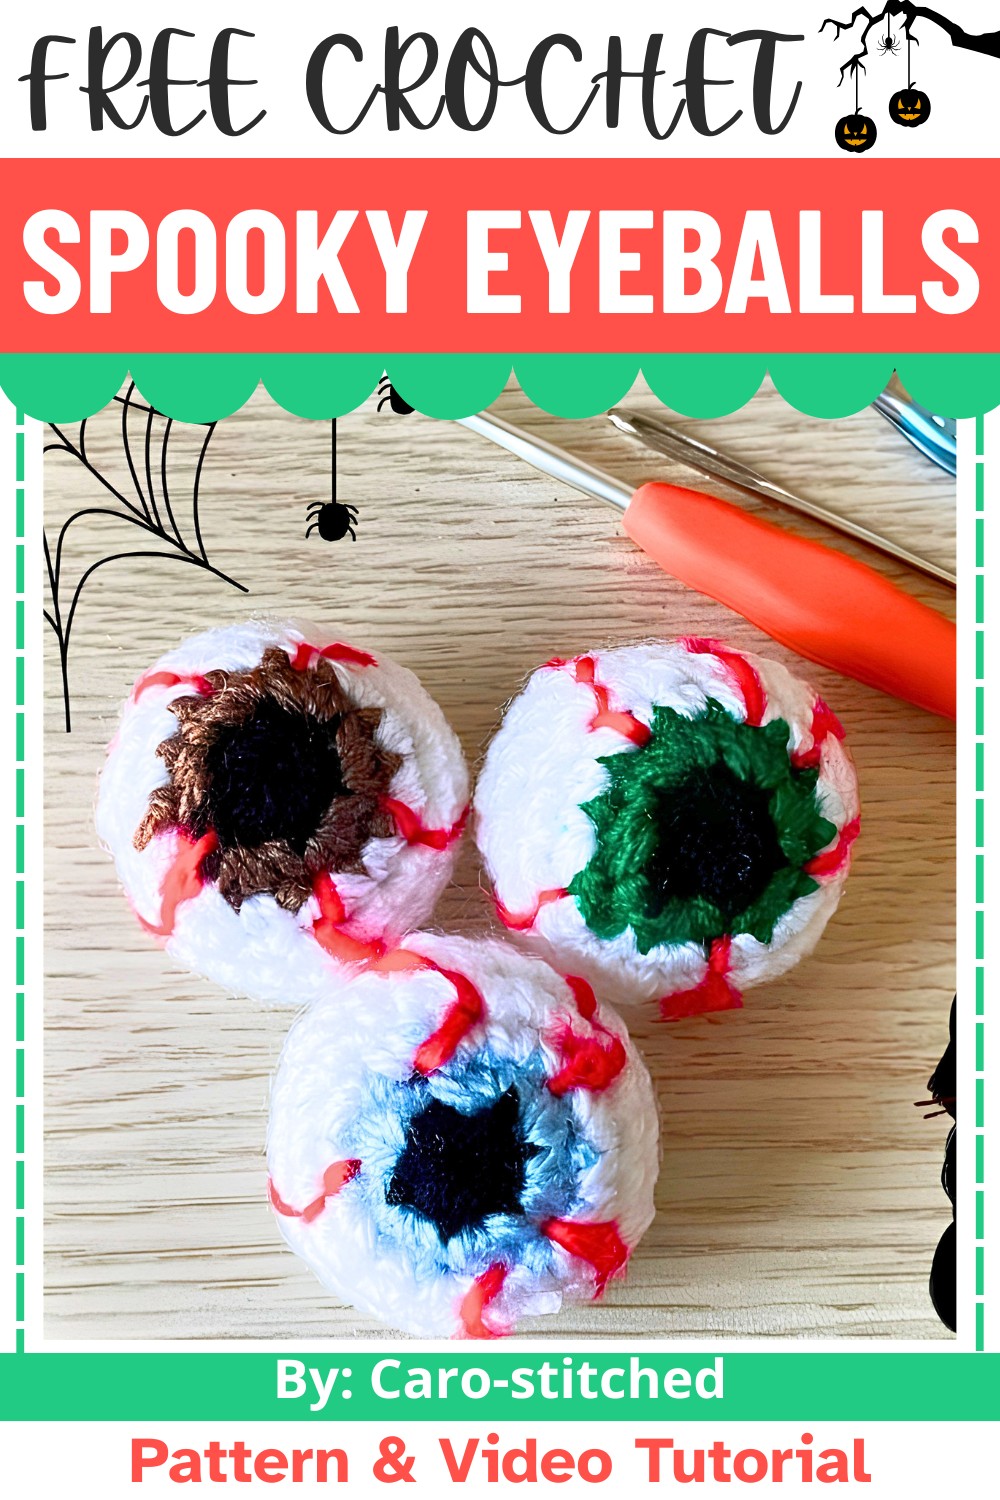
Creating these crochet eyeballs is a straightforward process that turns basic stitches into a piece full of visual impact. The pattern relies on simple techniques and a limited color palette, making it suitable for beginners, while remaining satisfying for experienced crocheters. Black yarn defines the pupils, white forms the base, and vibrant shades shape the rises, while optional red accents introduce an authentic Halloween touch. With each round adding another defining detail, the pattern below reveals how these distinctive Halloween accents come together with surprising efficiency.
Credit Caro-stitched
Materials & Tools Needed
- Yarn:
- Black (for the pupil)
- Any color of your choice (for the iris)
- White (for the main eyeball)
- Red (optional, for veins)
- Hook: 3.25mm crochet hook (smaller than usual for DK yarn to produce tight stitches)
- Stuffing: Polyfill or leftover yarn ends
- Scissors
- Tapestry Needle
- Optional: Stitch markers (or a simple paper clip can work)
Finished Size & Customization Ideas
- The finished eyeball is small and compact, perfect for Halloween decorations such as bowl fillers, keychains, or creepy garlands.
- Customize the iris in colors like green, blue, yellow, or even multicolor for added spookiness.
- Add fewer or more red veins depending on your preference.
Pattern Abbreviations & Terminology
- UK Terms (used in tutorial):
- ch: Chain
- dc: Double Crochet
- sl st: Slip Stitch
- dec: Decrease
- Magic ring: Used to begin rounds
- US Equivalent Terms:
- ch: Chain
- sc: Single Crochet
- sl st: Slip Stitch
- dec: Decrease
- Magic ring: Used to begin rounds
- The chain stitch does not count as a stitch in this pattern.
Step-by-Step Crochet Instructions
Part 1: The Pupil
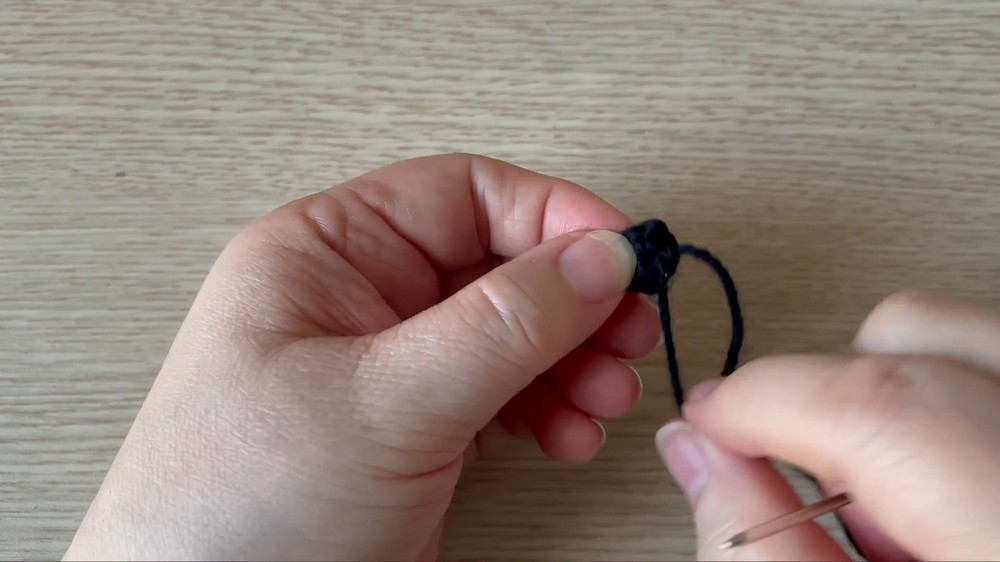
- Start with black yarn and create a magic ring:
- Wrap the yarn around two fingers, forming a cross.
- Insert the hook under the first strand and grab the second strand.
- Pull it through and twist to secure the magic ring, forming your first chain.
- Work 6 double crochets (dc) into the magic ring (US: 6 single crochets [sc]).
- Pull the tail to close the ring tight.
- Create an invisible join:
- Cut the black yarn, leaving a tail.
- Thread the tail through a needle and insert it under the first stitch.
- Then insert the needle back through the last stitch’s loop to mimic the appearance of a completed round.
- Knot securely and tuck in the ends (don’t trim fully; these can be used as extra stuffing later).
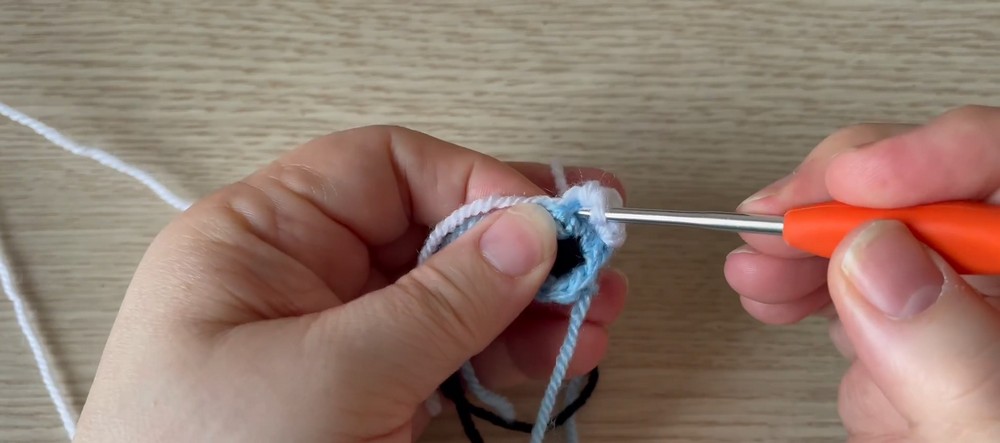
Part 2: The Iris
- Attach your chosen iris-colored yarn to any stitch from the previous round.
- Secure by pulling the yarn through and chaining 1.
- In this round, work 2 dc (US: sc) into each stitch (increase round):
- You’ll end the round with 12 stitches.
- Once complete, create an invisible join with the same method as before (leave a longer tail for neatness).
Part 3: The Eyeball Base
- Attach white yarn to any stitch, chain 1.
- Round 1: Begin an increase round:
- Alternate 1 dc (US: sc) in the first stitch and 2 dc (US: sc) in the next. Repeat all the way around.
- Total stitches for the round: 18.
- Round 2: Increase using the pattern: 1 dc (US: sc), 1 dc (US: sc), 2 dc (US: sc).
- Total stitches for the round: 24.
- Rounds 3 & 4: Work 1 dc (US: sc) in each stitch all the way around (no increases).
- You’ll maintain 24 stitches for both rounds.
Part 4: Shaping the Eyeball
- Round 5 (Decrease Round): Begin decreasing:
- Work 1 dc (US: sc) into the first two stitches, followed by a decrease:
- Insert the hook under the front loop of the next two stitches, yarn over, and pull through both loops.
- Yarn over again and pull through all loops on the hook.
- Repeat pattern (1, 1, decrease) around.
- Total stitches: 18.
- Work 1 dc (US: sc) into the first two stitches, followed by a decrease:
- Round 6 (Decrease Further):
- Work 1 dc (US: sc), followed by a decrease (1, decrease) pattern.
- Total stitches: 12.
- Round 7 (Final Decrease Round):
- Decrease in each stitch around.
- Total stitches: 6.
- Stuff the eyeball tightly with polyfill or yarn scraps before finishing the last round.
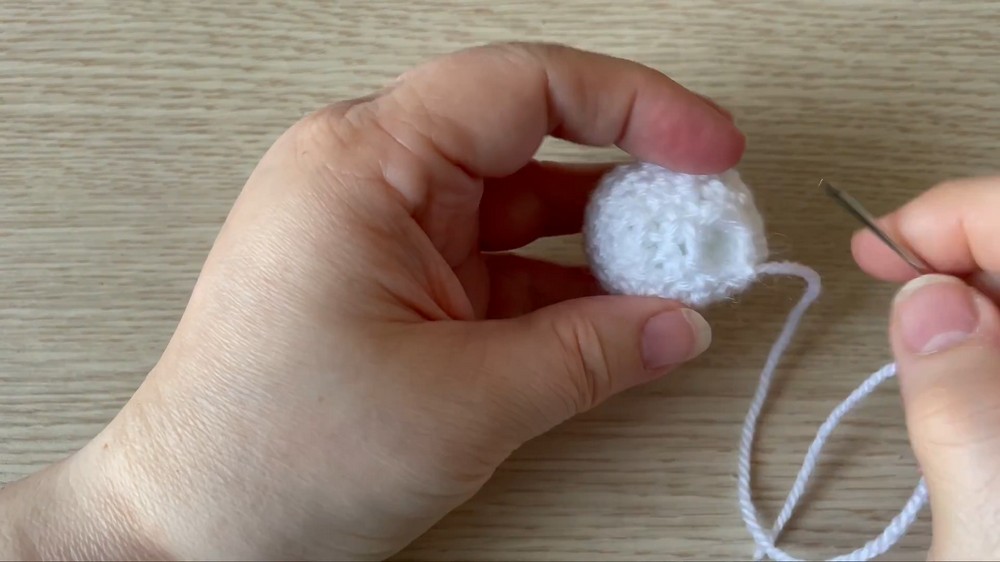
Part 5: Closing the Top
- Cut a long tail of yarn and thread your needle.
- Weave the needle through the remaining 6 stitches at the top, pulling tight to close the hole completely.
- For added security, stitch across the hole a few times and knot the thread.
- Insert the tail into the eyeball using the needle to hide it.
Part 6: Adding Red Veins
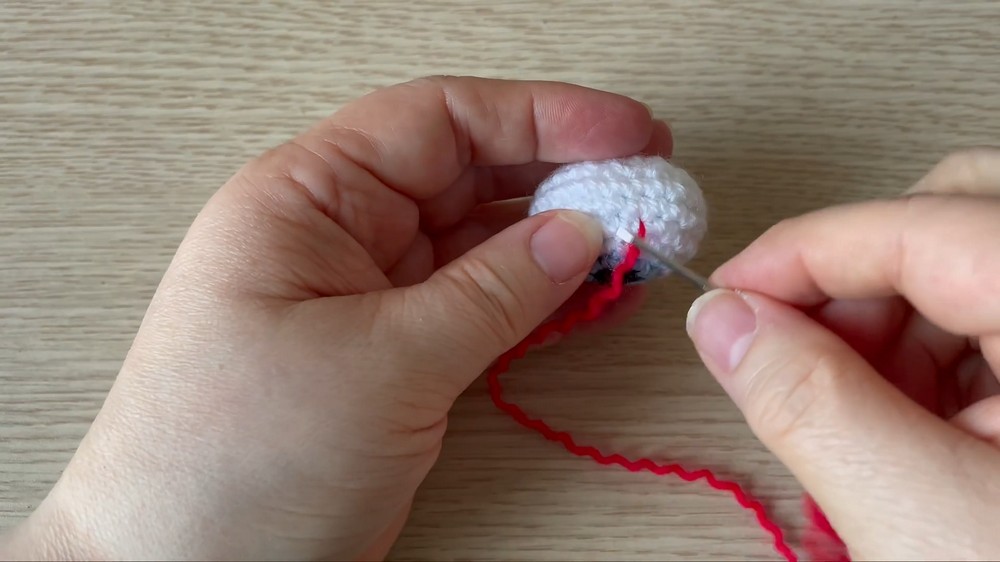
(Optional, but enhances spookiness)
17. Separate a strand of red yarn into thinner threads to create realistic veins.
- Thread a needle with the red yarn and randomly stitch veins starting from the iris outward.
- Vary the angles and lengths for a natural "creepy" effect.
- To finish, insert the needle through the eyeball, pull tight, and trim the yarn flush so it’s hidden.
Customization Ideas
- Add googly eyes or embroidery for additional creepy details.
- Make different sizes by adjusting yarn weight and hook size.
- Experiment with multicolored irises or glow-in-the-dark yarn for extra spook!