Have you ever noticed how the tiniest handmade decorations often bring the most Halloween charm? This little crochet pumpkin is a delightful piece that adds a festive touch without taking up much space. You can place it on a table, brighten a work desk, or tuck it into a kitchen display for a cozy seasonal accent. Making several in different sizes or shades creates an even more playful arrangement for the season. The most surprising part is how such a simple crochet design comes together with only a few easy techniques.
Crochet Tiny Halloween Pumpkin

Crocheting this pumpkin is relaxing and beginner-friendly, making it an enjoyable piece for a quiet evening. The process usually starts with simple rows that are later stitched together to form the pumpkin shape. After a bit of stuffing, a small stalk is added to give the piece its classic autumn character. You can also personalize each pumpkin with different colors or tiny facial details for extra personality. The step-by-step crochet pattern below reveals how these simple elements transform into an adorable Halloween decoration.
Credit Caro-stitched
Materials & Tools Needed
- Yarn: Paintbox Cotton Yarn (or similar in DK weight)
- Hook: 3.25 mm crochet hook (for tight stitches)
- Stuffing: Polyfill or leftover yarn scraps
- Needle: Yarn/tapestry needle for sewing ends
- Scissors
- Optional: Brown DK yarn for stem
Finished Size & Customization Ideas
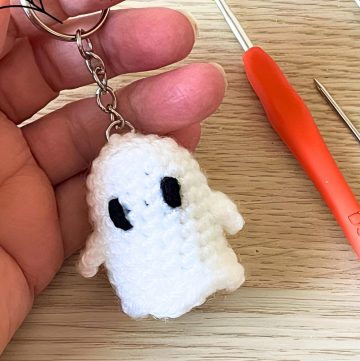
- The finished pumpkin is small and perfect for Halloween decorations, keychains, or displays.
- Customization suggestions:
- Add a keychain ring to turn it into an accessory.
- Use different yarn colors for variety (e.g., orange for classic pumpkins, silver for spooky pumpkins).
- Embroider faces to create jack-o’-lanterns!
Pattern Abbreviations & Terminology
This pattern uses UK and US terminology interchangeably:
- ch – Chain
- sl st – Slip Stitch
- dc (UK) / sc (US) – Double Crochet (UK) / Single Crochet (US)
- tr (UK) / dc (US) – Treble Crochet (UK) / Double Crochet (US)
- blo – Back Loop Only
- st(s) – Stitch(es)
Step-by-Step Detailed Crochet Instructions
1. Crochet the Pumpkin Body
Foundation Row:
- Create a slip knot and chain 10.
- Work into the second chain from the hook (ignore the loop on the hook).
- Crochet 1 UK dc (US sc) into each of the next 9 chains. (You should have 9 sts at the end.)
- Ch 1, turn.
Row 1:
- Work 1 UK dc (US sc) into the back loop only of each stitch across (9 sts total).
- Ch 1, turn.
Row 2:
- Work 1 UK dc (US sc) into the full stitch (both loops) of each stitch across (9 sts total).
- Ch 1, turn.
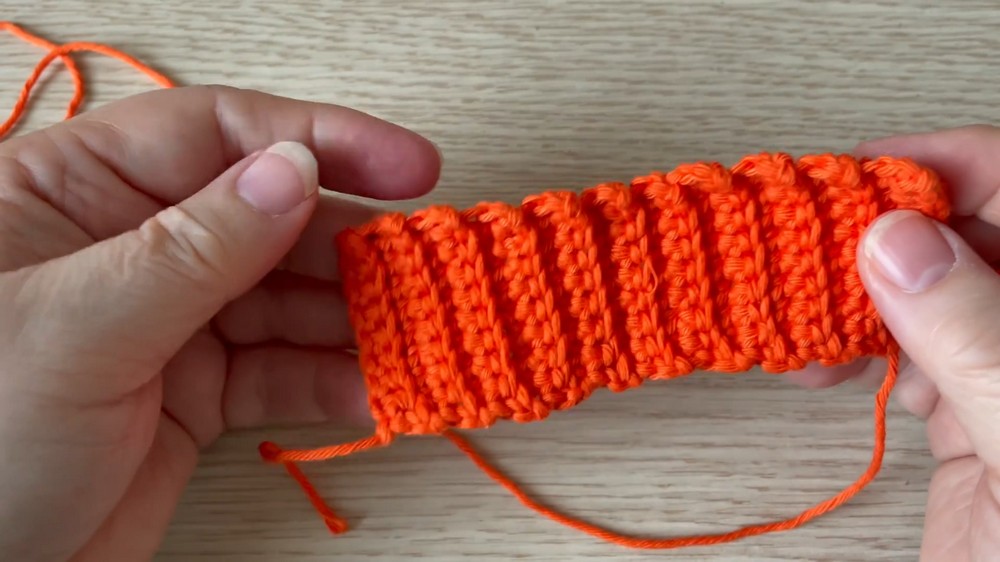
Rows 3–40:
- Alternate between Row 1 (blo) and Row 2 (both loops) for 20 repeats (40 rows total).
- End with a long tail for joining.
2. Assemble the Pumpkin Body
Join the Ends:
- Fold the strip so the right side faces inward.
- Slip stitch the short edges together:
- Insert the hook through the corresponding loop on both edges.
- Yarn over and pull through both loops and the one on the hook.
- Continue to the end.
- Fasten off and leave a long thread for sewing.
Shape the Pumpkin:
- Turn the piece right side out.
- Thread the long yarn tail onto a needle and weave in and out of stitches around one open edge.
- Pull the yarn tight to cinch the edge closed. (This forms the base of the pumpkin.)
- Secure it with a few stitches to prevent it from reopening.
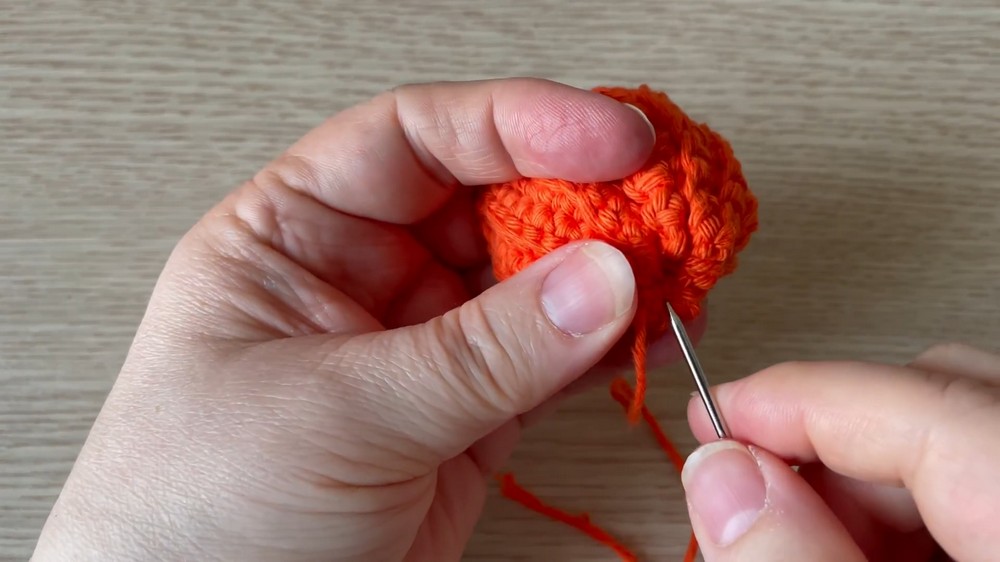
Stuff the Pumpkin:
- Fill the pumpkin with polyfill or yarn scraps.
- Adjust the amount for desired firmness.
- Repeat the weaving and cinching process for the top edge.
- Pull tight to close, secure with stitches, and ensure both edges are completely closed.
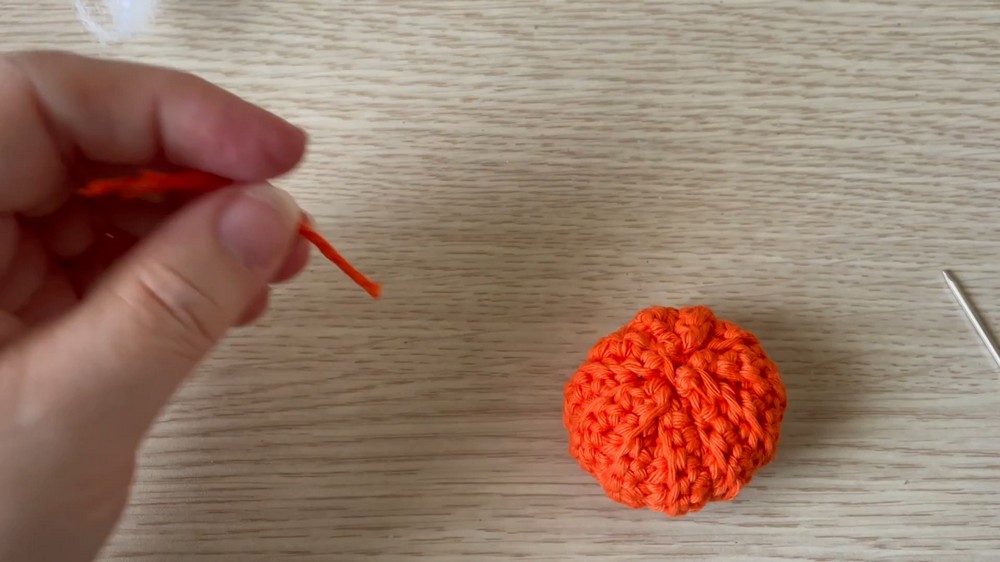
3. Create the Pumpkin Ridges
- Insert the needle through the center bottom of the pumpkin and pull it up to the top center.
- Pull the yarn tightly to create a dimple.
- Repeat this process multiple times, pulling tight each time, to form ridges.
- Secure the thread with a knot and fasten off.
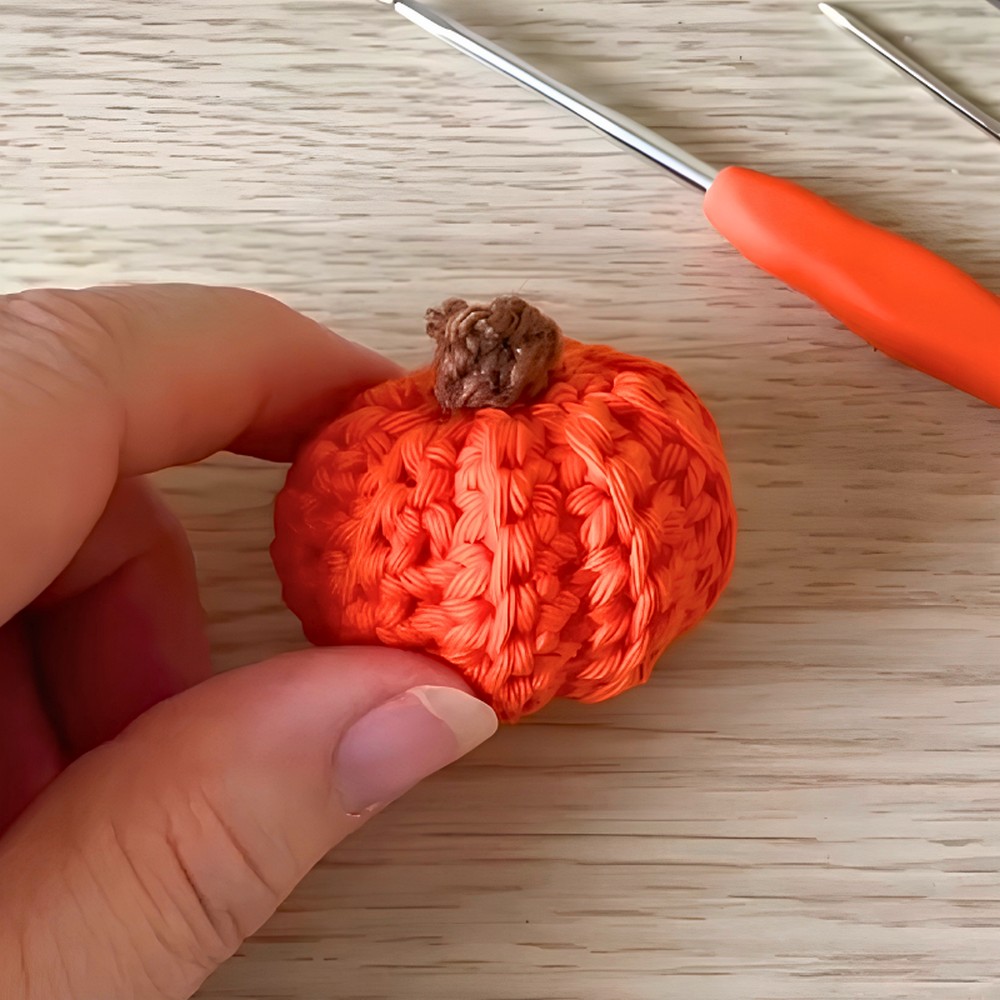
4. Crochet & Attach the Stem
Magic Ring Stem:
- Using brown yarn, make a magic ring.
- Chain 2, then work 6 UK tr (US dc) stitches into the ring.
- Pull the ring closed and slip stitch into the first stitch to join.
- Leave a long tail for sewing.
Attach the Stem:
- Position the stem on the top of the pumpkin.
- Use the tail to sew it securely, working around the base of the stem.
- Fasten off and tuck all ends into the pumpkin.

Finishing Touches
- Trim any loose threads.
- Adjust stuffing to perfect the pumpkin shape.
- Add optional details like felt faces, beads, or embroidery onto the pumpkin.