A live edge cutting board is an easy and fun furniture project that can be beautiful, unique, and functional. The key to success is learning how to correctly choose the suitable hardwood slab, then using the right tools to work with it. This DIY Live Edge Cutting Board Plans guide provides step-by-step instructions to help you through everything from primary design considerations to sanding and staining your finished cutting board.

We all know the joys of a great steak, but it can be hard to enjoy without a good cutting board fully. Cutting boards are an essential tool for any kitchen, and if your current one is not up to snuff, you might be looking for a DIY fix. If so, we are right there with you! Today, we are talking about making your own live edge cutting board.
How To Make A Live Edge Board:
Live edge cutting boards are a fun and functional piece to add to any kitchen. Simple in design and execution, this project is excellent for beginners just starting. If you are looking for a project that will impress your friends and family, this is it! In this collection of live edge cutting board plans, you will find 15 different designs. Take advantage of your woodworking skills and go for a simple design that anyone can follow, or try something more intricate with your craftsmanship on display. Either way, these live edge tutorials will have you enjoying your new creation in no time.
How To Make A Live Edge Board Plan:
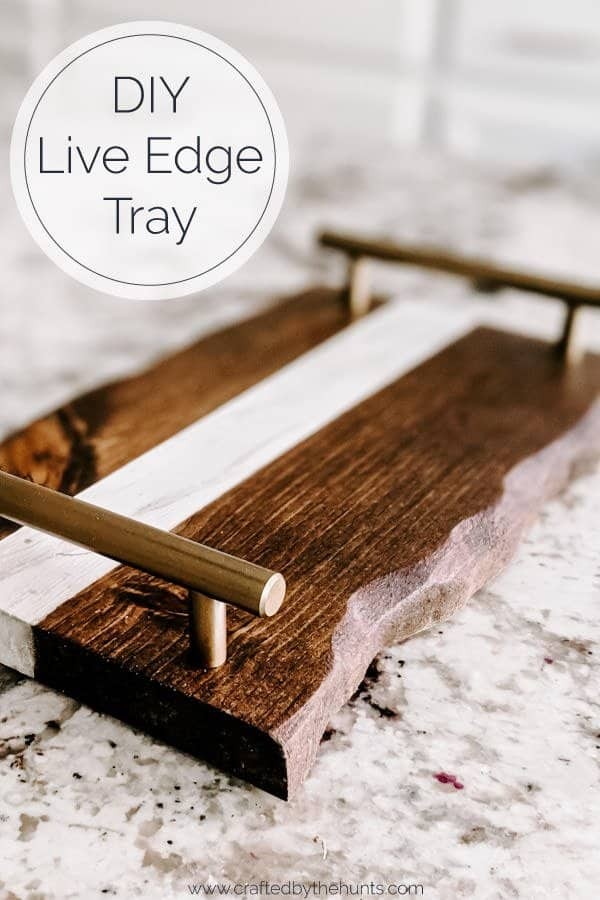
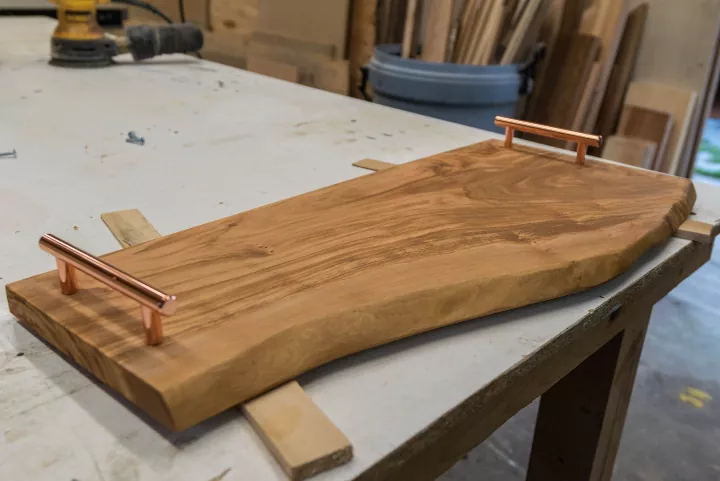
This How To Make A Live Edge Board Plan will show you how to create a live edge serving board with a built-in handle. The handle can be used as a hanging display for the board or for moving it around. This advanced project requires some basic woodworking skills and tool knowledge. To make this live edge board plan with a handle, you will need access to a table, drill press, miter saw, jigsaw, bandsaw, and router table.
- Jigsaw
- Drill press
- Wood clamps
- Sandpaper
- Forstner bit
- Hand rasp
DIY Live Edge Cutting Board Plan With Natural Wood Slabs:
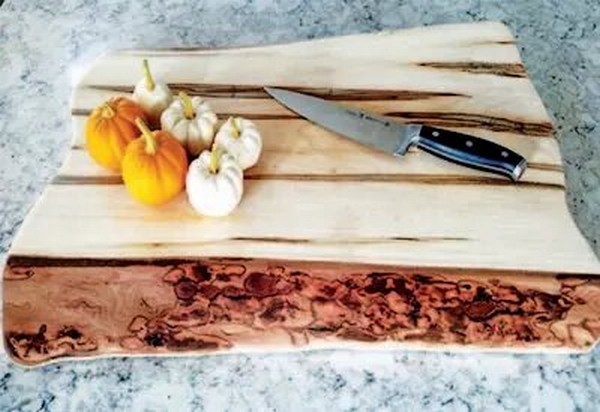
Have you ever seen a live edge cutting board made from a piece of ambrosia maple? It is truly the most stunning of the members of the maple family. This live edge cutting board plan is suitable for any woodworker with basic jigsaw skills. The ambrosia maple slabs used in this project have gorgeous spalting that makes the color of the wood more vibrant and, at times, even iridescent. The slabs are finished with mineral oil to protect them from moisture and prevent drying.
- Jigsaw
- Chisels
- Sandpaper
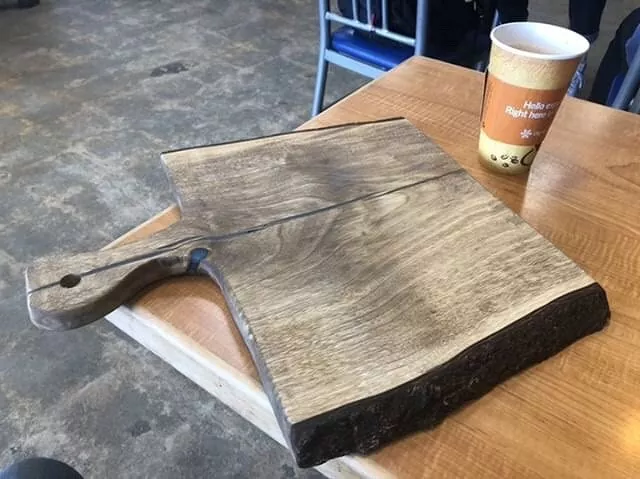
How To Make A Live Edge Walnut Cutting Board:

Making a live edge cutting board is not hard, but you should know a few things about the process. The first step is picking out your wood. You want something that has a minimum of knots or other defects. Certain woods, such as Maple, are better than others when working with. Nevertheless, even if you have to cut it down, it only takes a minute to get the sizing right.
How to make a live edge walnut cutting board is made of solid walnut with a hand-carved handle. The builder used a pull saw to form the delicate curves of the handle and then shaped the other two sides with a jigsaw. To complete this project, he drilled a hole through the middle so it could be hung anywhere in your kitchen.
- Jigsaw
- Pull saw
- Drill
- Sandpaper
How To Make A Live Edge Board:
This informative tutorial on How To Make A Live Edge Board will show you how to get a perfect finish on your live edge boards. Start by sanding your board before finishing it, and make sure to sand both sides of the wood evenly to get an even surface. Though there are many ways to apply a finish, this tutorial shows how one woman sands her maple cutting boards with a random orbital sander and then applies mineral oil with a rag for protection against moisture.
- Multiple sandpaper grits (80–320)
- Vinegar
- Water
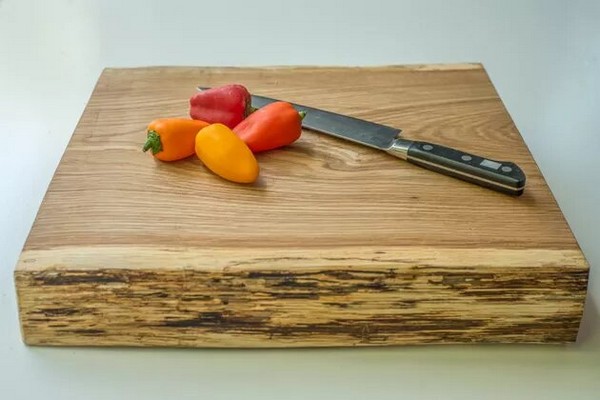
DIY Large Charcuterie Board Plan:
This plan will help you create your own rustic live-edge charcuterie board with a large footprint and ample surface area, perfect for serving a crowd! Built from smaller pieces of wood scrubbed with mineral spirits and left unfinished to reveal the natural grain pattern and woodsy feel, the DIY Large Charcuterie Board Plan has enough space for all of the typical charcuterie offerings. This is the perfect woodworking project for anyone who loves charcuterie and cheese. This sizeable DIY charcuterie board plan has all the tools, tips, and techniques you need to build a beautiful custom cutting board for your home.
- Miter saw
- Jigsaw
- Epoxy
- Table saw
- Router
- Planer
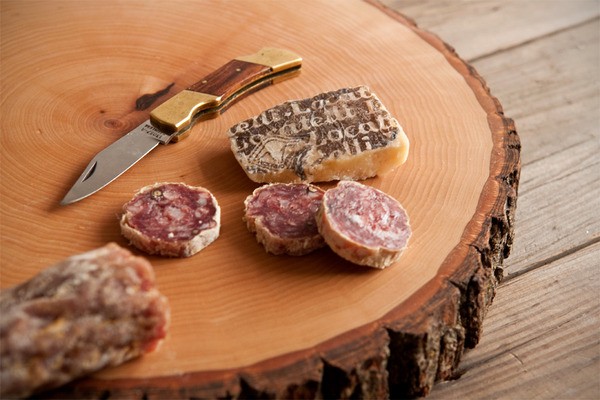
DIY Wood Slice Cutting Board Plan:
Wood is a natural material with characteristic flaws, knots, and imperfections. DIY Wood Slice Cutting Board Plan allows you to cut a wood slab from a tree stump and turn it into an instant cutting board. Your board will be unique, featuring characters and personalities all on its own. This project is suitable for beginning woodworkers, advanced amateurs, and anyone who wants to add some woodgrain beauty to their kitchen in an easy and fun way.
- 50-grit and 120-grit sandpaper
Make A Cutting Board Out Of A Tree:
Provide food for your family and friends with a simple cutting board made from a salvaged tree. The process to get this beautiful piece of live edge furniture will take only 3-4 hours, and the cost is minimal compared to store-bought cutting boards. This comprehensive guide walks you through each step needed to convert a stump into a stunning workstation that gives you years of use. The result is a beautiful, high-quality cutting board that will envy your neighborhood.
- Chainsaw
- Scrap wood (1” x 3”)
- Orbital sander
- 80-grit, 120-grit, and 220-grit sandpaper
- Screwdriver
- Hammer
Create A Live Edge From A Normal Board:
While most of the distinctive live edge boards are cut from full logs, this tutorial shows you how to make a faux live edge from a classic piece of wood. A twist on a live edge cutting board builds it is made by outlining an organic shape on your wood, cutting it with a jigsaw, and then sanding that shape into a rustic look. The three-step process is simple and easy to follow––no secret tricks or special tools are needed!
- Electric sander
- 60-grit sandpaper
- Pencil
- Jigsaw
- 80–220 grit sandpaper (optional)
Resin DIY Cutting Board Plan:
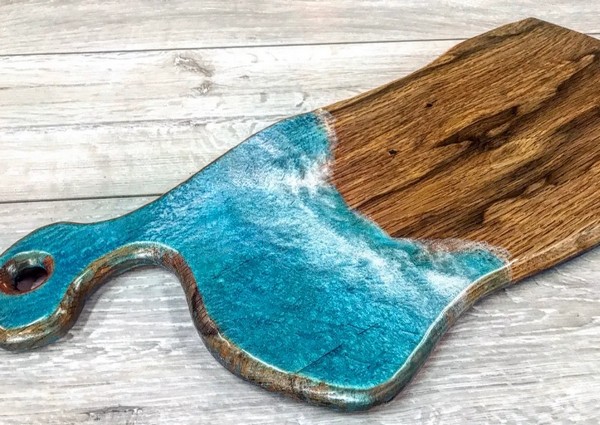
Whether you are building your first cutting board or simply looking for a new technique to breathe new life into the old favorite, the resin will change how you view woodworking. Resin is easy to use and results in spectacular finished products. This project will show you how to create a resin ocean wave live edge cutting board with blue and white pigments; using this method, you can add any color scheme that suits your taste! The use of pigment allows you to add an element of visual interest to the workpiece, creating a stunning final result.
- Resin & hardener
- Powder pigment (Okinawa)
- Heat gun
- Carpenter crayon
- Double-sided tape
- Powder pigment (Bora Bora)
- Powder pigment (White)
- Flush trim bit
- Roundover bit
Live Edge Myrtle Cutting Board Plan:
Cutting boards are some of the kitchen's most common and practical tools. The shape and size can vary, but they generally have a flat surface with a large handle to allow you to get a good grip on them. This project shows you how to create your cutting board by making a live edge board and adding resin. For this style, you will need a planning jig and several other tools.
- Jigsaw
- Sandpaper
- Epoxy
- Blue mica powder
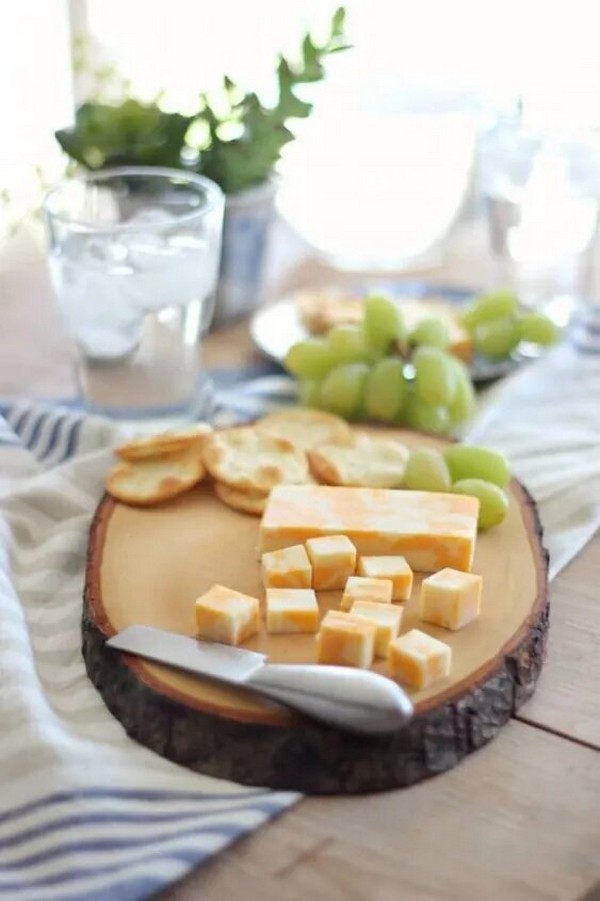
Homemade Charcuterie Board Plan:
Before you take out your credit card, consider this charming and inexpensive serving board nearly identical to the ones you can buy in craft stores. It just requires a slice from a pre-cut store-bought board with a circular live edge, plus a quick sanding and some tung oil. You can make a custom serving tray or cutting board in less than an hour (and for under $10). We made ours around 5 inches high because that is how high we like our boards, but the size and shape are entirely up to you.
- 150-grit and 220-grit sandpaper
- Stiff brush
DIY Curved Cutting Board Plan with Bent Lamination:
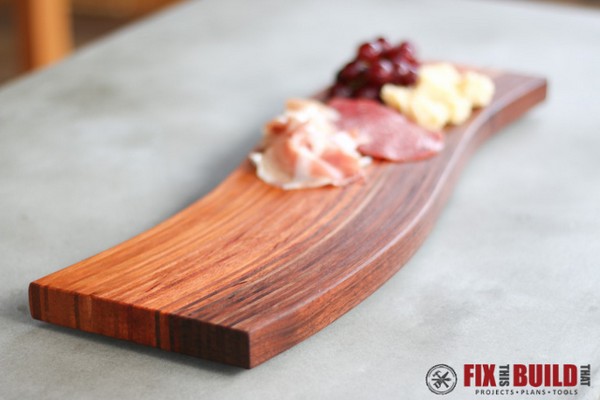
This plan is an excellent example of the skill and patience needed to build a high-quality board. While it can be necessary to use thicker pieces of wood when building a bending laminated cutting board, this example uses thin strips to create a unique pattern in the wood's natural grain. The finished product may look simple, but it took care and attention to detail to build this product right.
- Drum sander
- Parallel clamps
- Bandsaw
- Miter saw
- Tablesaw
- Sander
- Planer
Wine Stained Live Edge Serving Board:
Make the most of your live edge board with this innovative tutorial. This method of wine staining brings out the natural beauty of each piece, creating a vibrant ring around your beautiful new design. Moreover, while this technique is a beautiful way to boost any piece, it is excellent on those extra-dull boards that are not as exciting. This live edge tutorial will show you how to stain a board in true wine country style, complete with a wine bucket.
- Orbital sander
- Circular saw
- Red wine
- Handles
Walnut Charcuterie Board DIY Plan:
Adding an organic handle to your live edge wood board is a great way to make it more functional. Luckily, it is not that hard to do with a few tools and basic skills. You will need a drill bit and a jigsaw, which you can use together to create the perfect-sized holes for your chosen handle. You will not splinter your board by drilling halfway through one side and then halfway through on the other side while making this beneficial addition!
- Drill
- Chisels
- Jigsaw
- Hand router
- Orbital sander
DIY Large Charcuterie Board Plan:
You have come to the right place if you wonder how to make a DIY Large Charcuterie Board Plan for your next party or enjoyment. In this video, I will show you my quick 'n easy method of making large boards out of a slab of wood as fast as possible. You can use any smooth and hardwood to cut cleanly, but Ithis plan has like using walnut because it is relatively inexpensive, gorgeous, and durable.