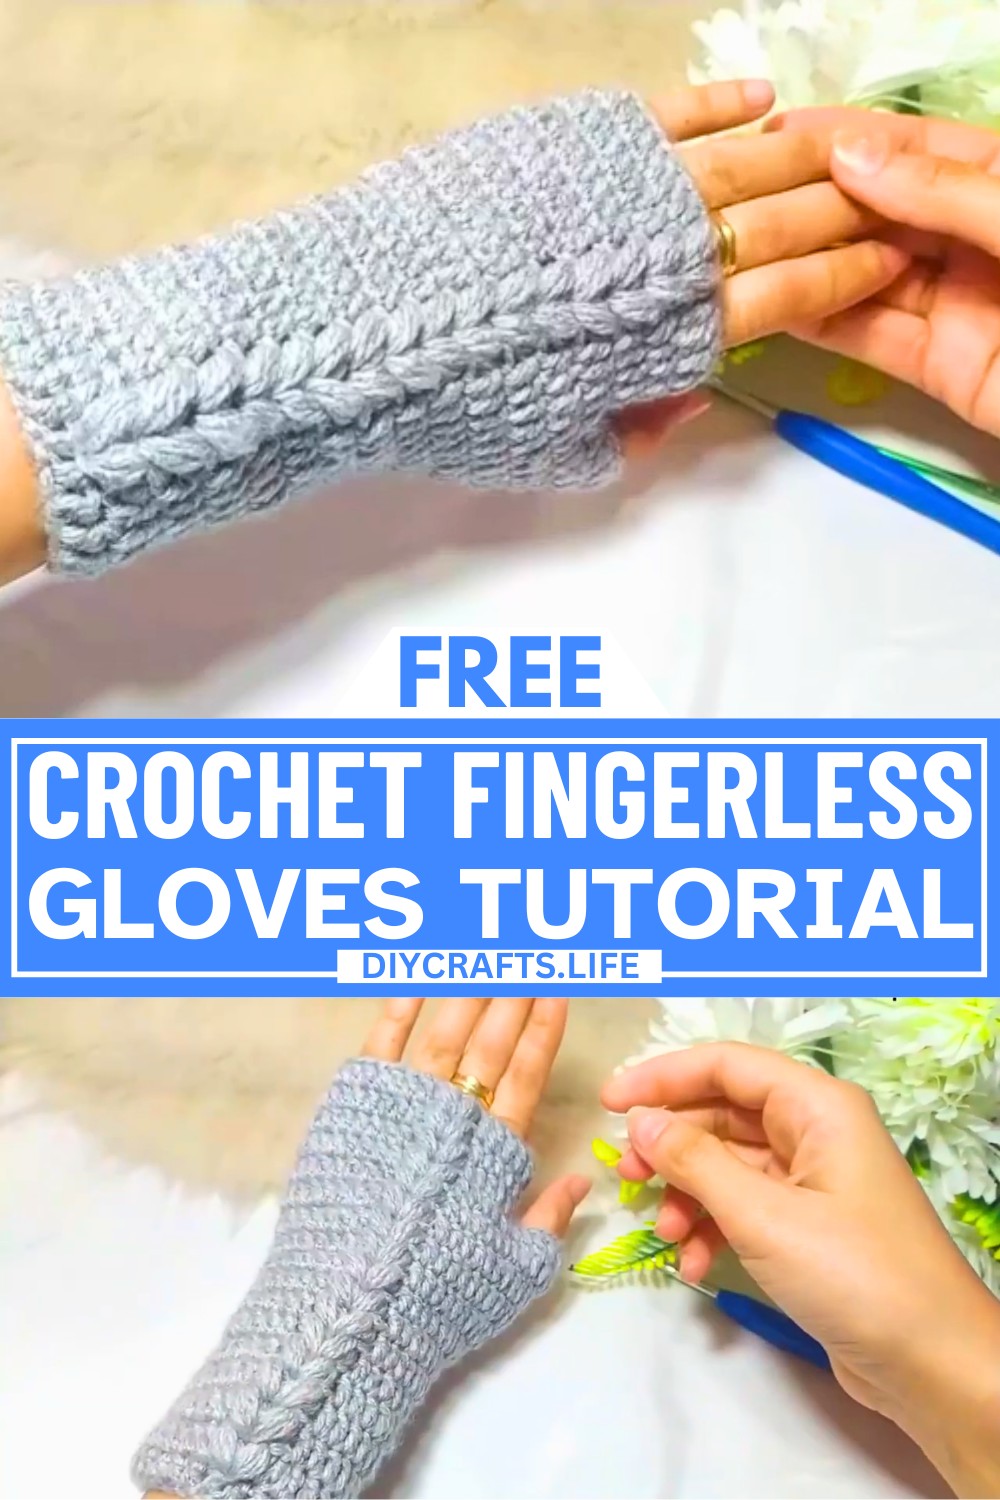
Crochet Fingerless gloves are not just stylish; they’re practical too. They keep your hands warm while letting your fingers move freely, making them ideal for typing, crafting, or chilly walks. These Crochet gloves are soft, lightweight, and customizable to fit perfectly on your hands.
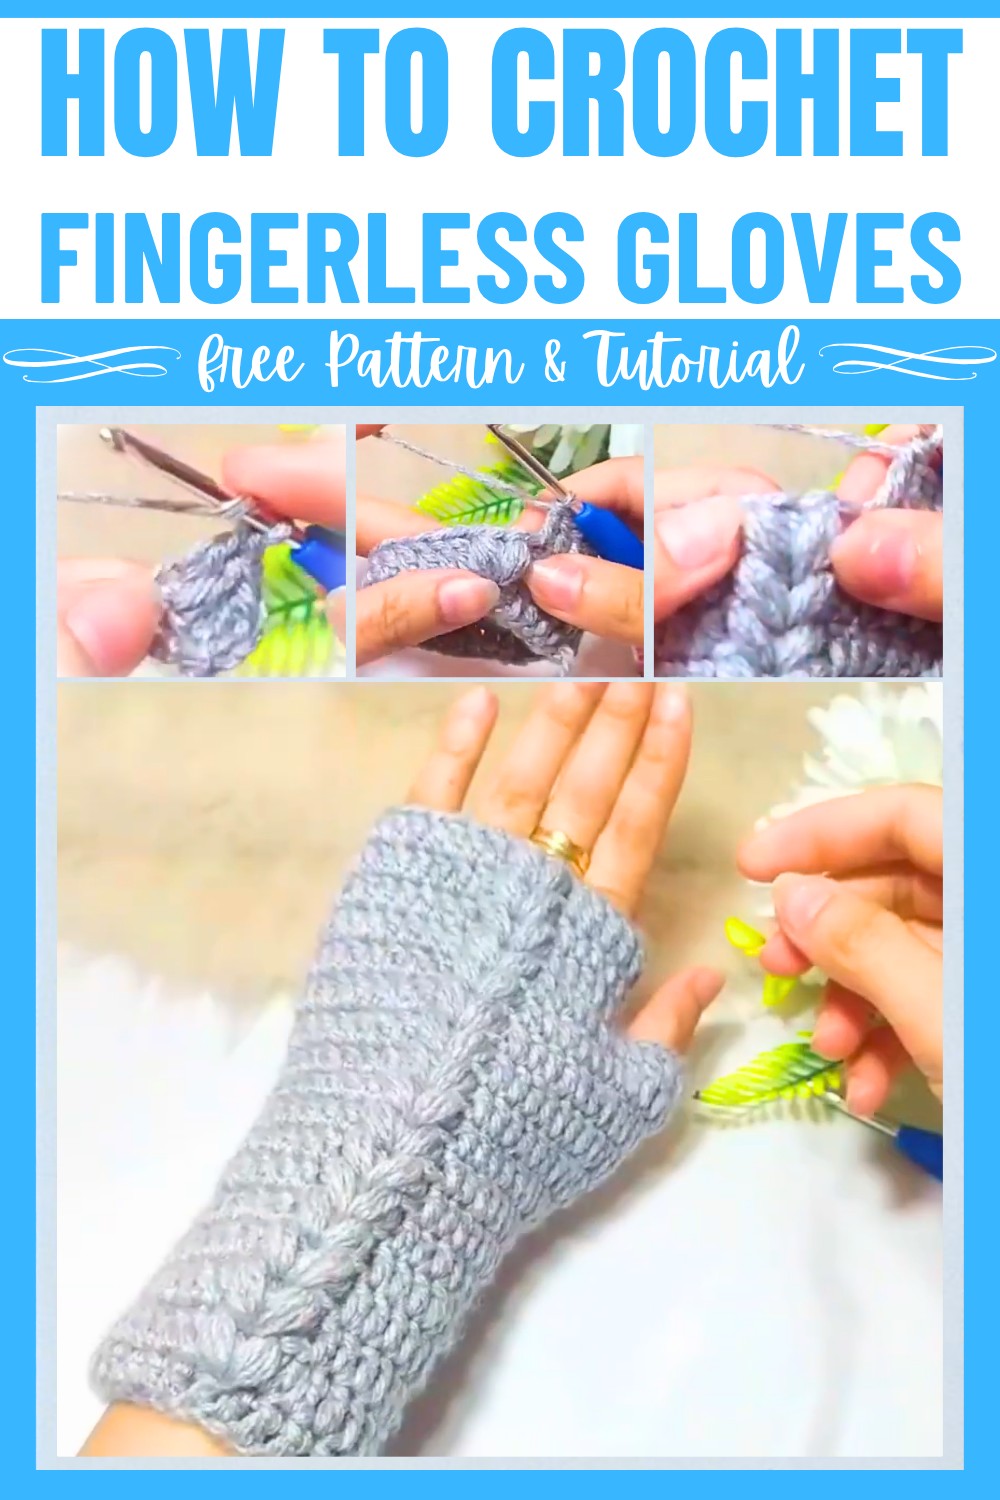
Making these Crochet gloves is fun and straightforward. You’ll combine basic crochet stitches to create a unique design. The pattern incorporates stitches like puff and column stitches to give the gloves a beautiful texture. You don’t need fancy yarn—just choose a thinner thread for a comfortable fit. The process includes creating cozy wrist sections, shaping your palm, and outlining the fingers for a snug yet breathable fit.
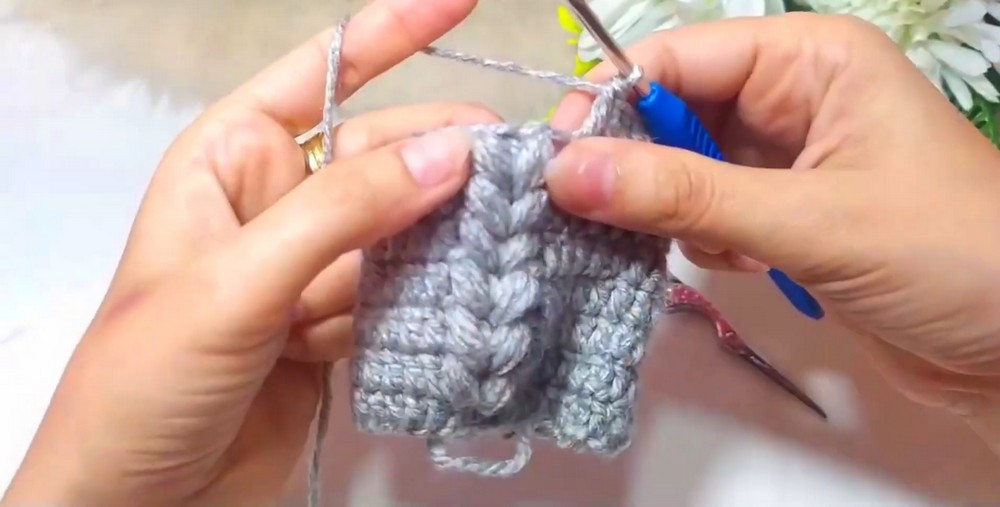
Credit Tayla Handmade Crochet
Materials & Tools Needed
- Yarn: Select a medium-weight yarn. Avoid thicker yarn as it may make the gloves look bulky.
- Crochet Hook: 3.5 mm crochet hook.
- Miscellaneous Tools:
- Stitch marker (optional for puff stitch placement).
- Tapestry needle for weaving in ends.
- Scissors.
Finished Size & Customization Ideas
- Recommended Wrist Circumference: Begin by measuring your wrist, as the number of chains depends on your wrist size. You need enough chains to fit snugly, while still allowing the glove to comfortably slide on and off.
- Customization Ideas:
- Adjust the length of the wrist section by working additional rounds before beginning the palm section.
- Add stripes or incorporate multiple colors for personalization.
- Embellish with buttons, beads, or borders for added decoration.
Pattern Abbreviations & Terminology
- ch: Chain
- sl st: Slip Stitch
- dc: Double Crochet
- puff stitch: Yarn over, insert hook, pull up a loop to create stitches (repeat specified number of turns/times, then pull through all loops).
- inc: Increase (work multiple stitches in the same space)
- st: Stitch
- rnd: Round
Skill Level: Beginner-friendly.
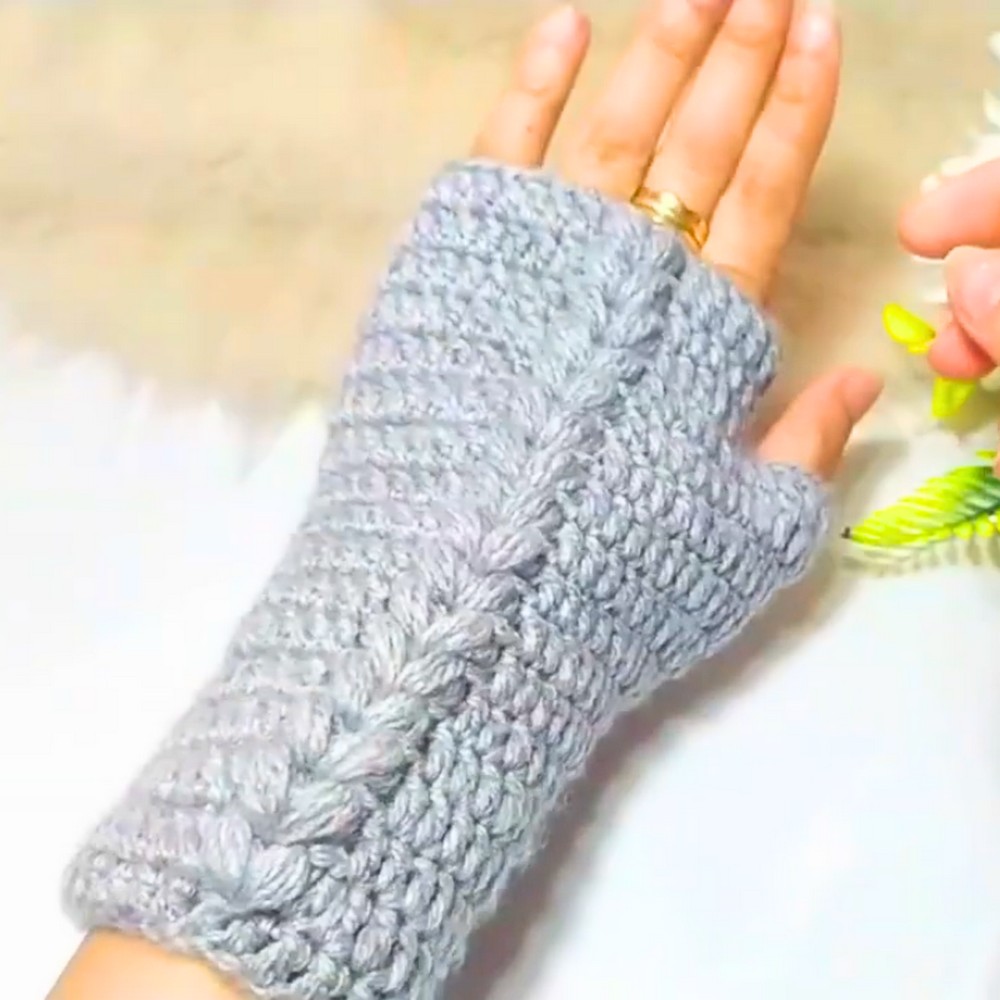
Step-by-Step Crochet Instructions
The gloves consist of two main components:
- Wrist Section
- Palm & Finger Section
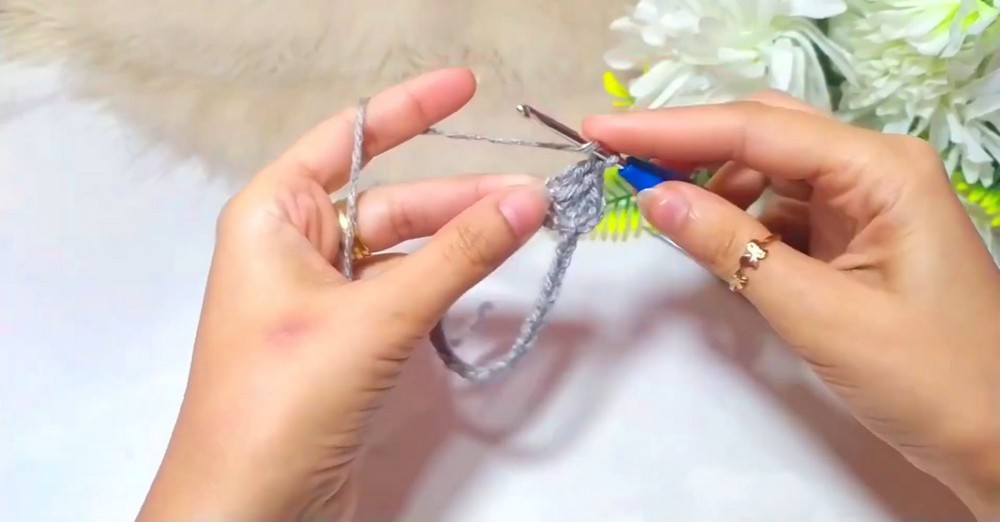
1. Wrist Section
- Foundation Chain:
- Create a chain of stitches equal to your wrist circumference. Ensure this chain wraps comfortably around your hand. For the example in the tutorial, 30 ch are used.
- Join the chain with a sl st to form a ring. Be careful to keep the chains straight to avoid twisting.
- Round 1 (Base Round):
- Work 2 ch (counts as first dc) into the same stitch where you joined.
- Continue working dc into each chain around the ring.
- Join with a sl st to the first dc. Do not work into the chain height.
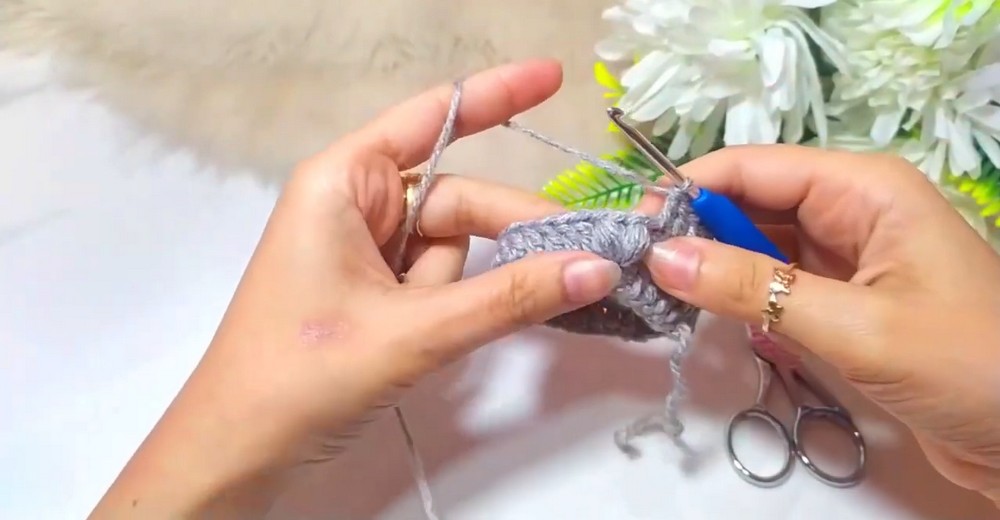
- Round 2:
- 2 ch (height), work 1 dc in the same stitch.
- Work dc into each stitch around.
- Finish the round by joining with a sl st into the first dc stitch (ignore the chain height).
- Subsequent Rounds (Wrist Length):
- Repeat Round 2 for as many rounds as needed to achieve the desired wrist length. The tutorial recommends 6 rounds for a longer cuff.
2. Palm & Finger Section
In this section, puff stitches and slight increases will shape the glove around the thumb and fingers.
Round 1 (Base Palm Round):
- Start with 2 ch (height). Work 1 dc into the same stitch.
- Work puff stitches where appropriate:
- To make a puff stitch: Yarn over, insert hook, pull up a loop (repeat 3 times), then yarn over and pull through all loops.
- Secure the puff stitch with 1 ch.
- Continue alternating between dc and puff stitches throughout the round, ensuring puff stitches are evenly spaced.
- Join with a sl st into the first dc of the round.
Round 2 (Increase for Thumb Area):
- Begin the round with 2 ch.
- Work 2 dc into the first stitch (increase).
- Continue working dc into each stitch until reaching the puff stitch. At the puff stitch, work another puff stitch in the center.
- Work a second increase with 2 dc near the thumb area at the end of the round.
- Finish the round by joining with a sl st into the first dc.
Round 3–5 (Shaping Palm & Thumb):
- Continue as before, working dc into each stitch and puff stitches where appropriate.
- Ensure that each round includes increases near the thumb area (at the start and end of the round) to accommodate the thumb gap.
- Repeat until the glove is long enough to begin wrapping the palm.
Finishing
- Thumb Separation:
- Once you’ve completed the desired palm length, create thumb space by skipping several stitches and working only between them.
- For example, leave a gap of 5–6 stitches (depending on size) and begin a smaller round for the fingers.
- Finger Section:
- Work the finger rows by continuing rounds of dc and puff stitches. Adjust the number of rounds based on how high you want the finger segments to go.
- Finalizing Glove:
- End the last round with a sl st to secure the work.
- Cut the yarn and weave in all loose ends with a tapestry needle.
Notes
- Adjust the number of rounds for wrist, palm, and finger sections based on the preferred glove length.
- For tighter gloves, reduce the number of chains in the foundation round.
- Maintain consistency in the placement of puff stitches for an even texture.