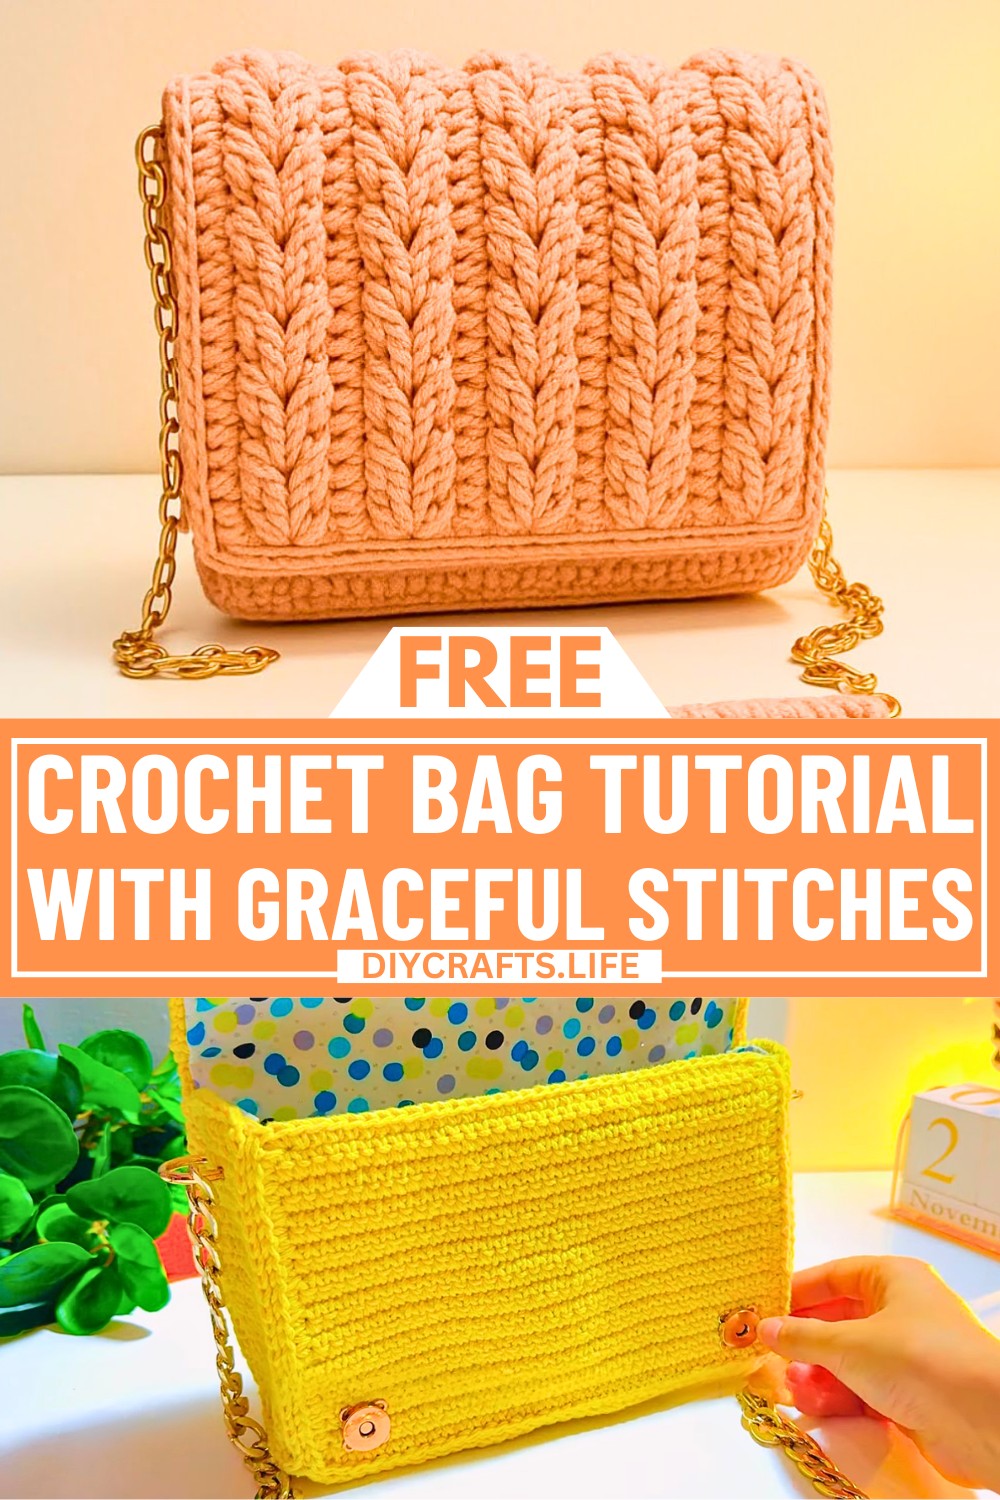
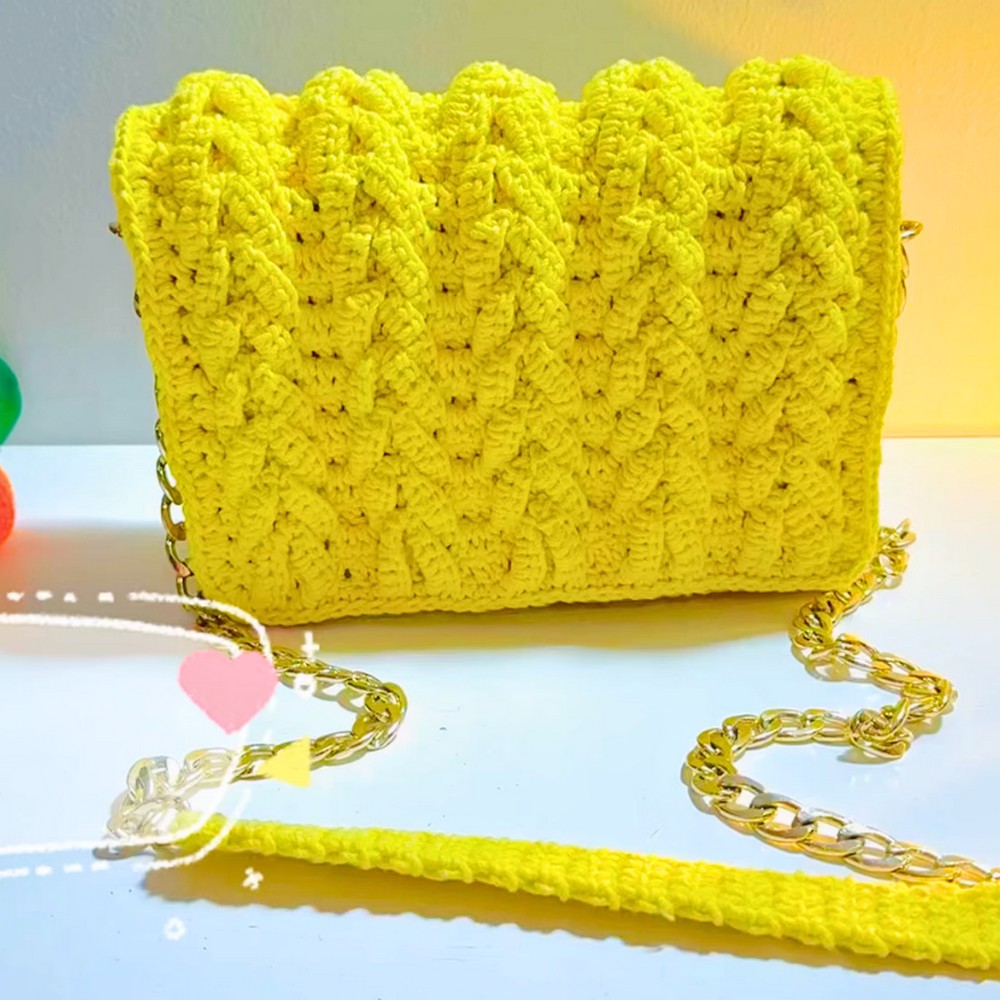
This crochet bag is not just an accessory but a piece of art you can make yourself. With its graceful design and neat stitches, it stands out as a stylish and practical item for everyday use. Perfect for holding essentials like your phone, wallet, or small books, it’s a blend of beauty and function, ideal for quick errands or casual outings.
What makes this bag special is the intricate pattern created using easy-to-learn stitches. The following pattern uses cotton macrame yarn and a 3 mm hook to create a sturdy yet elegant texture. Beginners and experienced crocheters alike will enjoy the simplicity of the design and the satisfying process of building each segment. You’ll start with the base, craft decorative shapes, and finish with a neat lining – resulting in a polished, professional-looking crochet bag.
Credit Tayla Handmade Crochet
Materials & Tools Needed
- Yarn: Cotton Macrame (2 mm thick), 543 grams
- Crochet Hook: Size 3mm
- Optional: Transparent thread and fabric for lining
- Other Tools: Scissors, yarn needle
Finished Size & Customization Ideas
- Finished Size: Approximately 19 cm wide (length based on the number of rows worked).
- You can adjust the size of the bag by increasing the foundation chain (for width) or increasing the number of rows (for height).
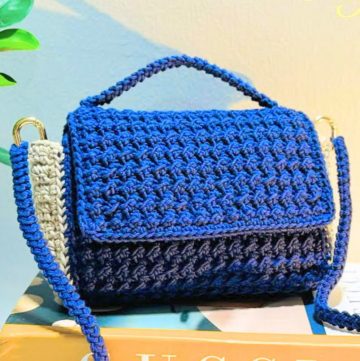
- Customization Ideas:
- Use contrasting or multi-colored yarn for added interest.
- Add a decorative strap or tassels for embellishment.
- Line the bag with matching fabric for durability.
Pattern Abbreviations & Terminology
- ch: Chain
- dc: Double Crochet
- sc: Single Crochet
- sl st: Slip Stitch
- sp: Space
- st: Stitch(es)
Note: This pattern uses US terminology.
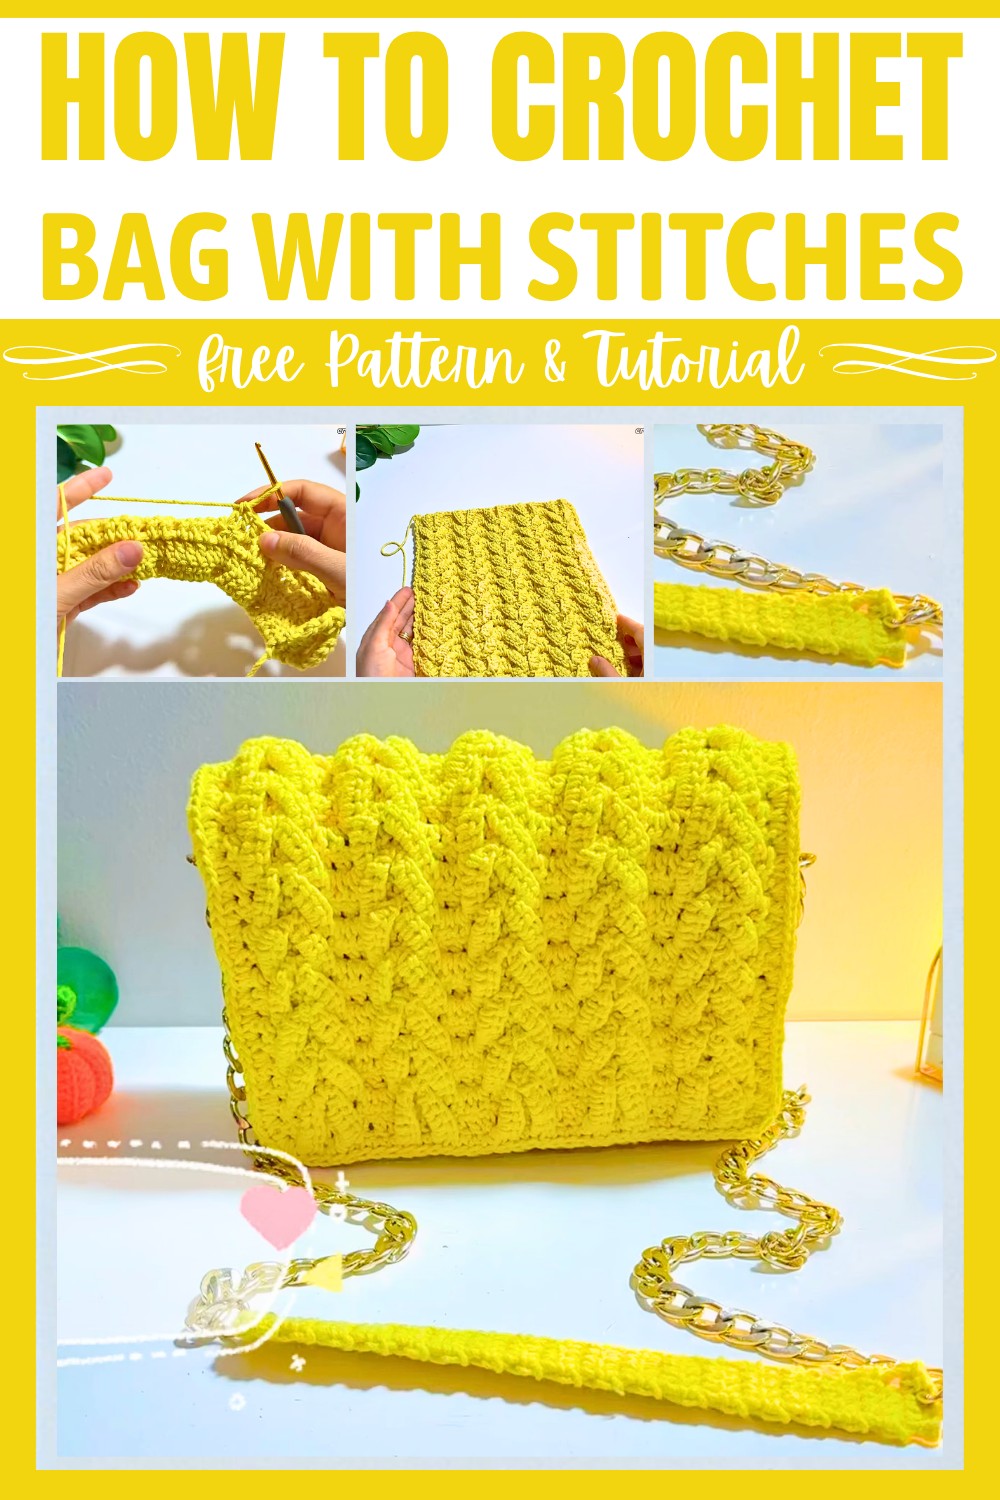
Step-by-Step Crochet Instructions
Part 1: Base of the Bag
- Foundation Chain:
- Make 37 chains. The length of this chain is approximately 19 cm.
- Row 1:
- Skip 2 chains, and in the 3rd chain, make 1 dc.
- Continue across, making a total of 35 dc in this row.
- At the end of the row, chain 2 and turn your work.
- Row 2 (Repeat Base Row):
- Treat the chain 2 as your first dc in this row.
- Work 35 dc across the row, making sure you include the last stitch at the end.
- Chain 2 and turn your work.
- Continue:
- Repeat Row 2 until a solid base is formed for your bag.
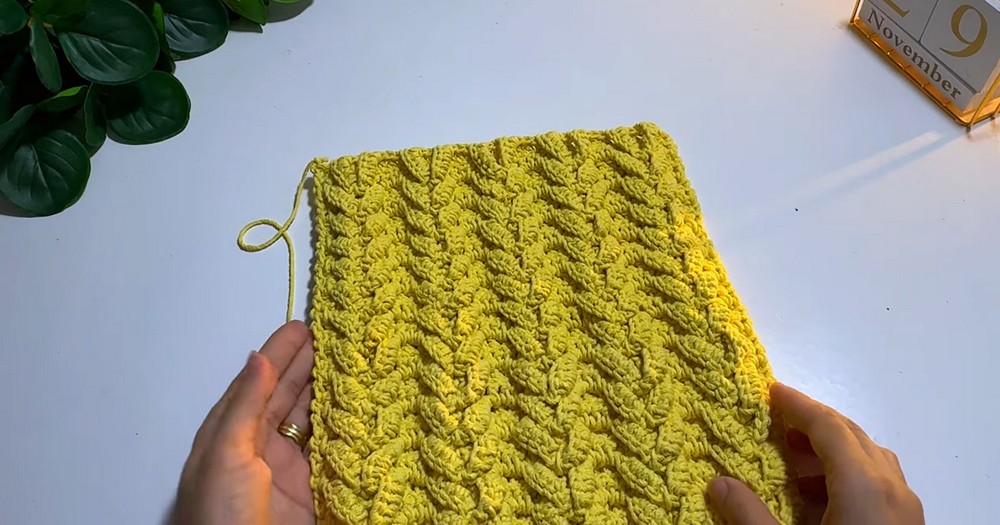
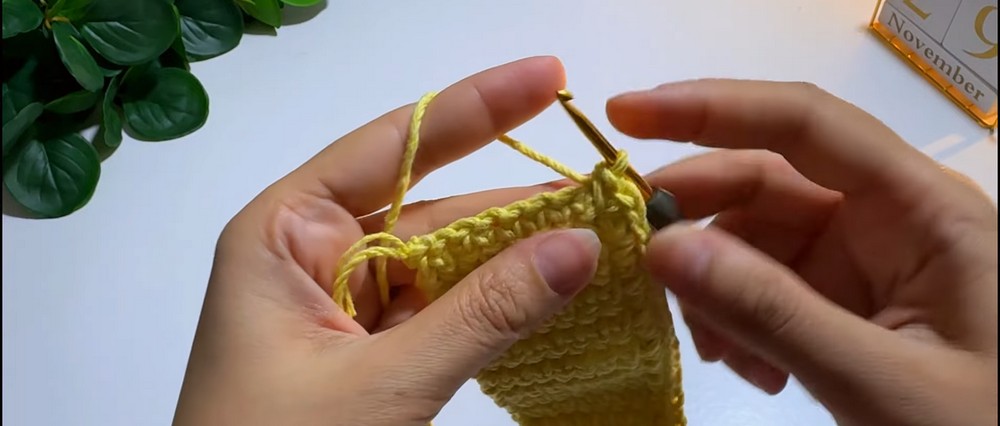
Part 2: Decorative Body Pattern
- Preparation: After completing the base rows, go up by chaining 2 to start the decorative pattern.
- Decorative Pattern (Repeat Section):
- Step 1: Skip the first stitch. In the second stitch, make 1 dc, followed by 5 ch and then skip 3 dc stitches.
- Step 2: In the 4th dc, make a sl st.
- Step 3: In the chain space just created, work 6 sc stitches.
- Step 4: Skip 1 stitch, then make 2 dc in the next stitch.
- Step 5: Chain 5, skip 3 stitches, make a slip stitch in the next (4th) stitch, and again work 6 sc in chain space.
- Step 6: Skip 1, and then work 3 dc in the next stitch.
- Repeat the Pattern Across: Continue repeating Steps 1–6 until you’ve reached the other end of the row.
- Subsequent Rows:
- At the end of a decorative row, chain 2 to act as the first dc, and turn your work.
- Repeat the same pattern consistently, ensuring the motifs align vertically.
- Height: Work this pattern until you reach your desired bag height.
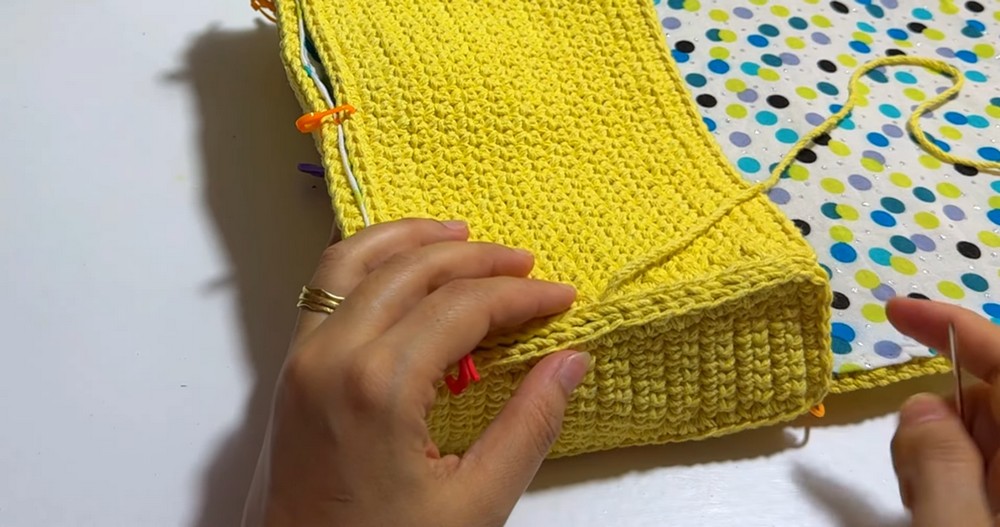
Part 3: Edging and Surrounding the Piece
- Once the body of the bag is complete, surround the entire piece with a single crochet edge.
- Method:
- Start from a corner, and make 2 sc in each corner stitch for a clean, rounded finish.
- Work evenly across all sides to create a finished border.
- Tighten and fasten off at the end.
Part 4: Sides of the Bag
- Foundation: Chain 8.
- Row 1: Skip 1 chain and work 8 sc across the chain.
- Subsequent Rows:
- Chain 1, turn, and work 8 sc in each row.
- Continue until you’ve reached the desired length to form the side panel (approximately 22 rows for the tutorial).
- Edging the Sides:
- After finishing the last row, work a single crochet border around the entire piece, adding 1 chain stitch + 1 sc in each corner for a neat edge.
Part 5: Inner Lining of the Bag
- Foundation: Chain 36.
- Row 1: Starting in the 2nd chain, work 36 sc across.
- Subsequent Rows:
- Chain 1, turn, and work 36 sc in each row until you reach your desired height (approximately 22 rows for the tutorial).
- Add a single crochet border around the lining piece as you did for the other parts.
Part 6: Assembling the Bag
- Attach the Sides:
- Use sc stitches or a yarn needle to sew the side panels to the front and back body panels.
- Make sure the edges align evenly for a professional finish.
- Optional Lining:
- Use fabric to create a lining that fits the bag.
- Sew the lining using transparent thread so the stitches are hidden.
- Finishing Touches:
- Attach straps or handles as desired.
- Weave in all loose ends and trim excess yarn.