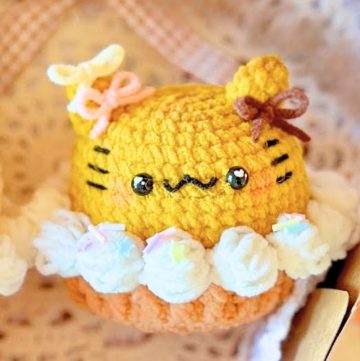
This crocheted pumpkin is perfect for adding a festive touch to your home this Halloween season. Whether you place it on a shelf, use it as a table centerpiece, or pair it with other autumn-themed decorations, it’s sure to bring cozy vibes to any space. Its soft, textured look makes it both charming and versatile.
Easy Crochet Pumpkin Tutorial

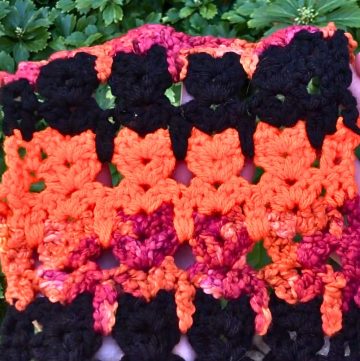
Creating this pumpkin is simple and fun. The design uses alternating stitches to create a lovely textured pattern that gives the pumpkin its unique appearance. With just a little yarn, patience, and basic tools like a crochet hook and stuffing, you’ll have your pumpkin ready in no time. Beginners will find this tutorial approachable, with step-by-step guidance on shaping the pumpkin, finishing it neatly, and adding the realistic stem.
Credit chacha crochet tuto
Material and Tools Needed
- Yarn:
- Body: 60% cotton, 40% acrylic yarn (approximately 35g per color, less than 50g total per color). Recommended crochet size 3.5–4mm.
- Stem: 100% cotton yarn (crochets at 3.5mm).
- Colors: Beige and Brown (for alternating rows).
- Crochet Hook:
- 3mm for the pumpkin body.
- 2.5mm for the stem.
- Additional Tools:
- Scissors
- Stitch marker
- Yarn needle for hiding threads
- Fiberfill/cotton wool (for stuffing)
- Glue gun (for attaching the stem and leaves)
Finished Size & Customization Ideas
- Example pumpkin size: Starts with a 50cm chain (104 stitches, even number), yielding 20cm height after 35 rows.
- Customization Options:
- Smaller pumpkin: Start with less than 50cm in chains.
- Larger pumpkin: Start with more than 50cm in chains or use thicker yarn and a larger crochet hook.
Pattern Abbreviations & Terminology
- ch: Chain
- sc: Single Crochet
- dc: Double Crochet
- sl st: Slip Stitch
- inc: Increase (2 stitches in the same stitch)
- dec: Decrease (work 2 stitches together)
- RS: Right Side
- WS: Wrong Side
US Crochet Terminology is used.

Step-by-Step Detailed Crochet Instructions
Pumpkin Body
- Foundation Chain:
- Using the beige yarn and a 3mm hook, make a chain measuring 50cm (or desired length). Example chain count: 104 stitches (even number essential).
- Ensure all chains face the correct direction and join ends with a sl st to form a circle.
- Row 1 (RS):
- Ch 1, make 1 sc in the first stitch (mark this stitch).
- Alternate: 1 dc in the next stitch, 1 sc in the following stitch. Continue across the row.
- Total: 104 alternating stitches.
- Finish with a dc and join the row with a sl st.
- Row 2 (WS):
- Change to Brown yarn (do not cut the beige yarn, alternate between colors for each row).
- Make a knot with beige and brown yarn for color change security.
- Start with the opposite stitch:
- First stitch = dc, second stitch = sc. Alternate the same way until the end of the row.
- Turn the work, join with sl st.

- Rows 3–35:
- Alternate yarn colors for each row.
- Continue alternating stitches (dc on sc from previous row, sc on dc from previous row).
- Work until the piece measures 20cm (or desired height). Example: 35 rows.
- Finish the last row with the beige yarn and secure the color.
- Closing the Ends:
- Work a row of single crochets in brown yarn on one side.
- Follow this with decreases:
- First decrease row: 4 sc, dec around.
- Second decrease row: 3 sc, dec around.
- Third decrease row: 2 sc, dec around.
- After the final row, leave a long thread for tightening and shaping.
- Repeat on Opposite Side:
- Close the opposite end following the same method as above.
- Stuffing:
- Fill with fiberfill/cotton wool until firm but soft.
- Finish sealing the pumpkin securely and hide the yarn ends.
- Creating Segments:
- Using doubled brown yarn and a yarn needle, stitch through the pumpkin to create five segments. Pull snugly to shape.
- Finish by tying off and hiding the yarn inside.

Pumpkin Stem
- Foundation:
- Using the light brown yarn and a 2.5mm hook, create a magic circle.
- Work 6 sc into the circle. Tighten and join with a sl st.
- Row 2:
- Inc in each stitch around (total: 12 sc).
- Row 3:
- Alternate: 1 sc, inc around (total: 18 sc).
- Rows 4–13:
- Work 1 sc in each stitch (total: 18 sc per row).
- Creating a Flared Top:
- Row 14: Work 1 sc in each stitch using only the front loops and make inc in each stitch (total: 36 sc).
- Row 15: Work 36 sc normally.
- Final Row (Row 16):
- Alternate: 1 sc, inc around (total: 54 sc).
- Work a finishing row of sl st, ch 1 across. Cut yarn and weave it into the back stitches.
- Stuff the Stem:
- Lightly pad the stem and attach it firmly to the pumpkin using hot glue or sewing.

Leaf
(Note: Leaf tutorial is featured in a separate video.)
- Attach the crocheted leaf to the pumpkin stem using a glue gun or stitches for added decoration.

Finishing Techniques
- Make sure all yarn ends are woven into the project securely.
- Use the glue gun to attach the stem and leaf.
- Shape the segments evenly before finalizing the form.