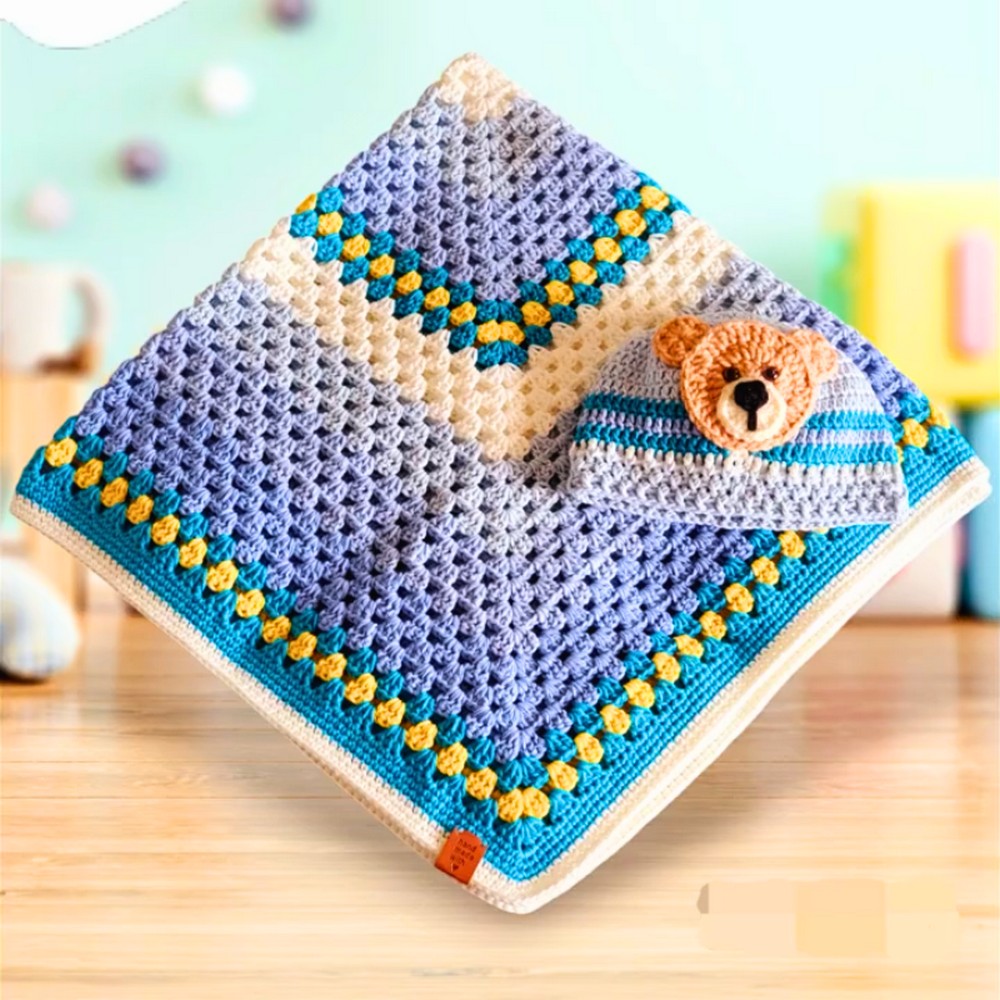
This baby blanket, made using a single large granny square, is the perfect mix of simplicity and charm. It's soft, cozy, and ideal for keeping babies warm and happy. The granny stitch used here makes the blanket not just adorable but also timeless, adding a classic touch to nurseries or baby gifts. With its lovely color patterns and neat borders, it's a thoughtful creation for any little bundle of joy.
Soft and Beautiful Baby Blanket with a Granny Square Touch

To create this blanket, you repeat a few simple steps, making it perfect for beginners. Starting with a magic ring, stitches are worked in layers to create a square that grows bigger with each round. You can easily customize its colors and size to make it uniquely yours. The adorable border adds a polished finish, making the final look neatly framed and extra special.
Credit Creative Hands by SHAY
Materials & Tools Needed
- Yarn: SMB Cotton Blend Yarn - 2 Half White, 2 Turquoise, 2 Light Blue each skein has 40grams each yellow 50g ea(cotton) baby blue 50g ea(cotton)
- Crochet Hook: 4.5 mm (for the main blanket), and 4.0 mm (for the border)
- Additional Supplies: Darning needle for weaving in ends, scissors
Finished Size & Customization Ideas
- Finished Blanket Size: Approximately 32 inches by 32 inches
- Customization: You can customize the colors and size by adjusting the number of rounds or using different yarn and hook sizes.
Pattern Abbreviations & Terminology
- ch: chain
- dc: double crochet
- sl st: slip stitch
- sc: single crochet
- st(s): stitch(es)
- YO: yarn over
Step-by-Step Detailed Crochet Instructions
Starting the Granny Square
- Magic Ring & Setup:
- Start with a magic ring.
- Chain 3 (counts as the first dc).
- Round 1:
- In the magic ring: Yarn over, make 2 dc.
- Chain 2, make 3 dc in the ring.
- Repeat: [Chain 2, 3 dc] twice.
- Chain 2, pull the tail to close the ring.
- Slip stitch into the top of the initial ch-3 to join.
- Round 2:
- Chain 2 (counts as the first dc).
- Turn work, make 2 dc in the first space.
- Chain 1, in the corner space [3 dc, ch 2, 3 dc].
- Repeat around, chaining 1 between clusters.
- Join with a slip stitch into the top of the initial dc.
Continuing Rounds
- Additional Rounds:
- Repeat the pattern: Chain 2, turn work; make 2 dc in first space.
- [Chain 1, 3 dc in the next space] to corner.
- In each corner space: [3 dc, ch 2, 3 dc]
- Continue building the square by repeating each round, joining with a slip stitch to the top of the first dc (not chain).
- Color Changes:
- Change color by not completing the last dc of the round.
- Join the new color when finishing the last dc, and tie securely.
- To join: Yarn over with the new color, pull through.
- Continue with the next round’s instructions.
Finishing Border
- Border:
- Switch to 4.0 mm hook.
- Chain 1, make 1 sc in each stitch around.
- In corner ch-2 spaces, make: 3 sc
- Continue around the blanket to form the border.
- Repeat for 3 more rounds or your preferred number of rounds.
- On the final edge, slip stitch to join; fasten off and weave in ends.
Weaving in Ends
- Final Touches:
- Use a darning needle to weave in yarn tails along similar colors for a neat finish.
- Ensure tails are secure to prevent unraveling.
Customization Ideas
- Experiment with different colors or self-striping yarn for unique patterns.
- Adjust the number of granny square rounds to make larger or smaller blankets.
This pattern gives you the flexibility to create a beautiful baby blanket, just as shown in the tutorial. Enjoy crafting your blanket!