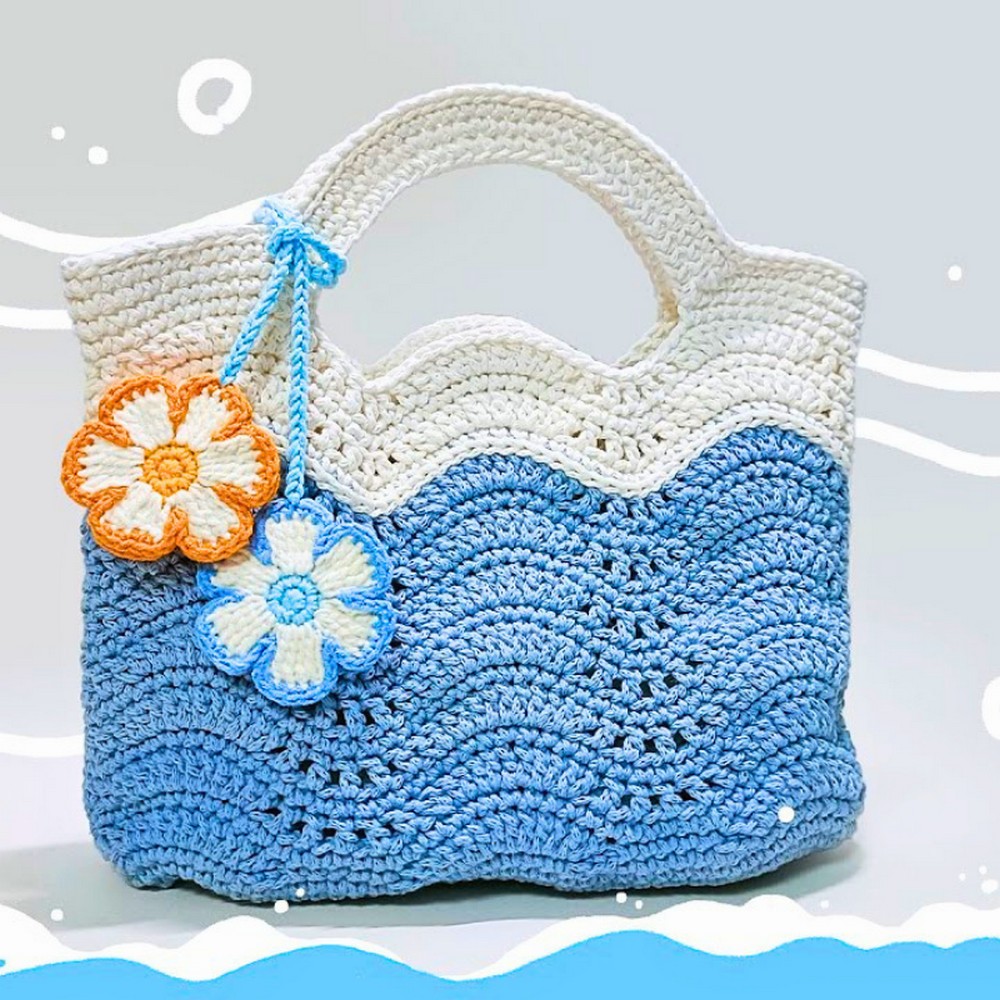
Crocheting a wave bag is a fun and satisfying way to create something both beautiful and useful. This crochet bag stands out with its unique wave-like design, giving it a cool and modern look. It’s lightweight, stylish, and perfect to carry small items like books, groceries, or even your crochet supplies.
How to Crochet a Wave Bag

To create this crochet bag, you'll work on a lovely wave pattern that gradually takes shape with each round. It begins with a strong base, flows into the sides with gentle, even rows, and ends with simple, sturdy handles. This crochet wave bag is made with hollow cotton yarn; it feels soft, holds up well, and gives your bag a long-lasting, stylish look. Choose your favorite colors to make the crochet bag your own. Whether it’s a gift or for yourself, crocheting this bag is fun and relaxing.
Credit Vicky Crochet
Materials & Tools Needed
- Yarn: 2mm hollow cotton yarn (any color of your choice).
- Hook: 3.5mm crochet hook.
- Other Tools:
- Scissors.
- Yarn needle (for weaving ends).
- Stitch markers (optional).
Finished Size & Customization Ideas
- Size: The finished size will depend on your tension and hook size, but following the tutorial results in an average small tote-sized bag.
- Customization Ideas:
- Experiment with color changes to create stripes or gradients in the side part or handle.
- Use a thicker yarn for a larger and sturdier bag.
- Add decorative embellishments like buttons, tassels, or patches.
Pattern Abbreviations & Terminology
The pattern uses standard US crochet terminology:
- sl st: Slip Stitch.
- ch: Chain.
- sc: Single Crochet.
- sc inc: Single Crochet Increase (2 sc into the same stitch).
- sc dec: Single Crochet Decrease (combine 2 stitches into one).
- dc: Double Crochet.
- dc inc: Double Crochet Increase (2 dc into the same stitch).
- st(s): Stitch(es).
- repeat: Repeat the instructions between the parentheses or brackets as indicated.
Step-by-Step Detailed Instructions
Bottom Part
- Create the Foundation Chain:
- Begin with a slip knot.
- Chain 27.
- Round 1:
- Start in the second chain from the hook.
- Work 2 single crochets (sc) in the first chain.
- Work 24 sc across the chain.
- In the last chain, work 3 sc.
- Continue on the other side of the foundation chain: Work 25 sc.
- Join with a slip stitch (sl st) into the first single crochet.
- Round 2:
- Chain 1.
- Work 2 sc (sc inc) in the first stitch.
- Work 2 sc (sc inc) in the next stitch.
- Work 24 sc across.
- Work 3 sc inc in the next 3 stitches.
- Work 24 sc across.
- Work 1 sc inc in the last stitch.
- Join with a sl st into the first single crochet.
- Round 3:
- Chain 1.
- Work 1 sc, then 1 sc inc, repeat for the first 5 stitches.
- Work 24 sc across.
- Repeat (1 sc, 1 sc inc) three times.
- Work 25 sc across.
- Work 1 sc inc in the last stitch.
- Join with a sl st.
- Rounds 4–7:
- Continue repeating the pattern established, forming the oval base. Make sure the stitch counts increase accordingly to complete the bottom. Reference the tutorial closely for precision.

Side Part
- Foundation Round:
- Chain 1.
- Work 1 sc into each stitch of the bottom part for a total of 102 stitches.
- Join with a sl st.
- Rounds 2-3:
- Work 1 sc into each stitch around (102 stitches in total per round).
- Join with a sl st.
- Round 4:
- Work 4 sl st.
- Chain 1.
- Work 3 sc.
- Skip 3 stitches.
- Work 3 dc inc in the next stitch (6 dc total).
- Repeat skip 3 stitches, work 3 dc inc, skip 3 stitches, work 5 sc.
- Continue this repeat pattern a total of 5 times.
- Work 3 dc inc.
- Skip 3 stitches.
- Work 2 sc.
- Join with a sl st.
- Round 5:
- Chain 1.
- Work 1 sc into each stitch around (102 sc total).
- Join with a sl st.
- Round 6:
- Chain 2.
- Work dc, skip 1 stitch, repeat for the round, including spaced dc increases where indicated.
- This round creates the wavy or scalloped design. Follow the sequence shown in the tutorial carefully.
- Round 7:
- Chain 1.
- Work 1 sc into each stitch around (102 sc total).
- Join with a sl st.
- Rounds 8–16:
- Continue alternating patterns established in rounds 6 and 7 to complete the side part.
- Note: Change to white yarn in the last sl st of round 16.
- Round 17:
- Chain 1.
- Work 1 sl st into each stitch around (102 sl st total).

Handle
- Round 1:
- Chain 1.
- Work 13 sc.
- Chain 28, skip 26 sts.
- Work 25 sc.
- Chain 28, skip 26 sts.
- Work 12 sc.
- Join with a sl st.
- Round 2:
- Chain 1.
- Work 12 sc.
- Work 1 sc dec.
- Work 26 sc.
- Work 1 sc dec.
- Work 23 sc.
- Join with a sl st.
- Round 3:
- Chain 1.
- Work 11 sc.
- Work 1 sc dec.
- Work 5 sc.
- Work 1 sc inc, 2 sc and 1 sc inc. Repeat 5 times.
- Work 5 sc.
- Work 1 sc dec.
- Join with a sl st.
- Round 4 (Final Handle Round):
- Chain 1.
- Work 10 sc.
- Work 1 sc dec.
- Follow the tutorial closely for the remaining stitches and adjustments.
- Finish with 102 sl st.

Finishing Techniques
- Weave in all yarn ends securely using a yarn needle.
- Block the bag if necessary to smooth out the stitches.
- Add an optional lining for durability.