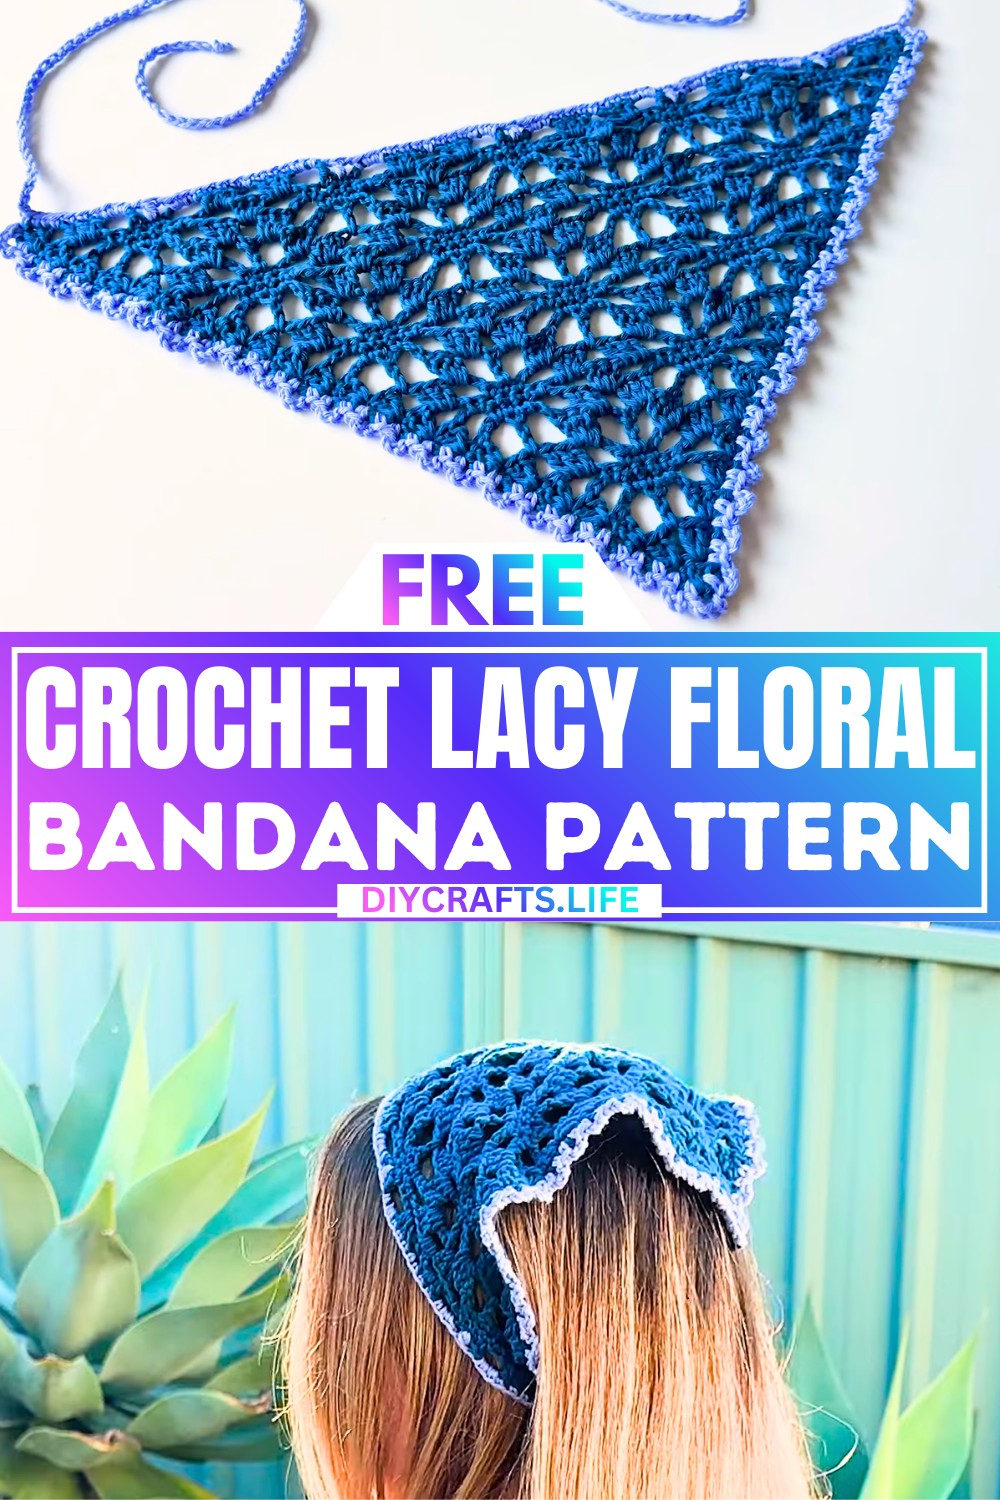
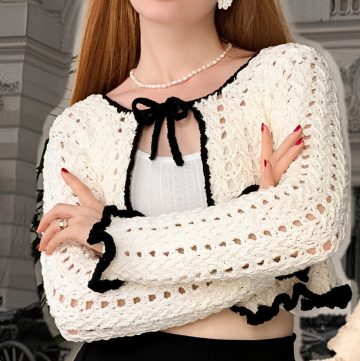
The Crochet Lacy Floral Bandana is a lightweight, stylish accessory perfect for adding a touch of charm to your outfit. It's soft, breathable, and versatile, making it perfect as a hair accessory, a head scarf, or even as a neck scarf. Whether you dress it up for an outing or wear it casually, this bandana is practical and fashionable.
Beginner-Friendly Crochet Lacy Floral Bandana Pattern
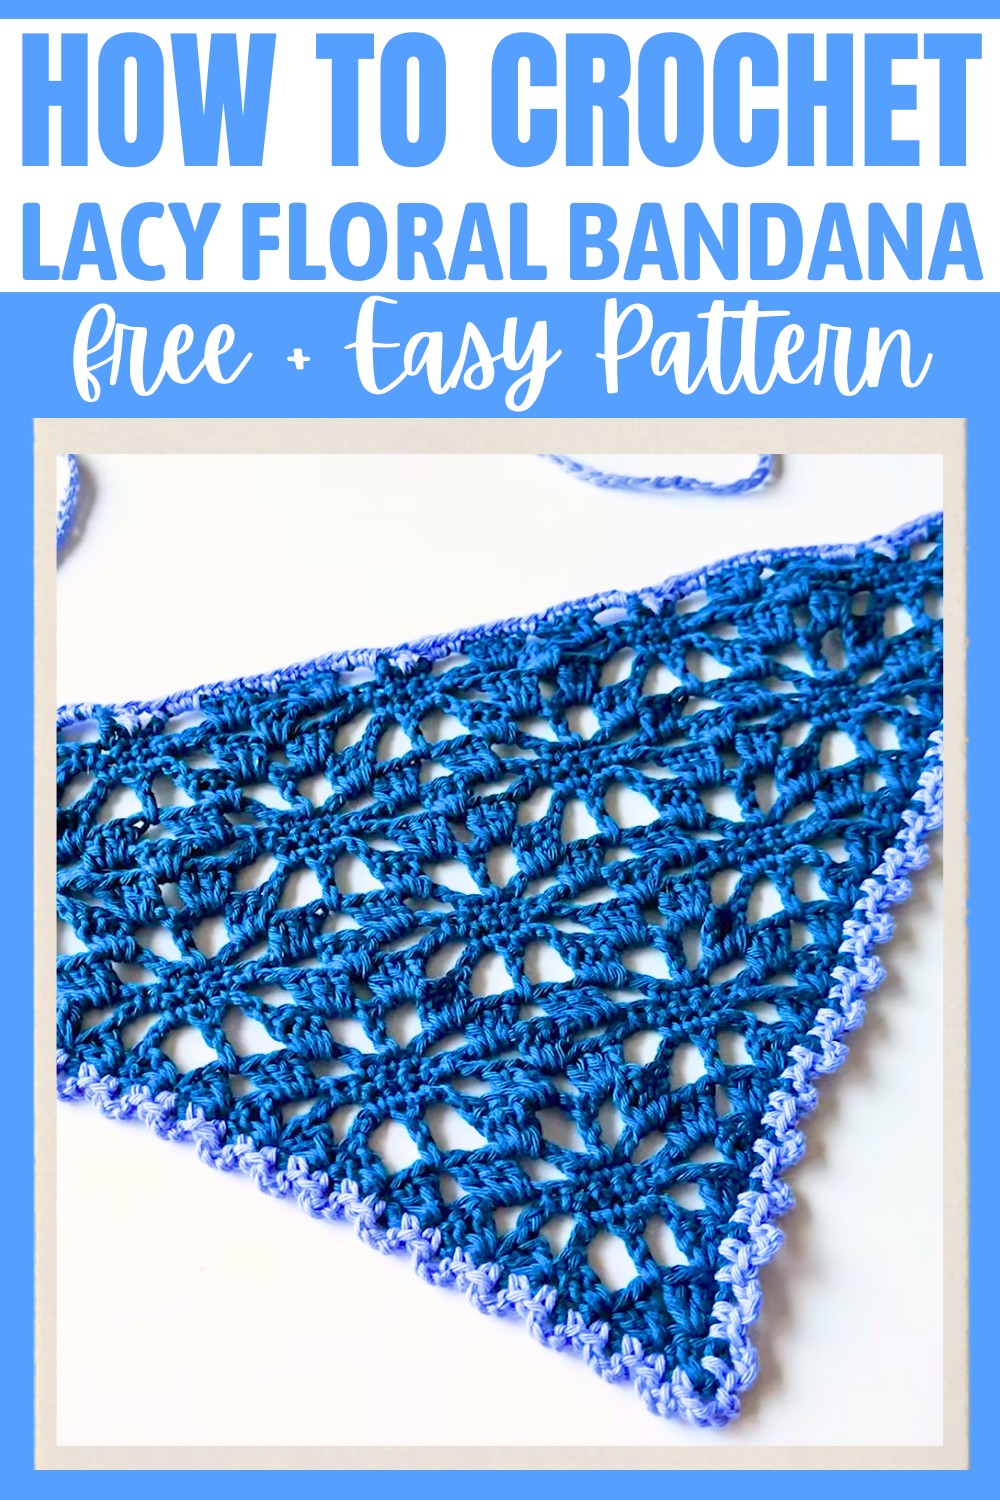
Featuring a light, lacy floral design, it’s ideal for beginners to work on and customize. All you need is some yarn, a hook, and basic stitches like single crochet and double crochet. You can even pick your favorite colors, from solids to multi-tone yarns, to make it uniquely yours. Adjusting the size is super easy—just keep crocheting until it's perfect for you! Add a delicate scallop border and comfy straps to complete the look effortlessly.
Credit Carley Rose Studio
Why It’s Special:
- It’s both functional and fashionable.
- Easy to follow, even for beginners!
- Adjustable size to fit you and your style.
- A beautiful way to learn simple stitch patterns.
Materials & Tools Needed
- Yarn Choices:
- The design works best with lightweight cotton yarn (e.g., Flinders cotton yarn).
- Approximately 1 x 50g ball should be sufficient.
- Works beautifully with variegated yarn or solid colors.
- Crochet Hook Size:
- Recommended: 4 mm crochet hook (adjustable depending on yarn weight).
- Other Tools:
- Scissors
- Tapestry needle for weaving in ends
- Blocking tools (e.g., pins, steam iron, or handheld steamer).
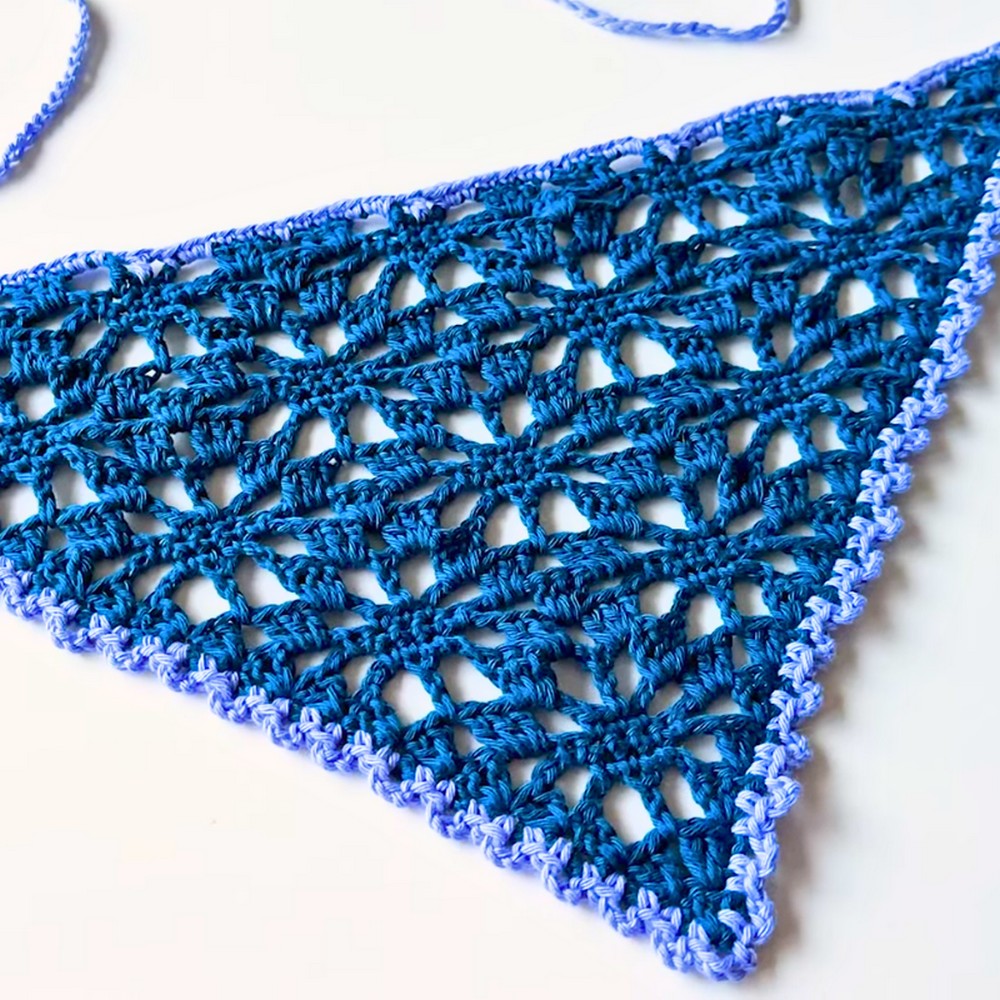
Finished Size & Customization Ideas
- Finished Dimensions (Post Blocking):
- Top width: Approximately 40 cm (16 in)
- Height (center to tip): Approximately 21–22 cm (8.5 in)
- Straps: ~40–42 cm (16 in)
- Customization Ideas:
- Size Adjustment:
Simply repeat the 4-row pattern until your bandana reaches the desired size. You can also adjust the hook size and yarn weight for a larger or smaller bandana. Stop at a row that's the second row in the overall repeat to ensure the border stitches align properly. - Alternate Colorways:
Add a contrasting border for a pop of color or follow through with a single shade for a monotone look. - Alternate Borders:
Variations like a picot or shell border can provide a unique finish.
- Size Adjustment:
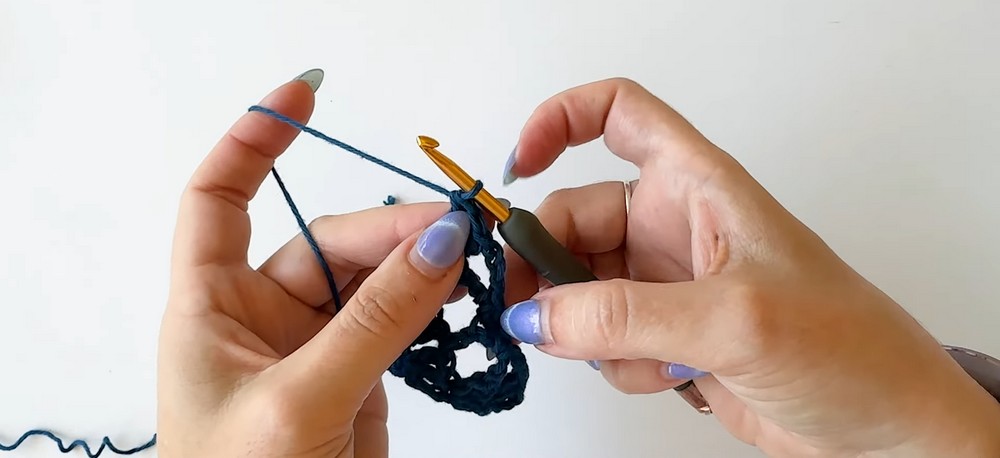
Step-by-Step Detailed Crochet Instructions
Foundation & Row Setup
- Magic Ring:
- Wrap the yarn around your two fingers to form a loop and hold the crossed section with your thumb.
- Insert the hook under the first loop and pull the second loop through. Twist the hook, yarn over, and pull it through to secure the ring.
- Row 1: Start by chaining 2 (counts as the first double crochet). Then, work 2 double crochets (dc) into the magic ring. Pull the tail end of the magic ring to close it. Turn.Stitch Count: 3 dc
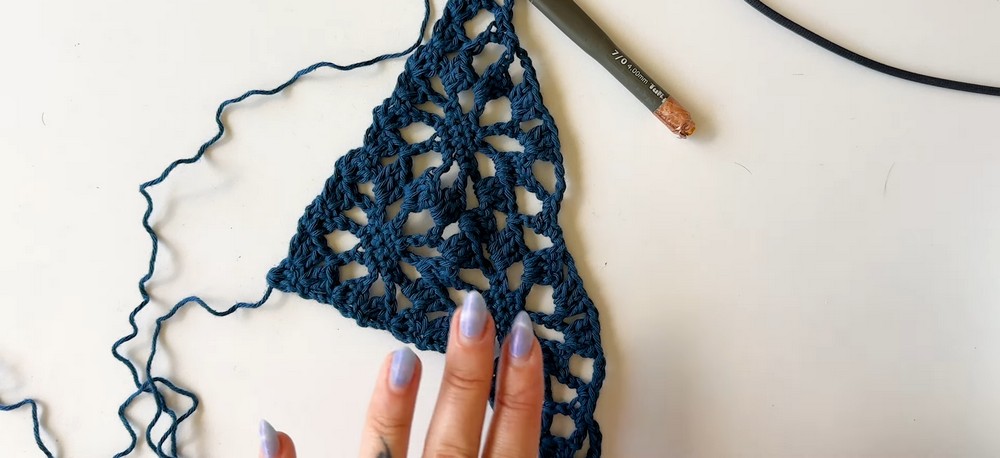
Triangle Body (Lacy & Floral Pattern Formation)
The pattern is created with 4 repeated rows:
Row 2: Establish Triangle Shape
- Chain 3, turn the work (counts as the first dc). Work 2 dc into the first stitch.
- Chain 1. Work 3 dc into the last stitch at the opposite side of the row.Stitch Count: 6 stitches (2 clusters of 3 dc)
Row 3: Introduce Lace Pattern
- Chain 3, turn the work, and do 2 more dc into the first stitch (beginning cluster of 3).
- Chain 3. Go to the chain-1 space from the previous row and work 1 dc.
- Chain 3. Work 3 dc into the last stitch.
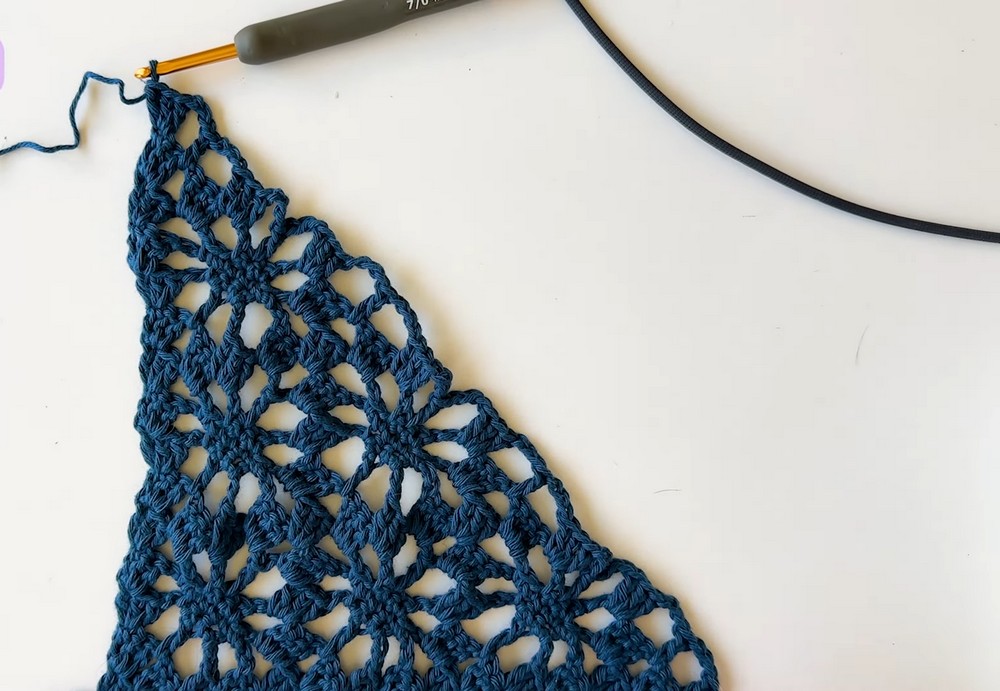
Row 4: Single Crochet Bands in Lace
- Chain 3, turn the work, and work 2 more dc into the first stitch.
- Chain 3. Go around the first chain-3 space and work 1 single crochet (sc).
- Work into the next chain-3 space: Place 1 sc into each of the next 3 stitches.
- Chain 3. Work 3 dc into the last stitch.
Row 5: Expand Floral Petals
- Chain 3, turn the work, and work 2 dc into the first stitch.
- Chain 3. Single crochet into the middle chain-3 spaces as before.
- Continue with the 3 dc clusters into the proper spaces as the bandana grows.
Repeats
- Rows 6–12 (or beyond): Repeat the 4-row pattern until the bandana reaches your desired size.
Tip: End on a second row of the repeat (e.g., Rows 6, 10, 14, etc.) for proper alignment of the border.
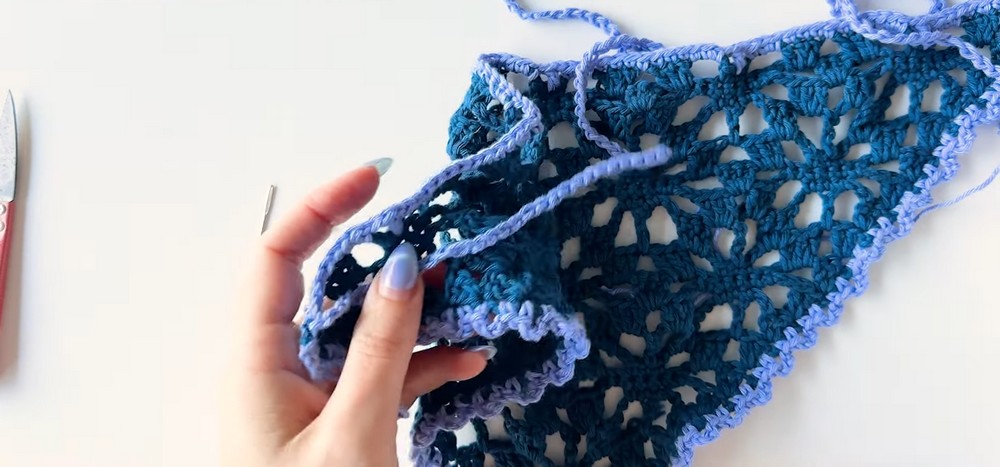
Border (Scalloped Edge)
- Secure the yarn (same or contrasting) in the last corner of the project. Work 1 single crochet into the corner stitch.
- Begin the scalloped pattern:
- Chain 3, then single crochet into the next space. Continue alternating 1 single crochet and chain 3 into each corresponding space or bar edge of the double crochets.
- For corners:
- Work 4 chains around the tip of the triangle, then resume the regular pattern for the next edge.
- Finish the border by fasten off and weave in the remaining ends using a tapestry needle.
Straps (Tie-Backs)
- From one corner, attach the yarn. Chain 80 chains (or desired length for the strap).
- Fasten off and repeat on the opposite corner for the second strap.
- Use a tapestry needle to weave in all final ends.
Blocking
Blocking enhances the floral lace and allows your project to hold its triangular shape. For cotton yarn:
- Pin the project to a foam board or mat in the desired shape.
- Use a steam iron or handheld steamer to shape, being careful not to press directly on the yarn.
Finished Measurements Recap
- Top Width: ~40 cm (16 in)
- Length from Top to Tip: ~21–22 cm (8.5 in)
- Strap Length: Same as top width (~40 cm/16 in).