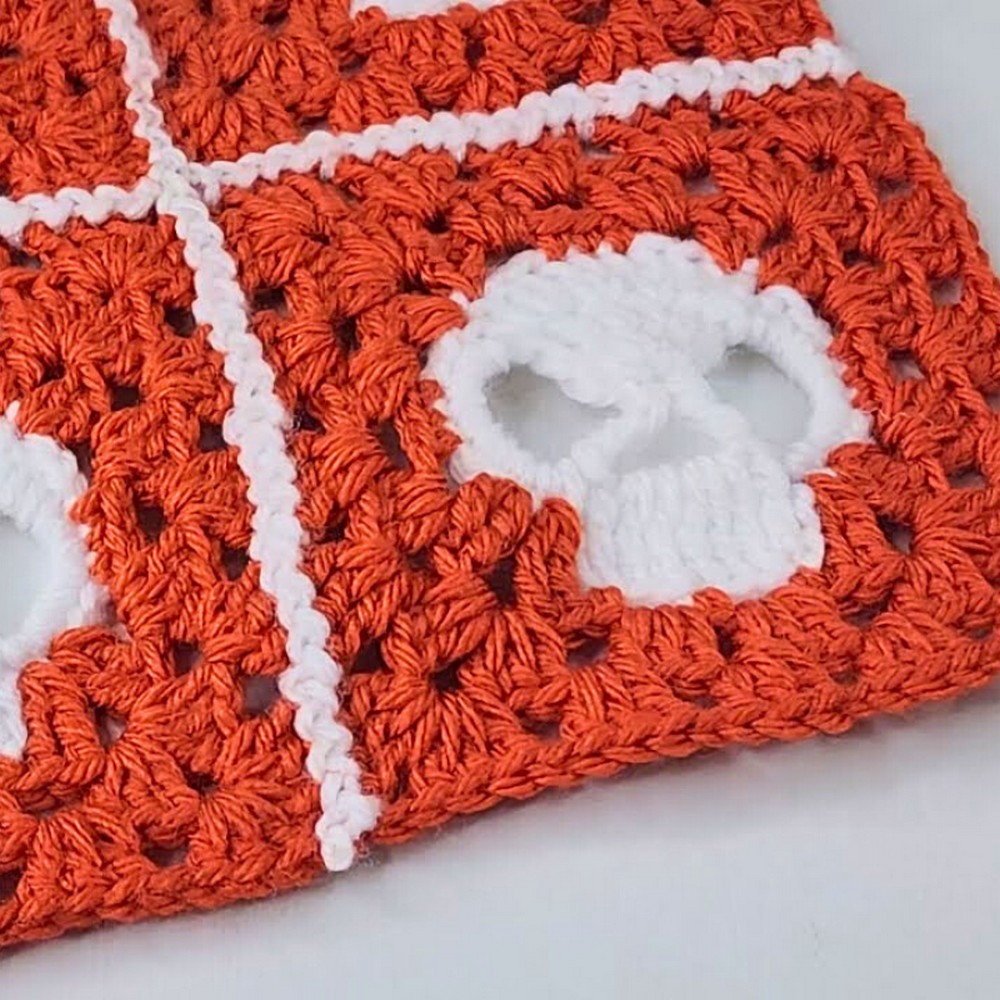
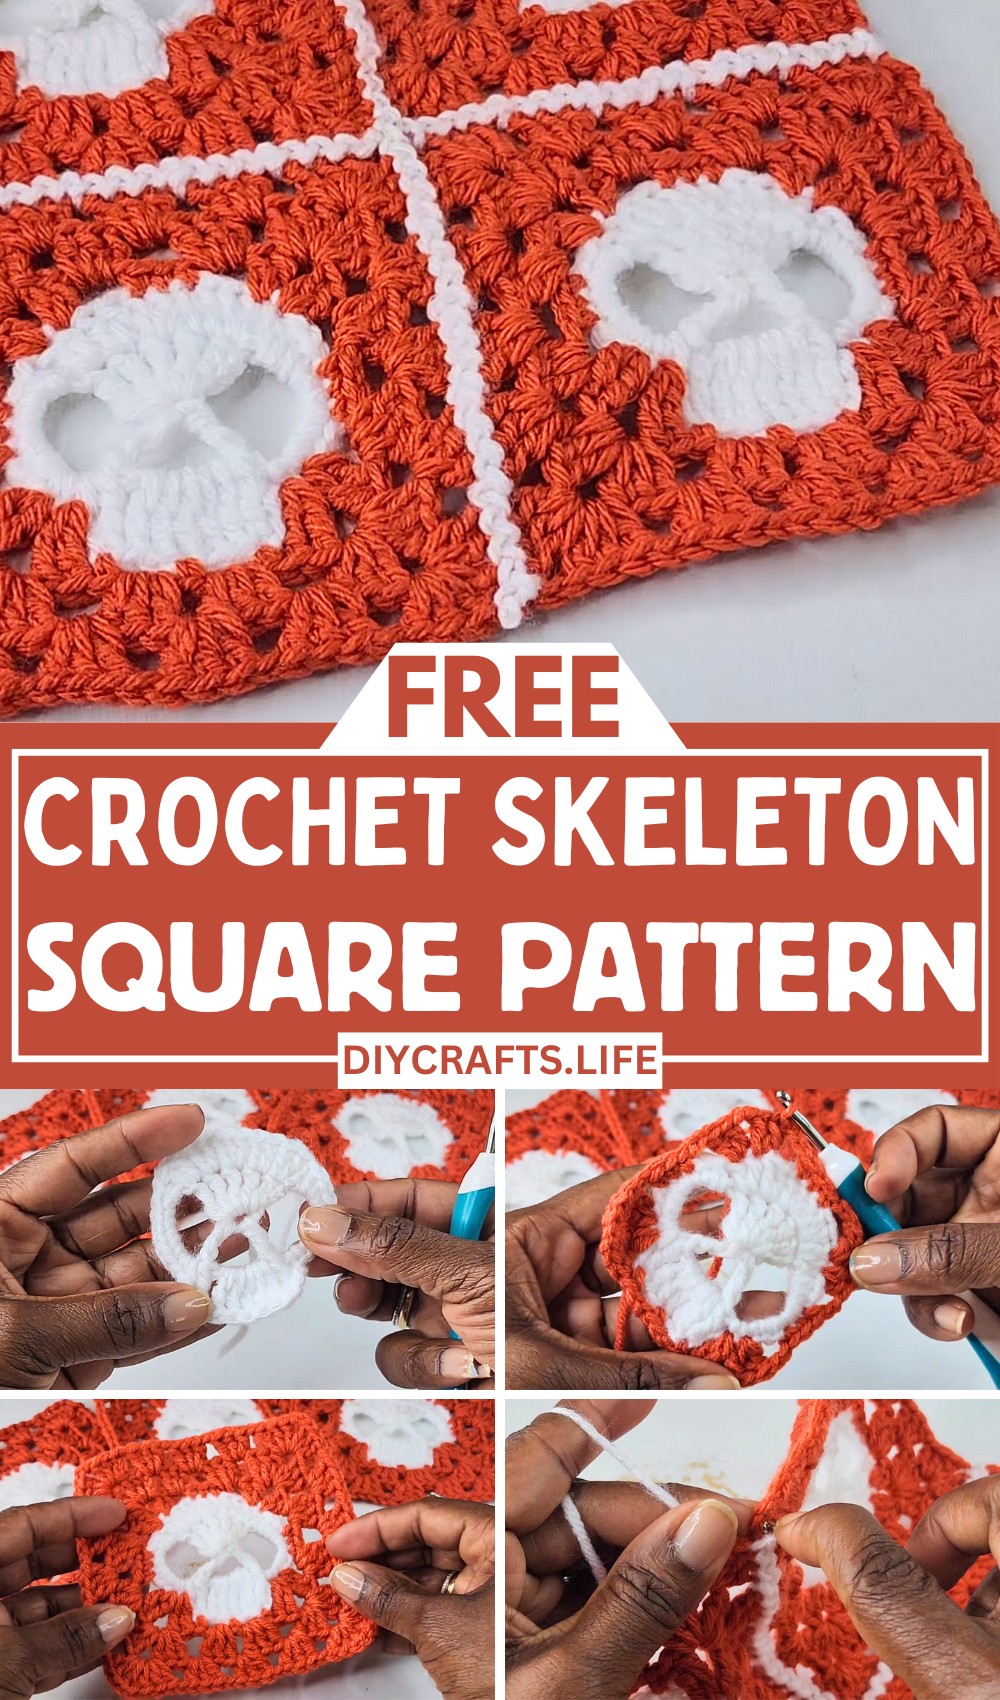
Create a stunning crochet skull granny square with a creative zigzag join method. This unique design adds macabre beauty to your decor or wardrobe, perfect for seasonal projects like Halloween or everyday flair. Customize the size and colors to suit your personal style.
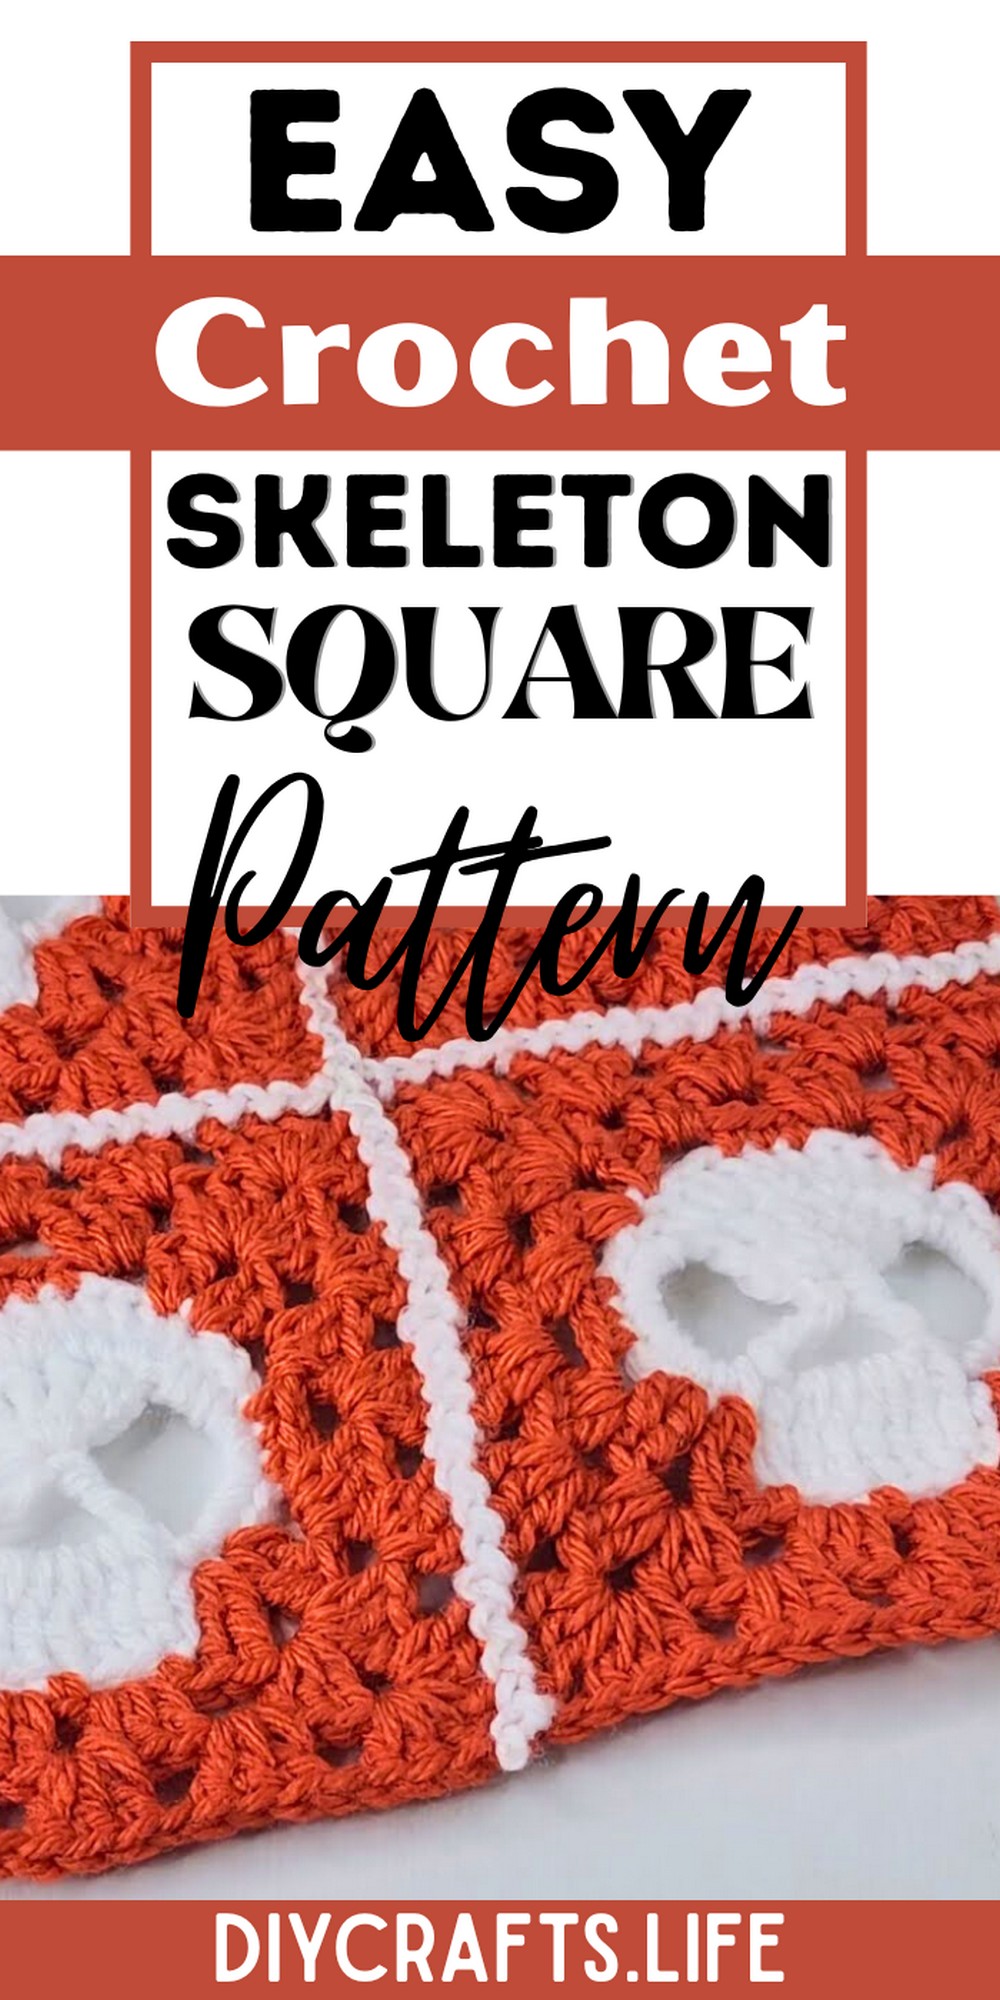
The skull granny square is both durable and eye-catching, making it ideal for everything from blankets to tote bags or stylish home decor. Its detailed pattern draws attention, while the zigzag join ensures a secure and visually appealing connection between squares.
Crochet Skeleton Square
This project suits crafters of all experience levels, offering flexibility to customize with colors and layouts. Its creative skull design sparks creative potential, letting you craft unique throws, garments, or accessories that truly stand out. Follow the step-by-step tutorial with confidence.
Materials and Preparation:
- Yarn: Medium weight (Category 4) yarn in two contrasting colors (e.g., white for the skull and black for the granny square background).
- Crochet Hook: Size 4.5mm or 5mm hook (adjust if needed for gauge).
- Additional Tools: Scissors, tapestry needle for weaving in ends, stitch markers (optional).
- Yarn Weight: Choose yarn with consistent weight for even stitches.
Abbreviations and Notes:
Abbreviations:
- Ch: Chain
- SC: Single Crochet
- DC: Double Crochet
- HDC: Half Double Crochet
- TR: Treble Crochet
- SL ST: Slip Stitch
- Magic Ring: Used for starting in the round.
Notes:
- Chains at the beginning of rounds may or may not count as stitches, as noted in the instructions. Pay close attention to each round's directions.
- For a neat finish, use standing stitches for joining new yarn colors, especially when creating the granny square portion.
- Ensure the squares are positioned "right-side up" before joining with the zigzag method.
Gauge, Approximate Size, and Pattern Notes:
Gauge:
Gauge isn’t strictly necessary for this project, as it's decorative. Adjust hook size slightly if your stitches are too loose or tight.
Approximate Size:
Finished skull granny square dimensions: Approximately 6” x 6”. This may vary depending on yarn and hook size.
Pattern Notes:
- Unique Techniques: Skull shaping uses chains and treble crochets to form eye and nose sockets.
- Use the zigzag slip stitch method for joining squares to prevent bulky seams.
- You can expand the granny square portion by adding more rounds to suit your project needs.
Step-by-Step Pattern:
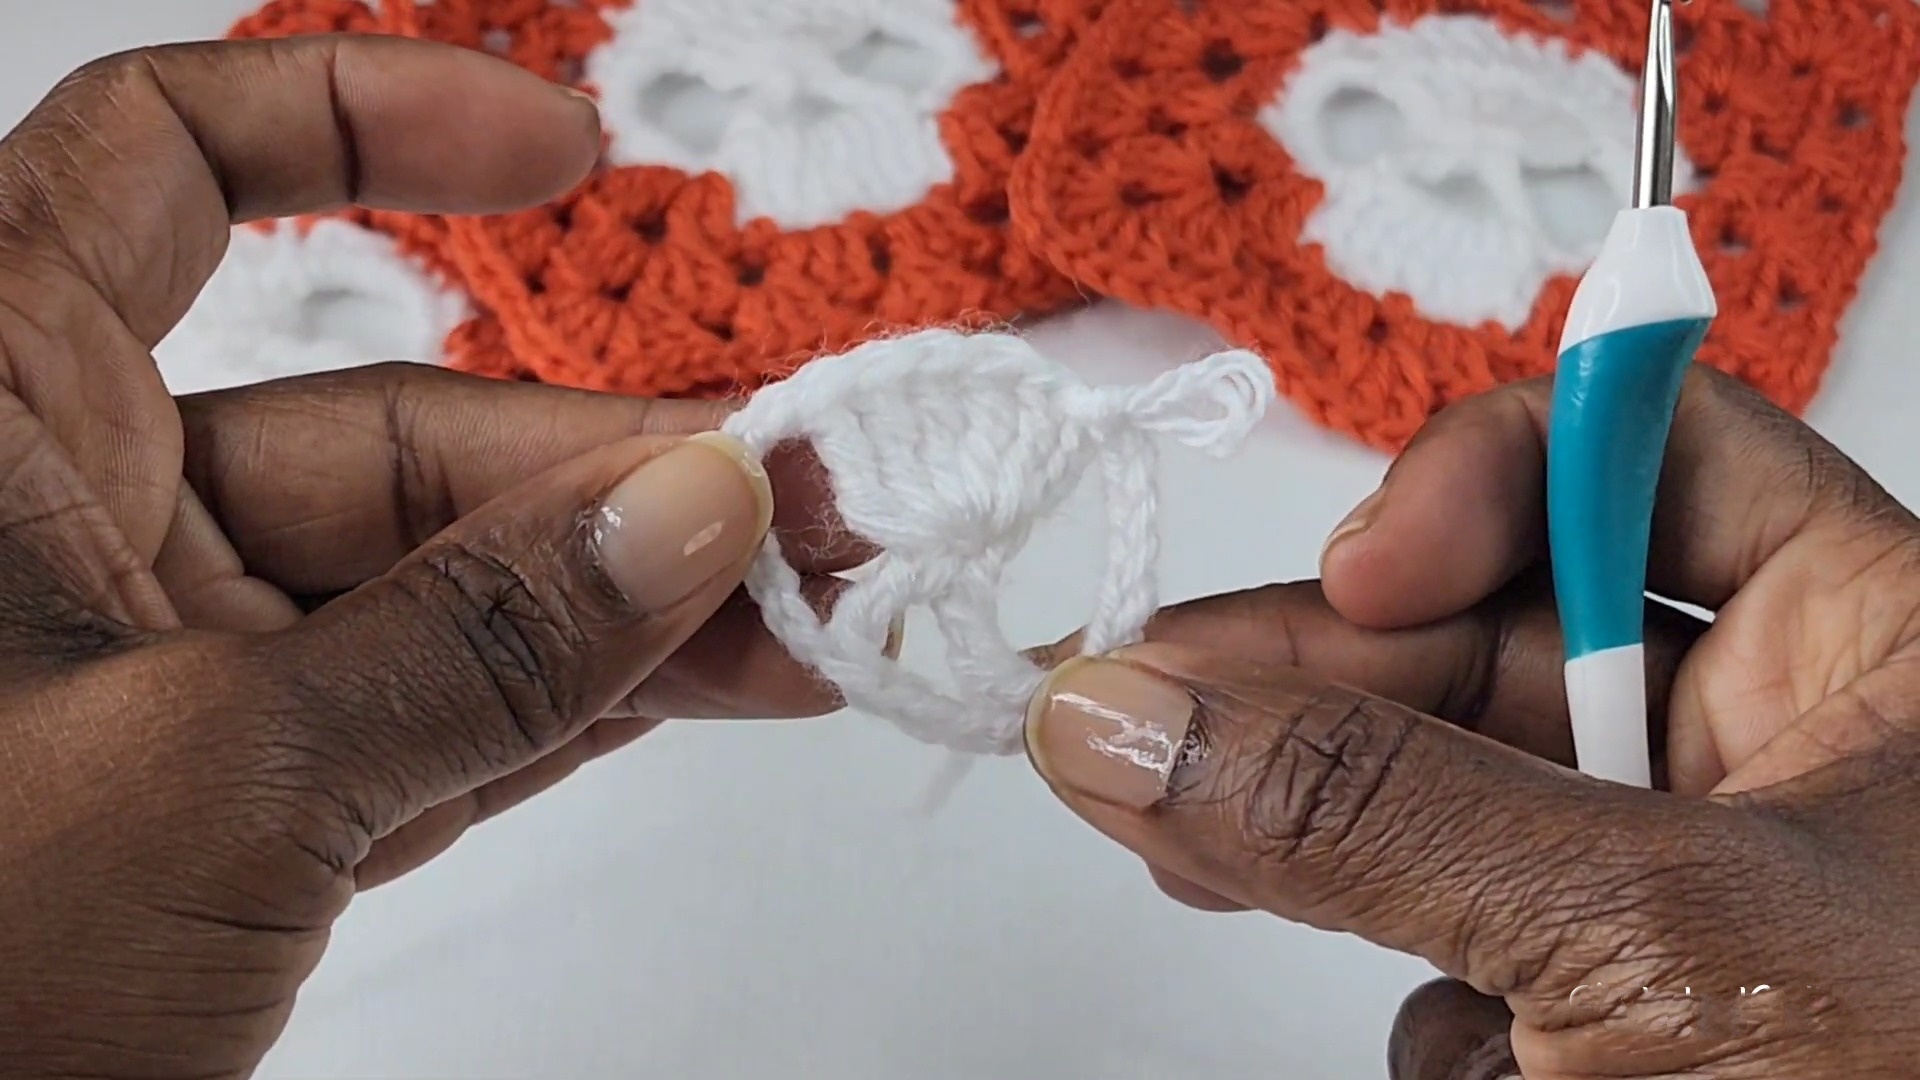
Round 1: Skull Foundation
- Magic Ring: Create a magic ring and tighten.
- Ch 3: Does not count as a stitch.
- Stitches inside the ring:
- Work 5 treble crochets (TR) into the ring.
(Wrap hook twice, insert into the ring, pull through, then pull through two loops three times.) - Ch 7.
- Work 1 treble crochet (TR) into the ring.
- Ch 4, then work another TR into the ring.
- Ch 7, then join with a SL ST to the first treble stitch.
- Work 5 treble crochets (TR) into the ring.
The ring now forms the skull’s eyes, nose, and chin area. Tighten the magic ring for clean shaping.
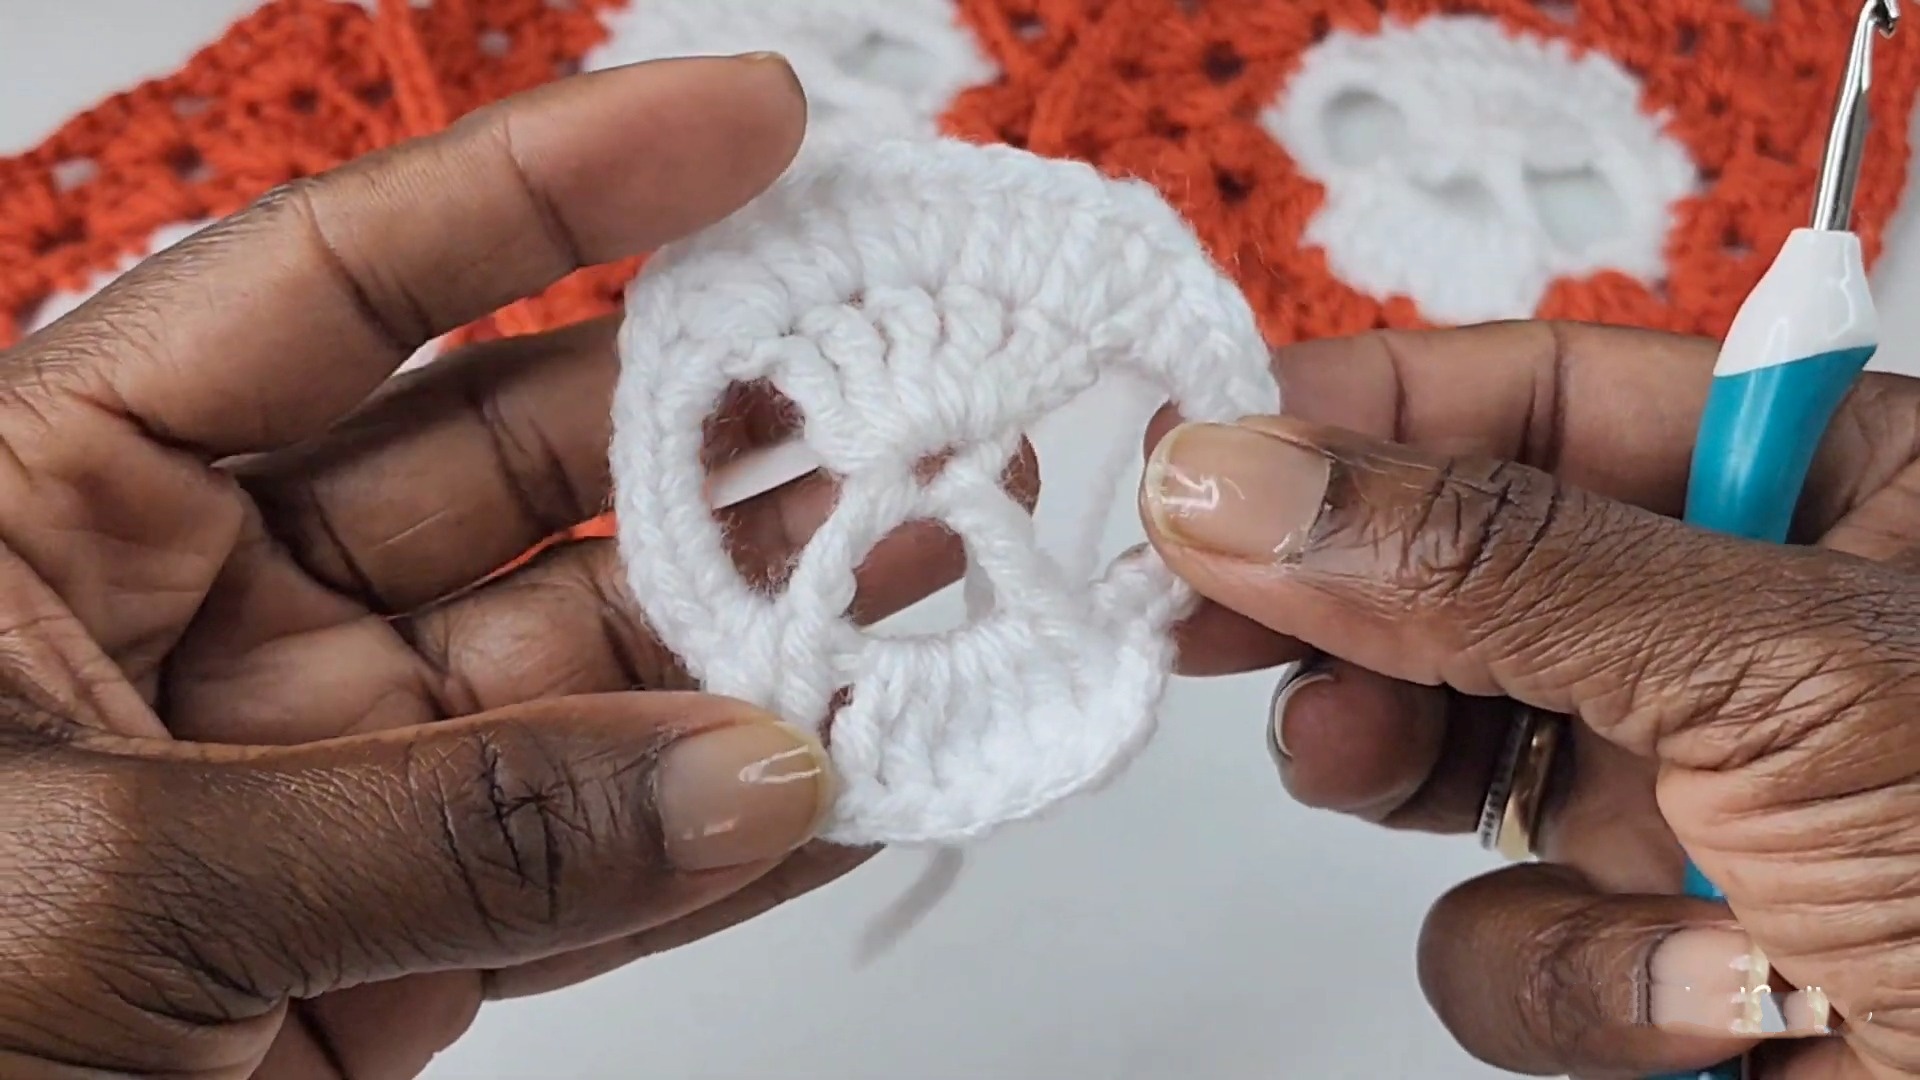
Round 2: Skull Details
- Ch 2: Does not count as a stitch.
- Add Double Crochets:
- Starting in the same stitch as the slip knot: Work 2 double crochets (DC) into each stitch around the skull.
- For areas with longer chains from Round 1:
- Chain-7 Space: Work 1 half double crochet (HDC) followed by 8 single crochets (SC) into the space.
- Chain-4 Space: Work 5 treble crochets (TR) to shape the nose bridge.
- Complete the round, then join with a SL ST in the first DC.
Fasten off and attach the second yarn color for the granny square portion.
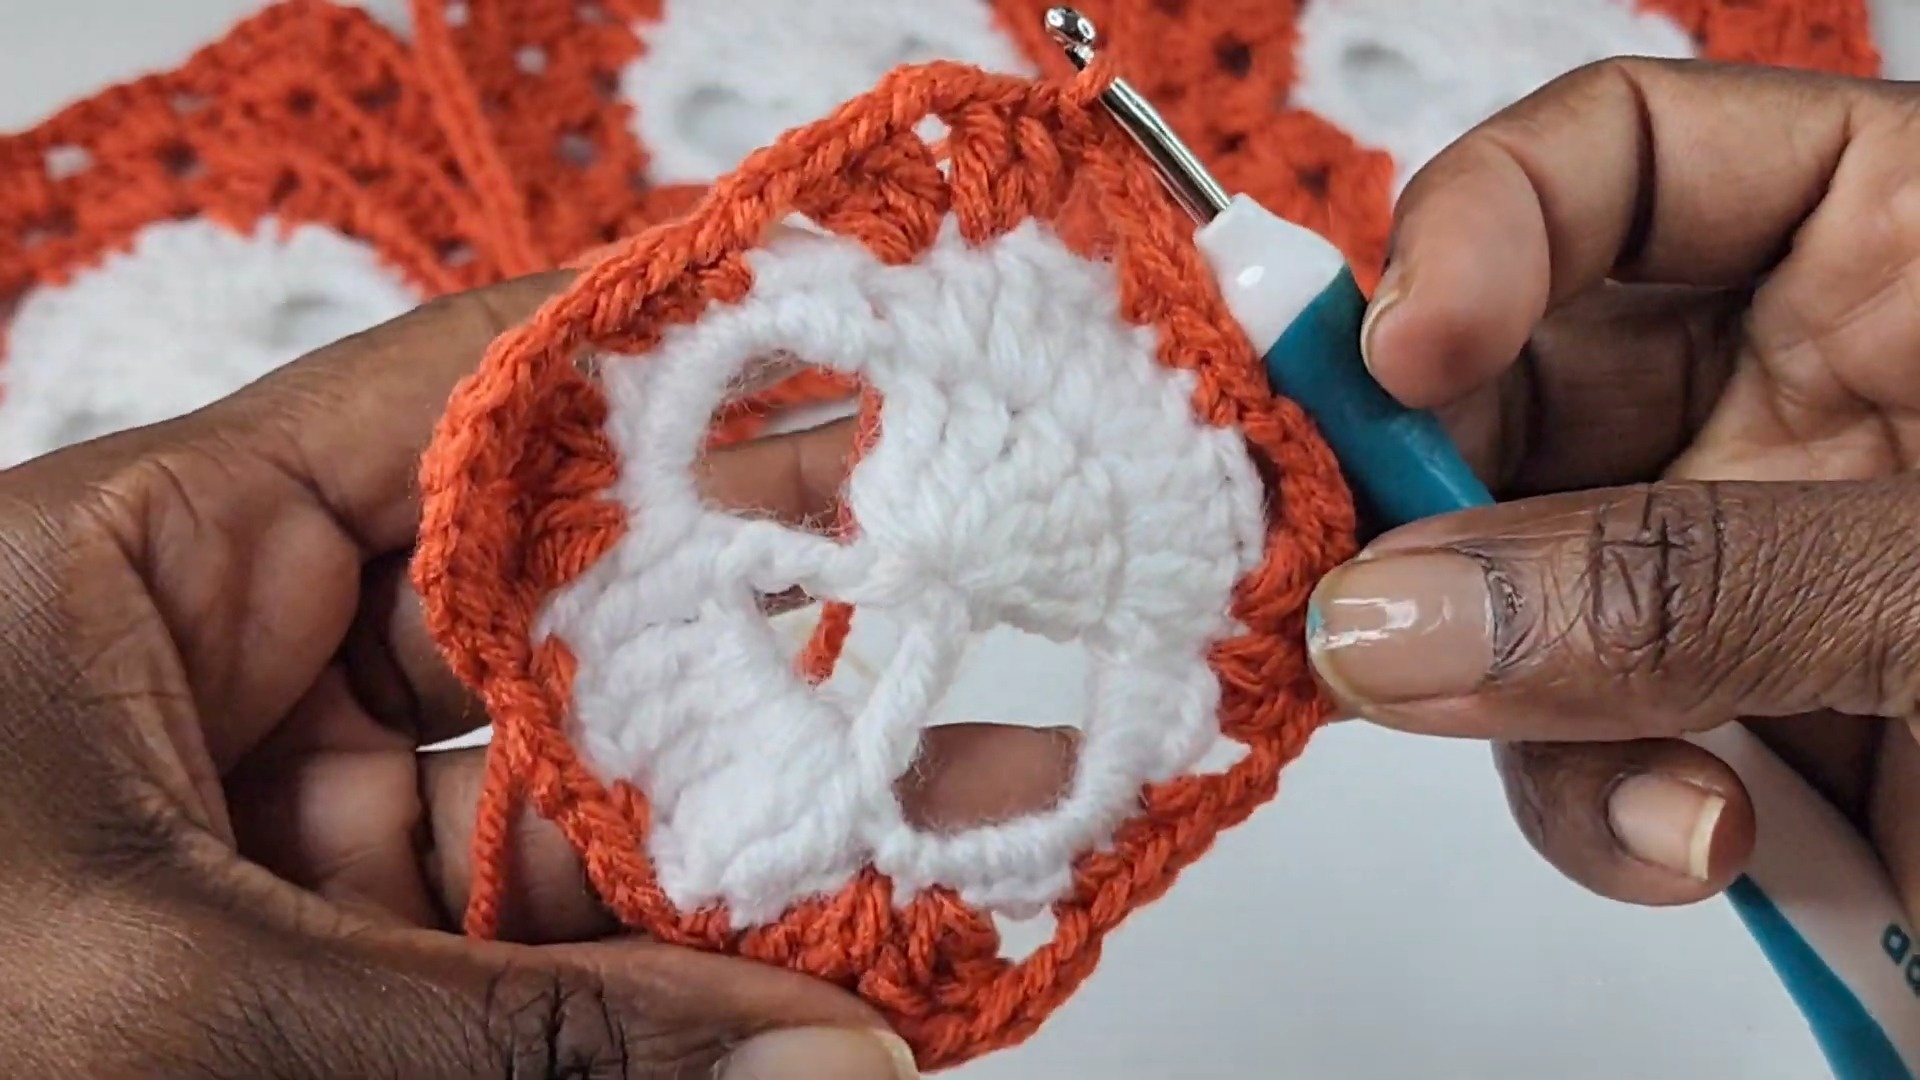
Round 3: Beginning the Granny Square
-
Attach new yarn with a Standing Double Crochet.
-
First Corner:
- Start in the 10th DC of the skull’s top. Work:
2 double crochets (DC), ch 2, 2 double crochets (DC). - Chain 2, skip 2 stitches.
- Start in the 10th DC of the skull’s top. Work:
-
Skull Side Details:
- Between stitches:
SC in 3 stitches, chain 2, skip 2 stitches. - Treble crochet pairs across the chin.
- Between stitches:
-
Continue forming 4 corners of the square using the pattern above. Once complete, join with a slip stitch to the starting double crochet.
Round 4: Expanding the Granny Square
-
Granny Clusters:
- In chain spaces between stitches, work:
3 double crochets (DC), chain 1. - In corner chain-2 spaces, work:
3 double crochets (DC), chain 2, 3 double crochets (DC). - Repeat around the square.
- In chain spaces between stitches, work:
-
Joining:
- At the end of the round, join with a slip stitch to the chain-3 at the start of the round.
Round 5: Final Granny Square Round (Optional)
- Repeat the structure of Round 4, adding granny clusters between spaces and reinforcing the shape of the square.
- For larger squares, continue adding rounds using the granny square pattern.
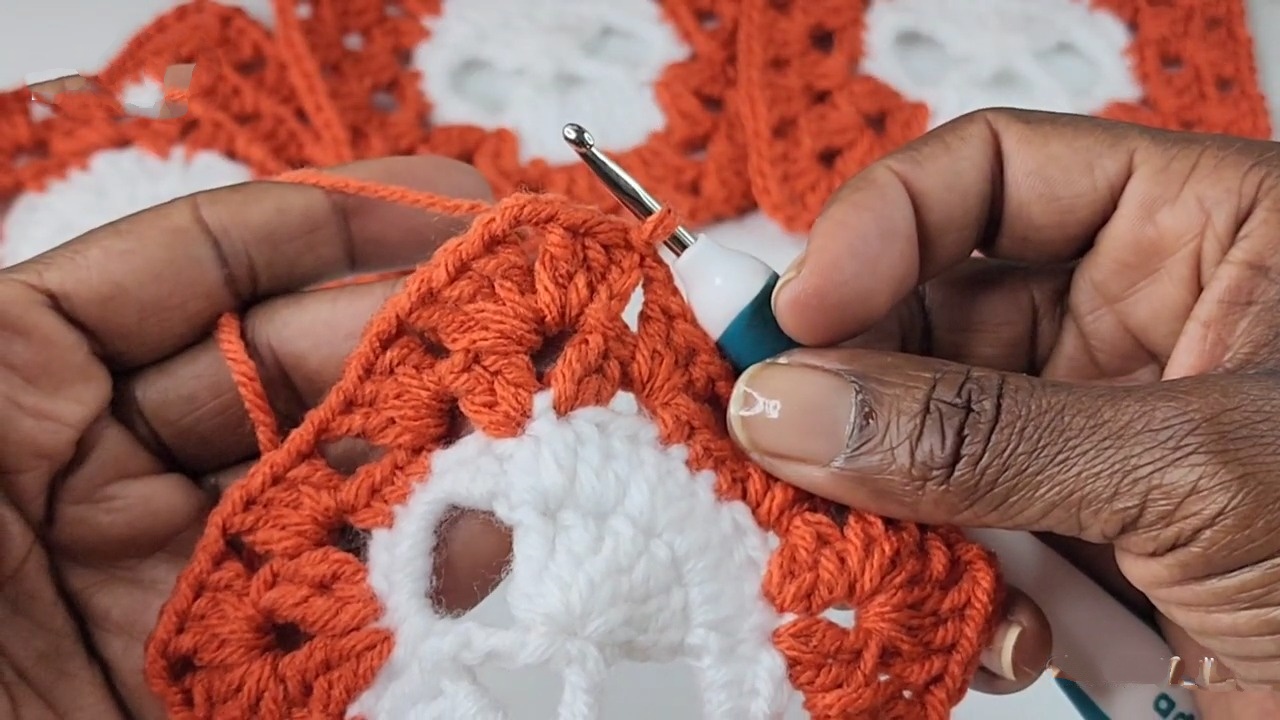
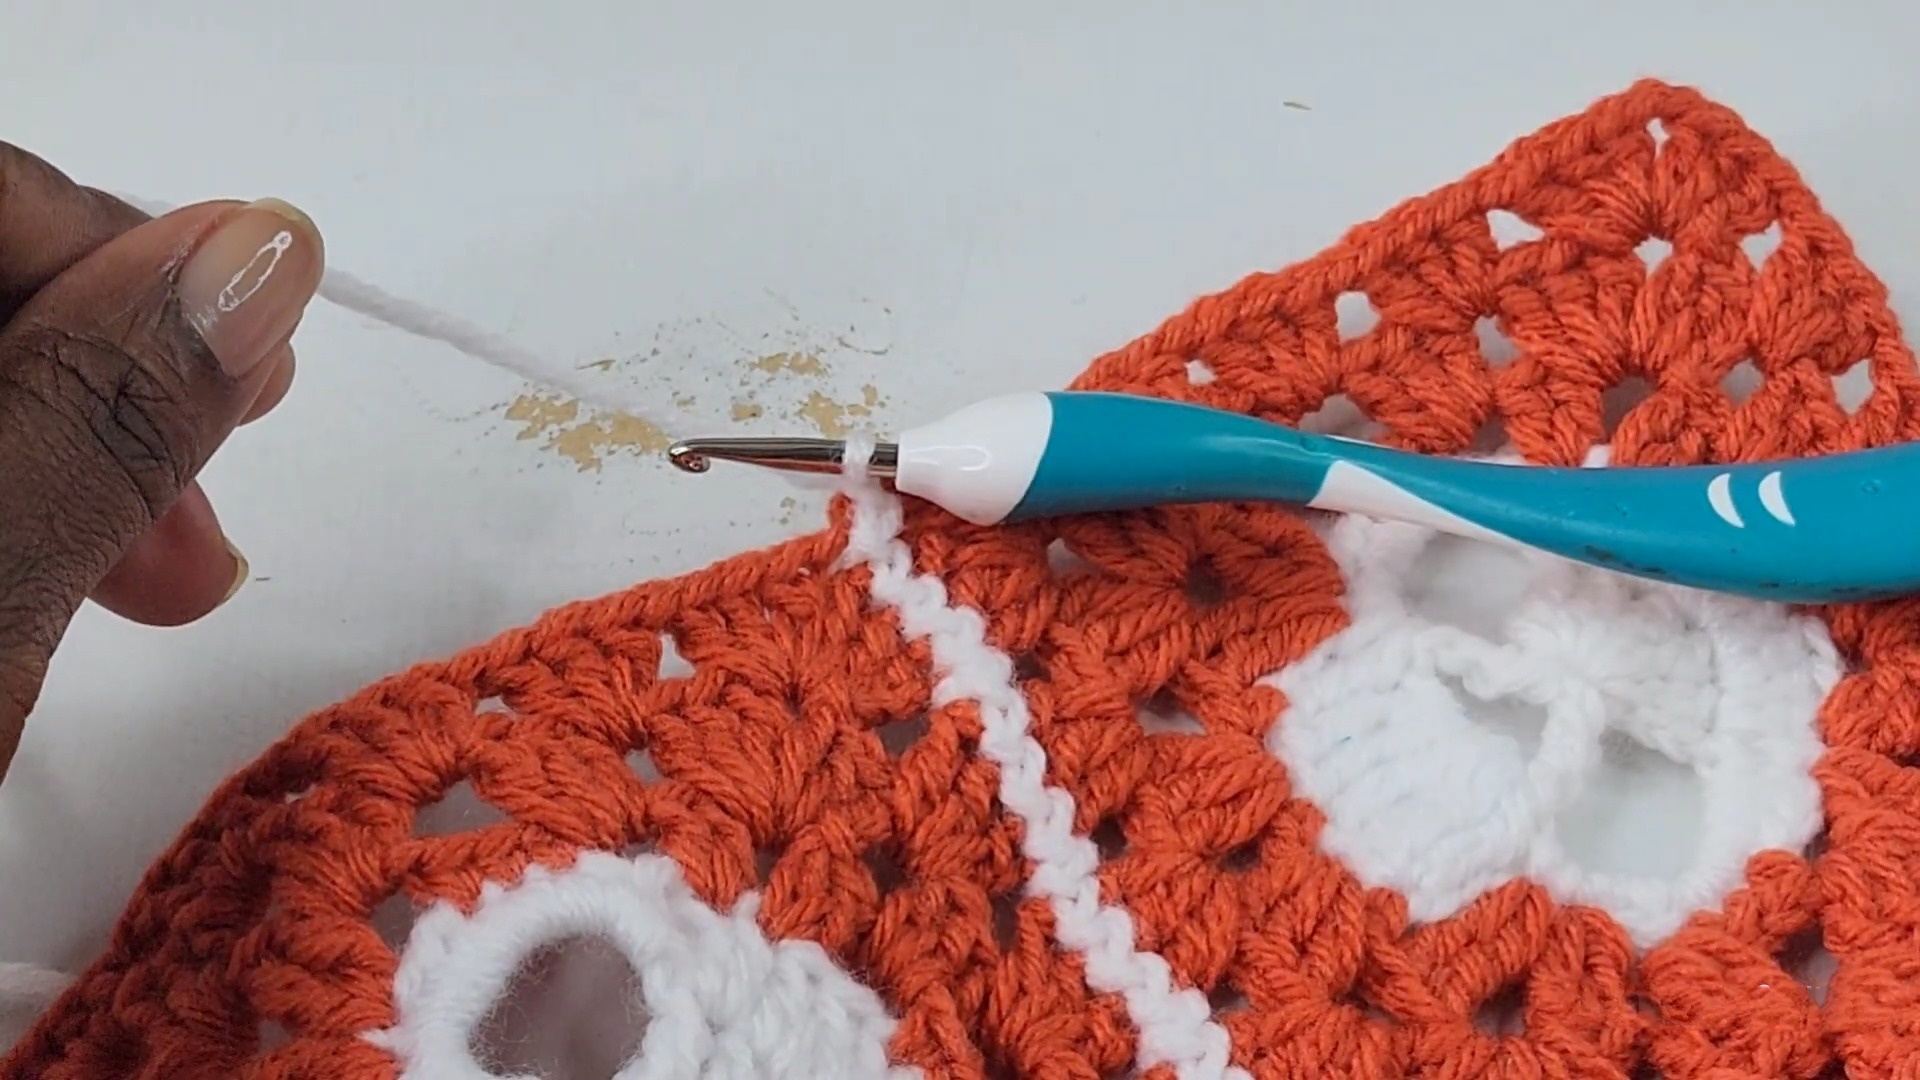
Zigzag Join for Multiple Squares:
-
Lay squares side by side, ensuring the “right side” is facing up.
-
Horizontal Join:
- Add a slip knot on your hook, insert into the corner space of one square, then the matching corner space of the adjacent square.
- Slip stitch alternately between the two squares along the edges, matching stitches one by one.
- At the end of the row, fasten off and weave in the ends.
-
Vertical Join:
- Turn squares vertically and repeat the zigzag join method to attach squares.
- Slip stitch into corresponding stitches between squares for a clean seam.
Check alignment and ensure tight joins throughout to create a polished look.
Final Touches:
Once your squares are joined, you can add a decorative border of your choice to frame the final piece. Suggested borders include single crochet rounds or a scalloped edge.
Pattern Question
Question: How can I adjust the size of the squares for different projects?
Answer: To make the squares larger, simply add additional granny rows after completing the skull shape, ensuring the pattern stays consistent.
Conclusion
The crochet skull granny square combines artistic flair with practicality, making it a fun and versatile addition to your projects. Whether you're crafting for Halloween or year-round charm, this pattern is enjoyable, customizable, and ideal for unleashing your creativity.