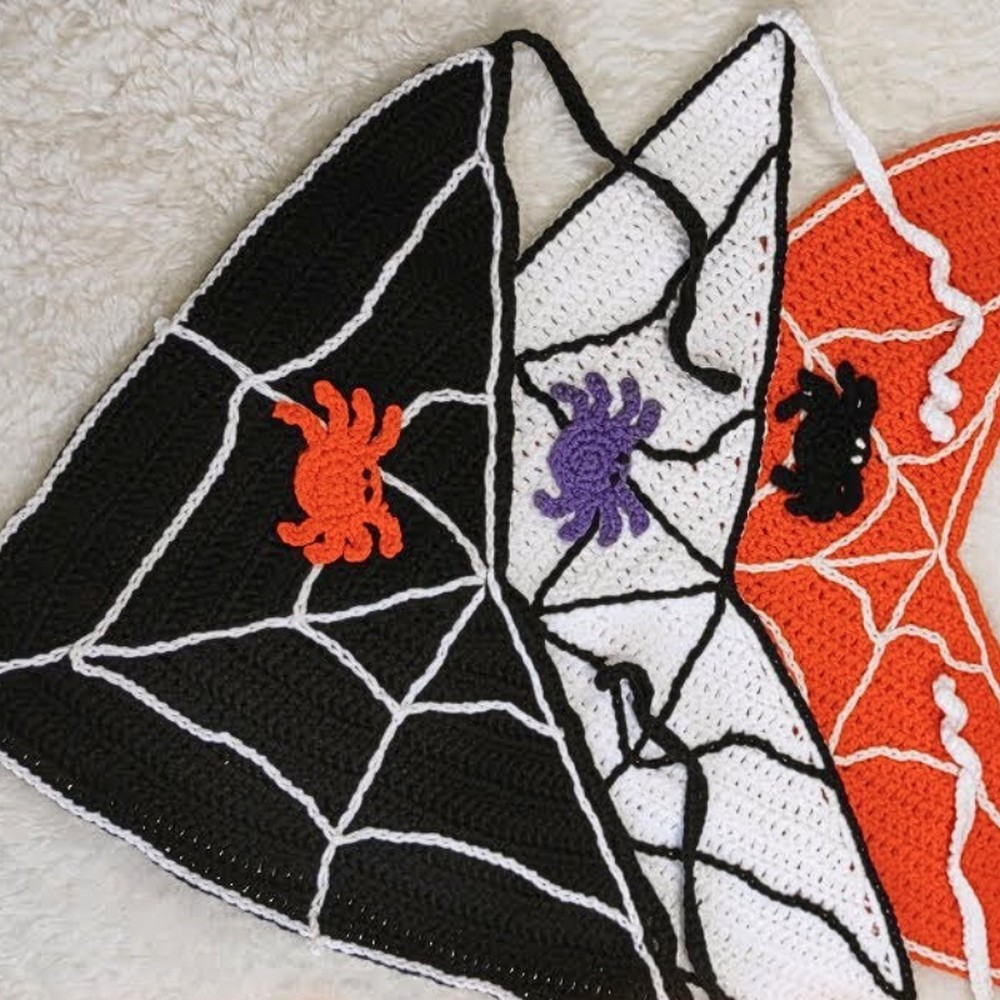
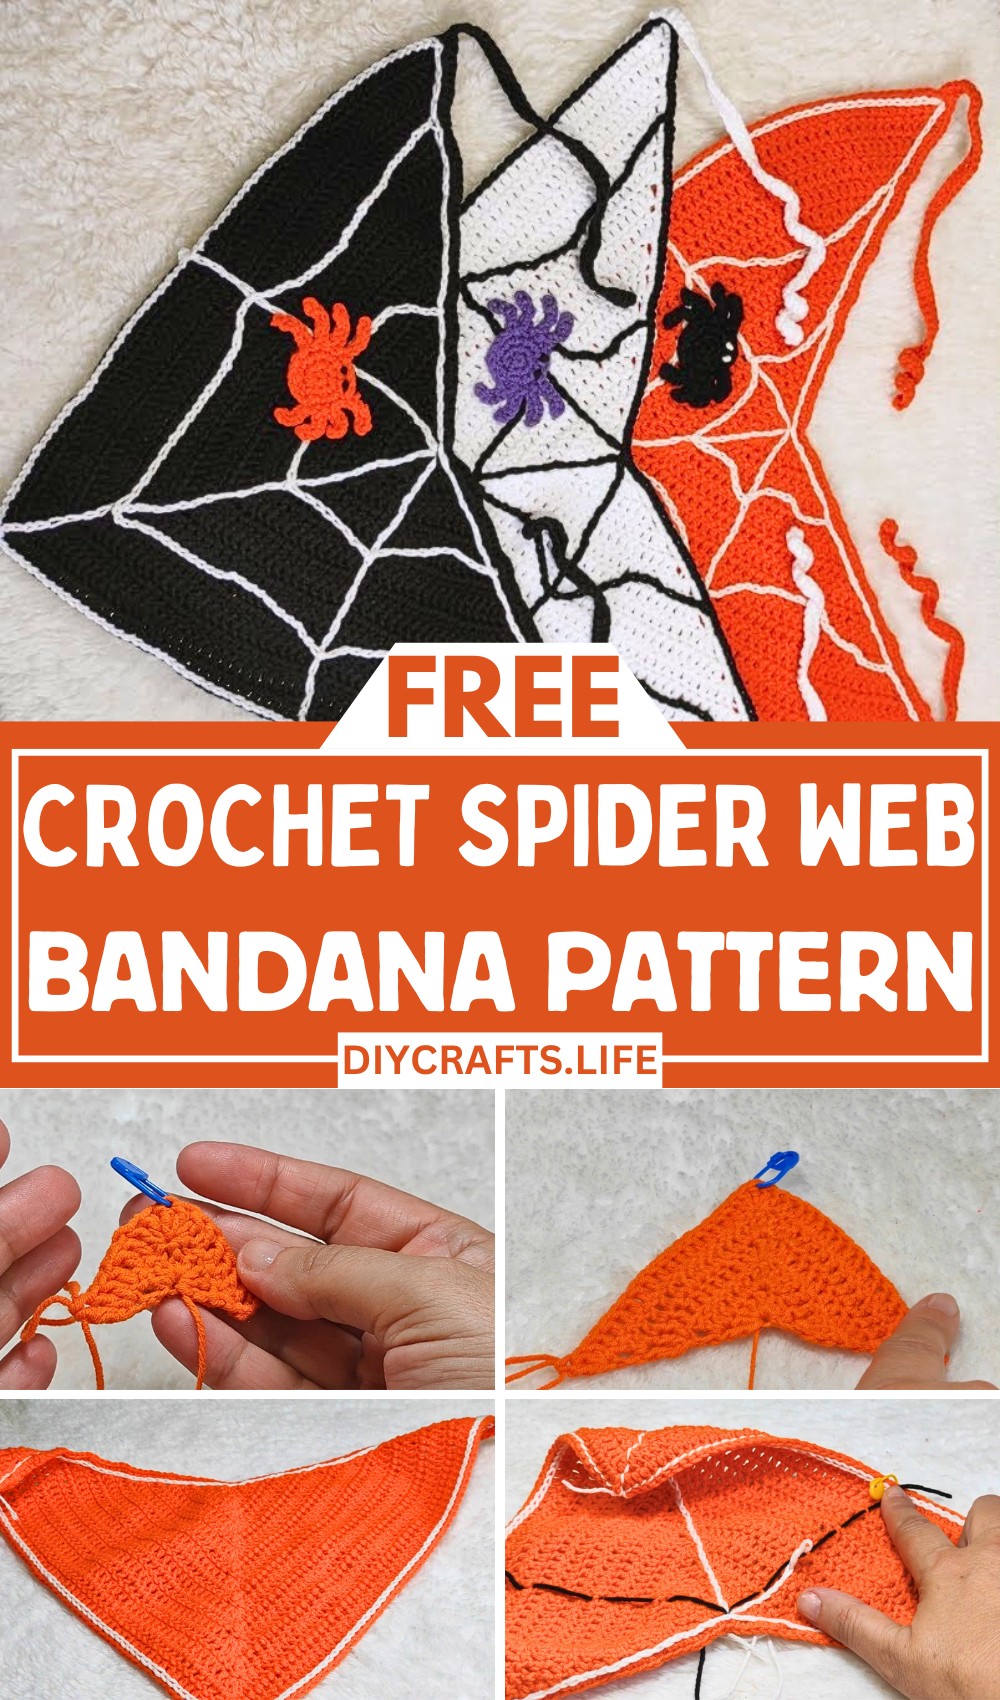
Create a stunning crochet spider web bandana that's perfect for Halloween or year-round wear! With a delicate yet bold design, this bandana is eye-catching, versatile, and easy to make. Whether you're dressing up for a spooky event or accessorizing your everyday outfit, this project stands out.

This spider web bandana doubles as a festive Halloween accessory and a stylish headpiece for any occasion. Its lightweight yet durable cotton construction ensures comfort, and its customizable colors allow you to create a unique statement piece to suit your style.
Crochet Spider Web Bandana
Crafting this bandana is simple and enjoyable, making it perfect for crocheters of all skill levels. With detailed step-by-step instructions, you can personalize its size, color, and embroidery, letting creativity shine. Beginners and experts alike will find it fun to create.
Materials and Preparation
To create the spider web bandana, gather the following materials:
Required Materials:
- Yarn type: Cotton yarn (soft cotton preferred for main part and embroidery); acrylic or half-cotton/half-acrylic can also be used.
- Main yarn color: Orange for the bandana base.
- Embroidery yarn color: Cream for the web design.
- Spider yarn colors: Black (main part of spider) and white (for the eyes).
- Crochet hook: 3 mm (sized for yarn thickness).
- Additional tools:
- Scissors (for cutting yarn ends).
- Stitch markers (for marking corners and ensuring accuracy).
- Darning needle (for hiding yarn ends and sewing on the spider).
Abbreviations and Notes
Abbreviations:
- CH: Chain
- DC: Double Crochet
- TR: Triple Crochet
- SC: Single Crochet
- SL ST: Slip Stitch
- YO: Yarn Over
Pattern Notes & Tips:
- Beginner-friendly: Even beginners can follow this pattern. The design repeats at each row, and the tutorial progresses row by row for clarity.
- Stitch markers: Use markers to mark the corners and tops of each triple crochet to ensure your triangle maintains accuracy as it grows.
- Tension: Maintain consistent tension when working stitches to create neat and uniform rows.
- Customization: The bandana can be sized to fit adults or children by adjusting the number of rows.
Gauge, Approximate Size, and Pattern Notes
Gauge:
Gauge is not crucial for this project, but consistent tension ensures uniformity. Use a 3 mm hook and medium-weight cotton yarn for similar appearance.
Approximate Finished Size:
- For adult-sized bandanas: The triangle measures approximately 20 cm from center to top after completing 16 rows.
- Customization for kids: Adjust the rows or height (e.g., 18 cm or smaller).
Pattern Notes:
- The project progresses row by row, starting with a solid base triangle followed by web embroidery.
- Embroidery techniques give the piece its unique spider web appearance.
Step-by-Step Pattern
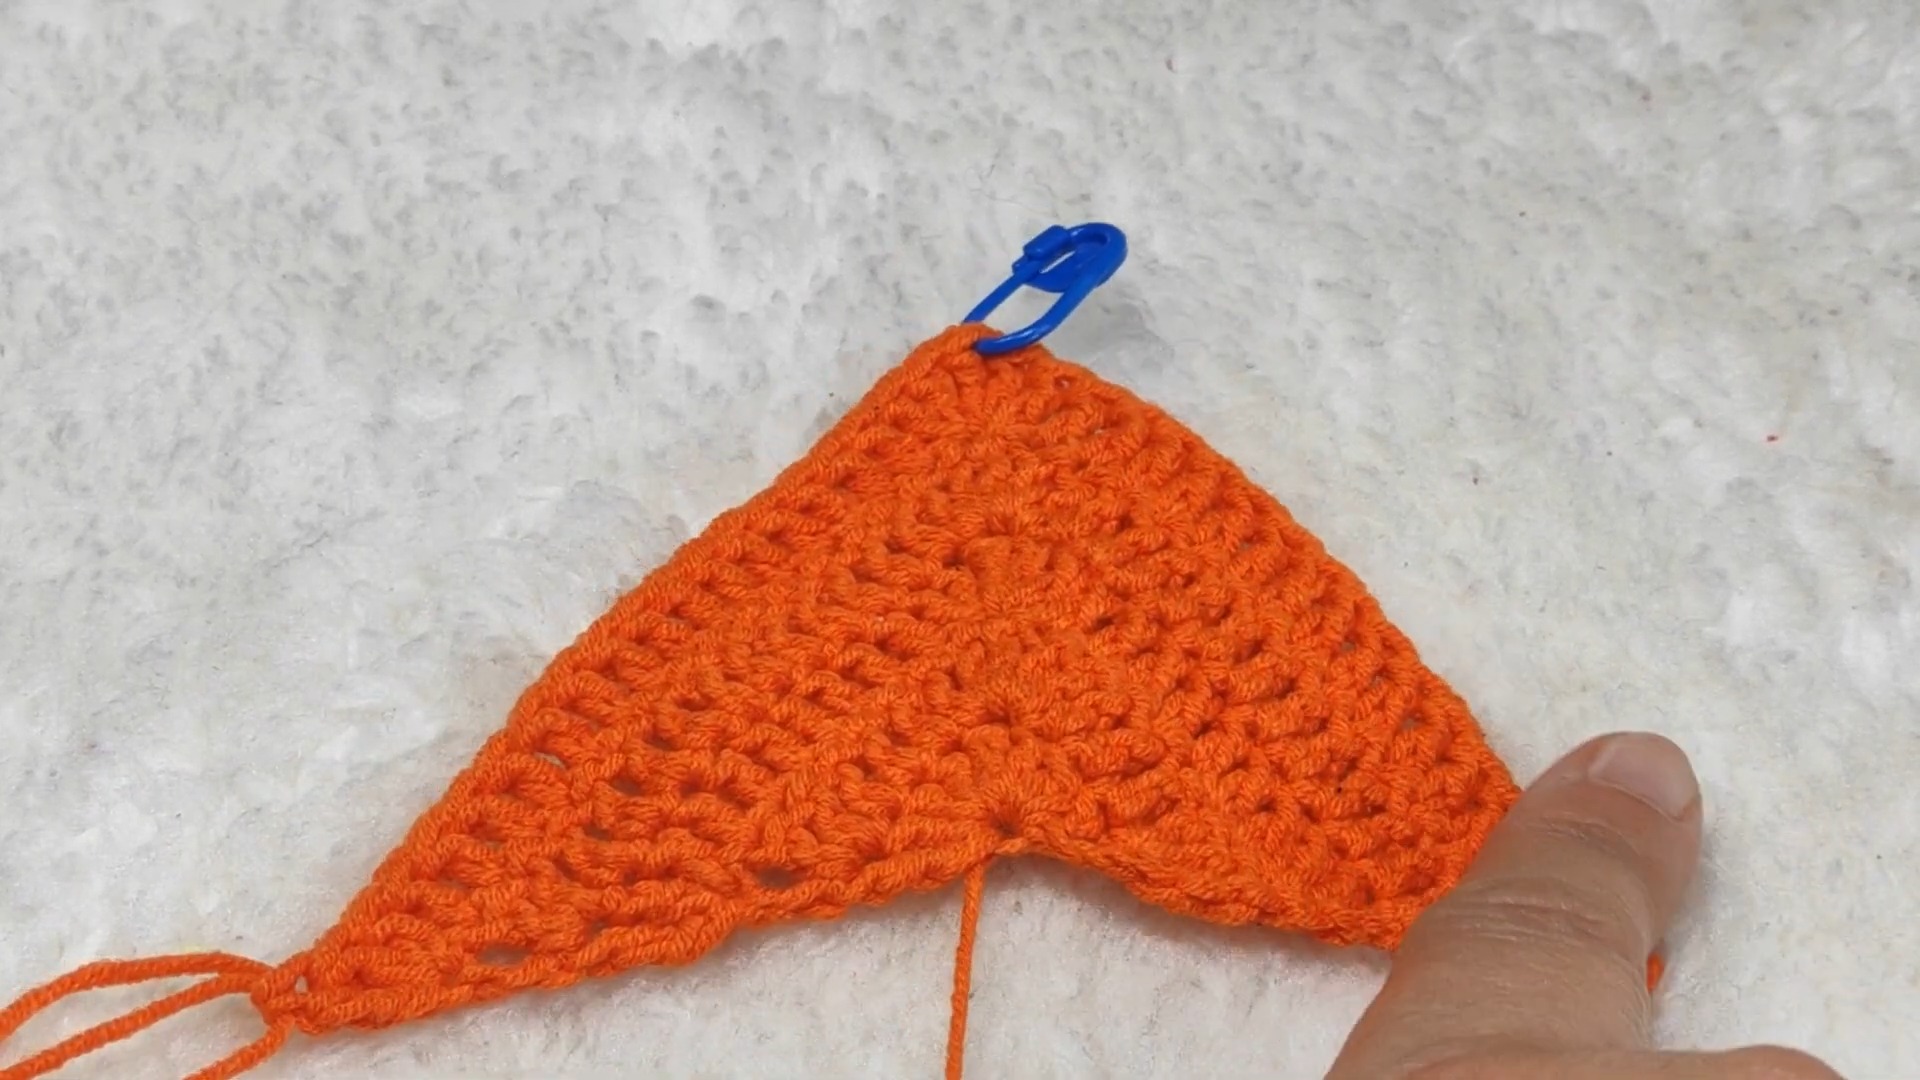
1. Foundation Triangle (Rows 1-16)
Row 1:
- Create a magic ring.
- CH 4 (counts as the first TR).
- Work 3 DC in the ring.
- YO twice, and make 1 TR in the ring.
- Work 3 DC in the ring again.
- YO twice, and make another TR in the ring.
- Pull the yarn end tight to close the ring and form a solid triangle.
Row 2:
- CH 4, turn your work.
- Work 2 DC into the first stitch.
- Crochet DCs one by one until you reach the top of the triangle.
- In the top stitch (TR from row 1), work:
- 2 DC, 1 TR, 2 DC.
- Place a stitch marker on the top TR to mark the corner.
- Continue DCs one by one until you reach the end of the row.
- In the last stitch (CH 4), work: 2 DC, 1 TR.
Rows 3–16:
- Repeat the same pattern from Row 2, expanding the triangle.
- Use the stitch markers to keep track of corners.
- Ensure each row has equal stitches on both sides.
After 16 rows, measure the triangle to ensure it is approximately 20 cm.
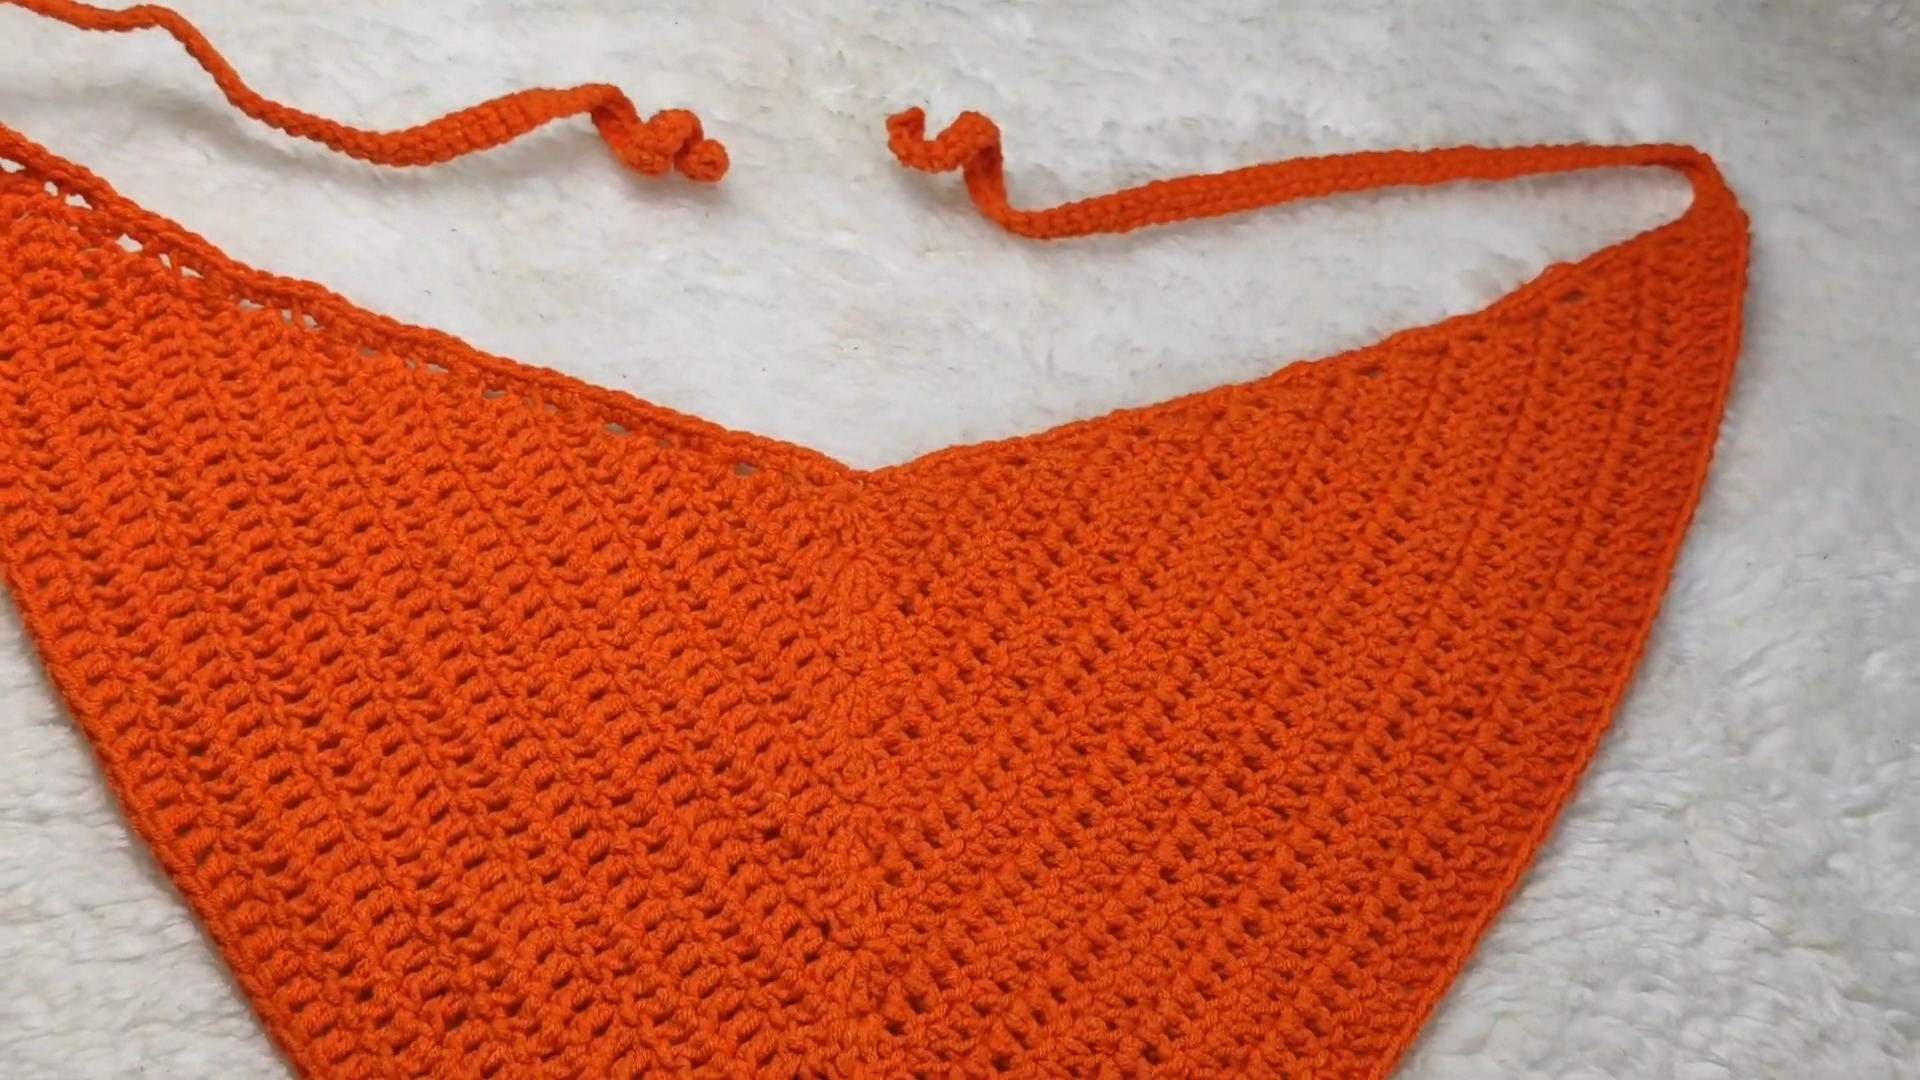
2. Adding Laces
- At the end point of each triangle side, create 25 cm chains. Adjust length based on preference.
- Use SC worked back along the chain to reinforce laces.
- Attach laces on both sides using the same method.
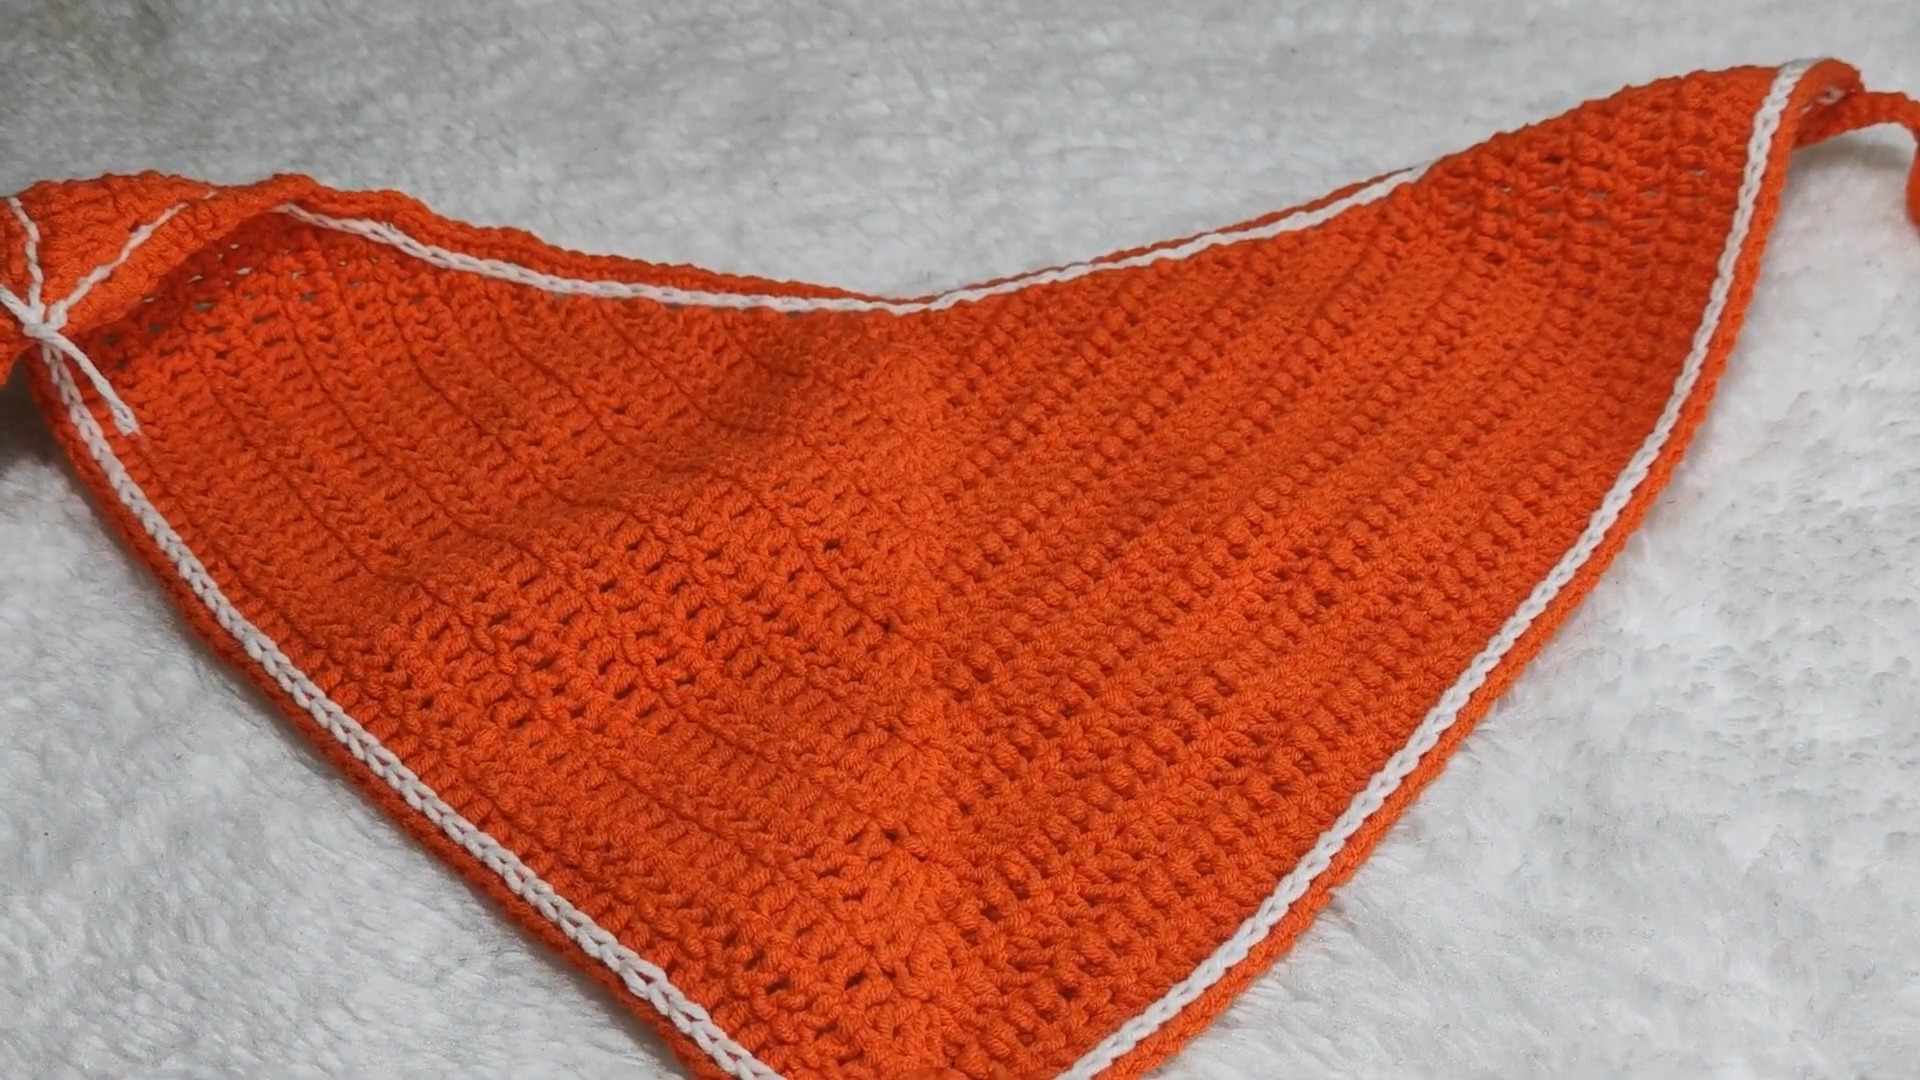
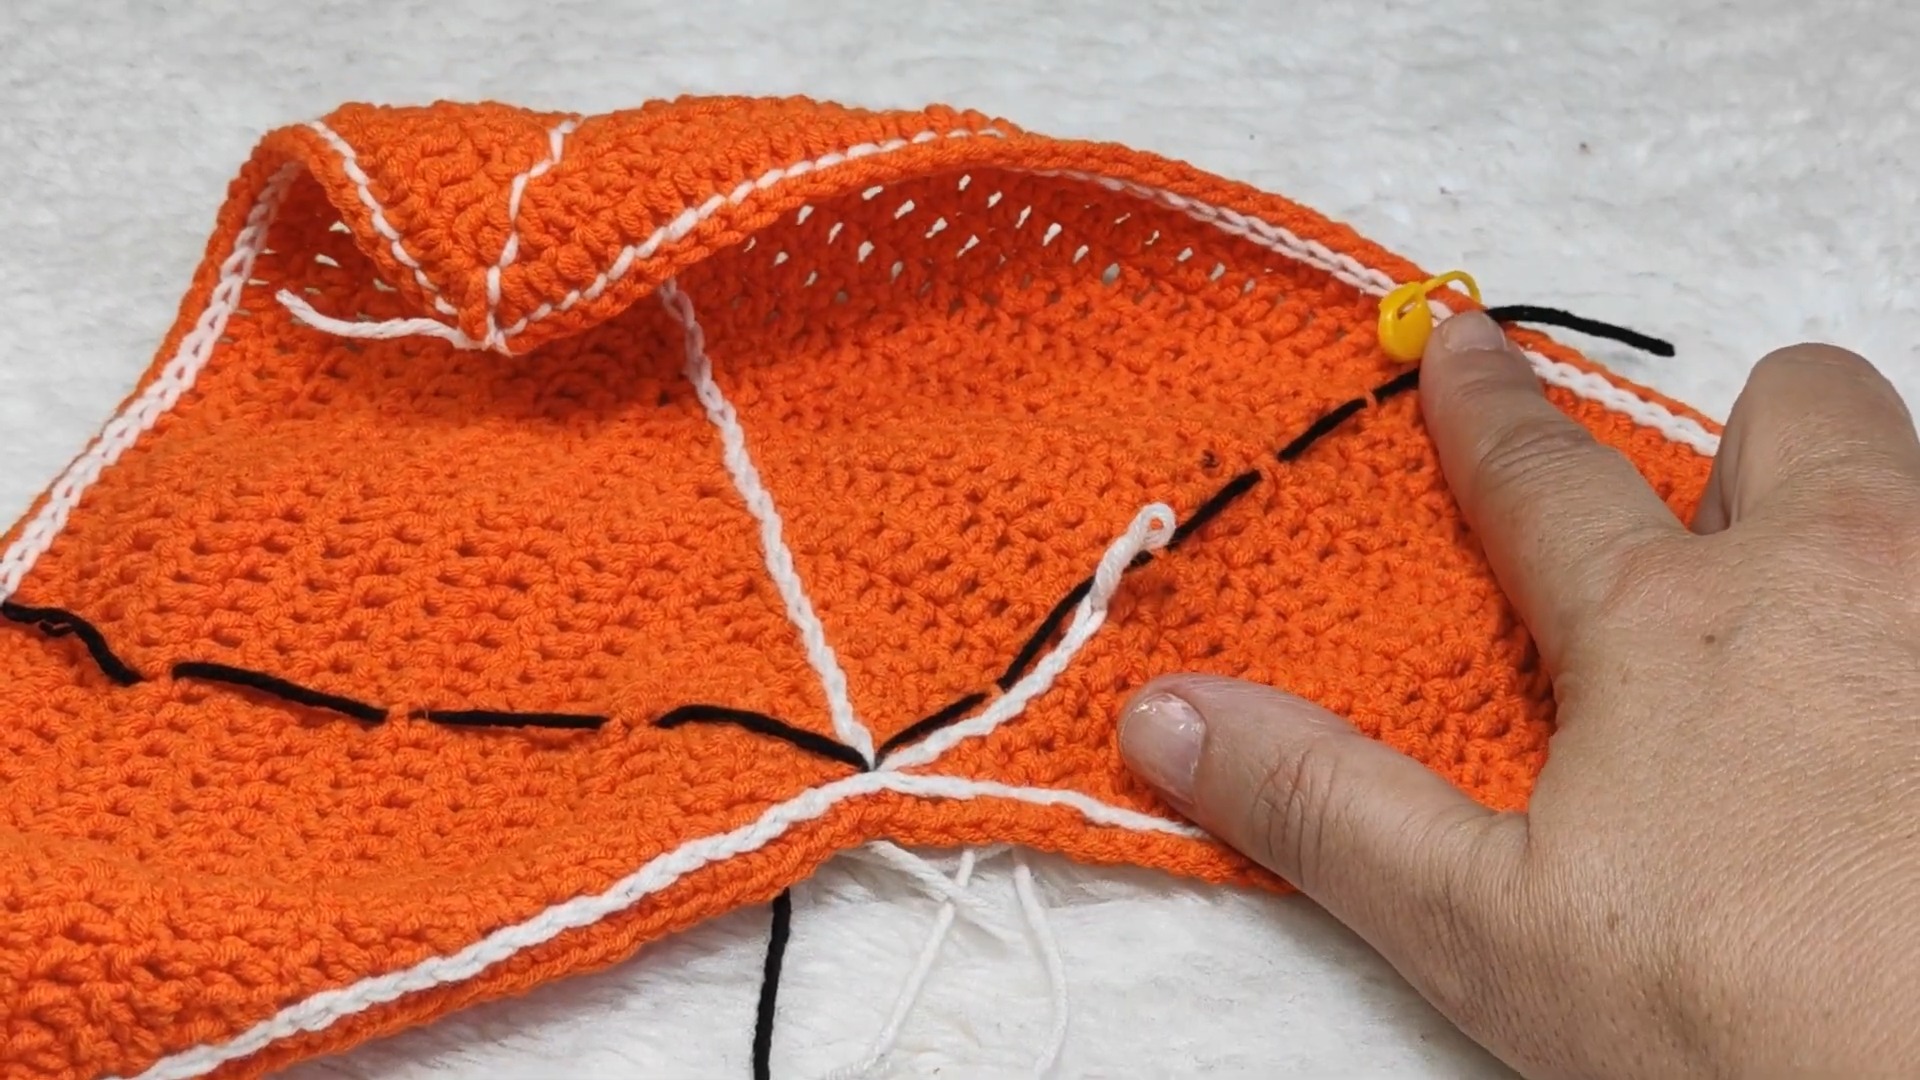
3. Web Design Embroidery
- Use cream-colored yarn to embroider the spider web design.
- Start at one triangle corner and work SL ST along each side, creating neat edging.
- To form the web pattern:
- Divide sides into sections using markers (e.g., 3 sections per side for curves).
- Embroider the web lines by working SL ST diagonally from the center outward.
- Create curved web designs as shown in the tutorial.
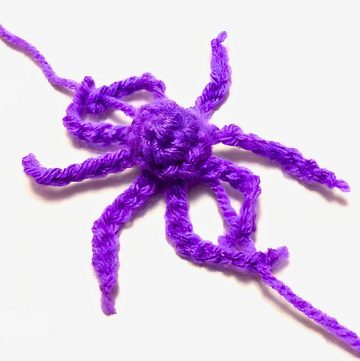
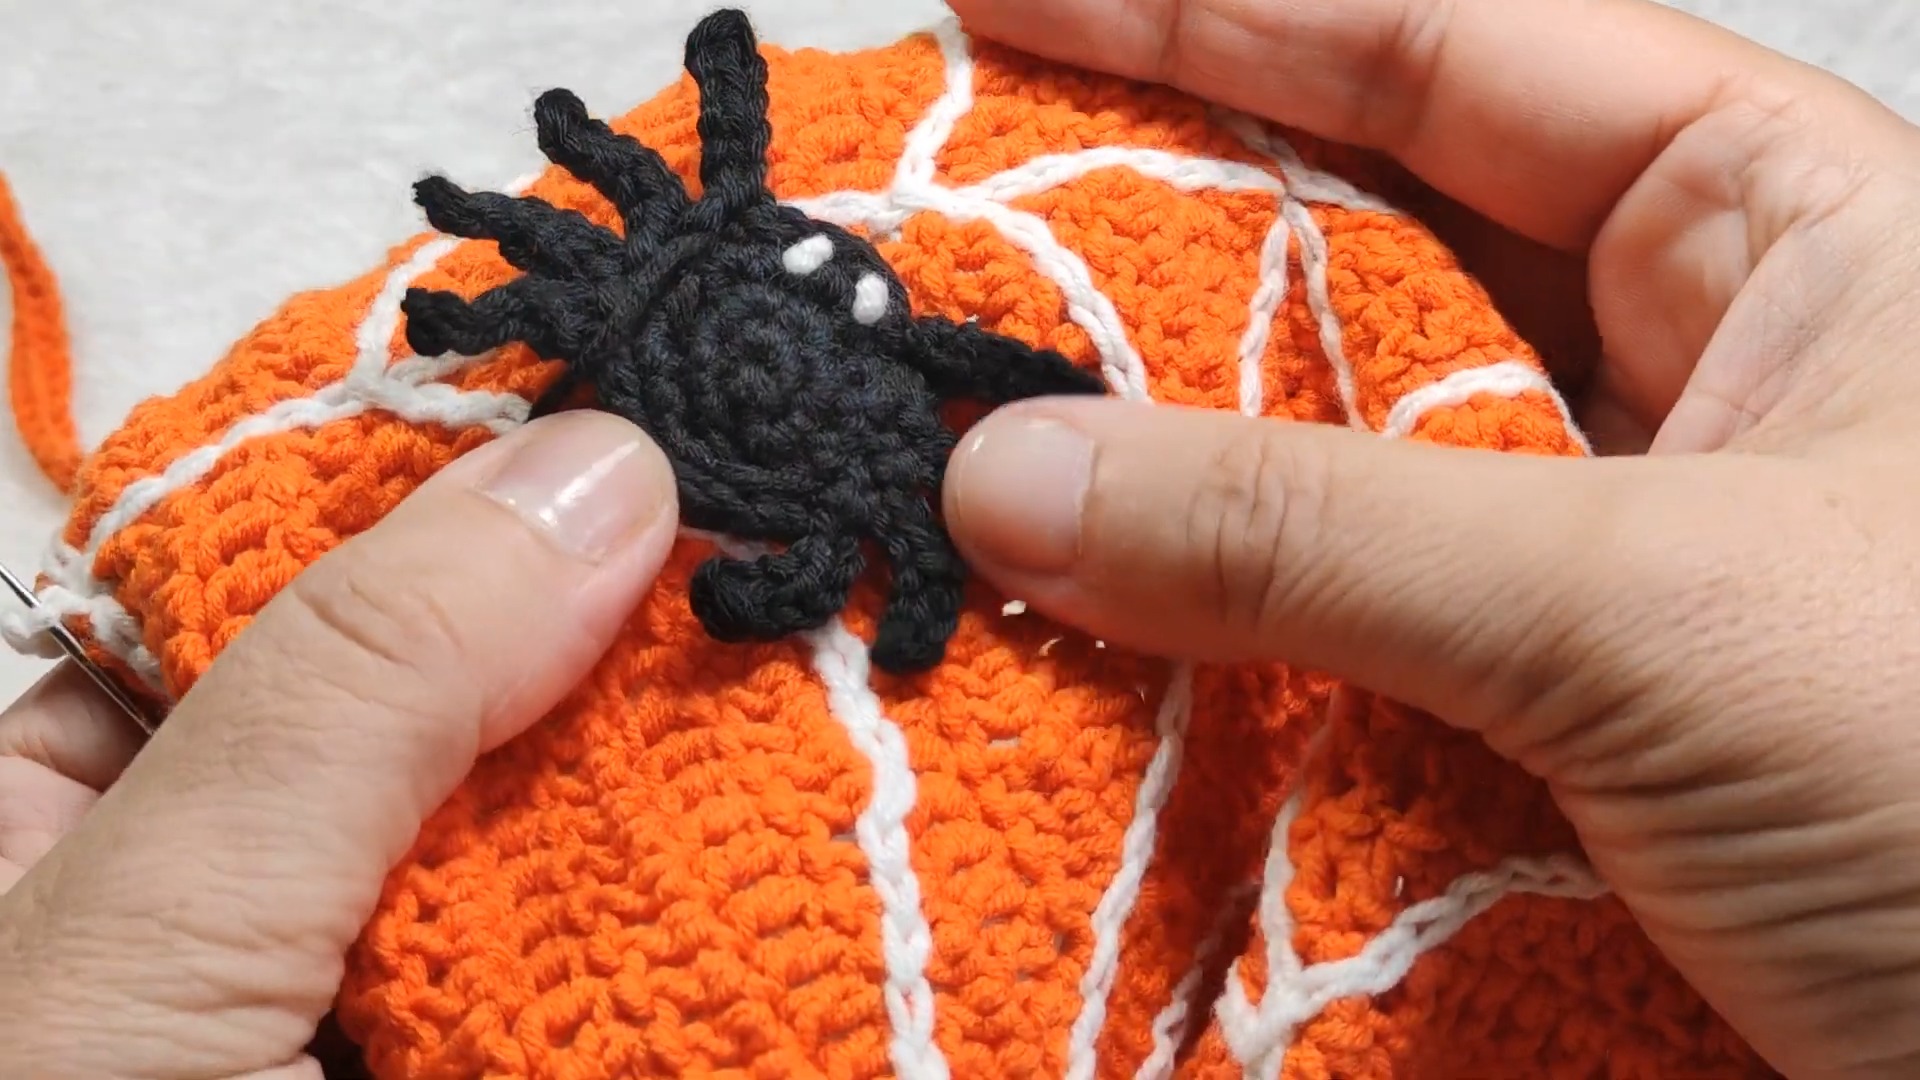
4. Spider Embellishment
- Crochet the spider separately using this tutorial.
- Use black yarn for the body and white yarn for the eyes.
- Sew the spider onto the web using a darning needle and black thread.
5. Finishing Touches
- Hide all yarn ends using the darning needle, working from the back side.
- Steam the bandana lightly to smooth it out and shape appropriately.
- Add any additional details as desired or leave it clean and simple.
Pattern Question
Q: How do I ensure the triangle base of the bandana is symmetrical?
A: Count stitches on both sides after each row. Both sides should have an equal number of stitches. Use stitch markers at the row corners for consistent alignment.
Conclusion
This crochet spider web bandana combines elegance, creativity, and functionality, making it a fun project for any crocheter. Whether you're crafting for Halloween or enhancing your wardrobe, it's a rewarding and enjoyable item to make and wear.