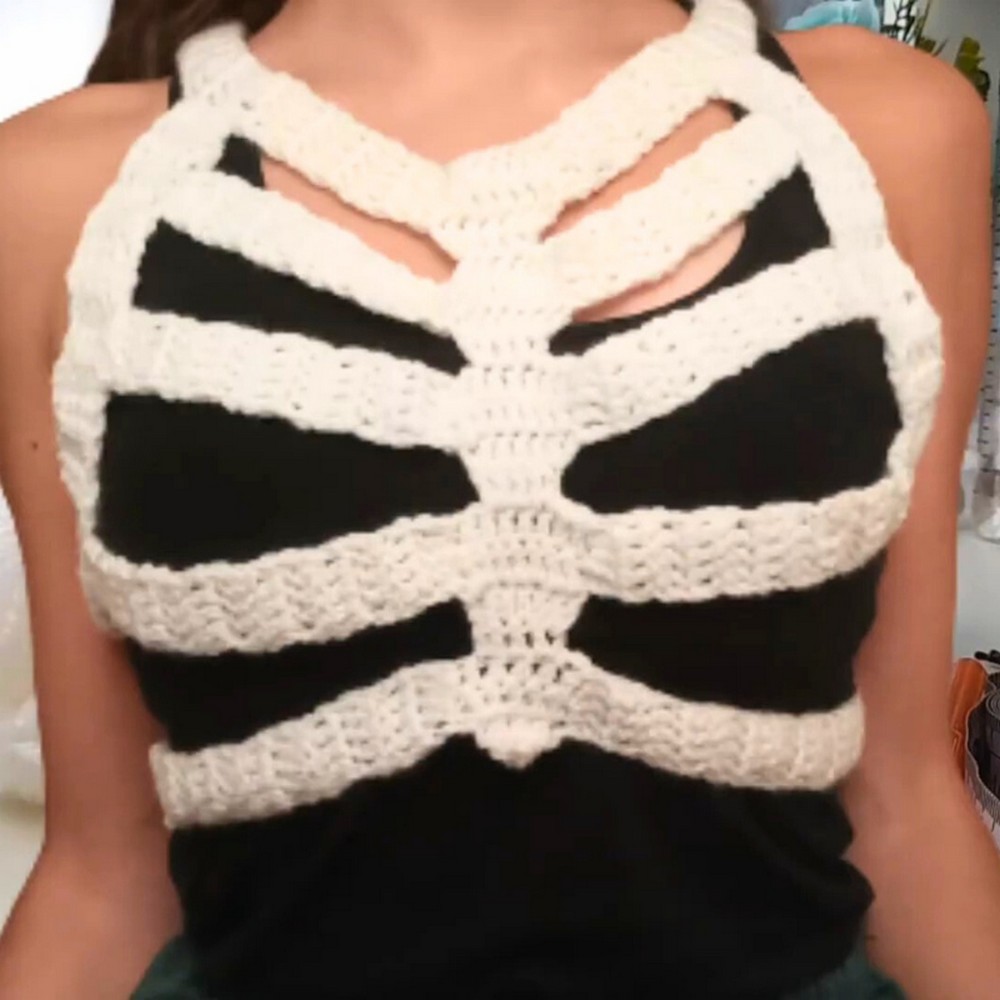
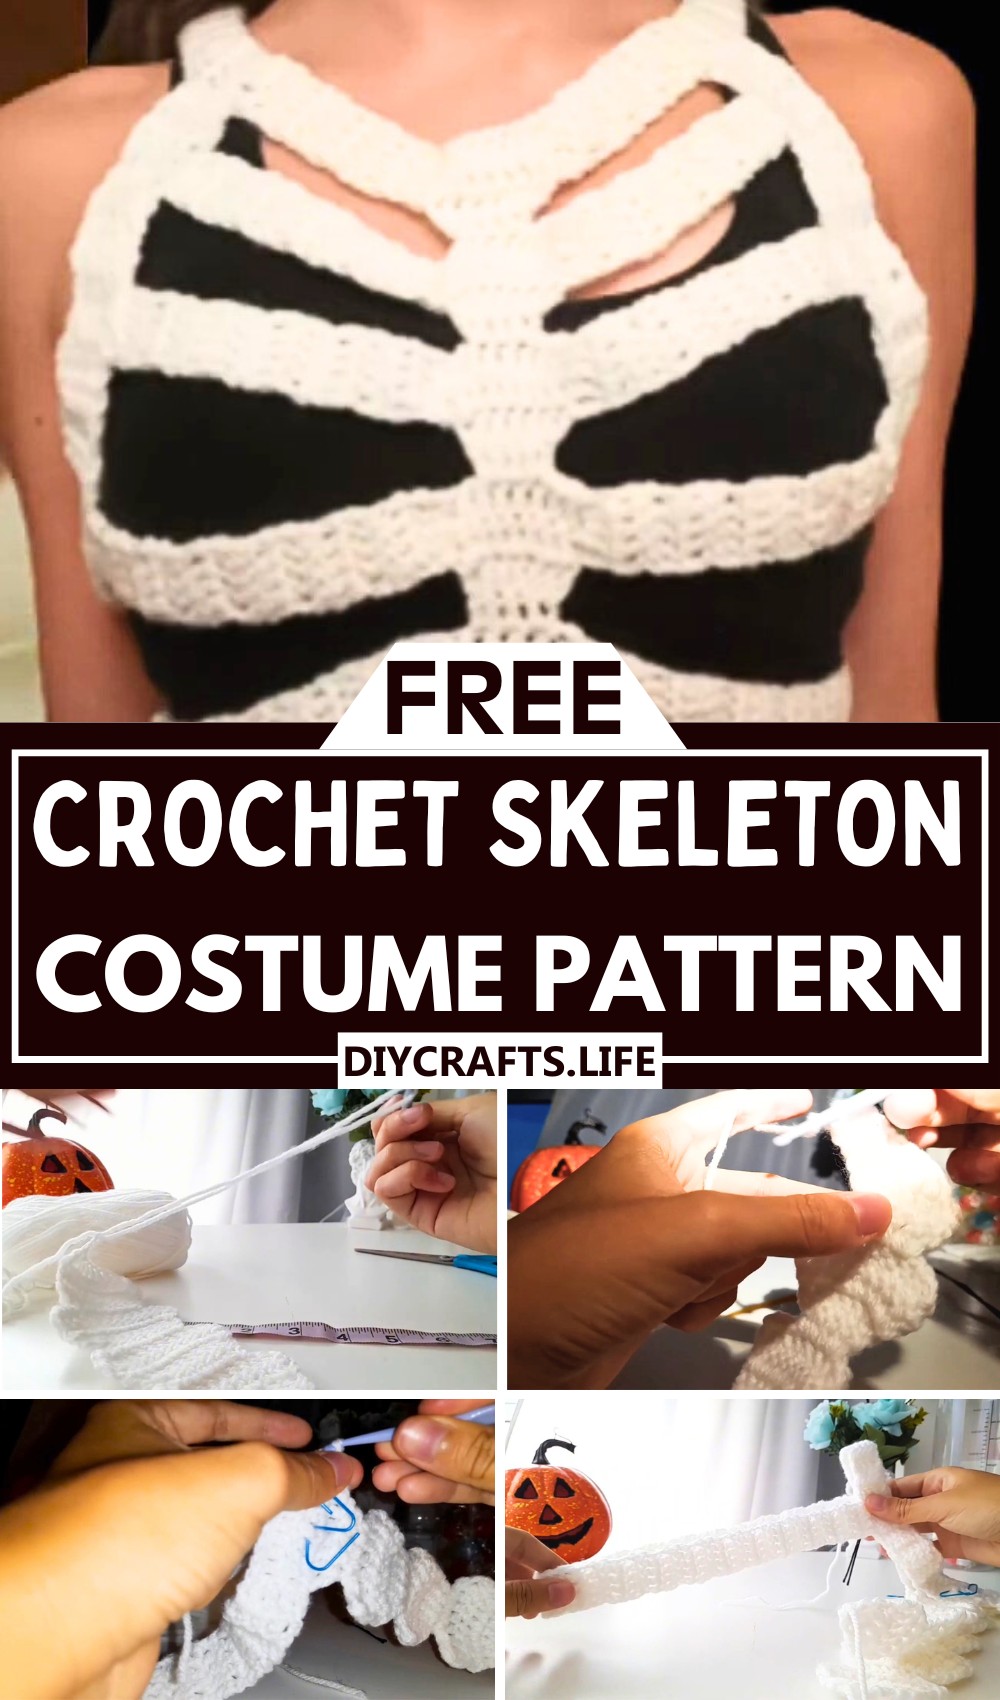
This glow-in-the-dark crochet skeleton costume transforms simple yarn into a wearable bone-inspired top that comes alive under UV lights and low-light settings. Featuring a corset-style structure, individually made bone details, and a luminous finish, it creates a distinctive Halloween look for festivals and costume events. The detailed construction and placement of each bone element give this piece a creative edge beyond ordinary crochet designs.
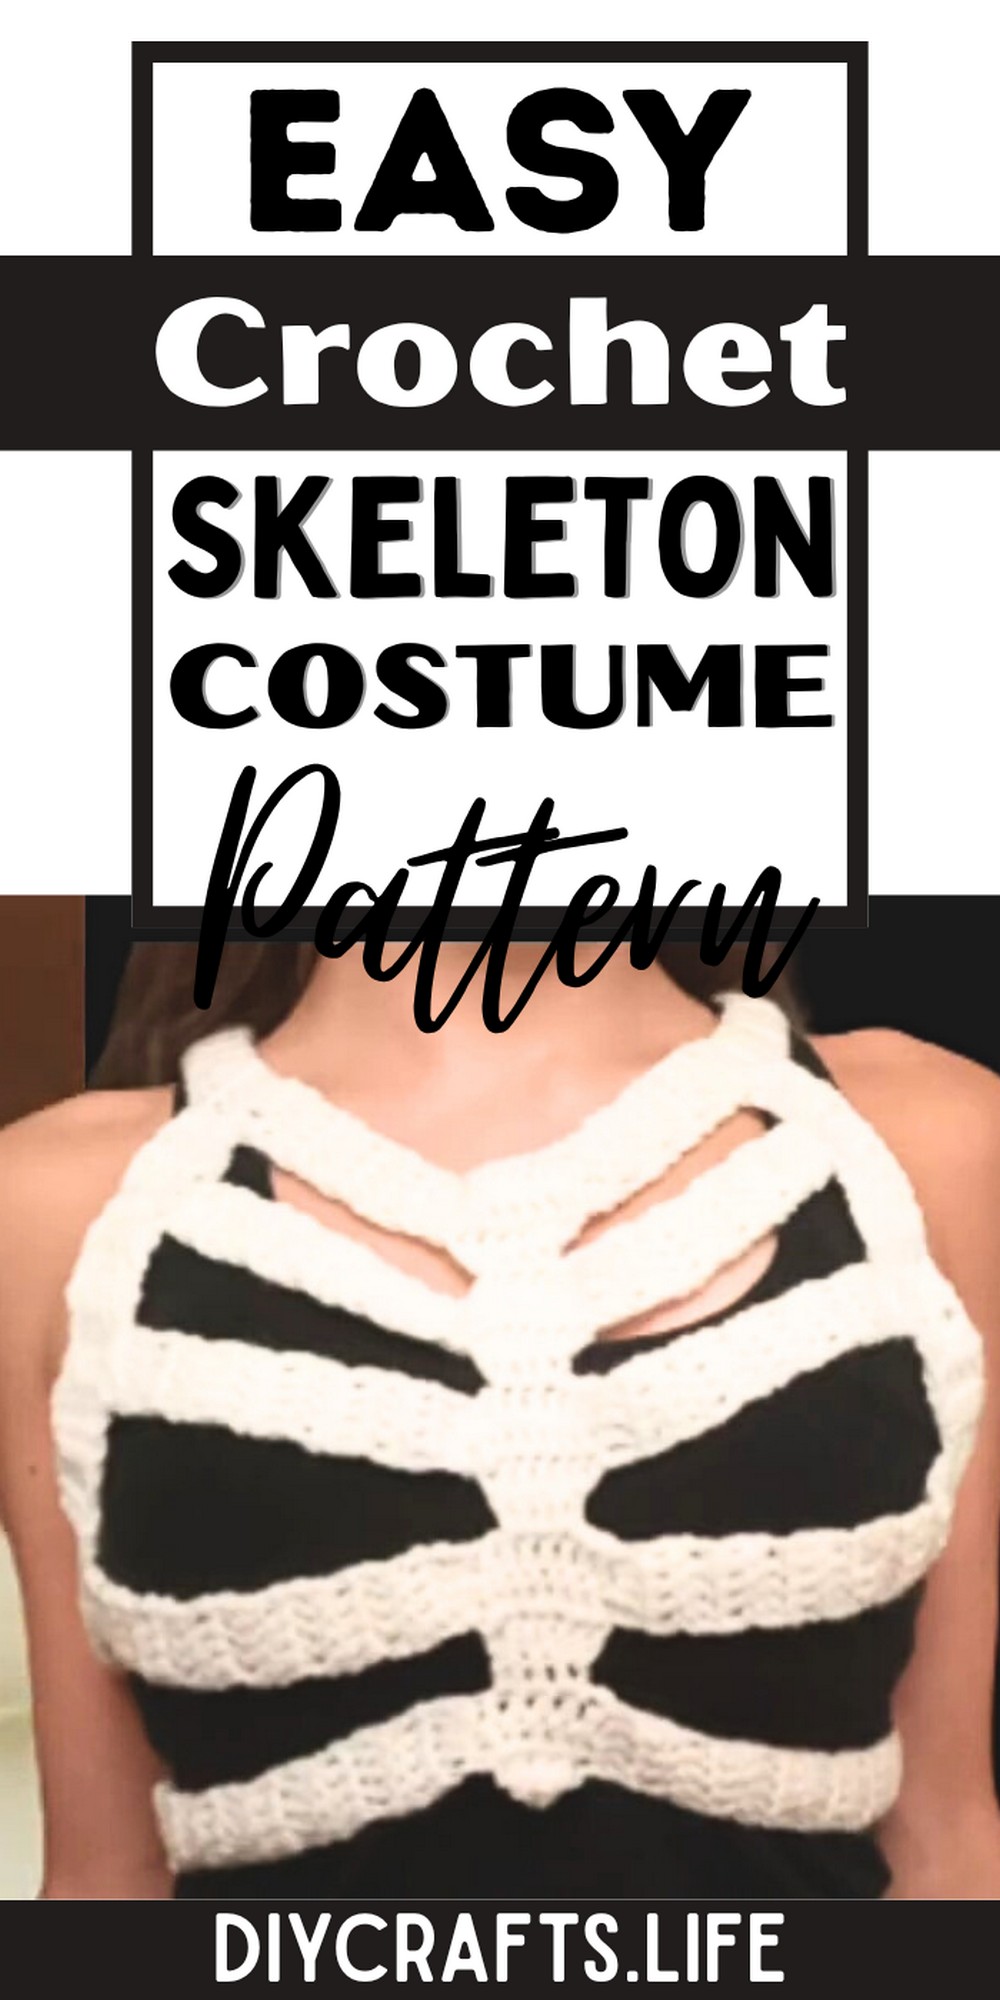
The crochet pattern uses beginner-friendly stitches with step-by-step instructions to shape the front and back panels. Then connects them with adjustable straps for a personalized fit. With measurements ranging from XS to XL, you can modify the sizing and bone placement to suit your style. Follow the tutorial to discover how each carefully placed crochet detail builds into a unique skeleton-inspired piece.
Materials & Tools Needed
To create the glow-in-the-dark crochet skeleton costume, gather the following materials:
- Yarn: Glow-in-the-dark yarn or any yarn that glows under UV light (white yarn is recommended).
- Crochet Hooks: Use the size appropriate for your chosen yarn (tutorial suggests flexibility in hook size).
- Yarn Needle: For sewing and weaving in ends.
- Bobby Pins or Stitch Markers: To mark stitches and ensure accuracy.
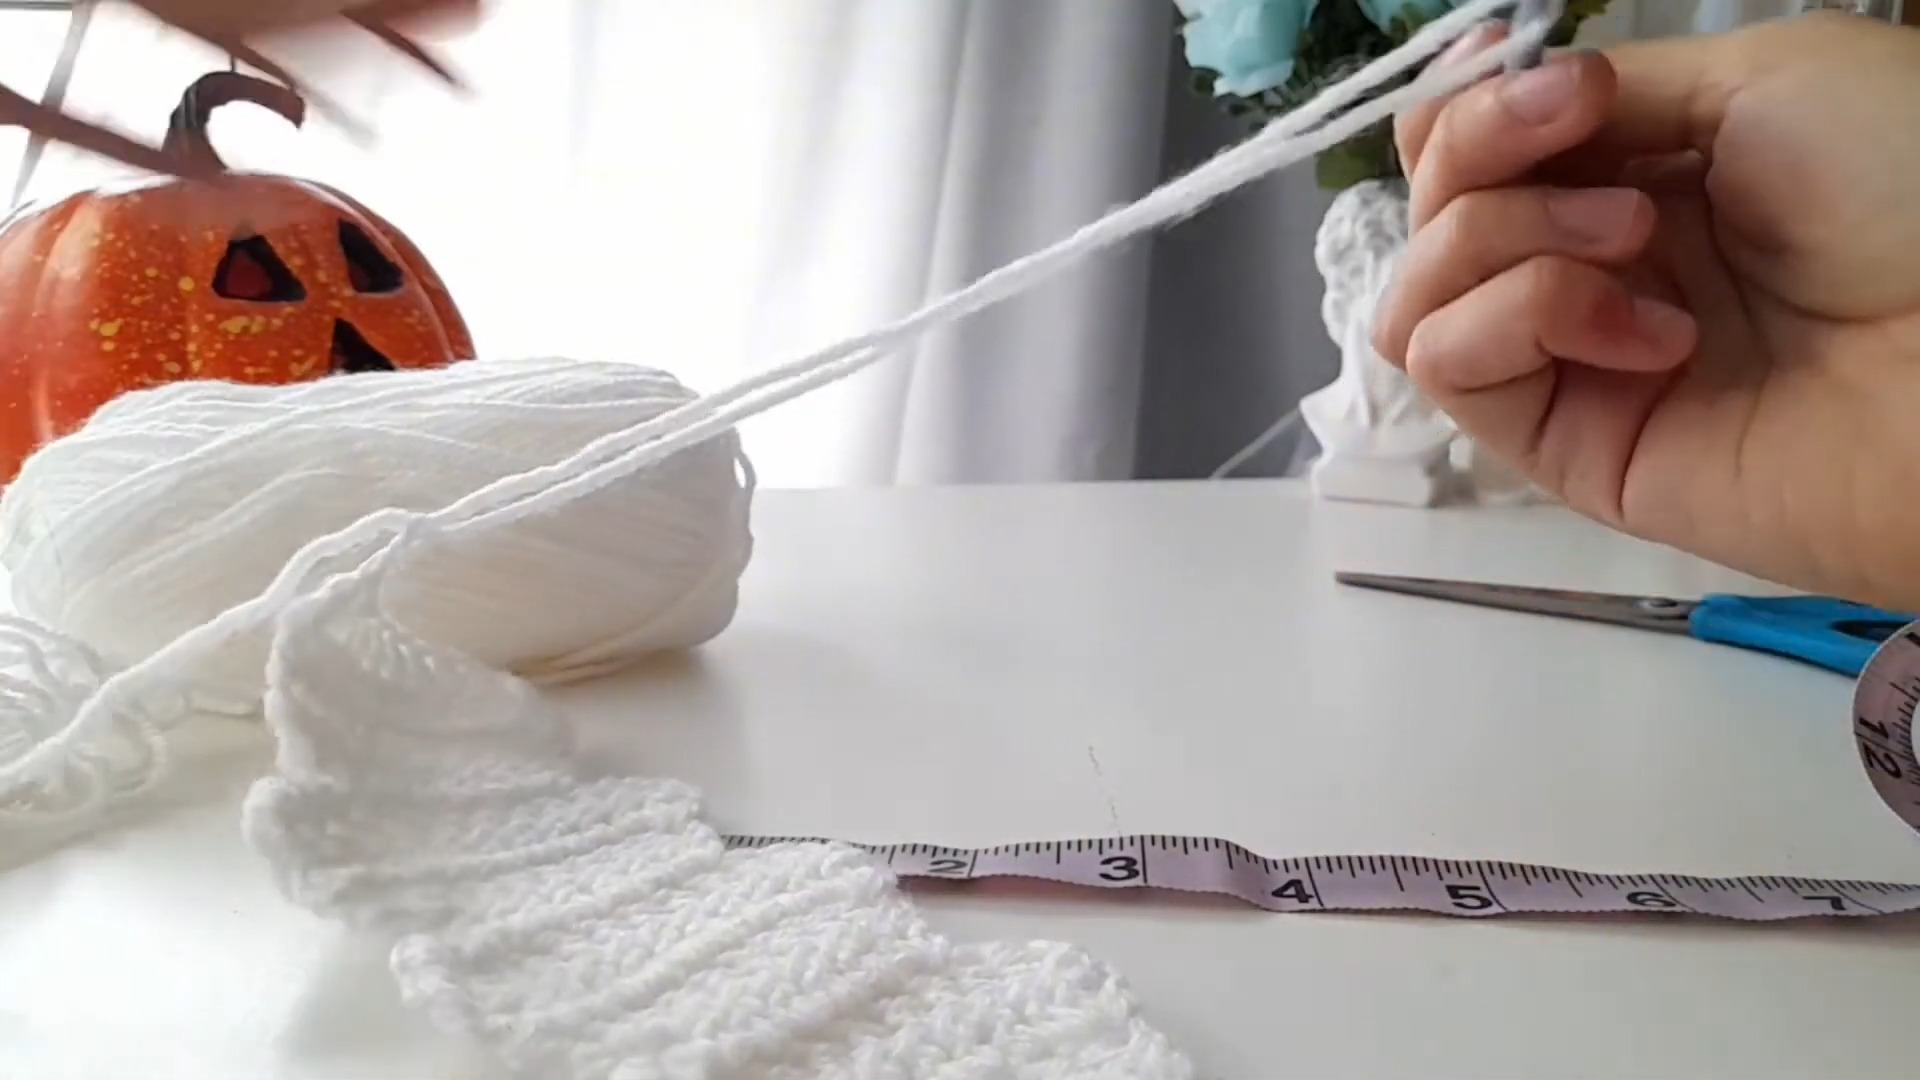
- Measuring Tape: For customization based on body size.
- Hot Glue Gun (Optional for additional finishing touches – mentioned in future video).
Finished Size & Customization Ideas
The finished size depends on body type and size. Below are general size guidelines for body measurements:
Backbone Size:
- Size S/M: 22 cm
- Size L: 25 cm
- Size XL: 28 cm
Shoulder Strap Size:
- Size S/M: 7 cm strap width, 49 cm strap length
- Size L: 8 cm strap width, 57 cm strap length
- Size XL: 9 cm strap width, 60 cm strap length
Note: Adjust the number of bones and strap lengths based on personal measurements for a snug fit.
Pattern Abbreviations & Terminology
Here are common crochet abbreviations and stitches used in this pattern:
- MR: Magic Ring
- ch: Chain
- dc: Double Crochet
- dc inc: Double Crochet Increase (two dc worked in the same stitch)
- sl st: Slip Stitch
- st(s): Stitch(es)
- ROW: Row or round of stitches (used interchangeably)
- Turn: Flip your work to crochet back across the previous row
Step-by-Step Detailed Crochet Instructions
Skeleton Backbone:
Each “bone” is constructed with four rounds and joined to one another. Follow these detailed steps:
1. Round 1:
- Create a Magic Ring (MR).
- Chain 2 (counts as the first dc).
- Crochet 4 dc, for a total of 5 dc inside the MR.
- Pull tight to close the MR.
- Result: 5 stitches.
2. Round 2:
- Chain 2 and turn your work (counts as the first dc again).
- dc inc in the first stitch (total of 2 dc in the same stitch).
- 1 dc in the second stitch.
- dc inc in the third stitch.
- 1 dc in the fourth stitch.
- dc inc in the fifth stitch.
- Result: 8 stitches.
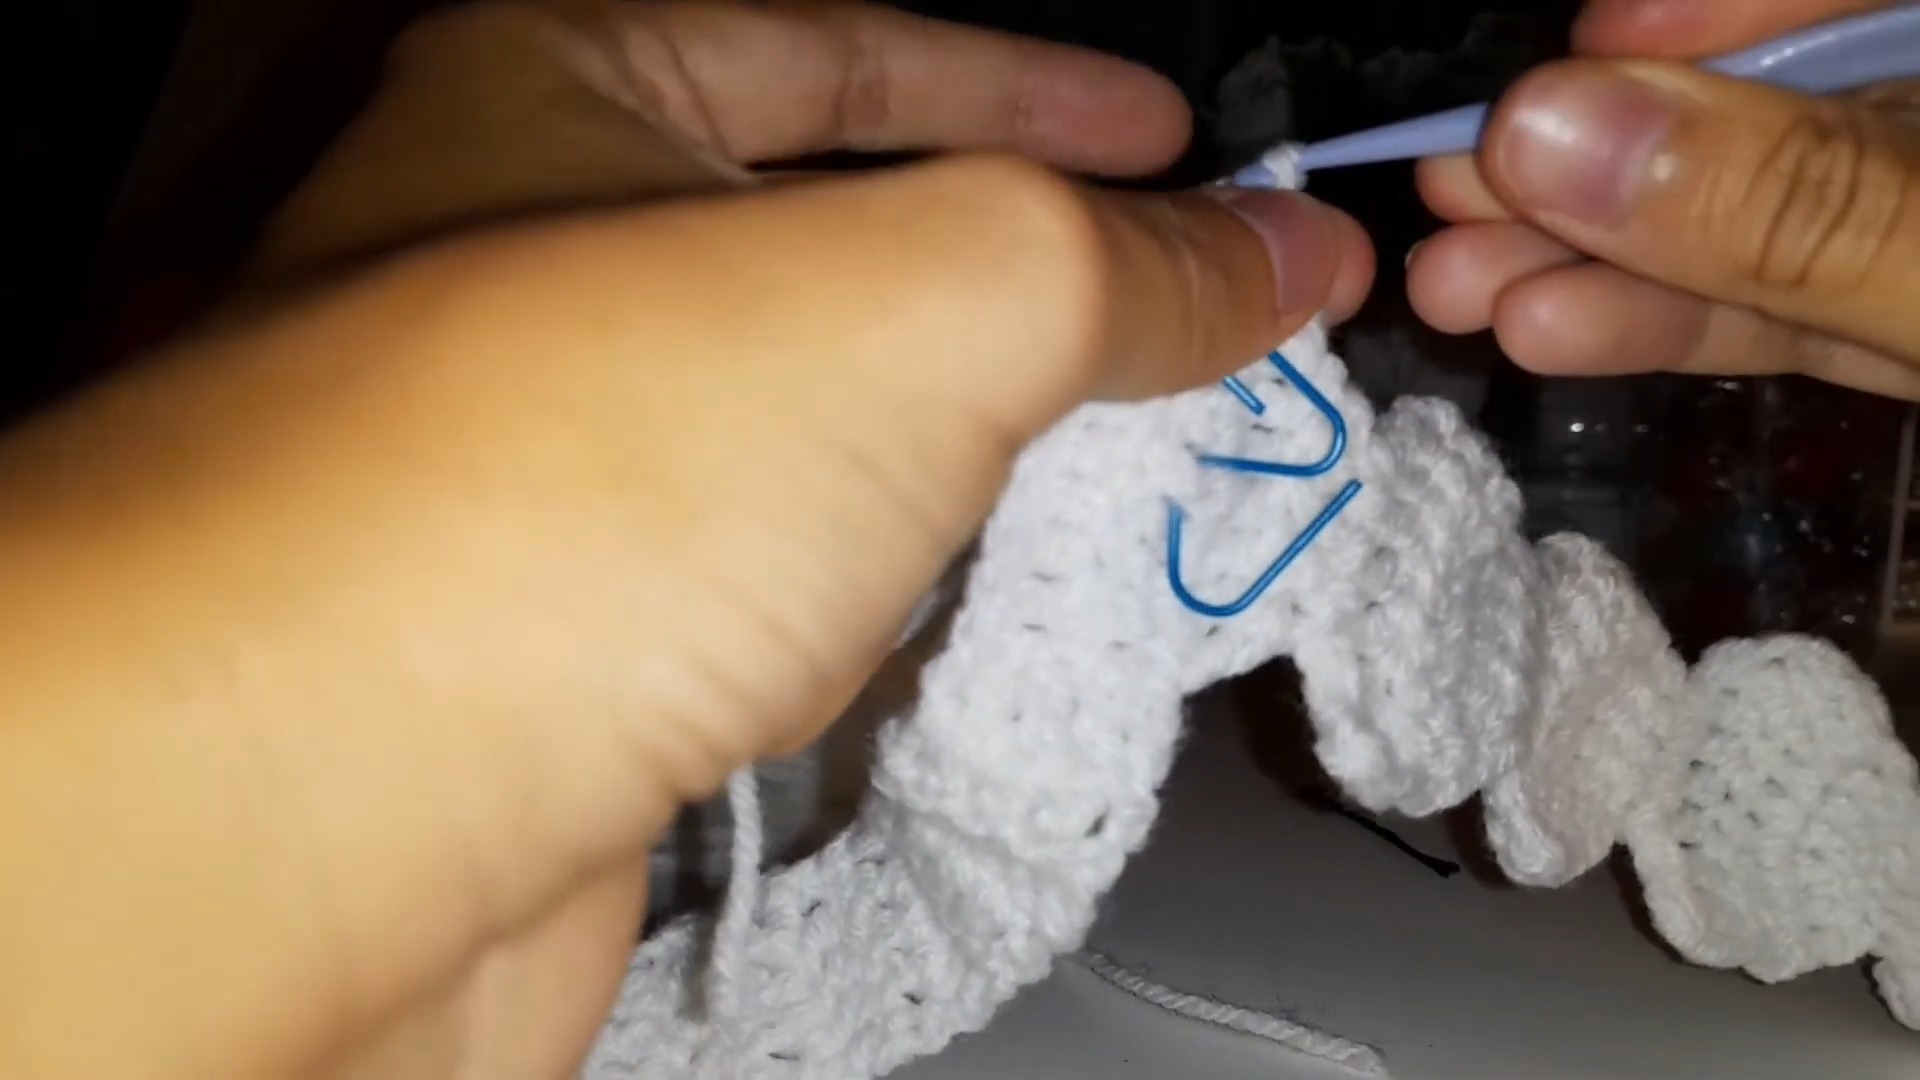
- Use a bobby pin or stitch marker to confirm stitch count.
3. Round 3:
- Chain 2 and turn your work (counts as the first dc).
- dc inc in the first stitch.
- 1 dc across each middle stitch.
- dc inc in the last stitch.
- Result: 10 stitches.
4. Round 4 (No Increases):
- Chain 1 (only when starting the last round of a bone) and turn your work.
- Skip the first stitch to avoid increases.
- Make 1 dc in each stitch across.
- Result: 10 stitches.
5. Bone Transition:
- Perform sl st in stitches 2, 3, and 4 of the last round to flatten the edge.
- Begin the next bone by following the same guidelines:
- First round: 8 stitches
- Second round: 10 stitches
- Third round: 12 stitches
- Fourth round: No increases.
- Repeat until the backbone measures the recommended length.
Front Bone:
The process of creating the front bones is similar but requires fewer stitches:
1. Round 1:
- Create a Magic Ring (MR).
- Chain 2, then crochet 3 dc inside the MR.
- Result: 3 stitches.
2. Round 2:
- Chain 2 and turn your work.
- dc inc in the first stitch.
- 1 dc in the second stitch.
- dc inc in the last stitch.
- Result: 5 stitches.
3. Round 3:
- Chain 2 and turn your work.
- dc inc in the first stitch.
- 1 dc across the middle stitches.
- dc inc in the last stitch.
- Result: 7 stitches.
4. Round 4 (No Increases):
- Chain 1 and turn your work.
- Skip the first stitch to avoid increases.
- Make 1 dc in each stitch across.
- Result: 7 stitches.
5. Bone Transition:
- Perform sl st in stitches 2, 3, and 4.
- Begin the next fragment as described above, repeating until the front section measures appropriately.
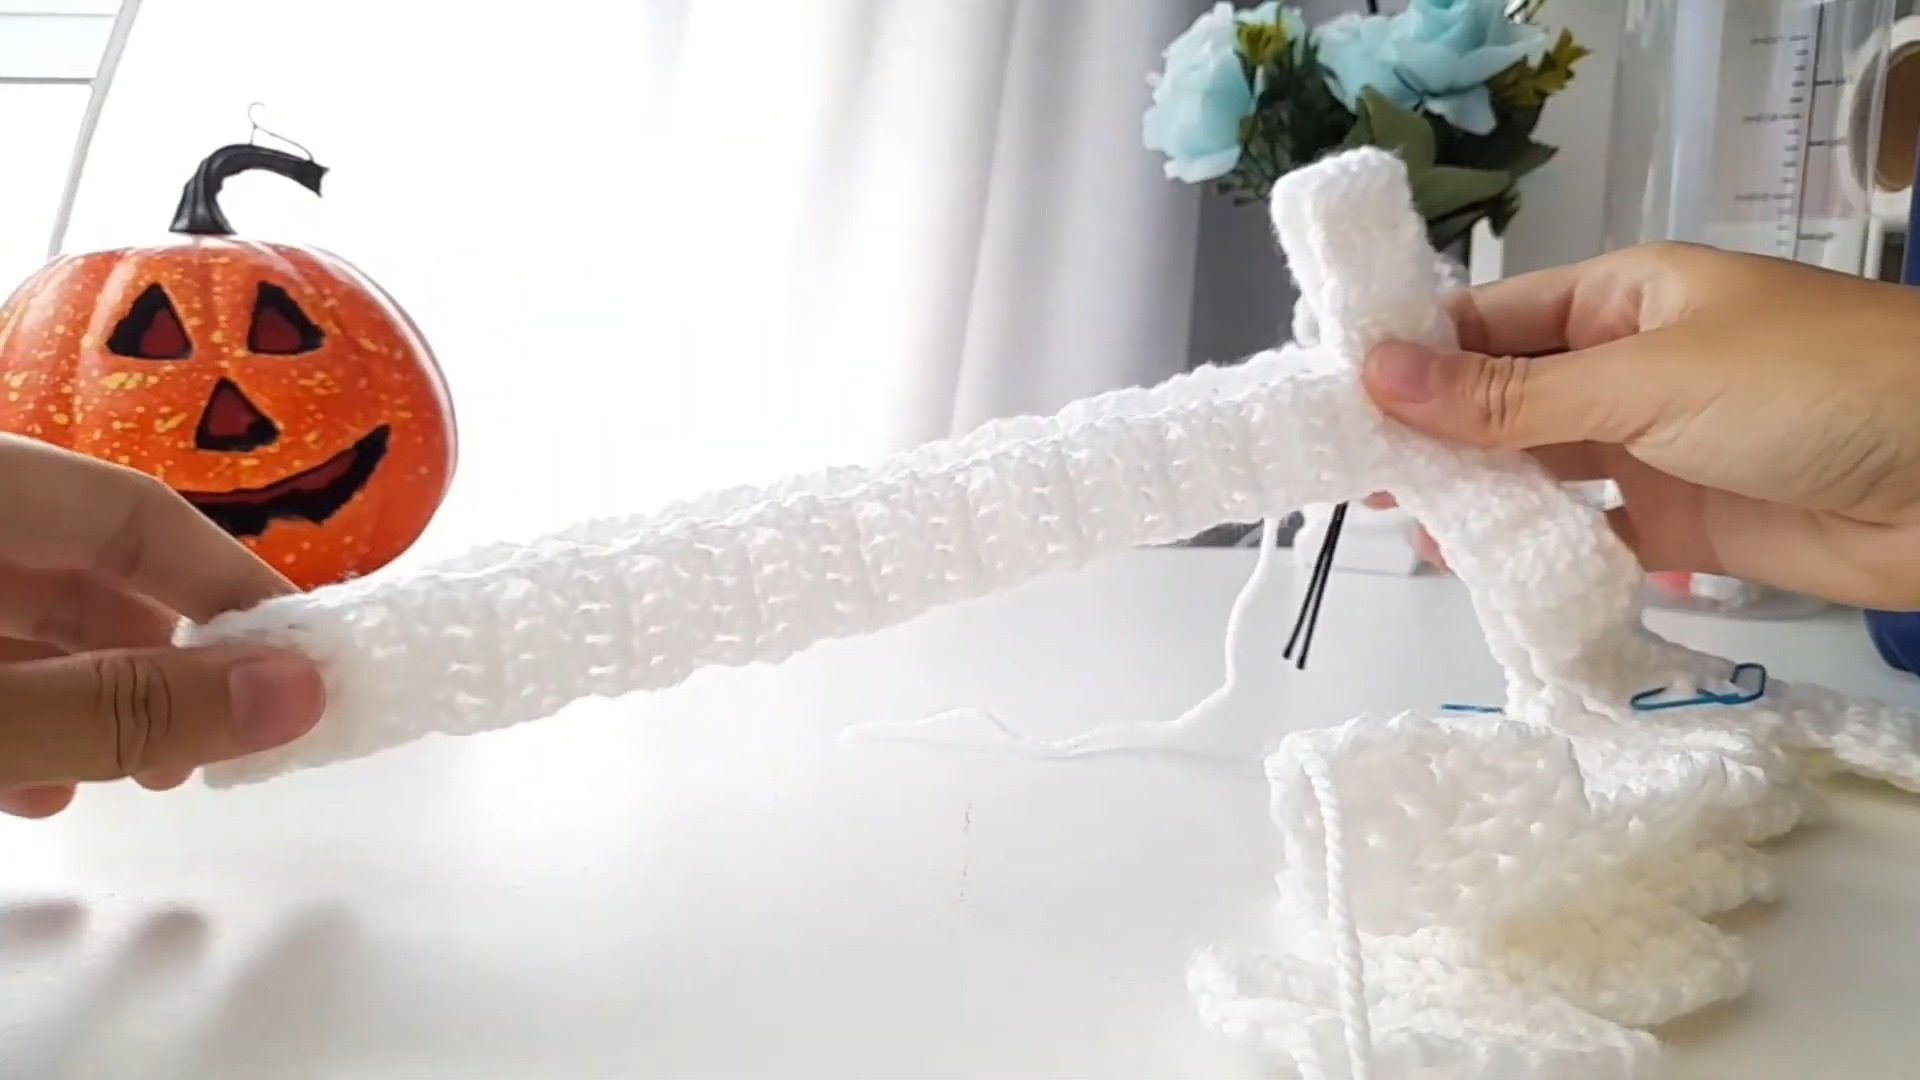
Joining the Back and Front Bones:
- Use yarn and a yarn needle for sewing.
- Leave sufficient yarn tails to secure each seam firmly.
- Align each front bone with corresponding back bones to create a symmetrical design.
- Ensure the "right side" of the crochet pieces faces outward.
Shoulder Straps:
- For straps, crochet rows of 5 dc.
- Recommended strap lengths: Refer to size chart above (custom adjustments encouraged).
Customization Tips:
- Wear the skeleton costume as you build the straps and join sections to ensure a snug fit.
- Adjust bone placements based on body type and preferences.
Conclusion
This glow-in-the-dark skeleton crochet pattern is perfect for Halloween or cosplay. Follow the step-by-step guide, refer to customization measurements for your size, and visit the tutorial video for visual guidance.