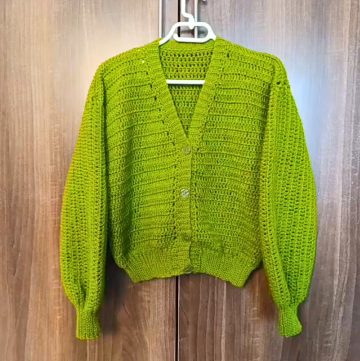
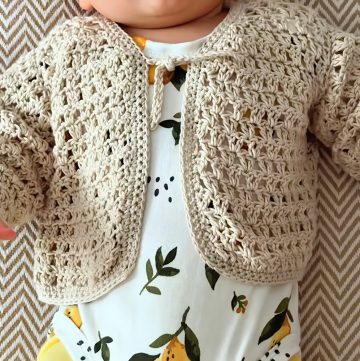
Step into a world where style meets handmade charm. This crochet top-down cardigan is more than just a design; it’s a creative journey where each loop and stitch brings comfort and elegance into your wardrobe. Crafted with care, this cardigan bridges simplicity and sophistication, making it the ultimate versatile piece for any occasion.

Crochet Top Down Cardigan Pattern
Designed to suit all styles, this top-down cardigan stands out with its seamless construction and beautiful drape. The functional yet stylish design allows you to customize length and fit effortlessly. Whether you prefer a relaxed and cozy look or something more polished, this cardigan pattern captures the perfect balance of individuality and fashion. Let your yarn choice and creativity bring this timeless piece to life!
Note: This cardigan is worked from the back down, with the back, fronts, body, and sleeves constructed in portions. Make adjustments to match your measurements where needed.
Credit Veroknitcrochet
Materials & Tools Needed
- Yarn: Super fine yarn (size 1) — 100% Lyocell or similar, approx. 500 g (5 skeins of 100 g each; 330 m per skein).
- Hook: 3 mm crochet hook.
- Other Tools:
- Scissors
- Measuring tape
- Tapestry needle
- Stitch markers (2)
- Closure accessory: clasp, sewing needle, and thread.
Pattern Abbreviations & Terminology
- Pattern uses US Terms:
- ch = chain
- dc = double crochet
- sl st = slip stitch
- picot = chain 3, sl st into the previous double crochet
- fan = 3 dc, ch 3, 3 dc in same space
- st = stitch
- rep = repeat

Step-by-Step Instructions
1. Back Panel
- Chain Foundation for the Back:
- Measure the width of your shoulders (e.g., 43 cm).
- Chain a multiple of 8 + 4 to match this measurement. For example:
- 15 × 8 = 120 + 4 = 124 chains.
- Make the chain slightly longer than your shoulder width.
- Row 1:
- Skip the first 3 ch (counts as 1 dc).
- In the 4th ch: work 3 dc.
- Make a picot (ch 3, sl st into the last dc).
- Skip 7 ch. In the next ch, create a fan: [3 dc, ch 3, 3 dc].
- Add a picot, then repeat [skip 7 ch, fan, picot] across.
- After the last skipped 7 ch, work 4 dc in the final ch.
- Row 2:
- Turn your work. Ch 3 (counts as 1 dc).
- In the first st, work 3 dc. Add a picot.
- In each ch-3 space of fans from the previous row, work a fan.
- End the row with 4 dc in the top of the last ch-3.
- Repeat Row 2:
- Continue until you reach the required armhole depth (e.g., 21 cm).

2. Front Panels
- Lay the back panel with the right side (starting chain at the right-hand side) facing up.
- Use stitch markers to count chain spaces for shoulders:
- Count 5 chain spaces in from each edge of the back. Mark these spaces for your two shoulders.
- Right Front Panel:
- Attach yarn at the right-side corner of the starting chain.
- Follow Row 2’s instructions, stopping at the last chain space before the shoulder marker.
- Finish the row with 4 dc where the stitch marker was placed.
- Shape Right Front Neckline:
- Start increases on one side (neckline):
- For increases, work rows 4 to 11, adding chain spaces to create a fan-like pattern along the neckline.
- Full details: Refer to the raw steps transcription under “Right Front – Increasing Rows.”
- After completing increases, continue straight until the row count matches that of the back.
- Start increases on one side (neckline):
- Left Front Panel:
- Attach yarn at the left corner on the wrong side of the back panel.
- Follow the same instructions as the right front, shaping and increasing similarly.

3. Join Back and Front Panels
- Lay the back and front panels flat, right side up.
- Join the right front and back panels:
- Yarn over, insert the hook into the last st of the front panel and the first st of the back panel, and complete 1 dc to join.
- Add 3 more dc in the first stitch of the back (forms a fan).
- Repeat the process for the left panel, joining it to the back. Both armholes should now be formed.
- Work evenly across the fronts and back, joining under the armholes and following the stitch pattern.
- Continue until you reach your desired length for the cardigan body.

4. Sleeves
- Right Sleeve:
- Attach the yarn at the underarm (center fan).
- Work a fan (3 dc, ch 3, 3 dc) around the armhole, spacing them as evenly as possible to avoid making the sleeves too large.
- Use the method of counting chain spaces equivalent to skipping 7 chains for consistent spacing.
- Subsequent Rows for the Sleeve:
- Follow Row 2 of the pattern:
- In each ch-3 space, make a fan. Continue around, completing the sleeves in rounds.
- Optionally, taper sleeve width by reducing fans slightly as needed.
- Follow Row 2 of the pattern:
- Work until the sleeve reaches your desired length (e.g., 43 cm for the tutorial). Cut and fasten off the yarn.
- Left Sleeve: Repeat the same process as the right sleeve.

5. Finishing
- Use a tapestry needle to weave in all loose ends.
- Sew a clasp (or closure of your choice) to the neckline region using a sewing needle and thread.
Final Notes
- This cardigan uses a stitch repeat of 1-row repeat (Row 2) for most of the project, making it beginner-friendly.
- Adjust measurements, sleeve lengths, or body length according to preferences.