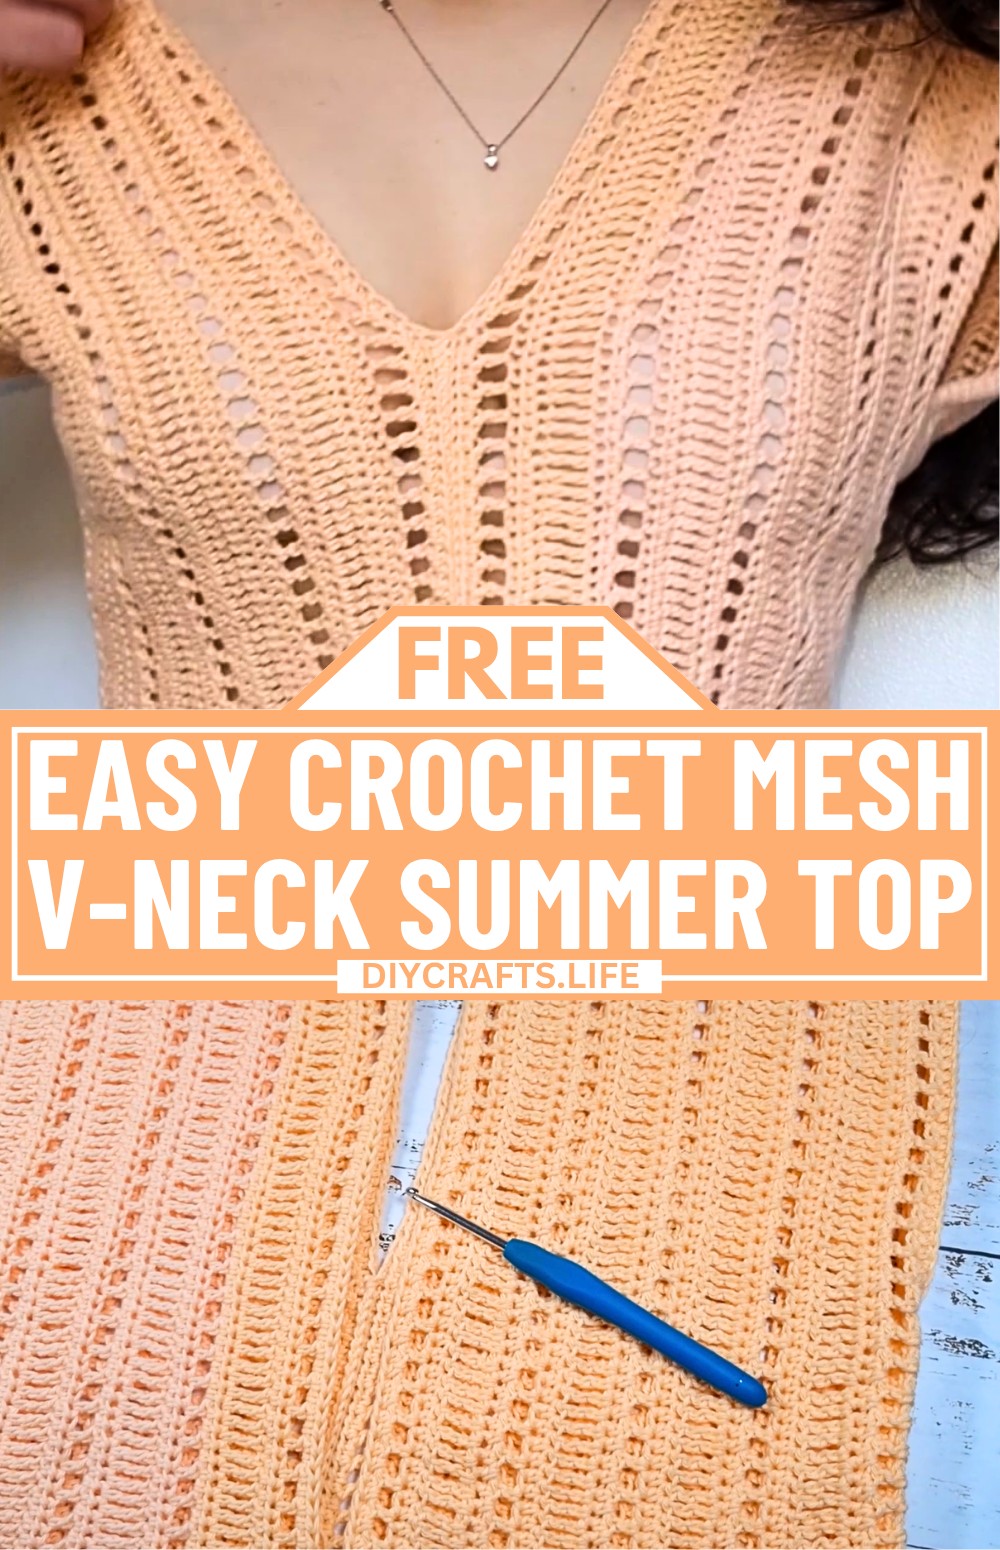
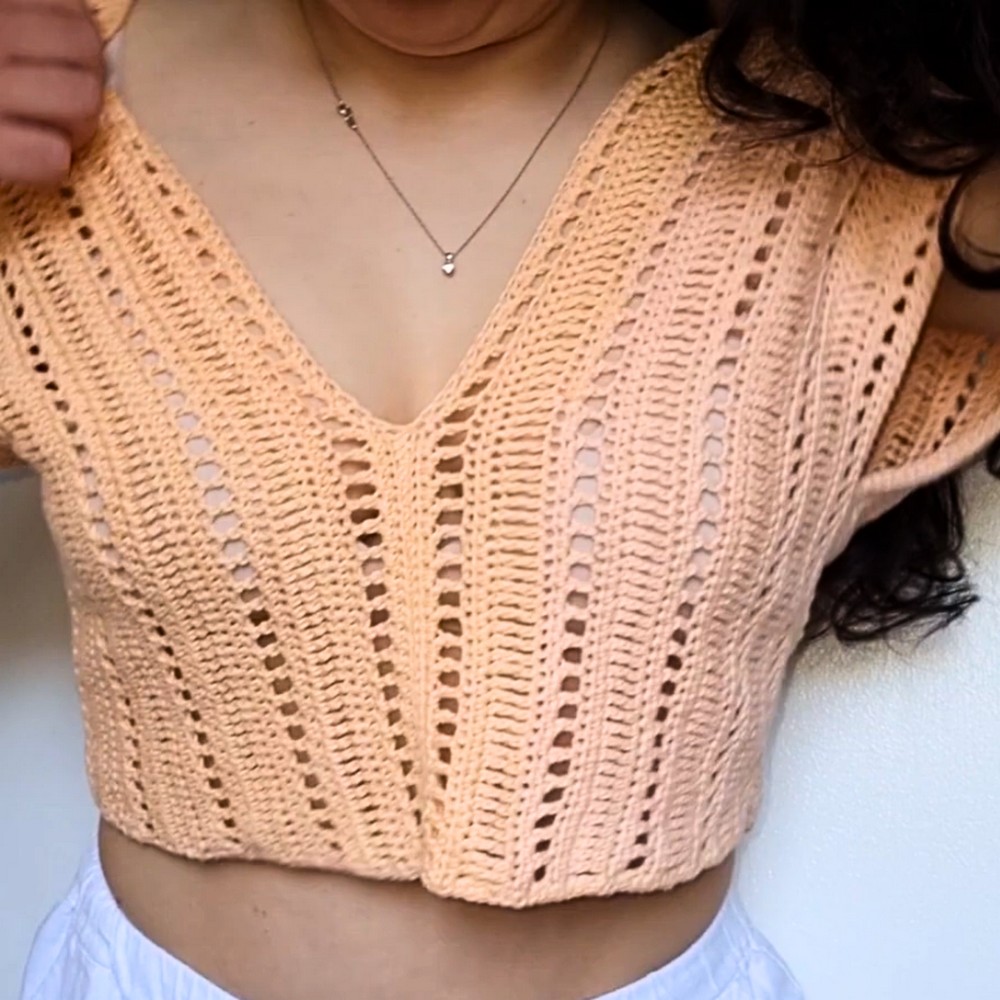
This delicate and breezy V-neck handmade crochet top is perfect for warm summer days. Made with lightweight cotton yarn in a loose mesh crochet design, it feels wonderfully airy and keeps you cool while looking effortlessly stylish. Whether paired with shorts for a casual day out or layered over a swimsuit, this crochet top is as versatile as it is beautiful. What makes this top even more appealing is that its elegant look comes from a surprisingly simple construction.
Crochet Mesh V-Neck Top Pattern

The crochet V-neck handmade top pattern is easy to follow and suitable for crocheters of all skill levels. It is made using two identical rectangular panels that are stitched together to form the front, back, and sides. The loose wavy stitch crochet pattern adds texture and charm, while the customizable size length and fit allow you to create a handmade piece that feels uniquely yours. A neat single crochet border provides the perfect finishing touch, giving the handmade top a clean and polished look that is ready to wear and enjoy.
Credit Felicia Bloom
Materials & Tools Needed
- Yarn: 100% cotton yarn (Fliacia uses rainbow-colored yarn).
- Feel free to choose the color that suits your taste.
- Hook: 4 mm crochet hook.
- Measuring Tape: To measure the desired length and width of the top.
- Yarn Needle: For weaving in the ends.
- Scissors
Finished Size & Customization Ideas
- Finished Size: The top consists of two rectangular panels that cover from the front to the back.
- The tutorial encourages customizing the fit based on your measurements.
- Front to Back Measurement: Measure from the front of your neck to the back of your shoulder.
- This will determine the length of the starting chain.
- Width: The width of your rectangle depends on how wide you'd like the top to sit, covering the shoulders.
- Customization Ideas:
- Adjust the armhole size by connecting the sides higher or lower.
- Use different color yarns for a striped or gradient effect.
- Add decorative stitch borders to customize further.
Pattern Abbreviations & Terminology
- Ch: Chain
- HDC: Half Double Crochet
- DC: Double Crochet
- TC: Treble Crochet
- Sl St: Slip Stitch
- SC: Single Crochet
- Skip: Skip the indicated stitch
- [ ]: Instructions inside brackets are repeated
Terminology: This pattern uses US Crochet Terminology.
Step-By-Step Detailed Crochet Instructions
The Pattern is made from 2 identical rectangular panels, worked in a simple mesh stitch pattern. Once the panels are complete, they are seamed together at the front, back, and sides.
PART 1: Creating the Panels
- Take Measurements: Measure the length you want the top to cover from the front of your neckline to the back.
- This will define the starting chain length. Ensure your starting chain is an odd number.
- Starting Chain:
- For demonstration, Fliacia uses 21 chains. (You will use a longer chain based on your measurements.)
- Make sure the chain length is what you measured.
Example: Chain (odd number of stitches).
- Row 1:
- Start in the 3rd chain from the hook. Work an HDC into that stitch.
- Continue working HDC across the entire row.
- Turn your work and create a turning chain (Ch 1) at the end of the row.Example Stitch Count: Number of chains - 2.
- Row 2 (Mesh Stitch Pattern):
- Begin with a DC in the first stitch.
- Ch 1, skip the next stitch, and DC into the next stitch.
- Repeat the pattern of [Ch 1, skip 1, DC] across the row.
- Turn your work and create a turning chain (Ch 1).
- Repeat Rows: Continue alternating Row 1 (HDC) and Row 2 (mesh stitch) until you’ve achieved the desired width of the rectangle.
- Fliacia repeated this sequence for her project to match the width of her shoulders.
- For reference: You might require 3–5 repetitions depending on your preferred width.
- Mark the Ending: Once complete, fasten off the yarn and leave a long tail for seaming.
- Make a Second Panel: Repeat the entire process to create an identical second panel.

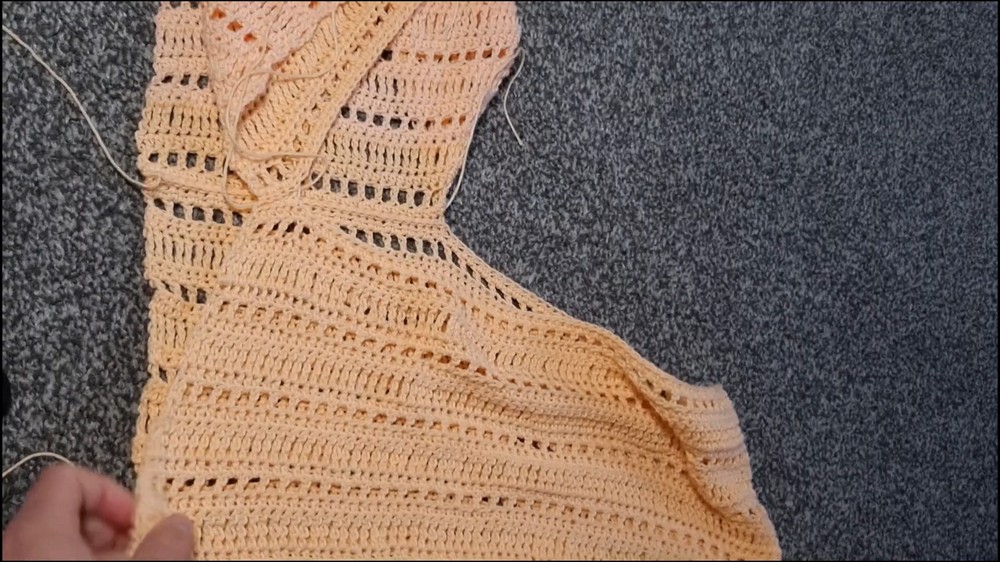
PART 2: Seaming the Panels Together
Once both panels are completed, it’s time to seam the panels to shape the top.
- Align Panels: Lay the panels side by side.
- Decide which section will form the front and which will form the back.
- Connect the Front and Back (V-neck opening):
- Use stitch markers to mark a small section near the top of the panels (for the front V-neck opening).
- Seam the panels together slightly in this section, leaving the rest open.
- Use the front loop of one panel and the back loop of the other panel for a secure and seamless connection.
- Seam the Back Section:
- Similarly, use markers to join the back panels.
- Seam a larger section than the front to make the top more secure.
- Connect the Sides (Armholes):
- Fold the top so the panels overlap to form the armholes.
- Seam the sides together from the bottom edge upwards, leaving enough of an opening for the arms.
- Use the same front loop and back loop stitching method.
- Make sure to leave a symmetrical space on both sides.
PART 3: Adding the Finishing Touches
To give the top a polished look, add a round of single crochets around the edges.
- Start Anywhere on the Edge:
- Begin with the right side facing up.
- Attach the yarn at any edge and secure it with a simple knot.
- Work a Round of SC:
- Work SC evenly along the edges, the neckline, and the armholes.
- This creates a neat and professional finish to the top.
- Fasten Off and Weave in Ends: Use the yarn needle to weave in any loose ends.

Final Thoughts
Congratulations! Your mesh-style V-neck summer top is now complete.
You can customize the design with a pop of color, stripes, or embellishments.