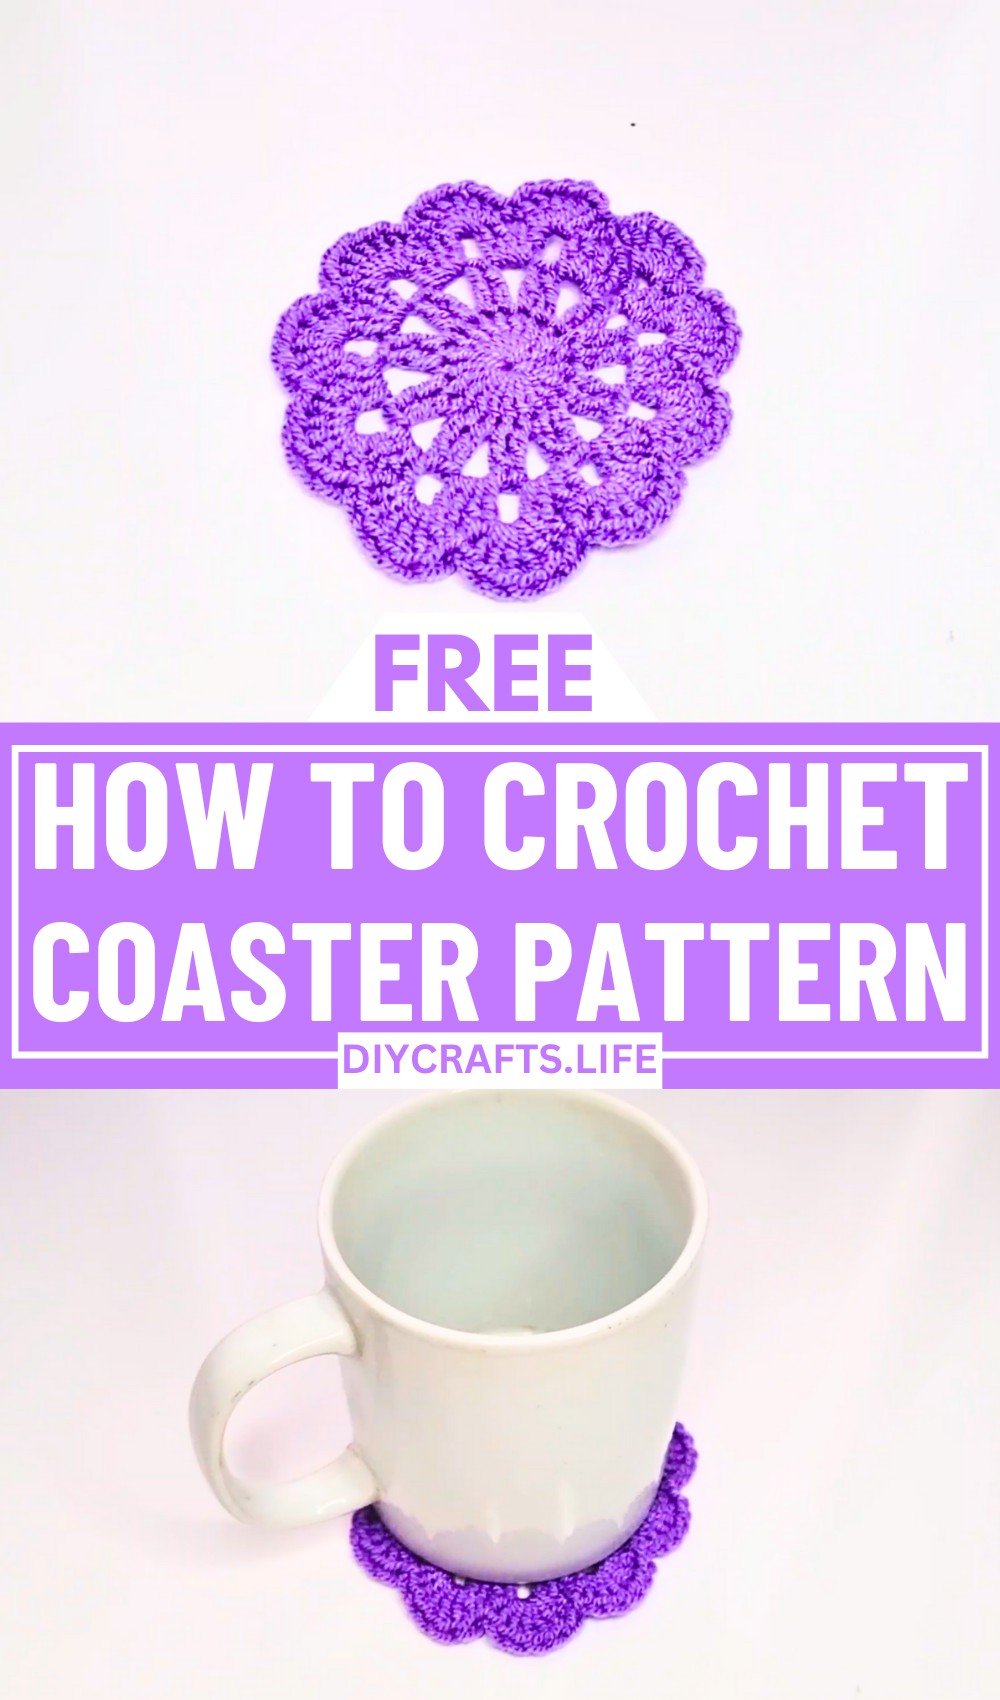
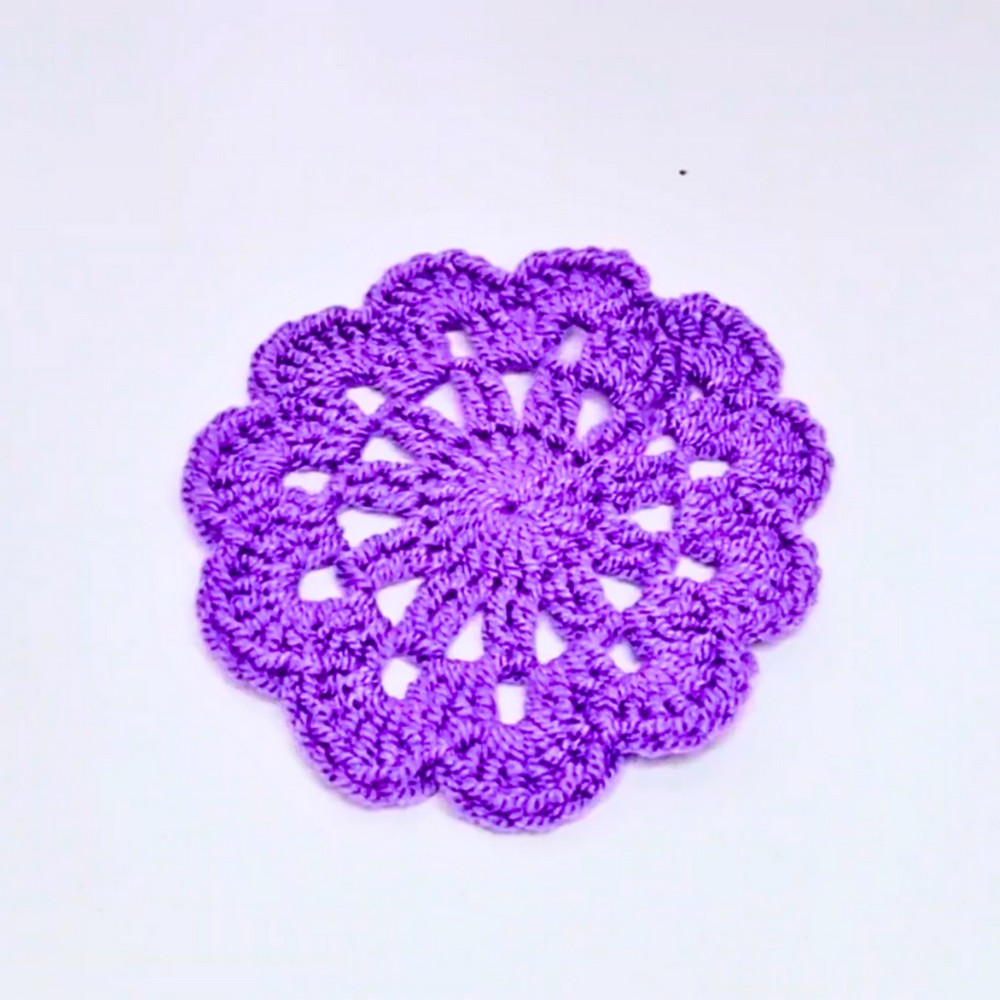
Bring beauty and elegance to your table with this stunning crochet coaster design. Whether hosting a gathering or enjoying a quiet coffee moment, these coasters add a handmade charm that’s both practical and decorative. Perfectly sized and carefully crafted, they give your space a homely yet stylish touch, making every placement of a cup or glass feel extra special.

Stylish Crochet Coaster Pattern
This crochet coaster stands out with its textured patterns and delicate details, turning a simple household item into a piece of art. Choose fresh, bold colors for a modern look or subtle tones for a classic style—the possibilities are endless. The symmetry and thoughtful design make it ideal for any occasion, elevating your decor effortlessly. Create sets that reflect your personal taste while enjoying the balance of function, creativity, and beauty in every stitch.
Credit Furry Yarns
Materials & Tools Needed
- Yarn
- Any lightweight cotton yarn or DK-weight yarn is ideal for coasters as cotton is absorbent and sturdy.
- You can use any color(s) of your choice to match your decor or customize the look (e.g., solids, variegated, or even striped yarn patterns).
- Hook
- 3 mm crochet hook (as mentioned in the video). The size is perfect for producing a tightly-knit fabric suitable for coasters.
- Other Tools
- Scissors (to cut yarn neatly).
- Tapestry needle (for weaving in ends).
Finished Size & Customization Ideas
- Approximate Finished Size: A single coaster made with a 3 mm hook and lightweight yarn is about 4–5 inches in diameter.
- Customization Ideas:
- Size: Use a larger crochet hook (e.g., 4 mm) and thicker yarn to make bigger coasters or placemats. For smaller coasters, use sock-weight yarn and a 2.5 mm hook.
- Colors: Use multiple yarn colors to add stripes, sections, or creative combinations to match seasonal or home decor.
- Texture: Change the stitch pattern slightly (by adding puff stitches or clusters) for a more unique design.
- Edges: Add a frilled or picot edge for a decorative touch.
Pattern Abbreviations & Terminology
(US Terminology used)
- MR = Magic ring
- ch = chain
- dc = double crochet
- sl st = slip stitch
- st(s) = stitch(es)
- YO = yarn over
Step-by-Step Detailed Crochet Instructions
Round 1: Start the Magic Ring
- Create a Magic Ring (MR) by wrapping the yarn around your fingers. Pull the working yarn through the loop with your hook.
- ch 2 (counts as the first dc).
- Make 20 dc inside the magic ring.
- Pull the tail tightly to close the ring.
- Join the round with a sl st into the top of the starting chain-2.
- Stitch Count for Round 1: 20 dc
Round 2: Adding Spaced Stitches
- ch 3 (counts as a dc).
- Make 1 dc into the same stitch.
- ch 2, YO, and make a dc in the next stitch.
- In the following stitch, make 1 dc. Then ch 2.
- Repeat this pattern (1 dc in each of the next 2 stitches, followed by ch 2) all the way around.
- At the end, join with a sl st into the top of the starting chain-3.
- Stitch Count for Round 2: 20 dc, 10 chain spaces
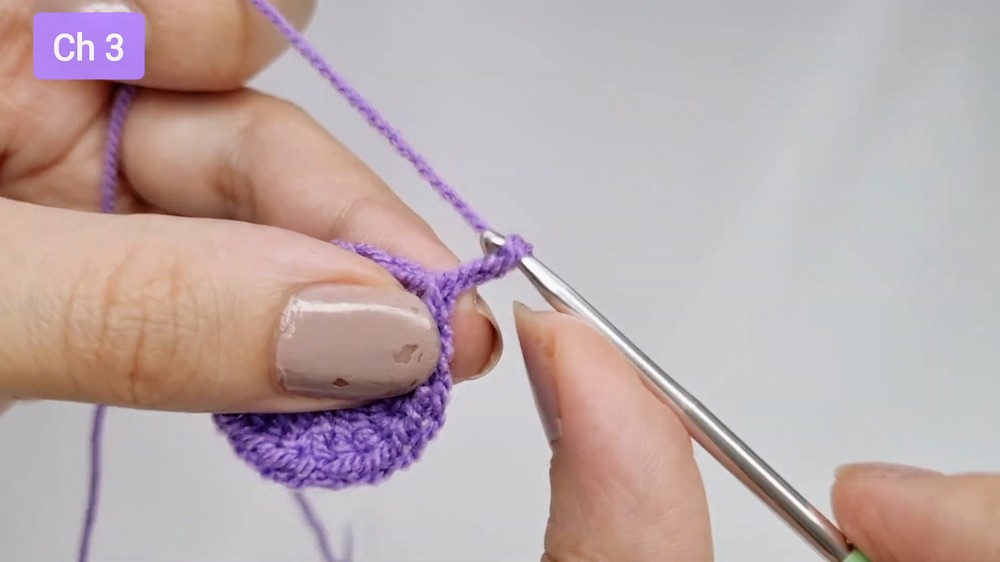
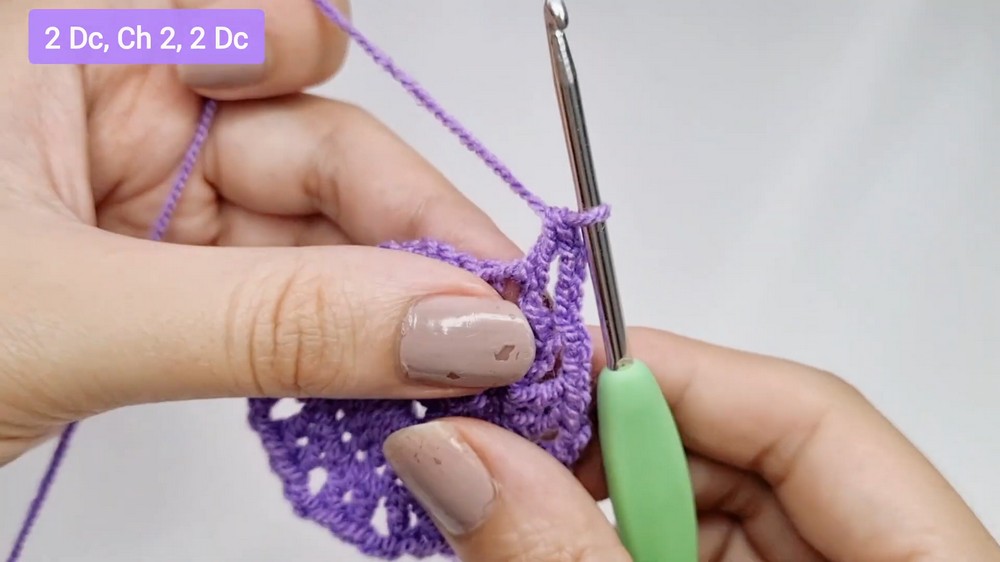
Round 3: Expanding the Coaster
- ch 3 (counts as a dc).
- Make 1 dc in the same stitch.
- ch 2, then into the next chain space (from Round 2) make:
- 2 dc, ch 2, and another 2 dc (all in the same chain space).
- Repeat this pattern (2 dc, ch 2, 2 dc) in every chain space around.
- At the end of the round, make 1 dc in the final stitch, then join with a sl st into the top of the starting ch-3.
- Stitch Count for Round 3: 40 dc (8 in each chain space), 10 chain spaces
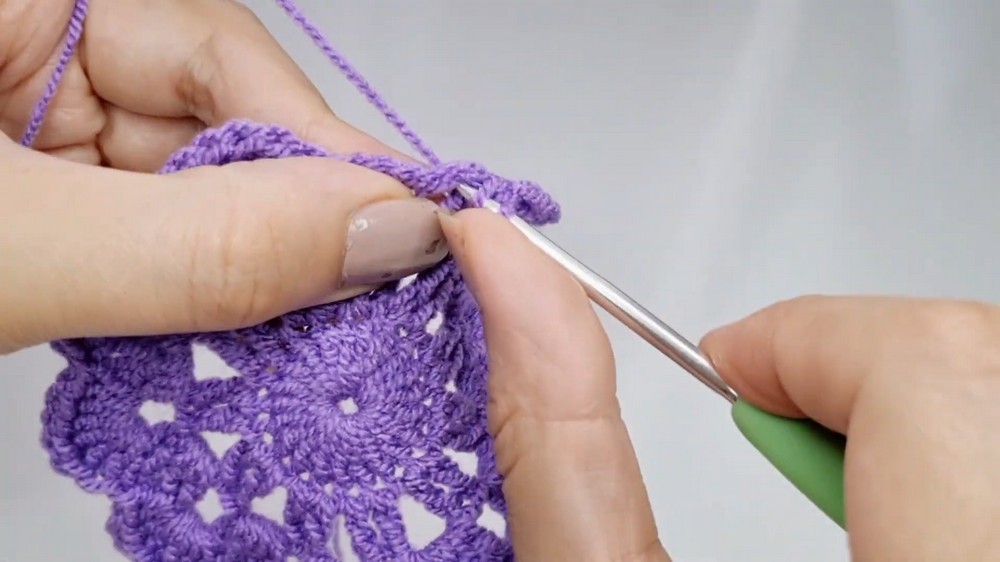
Round 4: Decorative Border
- ch 3 (counts as a dc).
- Skip to the first chain space. In each chain space, work:
- 6 dc into the chain space.
- Then make a sl st into the next chain space to secure the curved wave effect.
- Repeat this pattern (6 dc in one chain space, sl st in the next) around the entire circle.
- In the final chain space, make only 5 dc, then join with a sl st into the starting chain-3.
Finishing Steps
- Fasten off:
- Cut your yarn and pull the tail through the final stitch to secure.
- Weave in the ends:
- Use a tapestry needle to sew in the tail ends neatly on the back of your coaster.
- Optional Blocking:
- Lightly steam block or wet block your coaster to help it lay completely flat if the edges curl.
Tips for Success
- Use stitch markers if you have trouble keeping track of rounds or chain spaces.
- Keep your chains loose when building the decorative edge to avoid puckering.
- Play with textured yarn or sparkle thread for a unique finish.