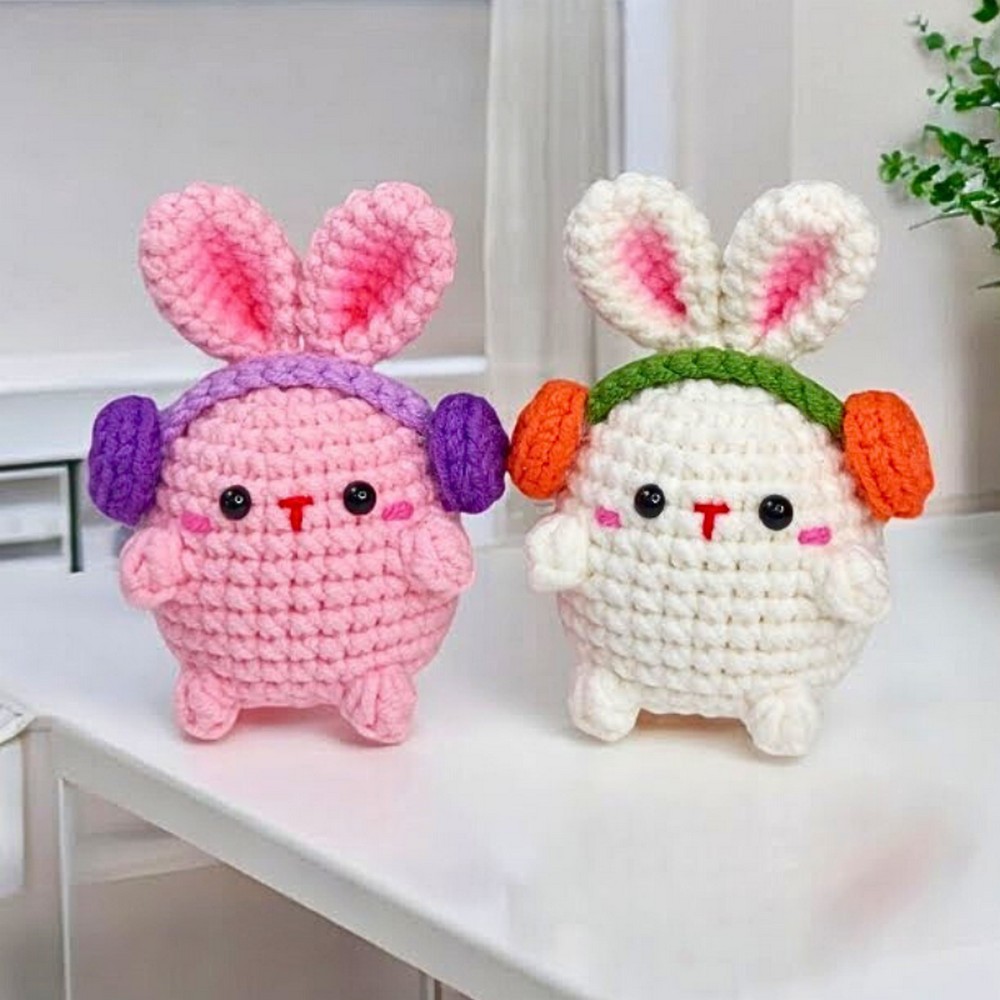
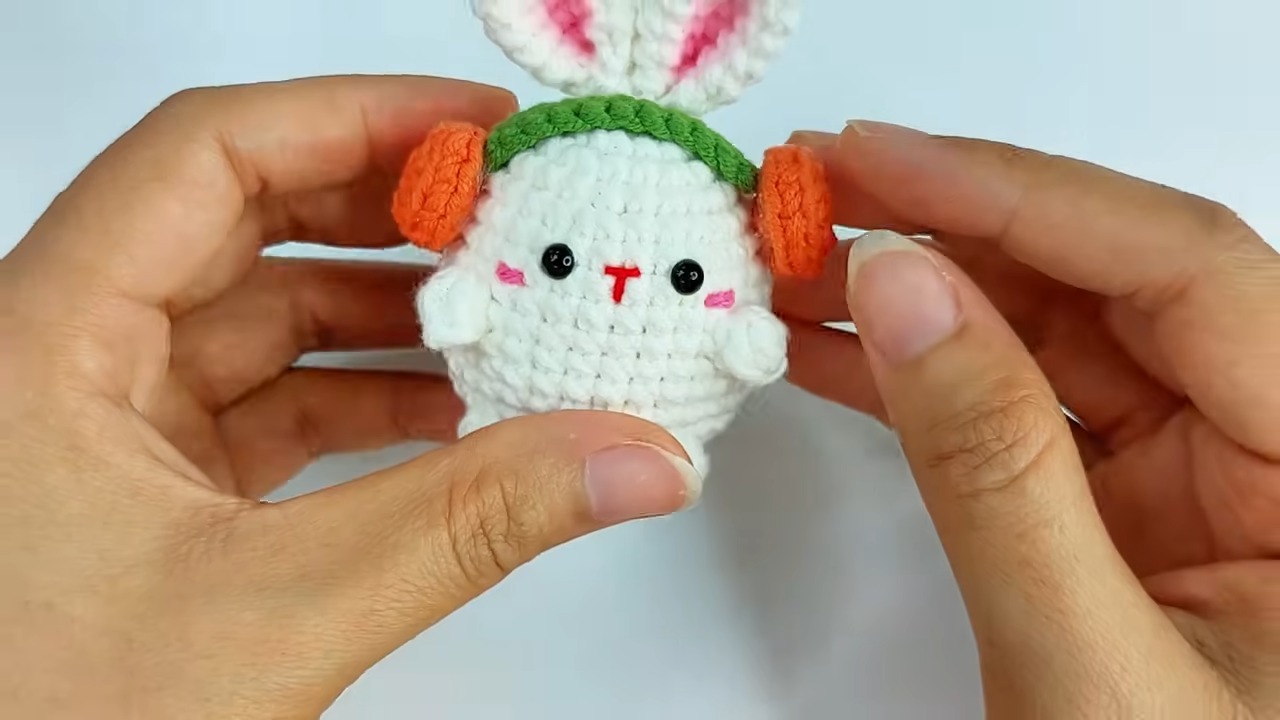
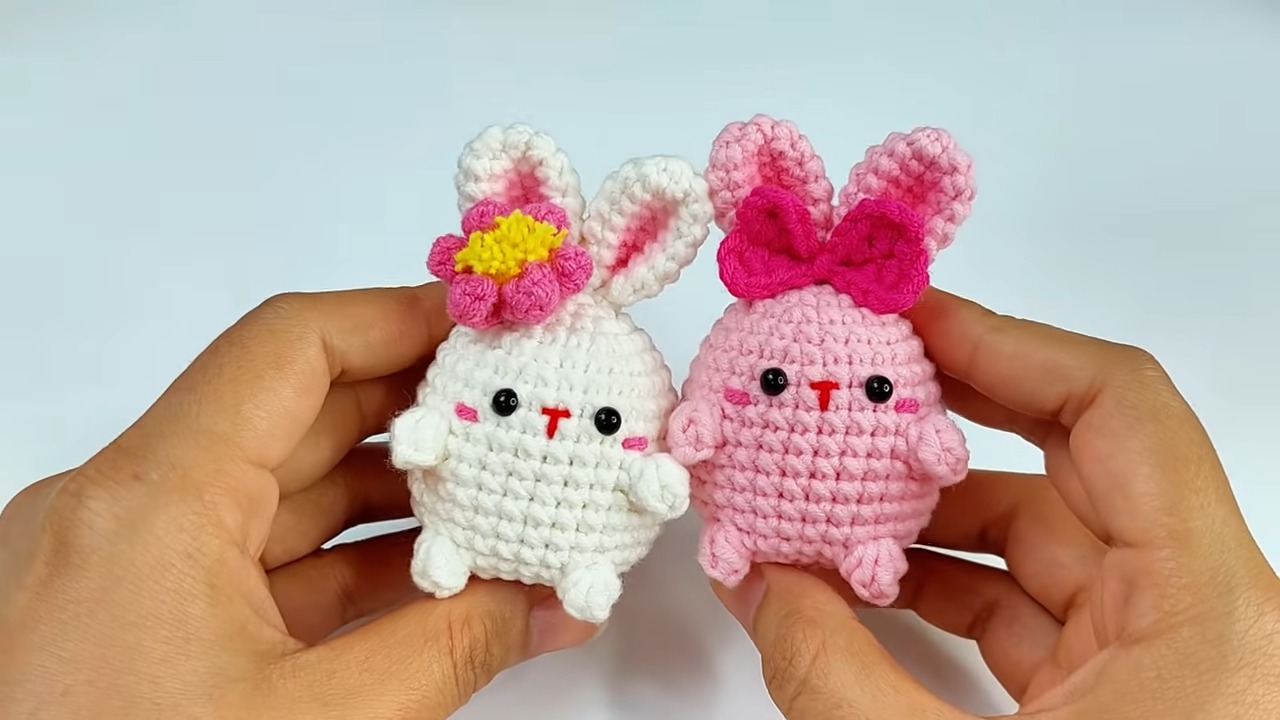
Looking for a whimsical crochet project? This adorable bunny with headphones and a bow is a perfect blend of charm and creativity! It's not only eye-catching but also customizable for any occasion—great as a gift, decor piece, or a fun keepsake for yourself.

This crochet bunny isn’t just cute—it’s durable and practical too! Its soft yet sturdy design makes it ideal for cuddling or displaying as decor. The headphones and bow add a unique, playful touch, making this project appealing to kids, music lovers, and crochet enthusiasts alike.
Beautiful Crochet Bunny Pattern
Whether you're new to crochet or a seasoned crafter, you can easily create this bunny using simple techniques. The pattern is customizable—choose different colors or accessories—and allows ample room for creativity. It's a rewarding project suitable for all skill levels!
Materials and Preparation
To create the Crochet Bunny with Headphones and Bow, you will need the following materials:
- Yarn:
- Light-weight yarn (size 2 or 3 recommended) in at least three colors — one for the bunny’s body, one for the bow, and one for the headphones.
- Crochet Hook Size:
- 2.5 mm or 3.0 mm crochet hook (depending on your tension).
- Additional Tools:
- 5 mm safety eyes (or embroidery thread for stitched eyes).
- Stitch marker (optional but helpful).
- Yarn needle for sewing parts together.
- Scissors.
- Stuffing material (polyfill).
Be sure to check the yarn weight label to ensure it fits your chosen hook size.
Abbreviations and Notes
Here are the crochet abbreviations used in this pattern:
- SC: Single Crochet
- INC: Increase (2 single crochets in one stitch)
- DEC: Decrease (single crochet two stitches together)
- Popcorn Stitch: A clustered stitch for texture (instructions included below).
- CH: Chain stitch
- SL ST: Slip Stitch
- DC: Double Crochet
- HDC: Half Double Crochet
Pattern Notes:
- This pattern uses amigurumi techniques worked in continuous rounds unless specified otherwise (e.g., SL ST rows).
- Use a stitch marker to track the first stitch of each round.
- Light-weight yarn is recommended for finer details. Adjust hook size for different yarn weights if needed.
Gauge, Approximate Size, and Pattern Notes
- Gauge: Not critical for this project. However, ensure your stitches are tight enough to prevent stuffing from poking through.
- Finished Size: Approximately 7–8 cm (3–3.5 inches) sitting height, depending on yarn thickness and hook size.
- Special Techniques:
- Popcorn Stitch: Work 5 double crochets into the same stitch, remove hook from the last loop, insert hook into the first DC of the 5, pull the dropped loop through, and complete the stitch.
- Magic Ring: Used to start parts of the bunny (instructions below).
Gauge swatch is not necessary for amigurumi, but keep tension consistent.
Step-by-Step Pattern
Bunny’s Head
- Round 1: 6 SC in magic ring. [6]
- Round 2: INC in each stitch around. [12]
- Round 3: (1 SC, 1 INC) repeat 6 times. [18]
- Round 4: (2 SC, 1 INC) repeat 6 times. [24]
- Round 5: SC in each stitch around. [24]
- Round 6: (3 SC, 1 INC) repeat 6 times. [30]
- Round 7–8: SC in each stitch around for 2 rounds. [30]
- Round 9: 7 SC, 1 INC, 14 SC, 1 INC, 7 SC. [32]
- Round 10: 11 SC, Popcorn Stitch, 8 SC, Popcorn Stitch, 11 SC. [32]
- Round 11–14: SC in each stitch around for 4 rounds. [32]
- Round 15: 12 SC, Popcorn Stitch, 6 SC, Popcorn Stitch, 12 SC. [32]
- Round 16: (2 SC, 1 DEC) repeat 8 times. [24]
- Round 17: (1 SC, 1 DEC) repeat 8 times. [16]
- Round 18: DEC around. [8]
- Stuff head firmly before closing. Use a yarn needle to stitch the hole closed.
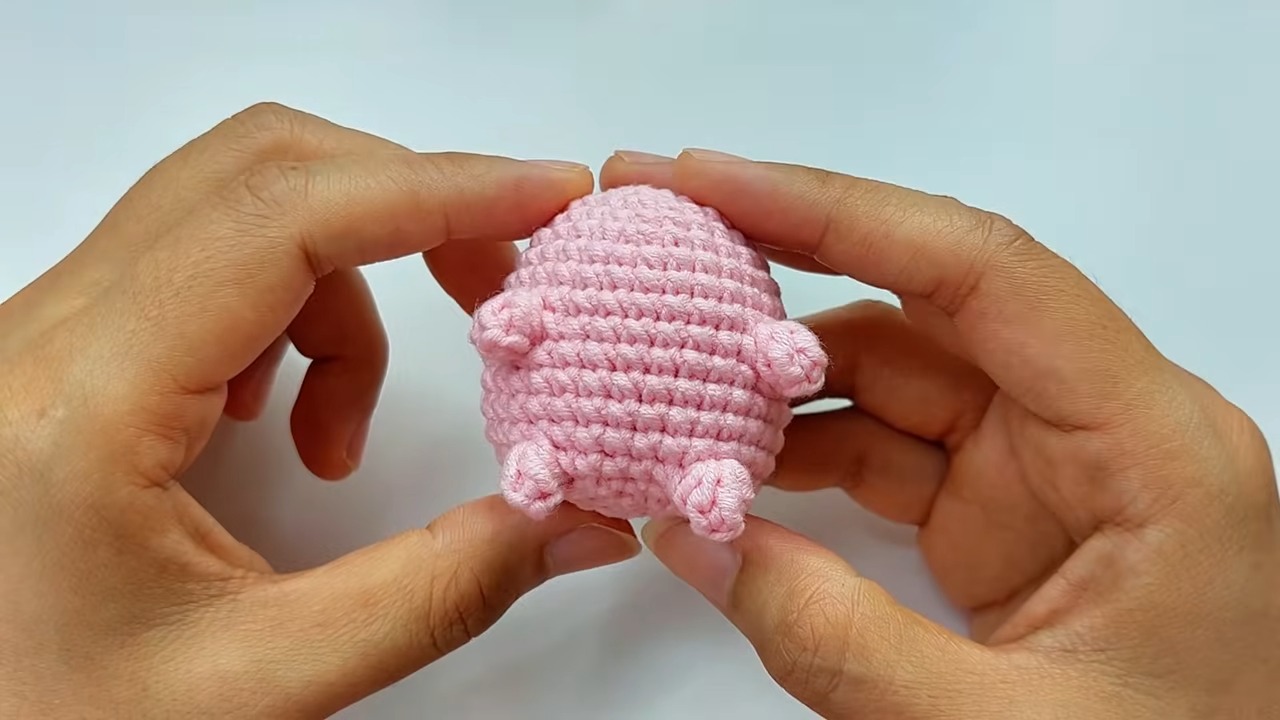
Ears (Make 2)
- Round 1: 6 SC in magic ring. [6]
- Round 2: INC in each stitch around. [12]
- Round 3–7: SC in each stitch for 5 rounds. [12]
- Round 8: (2 SC, 1 DEC) repeat 3 times. [9]
- Do not stuff ears; they should remain flat. Sew the ears to the top side of the bunny’s head.
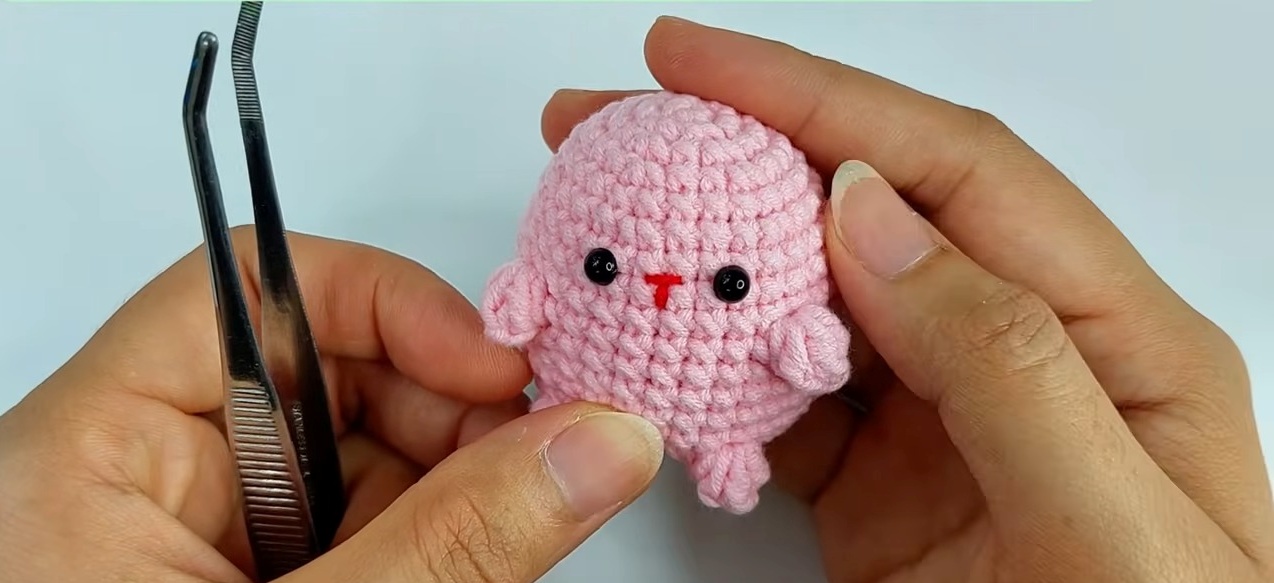
Eyes
- Attach 5 mm safety eyes or embroider eyes using black yarn/thread. Place eyes between Round 7 and 8, leaving 4 stitches between them.
Headphones
- Round 1: 6 SC in a magic ring. [6]
- Round 2: INC in each stitch around. [12] SL ST + CH 1 at end.
- Round 3: Using back loops only, SC in each stitch. [12] SL ST + CH 1.
- Round 4: Using back loops only, DEC in all stitches. [6] SL ST to close.
- Add the connecting band: CH 12, skip 1, and work 11 SC into the chain.
- Attach headphones lightly below the bunny’s ears.
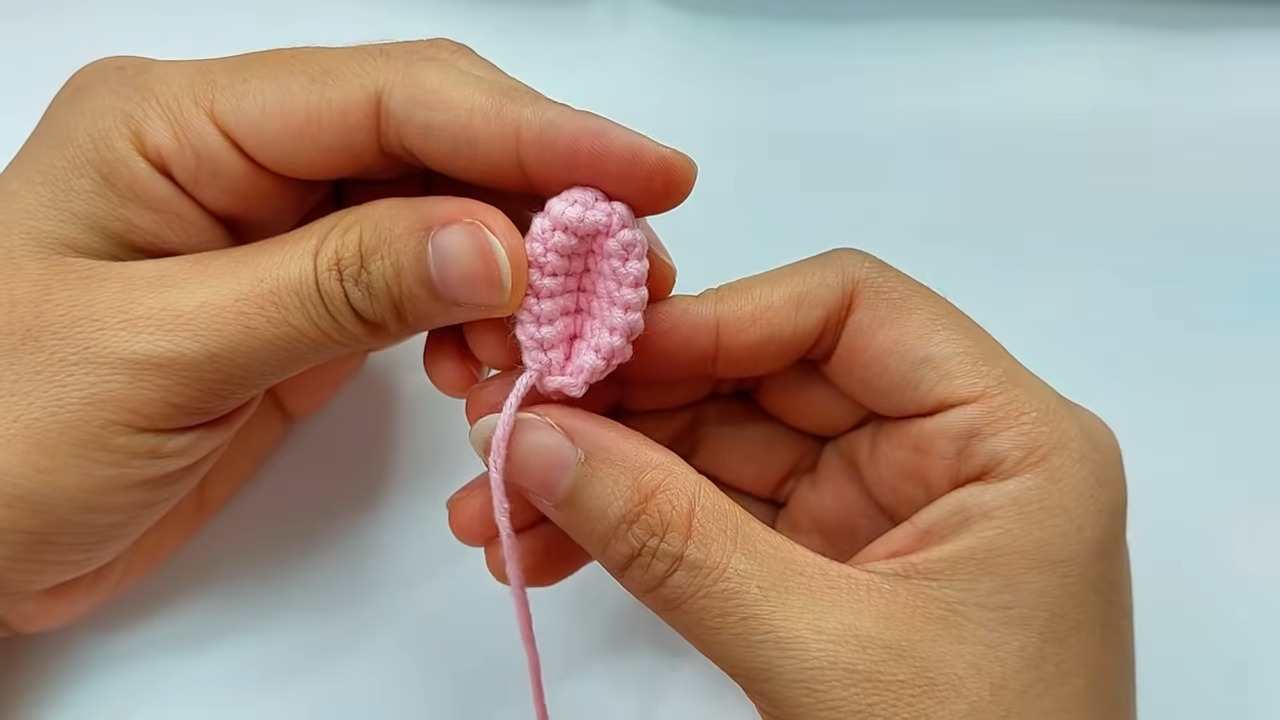
Bow
- CH 11. Skip 4 CH, then work:
- 1 DC, 1 HDC, 1 SC, 1 SL ST, 1 SC, 1 HDC.
- (1 DC + 4 CH + SL ST) into the same stitch.
- (4 CH + 1 DC) into the same stitch.
- Repeat steps to mirror the other side of the bow.
- Attach the bow to one ear using a yarn needle for a charming finish.
Assembly and Final Touches
- Sew all the parts together:
- Attach the bunny’s ears to the head, ensuring symmetry.
- Position the headphones just below the ears.
- Secure the bow onto one ear.
- Embroider a nose using pink or black yarn/thread, centered between the eyes.
- Adjust stuffing to ensure a neat and sturdy shape.

Pattern Question
Q: Can I use different yarn weights for this pattern?
A: Yes, but keep in mind that changes in yarn weight will affect the size of the bunny. Adjust your hook size accordingly to maintain consistent tension.
Conclusion
This crochet bunny with headphones and a bow is an enjoyable project that combines charm, creativity, and usability. Whether crafting for yourself or gifting to others, this unique item will showcase your skills and bring joy to anyone who sees it. Give it a try!


