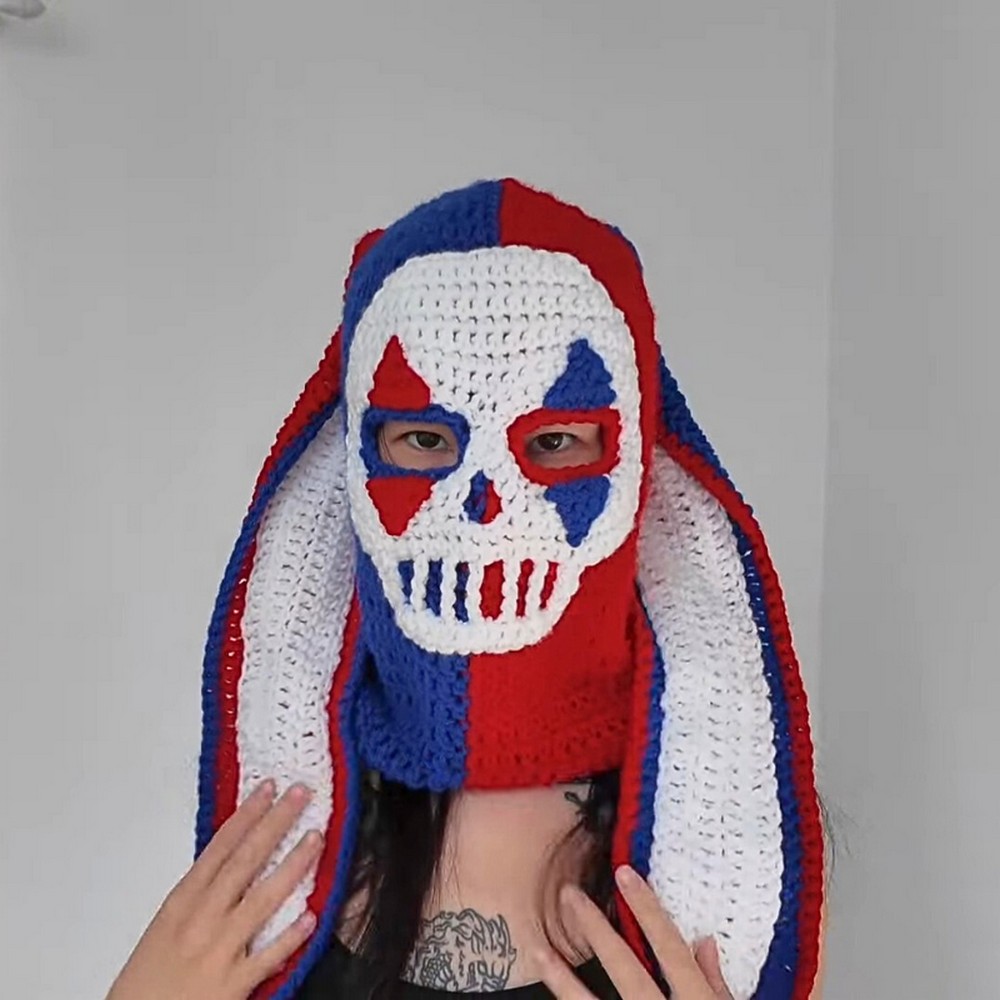
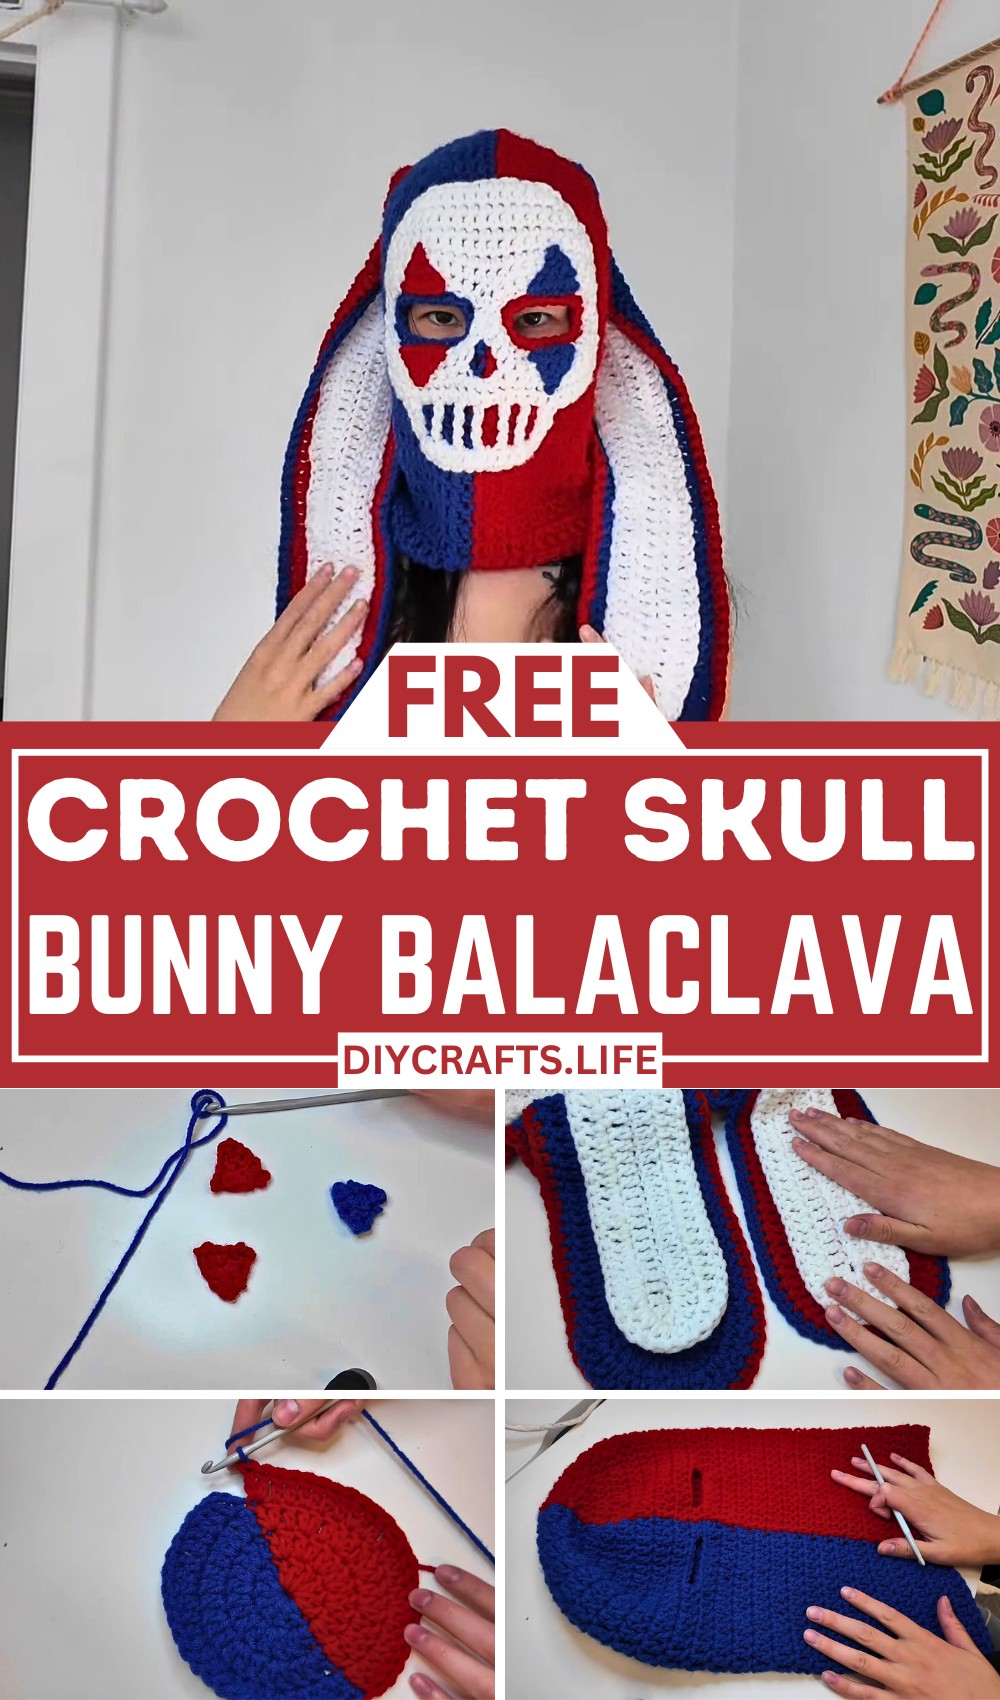
Create a bold, unique look with this crochet clown skull bunny balaclava! This striking piece blends playful clown-inspired details with a skull motif, resulting in a functional and unique accessory. Perfect for seasonal wear, it’s eye-catching, customizable, and creatively fulfilling to make.
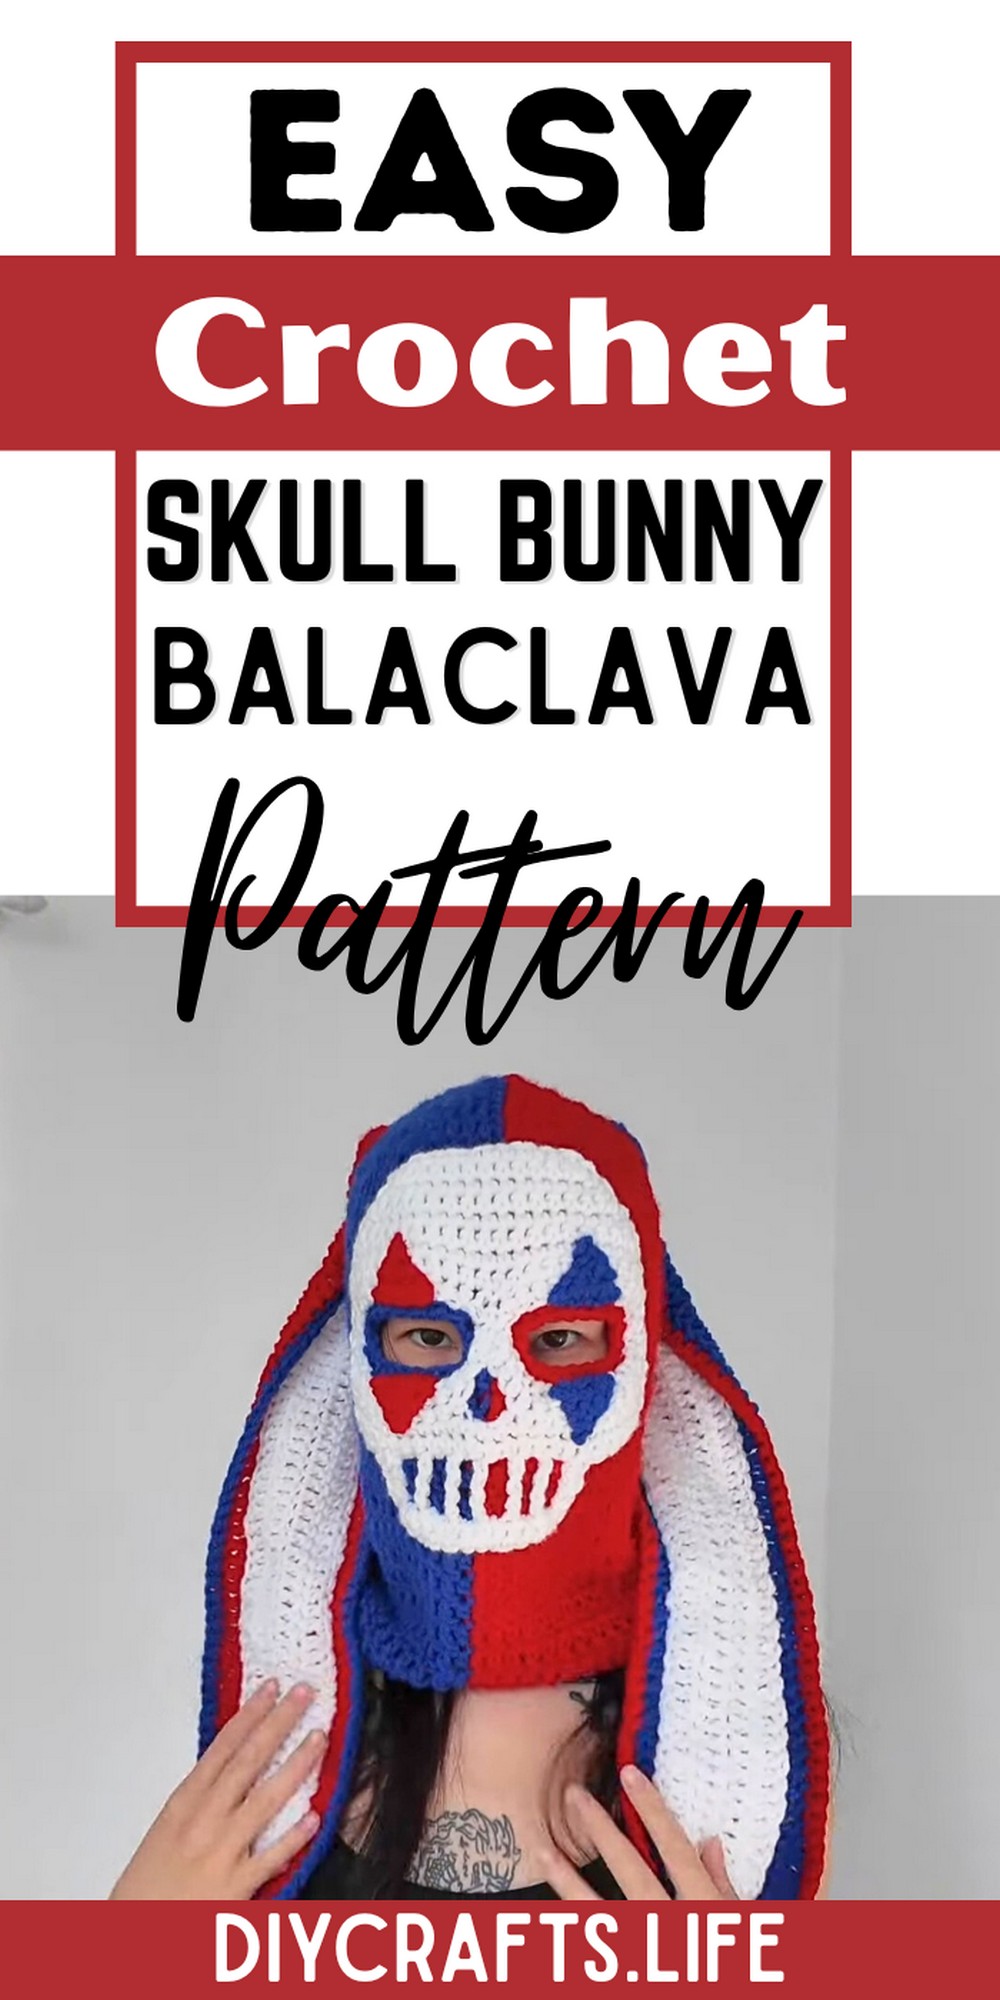
This balaclava not only keeps you warm but also makes a unique fashion statement. Its durable acrylic yarn ensures it lasts for regular use, and the bold color-block design gives it an edgy, fun look. With its clown triangles, bunny ears, and skull features, it’s ideal for both costumes and everyday winter wear.
Crochet Clown Skull Bunny Balaclava
Enjoy making this project whether you're a beginner or a seasoned crocheter! Familiarity with basic stitches like double crochets and increases is helpful. You can easily customize the colors with your favorite palette. The sewing adds detail, and you’ll be proud to show off your creative and vibrant masterpiece.
Materials and Preparation:
To create the clown skull bunny balaclava, you'll need:
- Yarn: Medium-weight acrylic yarn (suggested brand available at Michaels). Colors used: Red, Blue, White.
- Crochet Hook: 5.5 mm hook (matches recommended gauge for a medium-weight yarn).
- Additional Tools:
- Yarn needle (for sewing pieces together and weaving in ends).
- Pins (optional, to secure pieces in place while sewing).
- Measuring tape.
- Styrofoam head (optional for shaping and pinning).
- Written Pattern: Available for purchase (not required).
Abbreviations and Notes:
Abbreviations:
- Ch = Chain
- SC = Single Crochet
- DC = Double Crochet
- Sl St = Slip Stitch
- Inc = Increase (2 stitches worked into the same stitch)
- Dec = Decrease (skipping stitches to reduce stitch count)
Notes:
- This tutorial assumes crocheters are already familiar with basic stitches: chain, single crochet, double crochet, and color changes.
- Sewing is a key part of the project, so basic hand-sewing knowledge is helpful.
Gauge, Approximate Size, and Pattern Notes:
Gauge:
- Initial circle (Row 1): 2 inches in diameter (12 stitches total: 6 blue and 6 red).
Finished Dimensions:
- Balaclava: Fits most adult heads.
Special Techniques and Notes:
- Color Changes: Before completing the last step of a DC, switch to the next color for a smooth transition.
- Sewing: The skull, ears, and triangles are sewn on as separate pieces. Use matching thread or yarn for a clean finish.
- Customization: Color choices are flexible—use contrasting colors or pastel tones for different effects.
Step-by-Step Pattern:
1. Balaclava Base
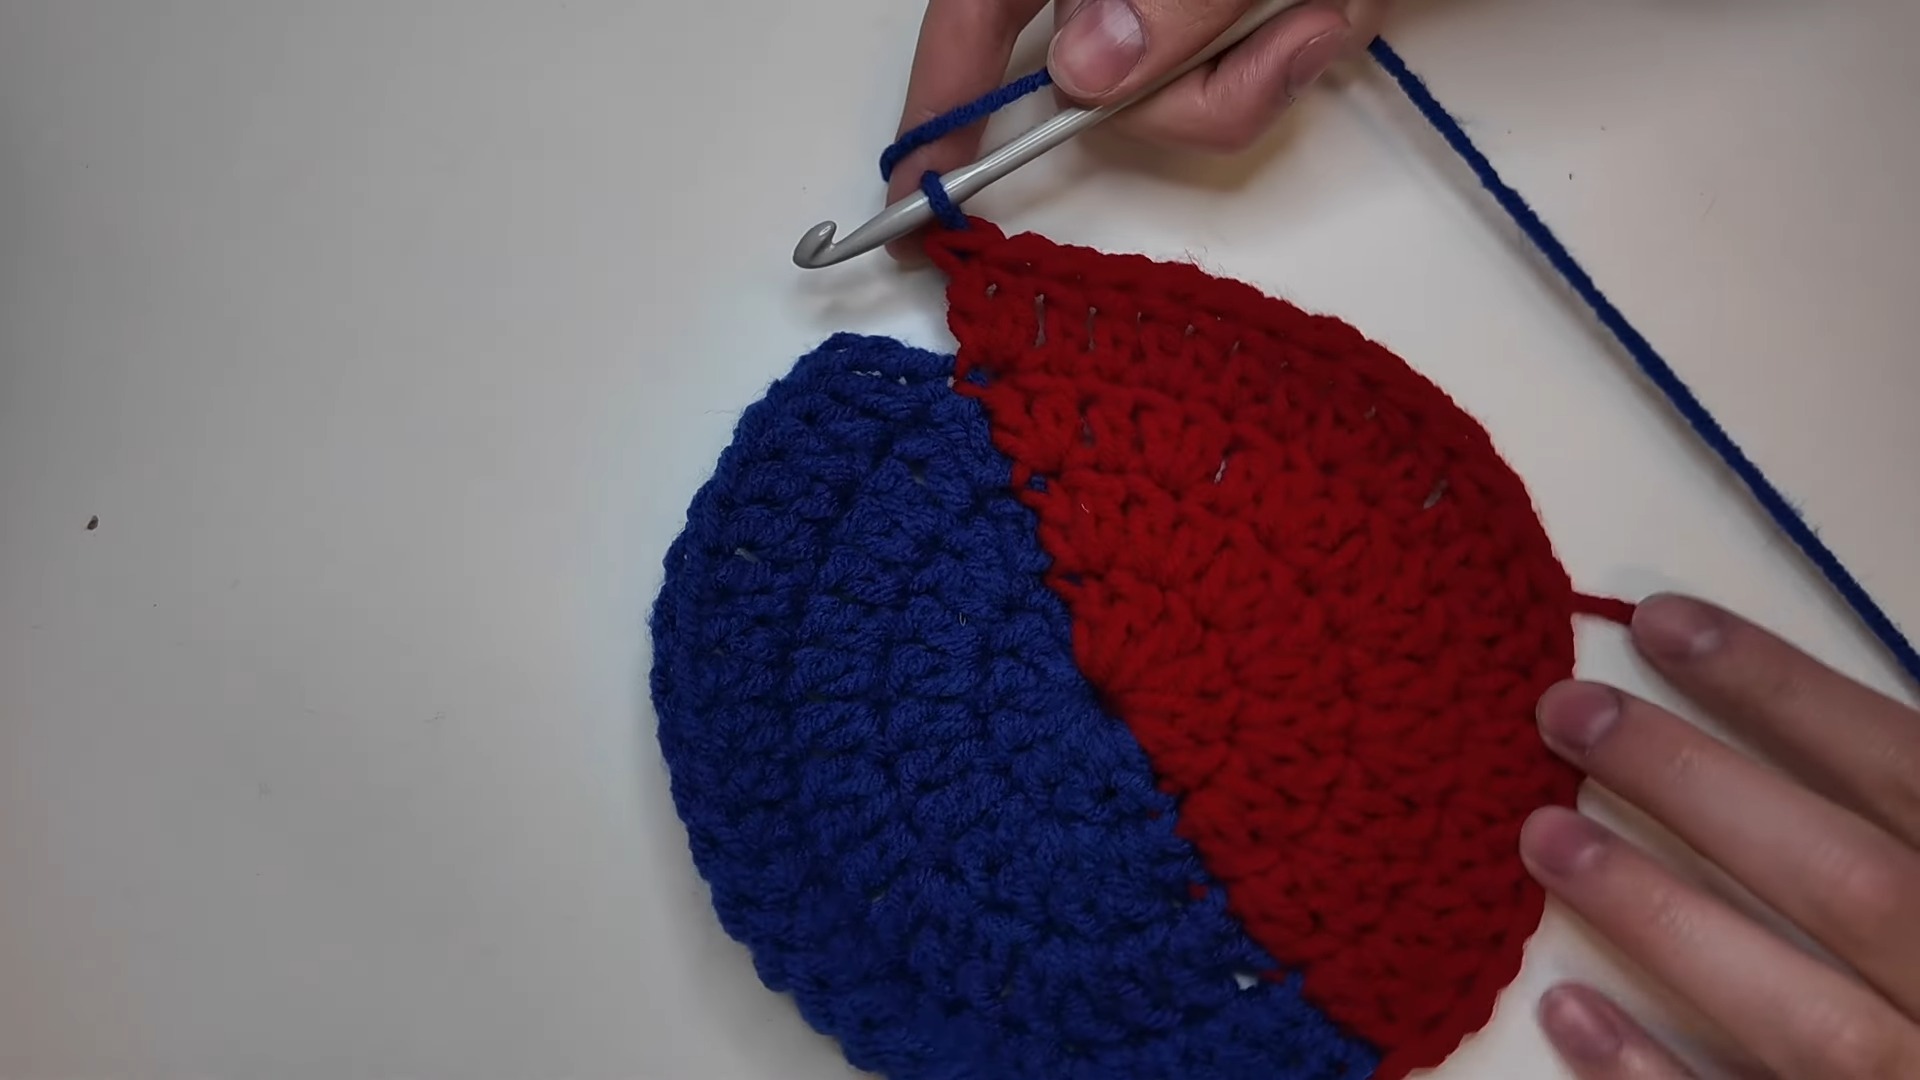
Foundation and Color Switching (Rows 1-5):
-
Start with blue yarn:
- Chain 3.
- Slip stitch into the top of the chain to create a loop.
- Chain 3 (counts as the first DC), then DC 6 into the loop.
-
Perform the first color change:
- Complete the last step of the sixth DC with red yarn.
- DC 6 into the loop using red yarn.
- Slip stitch into the first DC (ignore the chain 3 at the start).
-
Gauge Check:
- Ensure the circle is 2 inches across.
-
Continue increasing every row:
- Row 2: Chain 3, work 6 increases (2 DCs in each stitch). Alternate colors evenly. (24 stitches total: 12 in each color).
- Row 3: Work 1 DC, then 1 increase (2 DCs in the same stitch) around. Alternate colors. (36 stitches total).
- Row 4: Work 2 DCs, then 1 increase around. Alternate colors. (48 stitches total).
- Row 5: Work 3 DCs, then 1 increase around. Alternate colors. (60 stitches total).
Rows 6-9:
- Chain 3 at the start of each row, then work 60 DC evenly around. Alternate colors (30 stitches in each color).
Eyeball Holes (Row 10):
- Chain 3, DC 22 in blue.
- Create the first eyehole:
- Chain 6.
- Skip 6 stitches, then DC into the following stitch.
- DC 1 additional blue stitch, then change to red yarn.
- DC 2 in red, then repeat the eyehole process:
- Chain 6, skip 6 stitches, then DC into the following stitch.
- Finish the row with DC 22 in red.
Rows 11-21 (or up to Row 24):
- For rows following the eyeholes, treat every chain as a stitch (6 DCs across the eyeholes).
- Continue working evenly with 60 stitches in total (30 blue, 30 red).

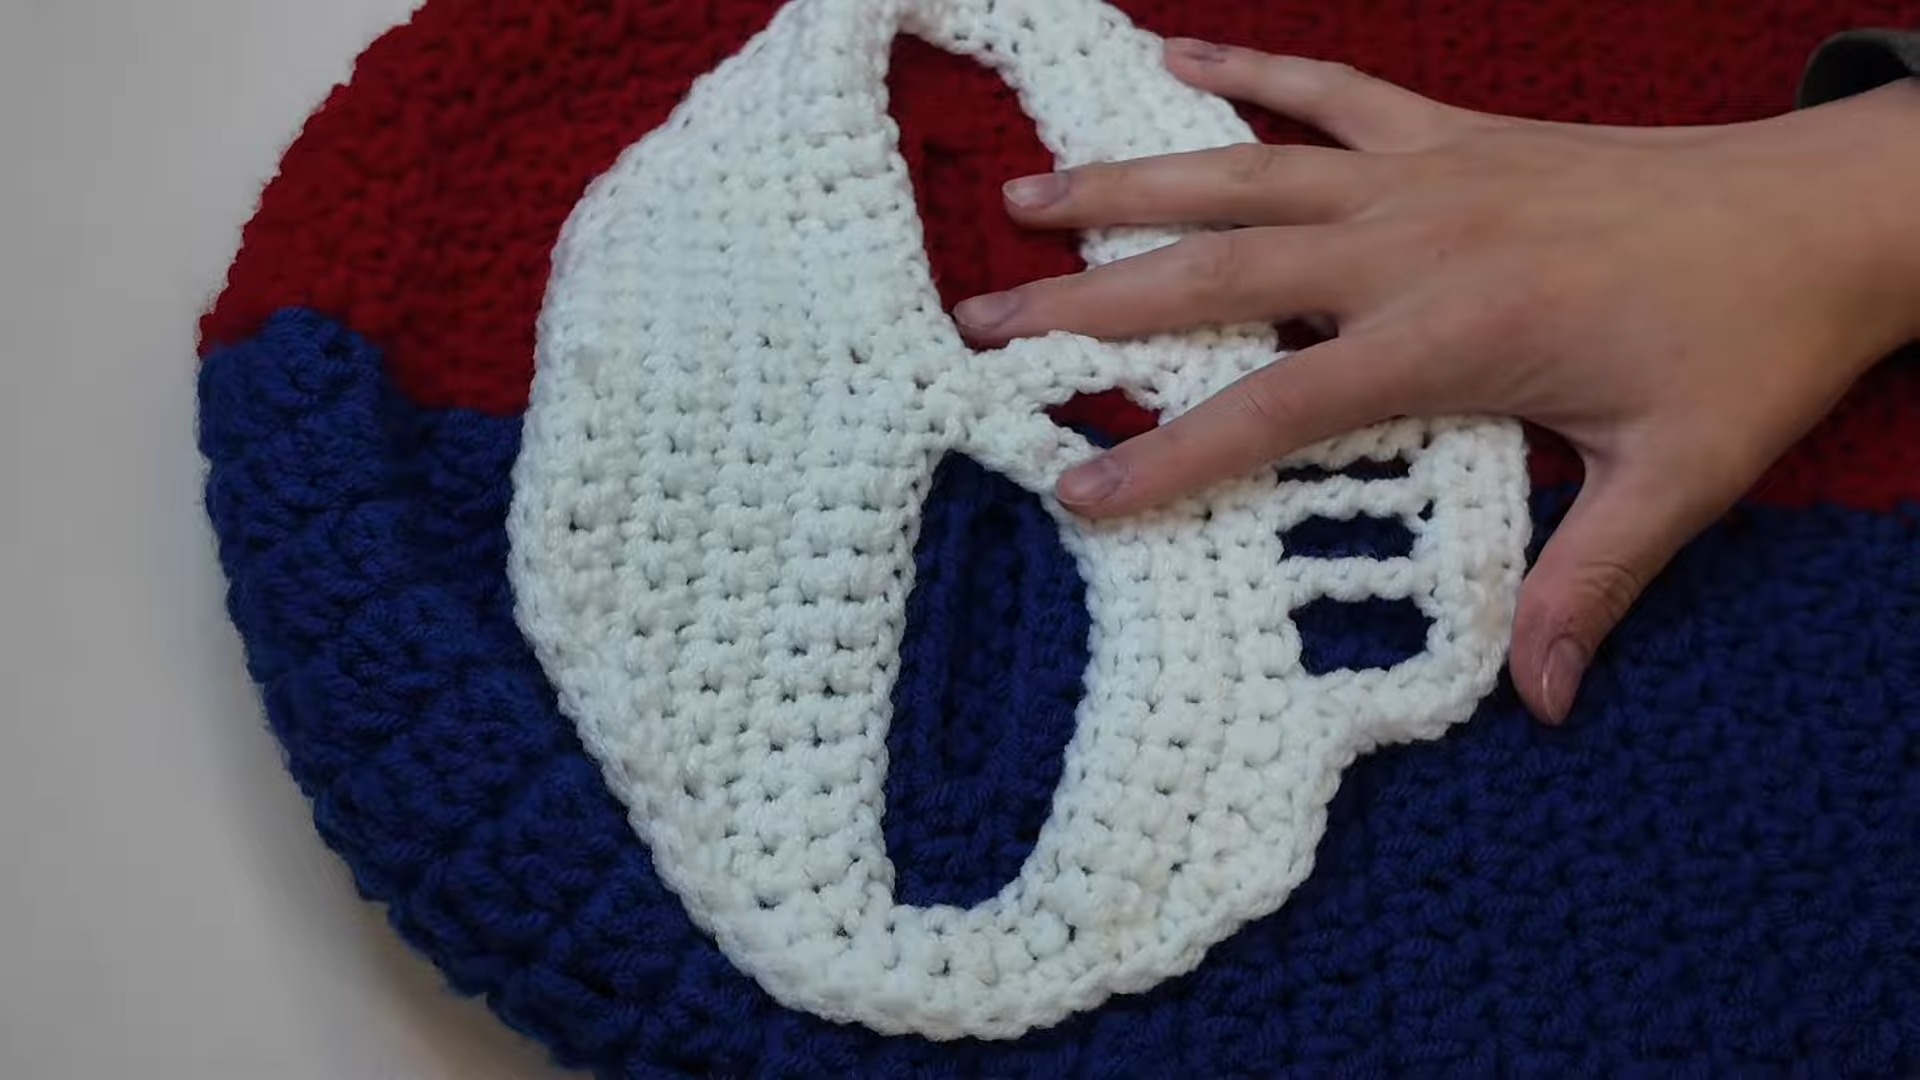
2. Skull Attachment
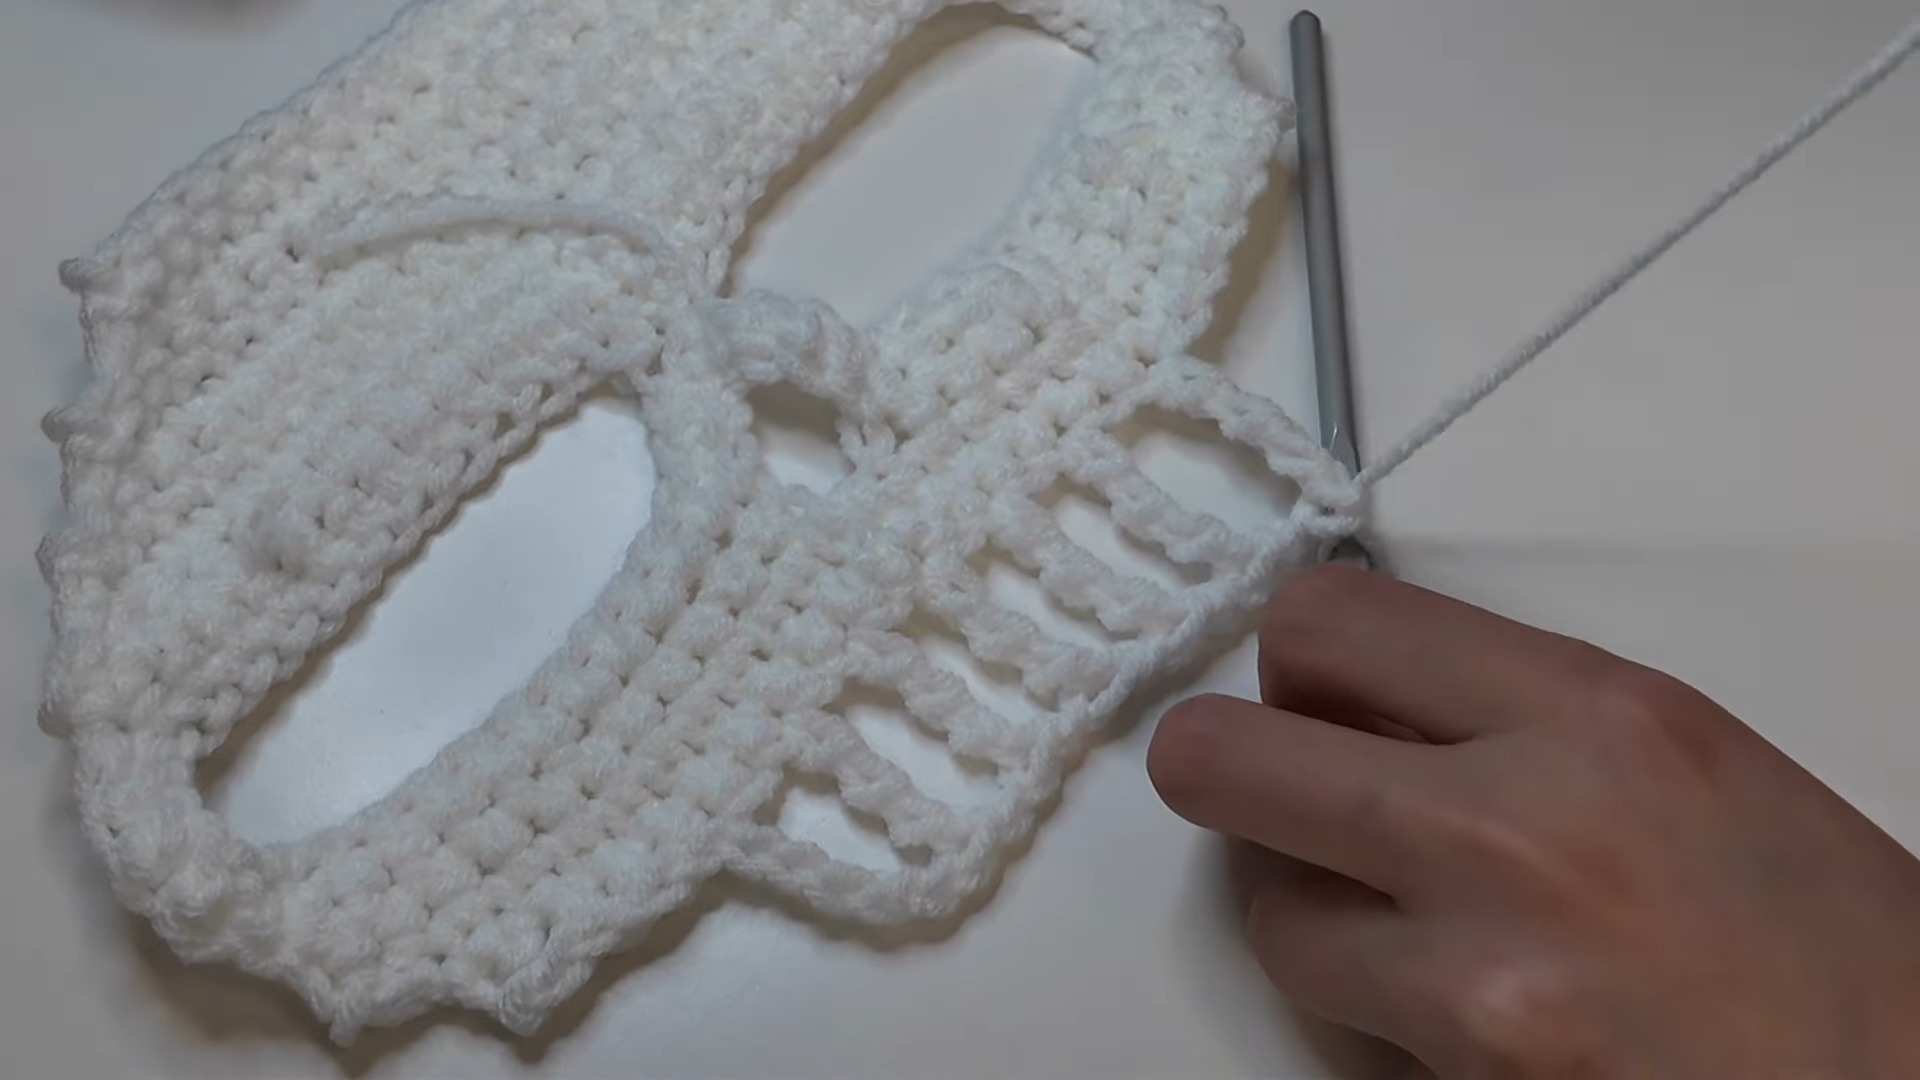
Creating the Skull:
-
Using white yarn:
- Start with a slip knot, then chain 30.
- Slip stitch into the first chain to create a loop.
- Chain 30 again, then slip stitch into the first chain again.
-
Single Crochet Around Eyeholes:
- Chain 1, then SC evenly (16 around each eye, 32 stitches total).
-
Top Rows:
- Count 12 stitches from the center and begin working 24 SC evenly across the top.
- Skip the first stitch of each row and decrease evenly until a taper is achieved:
- Row 1: 24 SC.
- Row 2: 22 SC.
- Row 3: 20 SC.
- Continue to row 7 with the taper decreasing by 2 stitches each row.
- Final row: 12 SC.
-
Bottom Rows:
- Begin in the opposite direction—15 stitches from the center.
- Repeat tapering technique (start with 24 stitches and decrease by 2 stitches each row).
- Add rows for a "nose-gap" by chaining between sections.
-
Final Teeth Decorations:
- Work quad triple crochet stitches at the base of the skull.
-
SC around the entire skull to create a clean edge.
Sewing the Skull to the Balaclava:
- Pin the skull evenly so the center aligns with the balaclava's color split.
- Using white thread, sew the skull down around the edges, eyes, nose, and mouth area.
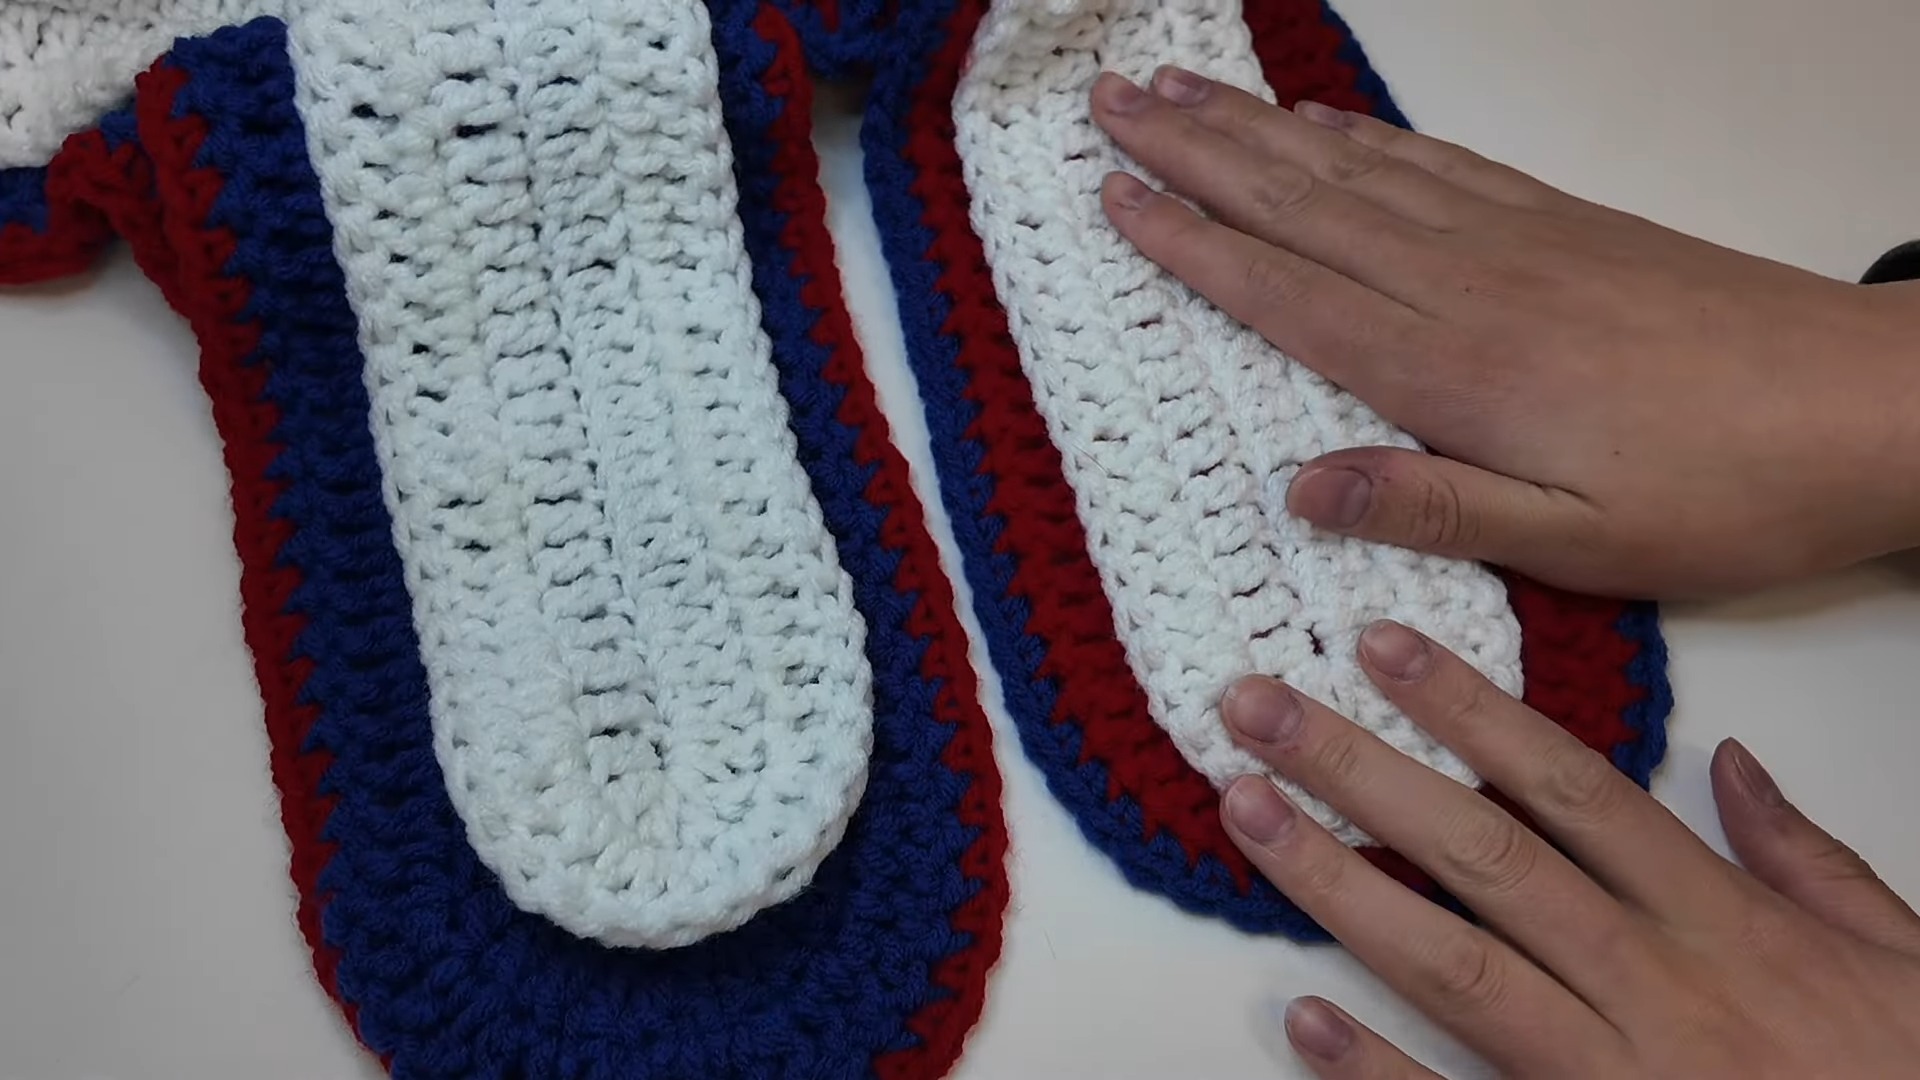
3. Ears
Outer Ear:
- Chain 50, then chain 3 more (acts as the first DC).
- DC evenly along the chain. At the end, work 6 DC increases into the last stitch, curving around.
- DC back along the opposite side of the chain.
- Work a second round, increasing in the curved edge (two DCs per stitch).
- Optional: Add a contrasting border color using SC stitches around the outer edge.
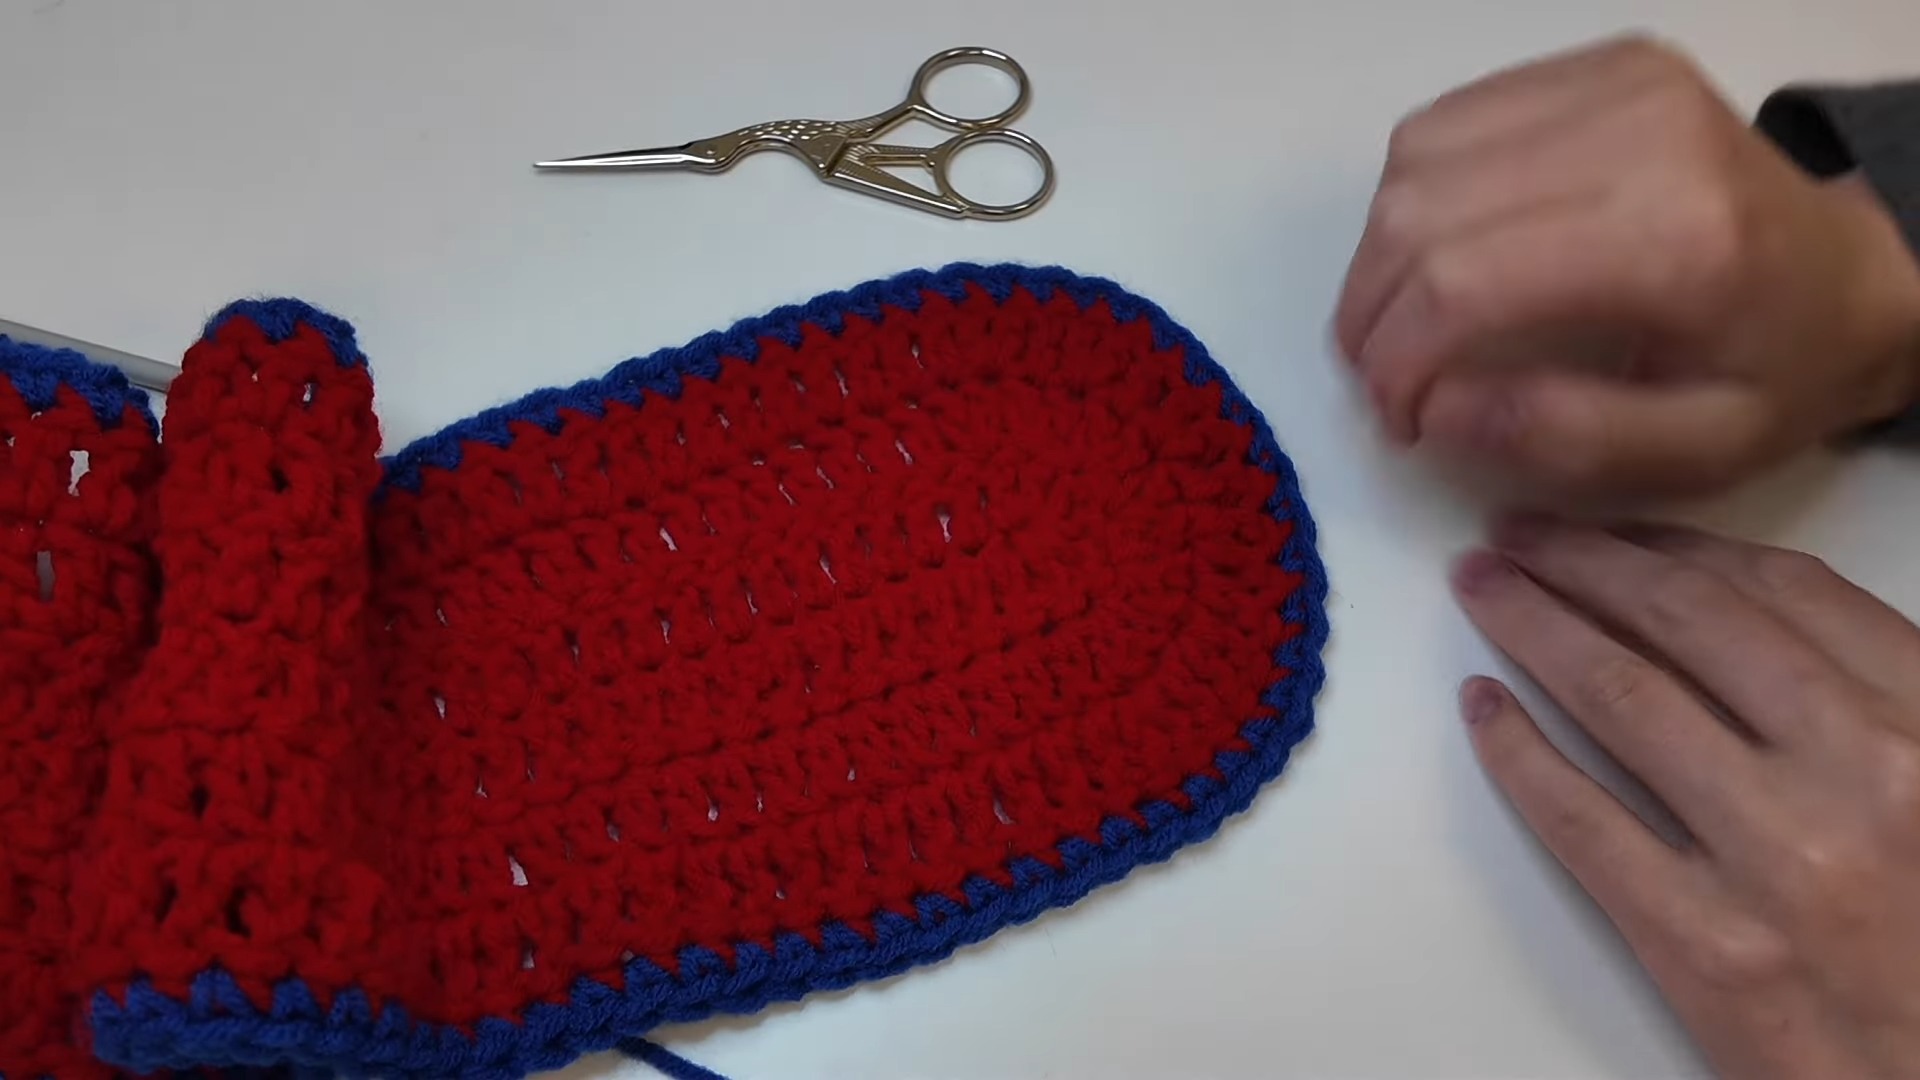
Inner Ear:
- Repeat two rows only with white yarn, then sew to the outer ear.
Folding and Sewing:
- Fold ears in half lengthwise and sew the bottom edges together to create a floppy ear shape.
- Attach ears to the balaclava, centered 4 rows down from the top back.
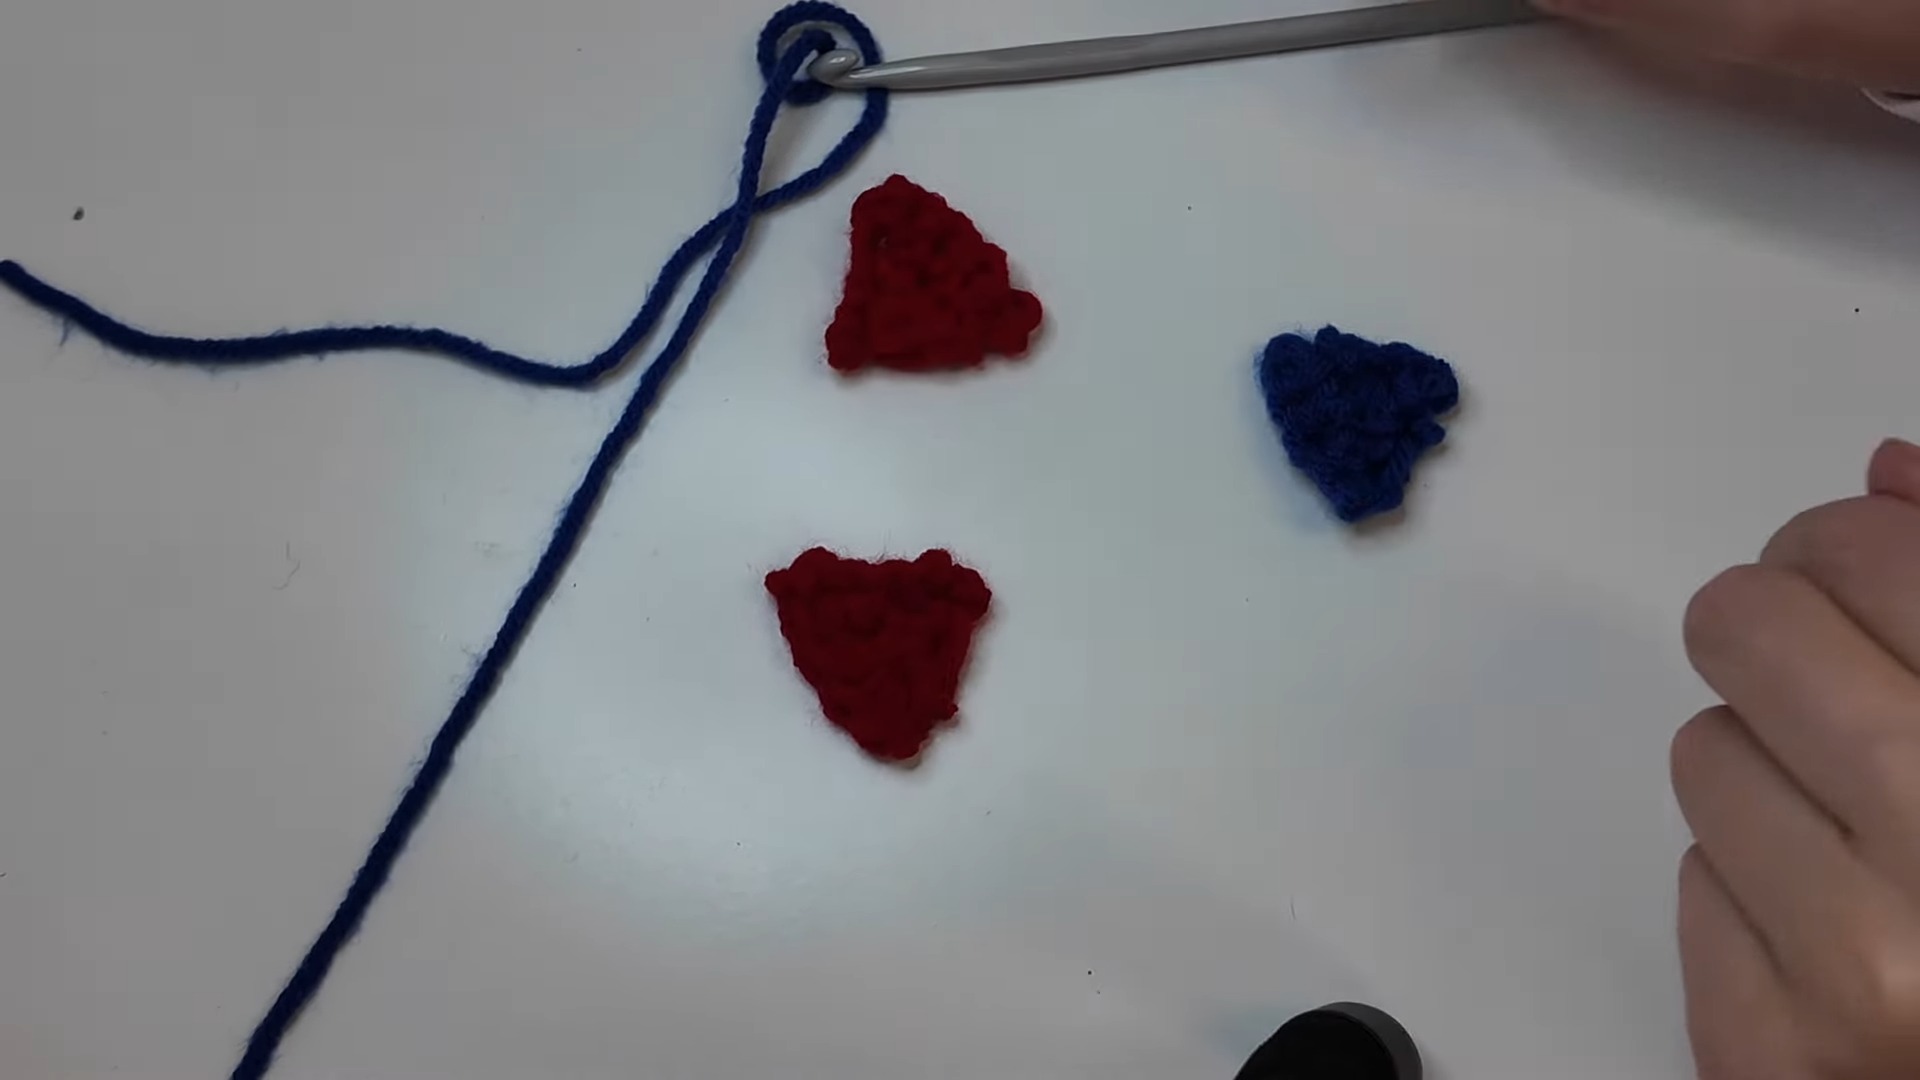
4. Triangles (Clown Accents)
- Start with a slip knot and chain 2.
- SC 2 into the first chain.
- Work increases at the edges every row:
- Row 2: SC 3.
- Row 3: SC 4.
- Continue until desired size is achieved.
- Make two red and two blue triangles.
- Sew triangles above and below the eyeholes using matching thread.
Final Assembly and Customization:
- Pin ears, skull, and triangles in place before sewing.
- Secure neatly with thread for durability.
- Try on frequently to adjust fit and spacing!
Pattern Question
Q: Can I use other yarn types instead of acrylic?
A: Yes! While acrylic is recommended for its affordability and availability, you can use wool, cotton, or other fibers. Just ensure it matches the weight and gauge for the best results.
Conclusion
If you love bold, fun crochet projects, this clown skull bunny balaclava is perfect for you. It’s practical, creative, and stylish, making it a rewarding project for all skill levels. Whether for a costume or a cold day, it’s a unique addition to any wardrobe—fun to create and even better to wear!


