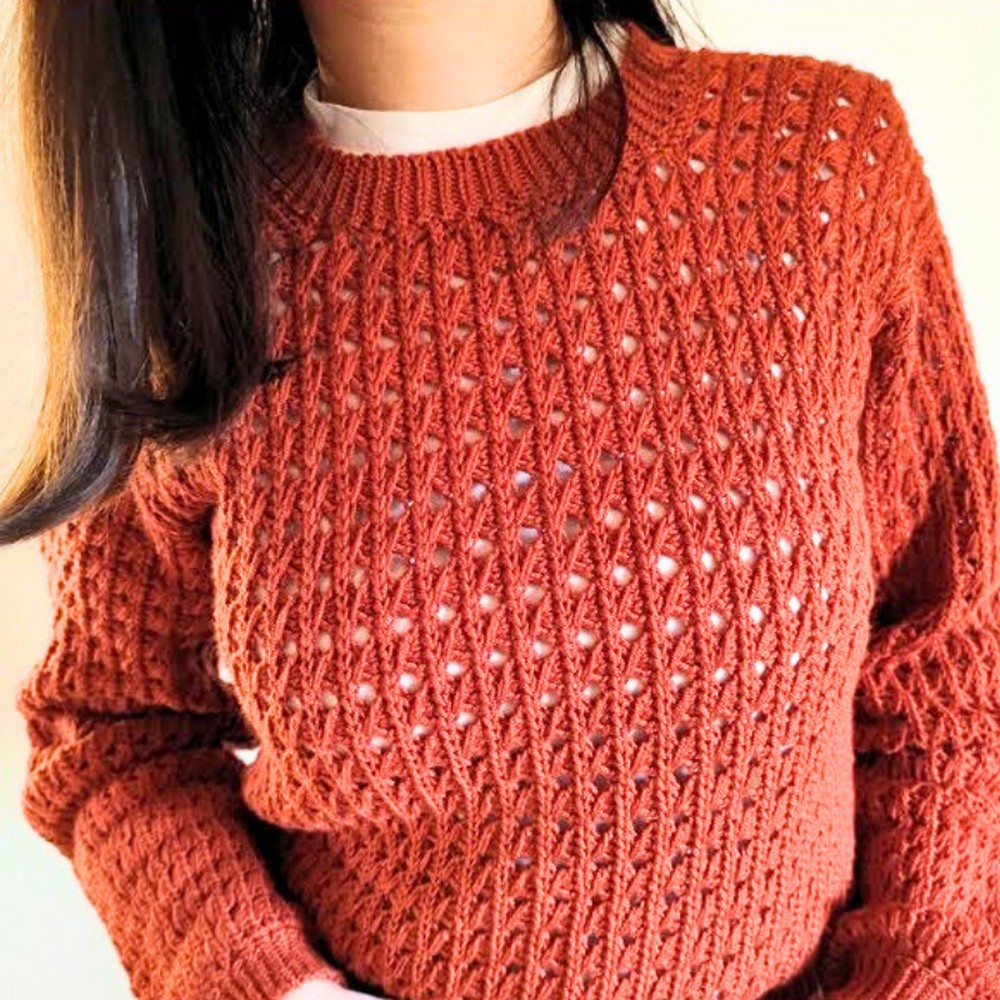
Step into cozy style with this timeless crochet crew neck sweater design. Perfect for chilly days or layering, this pattern blends warmth with sophistication. From the intricate stitch work to its luxurious feel, every detail adds charm to an undeniably classic piece. Whether paired with casual jeans or layered over dresses, this sweater will carry you through any season comfortably and fashionably.

Crochet Crew Neck Sweater
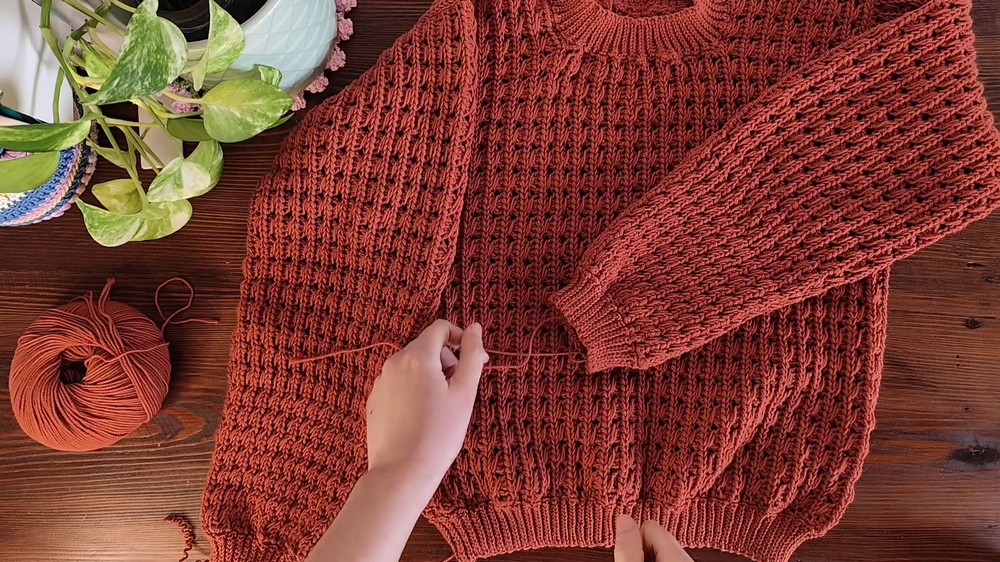
This sweater’s standout feature is its creative construction—crafted in four parts: front, back, and two flowing sleeves. Its textured design uses a unique two-row stitch repeat that offers a distinctive yet subtle pattern, showcasing both simplicity and elegance. The ribbed neckline, cuffs, and hem complete the look, creating a polished and professional finish. Easily customizable, this sweater invites you to add your personal touch, combining artistry with practicality to create a wardrobe staple that’s entirely yours.
Credit Veroknitcrochet
Materials & Tools Needed
- Yarn: Approximately 470 g of merino wool (50 g balls, 175 m per ball).
- Hook Size: 3.5 mm crochet hook.
- Scissors
- Tapestry needle
- Stitch markers
- Measuring tape
Pattern Abbreviations & Terminology
- ch: Chain
- sl st: Slip Stitch
- yo sl st: Yarn Over Slip Stitch
- sc: Single Crochet
- dc: Double Crochet
- hdc: Half Double Crochet
- bp: Back Post (used for loop-specific stitching methods)
- rows: Horizontal sequence in the pattern
- rep: Repeat
- RS: Right Side
- WS: Wrong Side
Step-by-Step Instructions
1. Overview
The sweater is made in four parts:
- Front panel
- Back panel
- Two sleeves
Once the pieces are completed, they are sewn together, followed by ribbing applied at the neckline, cuffs, and bottom.
Part 1: Front Panel
Step 1: Start with the foundation chain
- Create a slip knot on your hook.
- Chain a multiple of 4 + 3 until the measurement matches the length from the bottom of the sweater to the underarm (approx. 26 cm).
- In the tutorial: Chain 13 × 4 + 3 = 55 chains.
Step 2: Row 1 (WS) - Yarn Over Slip Stitch
- Skip the first chain from the hook.
- Begin working yo sl st in the second chain and in each chain across the row.
- Insert hook into the chain, yarn over, pull through, and pull through all loops on the hook.
- End with a yo sl st into the last chain.
- The wrong side (WS) of the piece is now complete.

Step 3: Row 2 (RS) - Back Loop Double Crochet
- Turn the work to the right side (RS).
- Start the row with either a stacked single crochet or ch 3, which counts as the first dc.
- For stacked sc:
- Insert hook into the back loop of the stitch.
- Yarn over, pull through, yarn over, pull through two loops (creates a sc).
- Insert hook into the second vertical bar of the sc.
- Yarn over, pull through first loop, yarn over, pull through final two loops.
- For stacked sc:
- Skip 1 stitch, then:
- Work 1 back loop dc into each of the next 3 stitches.
- Go back into the skipped stitch and make a back loop dc around the previous 3 back loop dc stitches.
- Repeat step 3 (3 back loop dc + 1 back loop dc in the skipped stitch) until the end of the row.
- In the last stitch, make 1 back loop dc.
Step 4: Row 3 (WS) - Yarn Over Slip Stitch
- Turn back to the WS.
- Chain 1 (turning chain).
- Work a yo sl st in every single stitch of the row, ending with a sl st in the last stitch.
Step 5: Repeat Rows 2 & 3
Continue alternating between Row 2 (RS) and Row 3 (WS) until you reach the desired measurement for the armhole.
Step 6: Armhole Increase
- While on Row 4 (RS), chain a multiple of 4 + 1 to extend the width for the armhole (desired length is approx. 20 cm).
- Chain 10 × 4 + 1 = 41 chains.
- Turn your work (WS) so the wrong side of the chain is facing.
- Work a yo sl st in every chain added for the armhole and then across the rest of the rows.
Step 7: Shoulder Section
- Follow the stitch pattern (alternate Rows 2 & 3) to build the shoulder area.
- Stop when the shoulder measures about 10 cm.

Step 8: Neckline Decrease
- On the RS, complete a Row 2 repetition but stop when there are 17 stitches left. This forms the first half of the neckline.
- Make 1 back loop dc in the last stitch.
- Work the return row (Row 3 - WS).
- Continue repeating the stitch pattern until the neckline section measures 16 cm (approximately 21 rows).
Step 9: Second Shoulder
- Add back 16 stitches to form the second shoulder.
- Chain 16 + 1 turning chain = 17 chains.
- Turn to the WS and make yo sl st into each chain and across the rest of the row.
- Build rows to match the first shoulder (15 rows, with the last being WS).
- Decrease for the second armhole. This mirrors the process of the first armhole.
Step 10: Complete Front Panel
Continue the stitch pattern to complete the front panel.

Part 2: Back Panel
- Start the back panel exactly like the front, maintaining the same counts for rows, armhole, and shoulder.
- For the back neckline:
- Decrease only one repetition at the end of Row 2 (leave 5 stitches instead of 17).
- Skip fewer stitches than the front to create a higher neckline.
- Continue following the pattern to complete the second shoulder and armholes as before.
Part 3: Sleeves
- Begin with chains for the sleeve length (multiple of 4 + 3).
- Example: Chain 99 for a sleeve length of 43 cm.
- Work the rows lengthwise (not vertically) using the following sequence:
- Row 1: Yarn Over Slip Stitch entirely.
- Row 2: Begin normal Row 2 pattern but:
- Transition to hdc (in back loop) for the first decreases (near the marker).
- Transition again to sc further into the row for additional decreases.
- Alternate Row 2 (RS) and Row 3 (WS) while reducing width, until the sleeve fits into the armhole circumference.

Joining the Sweater
- Sew the pieces together:
- Use a tapestry needle and mattress stitch.
- First, join the shoulders of the front and back panels.
- Attach sleeves to the armholes, ensuring the narrow end fits snugly.
- Finally, close the sides and sleeves using a continuous mattress stitch.
Part 4: Ribbing
- Neckline Ribbing:
- Attach yarn mid-back of the neckline.
- Work 1 row of single crochet around the neckline, then slip stitch into the first sc to join in the round.
- Create ribbing:
- Chain for ribbing height (e.g., 10 chains = 5 cm).
- Work sl st into the chain stitches.
- Attach to neckline using sl st into 2 sc, then turn.
- Continue slip stitches in back loop only until all single crochet stitches are covered.
- Cuffs & Bottom Ribbing:
- Repeat the same ribbing process for sleeve cuffs and bottom hem.
Finishing
- Weave in all ends using a tapestry needle.
- Block the sweater as needed for a polished finish.