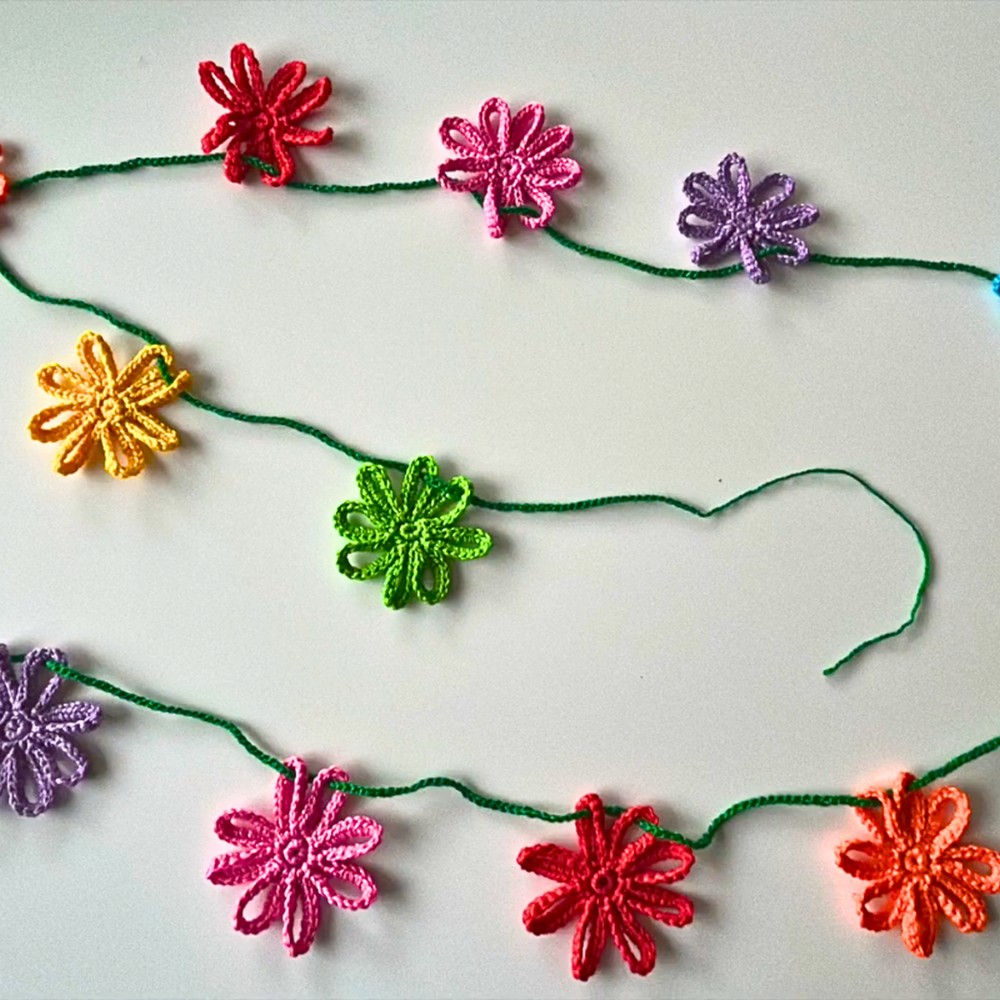
Brighten up your space with a touch of charm and elegance! This Crochet Flower Garland design transforms simple yarn into an enchanting string of vibrant blooms. Perfect for any room, event, or occasion, this delightful creation brings timeless beauty and joy wherever it's displayed.

The Crochet Flower Garland stands out with its intricate petals, seamless design, and customizable color combinations. Whether you want soft pastels for a calming vibe or bold, lively tones for a cheerful look, this pattern is perfect for it all. Its versatility allows you to express your creativity while adding a handmade, heartfelt touch to your surroundings. From home décor to gifts, this garland is the perfect blend of art and style.
Credit Hook & Loop Crochet Tutorials
Materials & Tools Needed
- Yarn:
- Several colors of 100% cotton yarn for the flowers (specific color options depend on your preference).
- Green yarn for the garland’s cord.
- Crochet Hook:
- 2 mm crochet hook – this helps create tight and small stitches for the delicate flower details.
- Additional Tools:
- Scissors: To cut the yarn neatly.
- Tapestry Needle: For weaving in tails and attaching the flowers to the cord.

Finished Size & Customization Ideas
Approximate Finished Size:
- The size of the garland depends on how many flowers you create and the length of the cord. Each individual flower typically measures around 1.5–2 inches in diameter.
Customization Ideas:
- Adjust Size:
- Use thicker yarn and a larger crochet hook (e.g., 3.5 mm or 4 mm) to create larger flowers.
- Use thinner yarn or thread for daintier, smaller flowers.
- Change the Cord Length:
- Chain more stitches for a longer garland or fewer stitches for a shorter cord.
- Color Variations:
- Use a gradient of one color for the petals.
- Create multi-colored flowers by switching colors in the second round.
- Match the cord and flower colors to suit specific occasions or themes.
- Add Embellishments:
- Attach beads or buttons to the flower centers.
- Weave small fairy lights into the garland for added charm.
Pattern Abbreviations & Terminology
- ch = chain
- sc = single crochet
- sl st = slip stitch
Note: The pattern uses U.S. crochet terminology.
Step-by-Step Crochet Instructions
Flower Instructions:
- Round 1:
- Start with a slip knot.
- Chain 5 (ch 5) and form a ring by making a slip stitch (sl st) into the first chain stitch.
- Work 8 single crochets (sc) into the center of the ring.
- Close the round with sl st into the first single crochet (sc).
- Round 2 (Petals):
- Start by making chain 15 (ch 15), then complete a slip stitch (sl st) in the same stitch.
- Move to the next stitch and continue: sl st, chain 15 (ch 15), sl st into the same stitch.
- Repeat this pattern around until there are 8 petals total.
- Close the round with a slip stitch (sl st) at the base of the first petal to secure.
- Petal Stitches (Optional Enhancement):
- Work 15 single crochets (sc) in the chain space of each petal.
- Secure the stitches with 1 sl st at the petal base before moving to the next petal.
- Finish Each Flower:
- After finishing the last petal, make a slip stitch, chain 1, pull up on the yarn, and cut it.
- Use a tapestry needle to weave in all tails to tidy the flower.
- Stretching/Blocking Flowers (Optional):
- Stretch out the petals for a more polished effect.
- Pin the flowers onto a foam board and lightly mist with water to shape them. (Allow time to dry.)

Garland Cord Instructions:
- Start with a slip knot and leave a long tail of yarn (this will help attach the cord later).
- Create a chain as long as desired for your garland.
- Example: Chain a long strand to match the length of your intended space (mantelpiece, window, wall).
- Leave another long tail at the end of the chain for securing flowers.

Attaching Flowers to the Garland:
- Arrange the flowers along the chain in the order you prefer.
- Thread the cord through the back of each flower using a tapestry needle (or simply weave it through).
- Prevent flowers from sliding by securing them:
- Add a small stitch where the flower attaches to the cord. This will keep the flowers in position.

Finishing Touches
- Display Suggestions:
- Perfect for decorating birthday parties, special occasions, or adding a cheerful touch to your home decor.
- Optional Embellishments: Add additional elements like beads, ribbons, or other decorative accents for a custom look.
Enjoy your Crochet Flower Garland! 🌸


