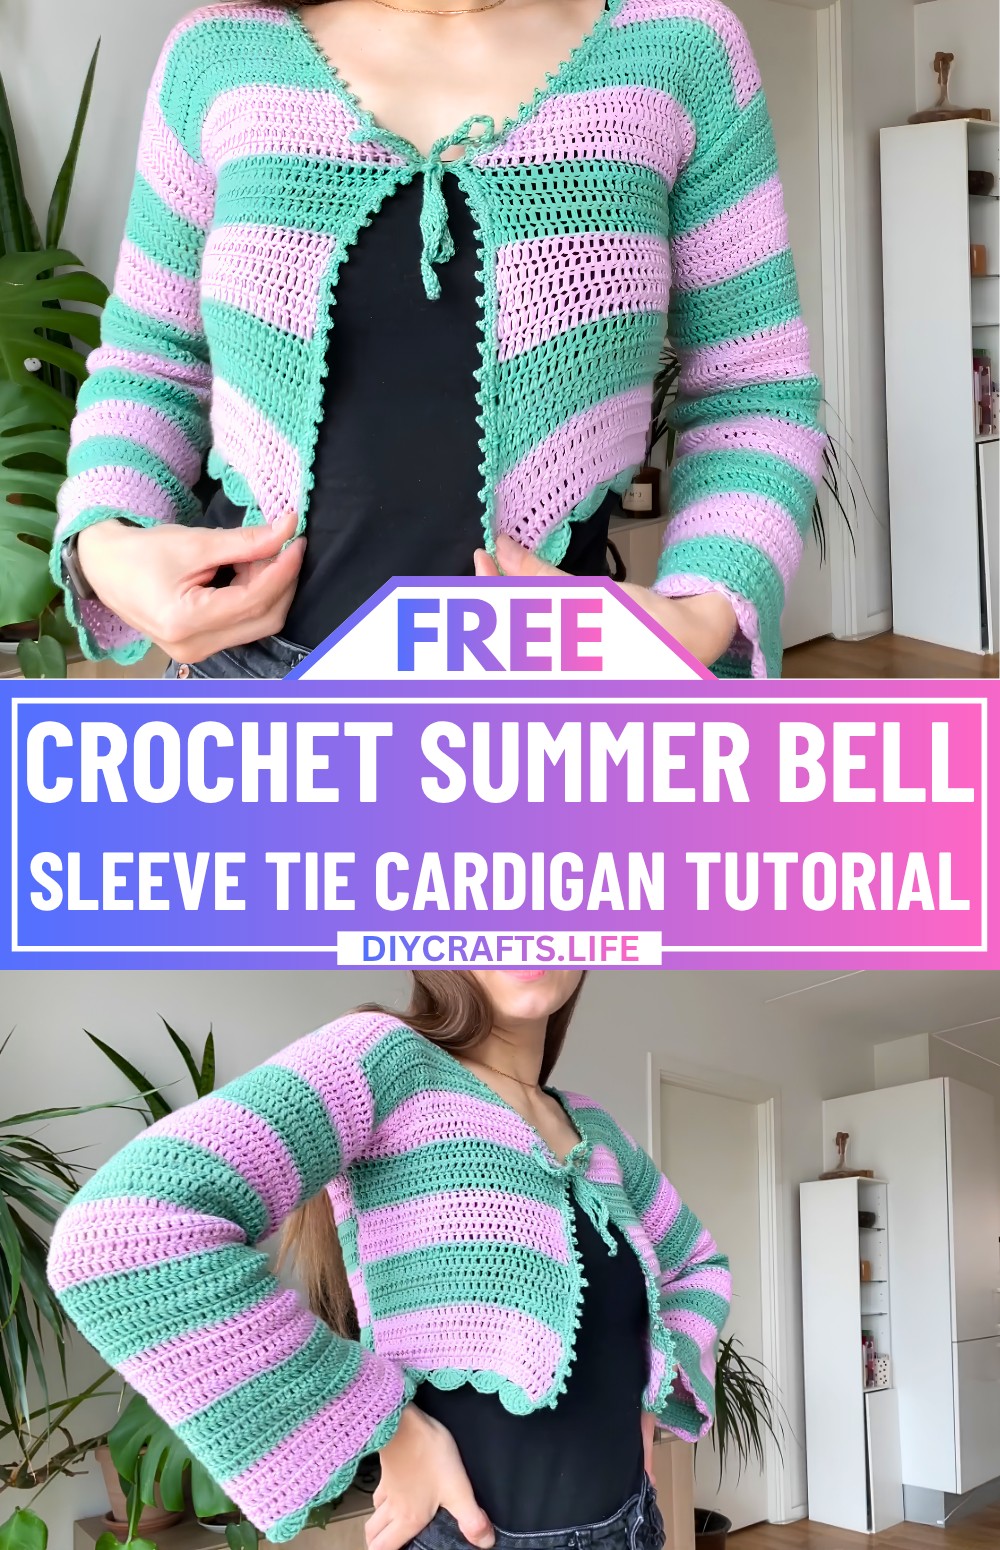
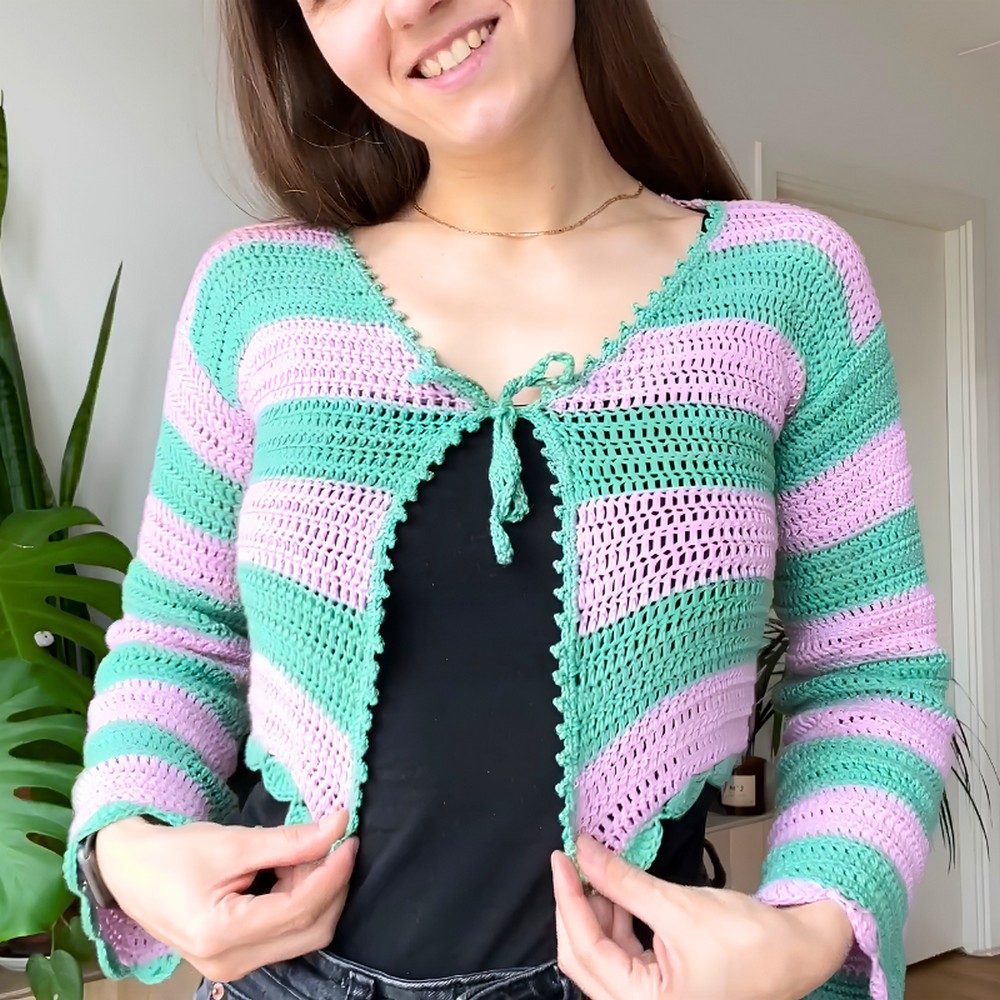
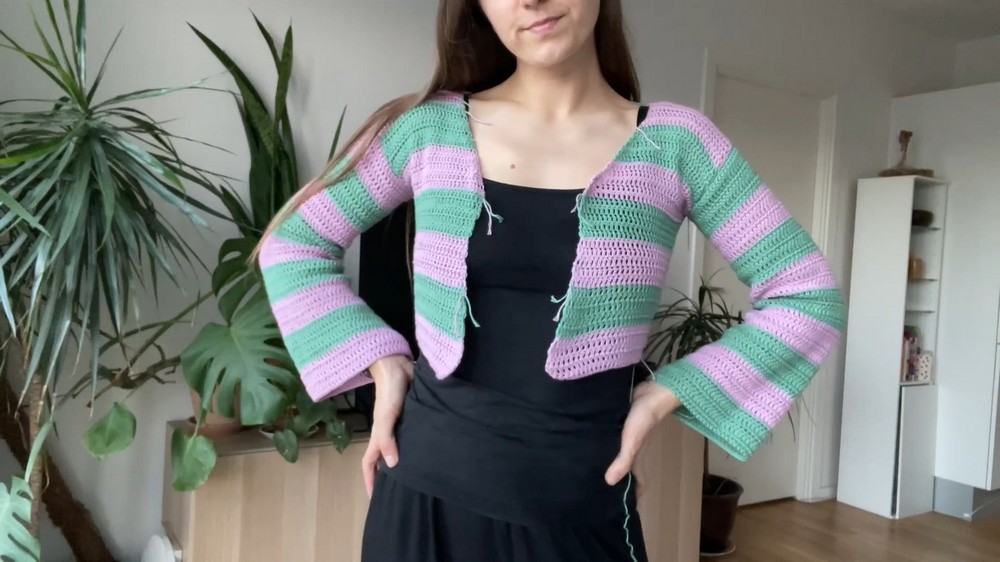
This crochet bell sleeve tie cardigan is a lightweight and stylish piece designed perfectly for spring and summer wear. It features a flattering cropped silhouette, flowing bell sleeves, and an elegant front tie detail that makes it both comfortable and fashionable for everyday styling. You can easily wear it for casual outings, breezy evening walks, or even dress it up for special occasions, as it adapts beautifully to different looks. But the real charm of this crochet cardigan shows up when you see how effortlessly it transforms a simple outfit. It turns it into something unexpectedly eye-catching.
Crochet Bell Sleeve Tie Cardigan Tutorial
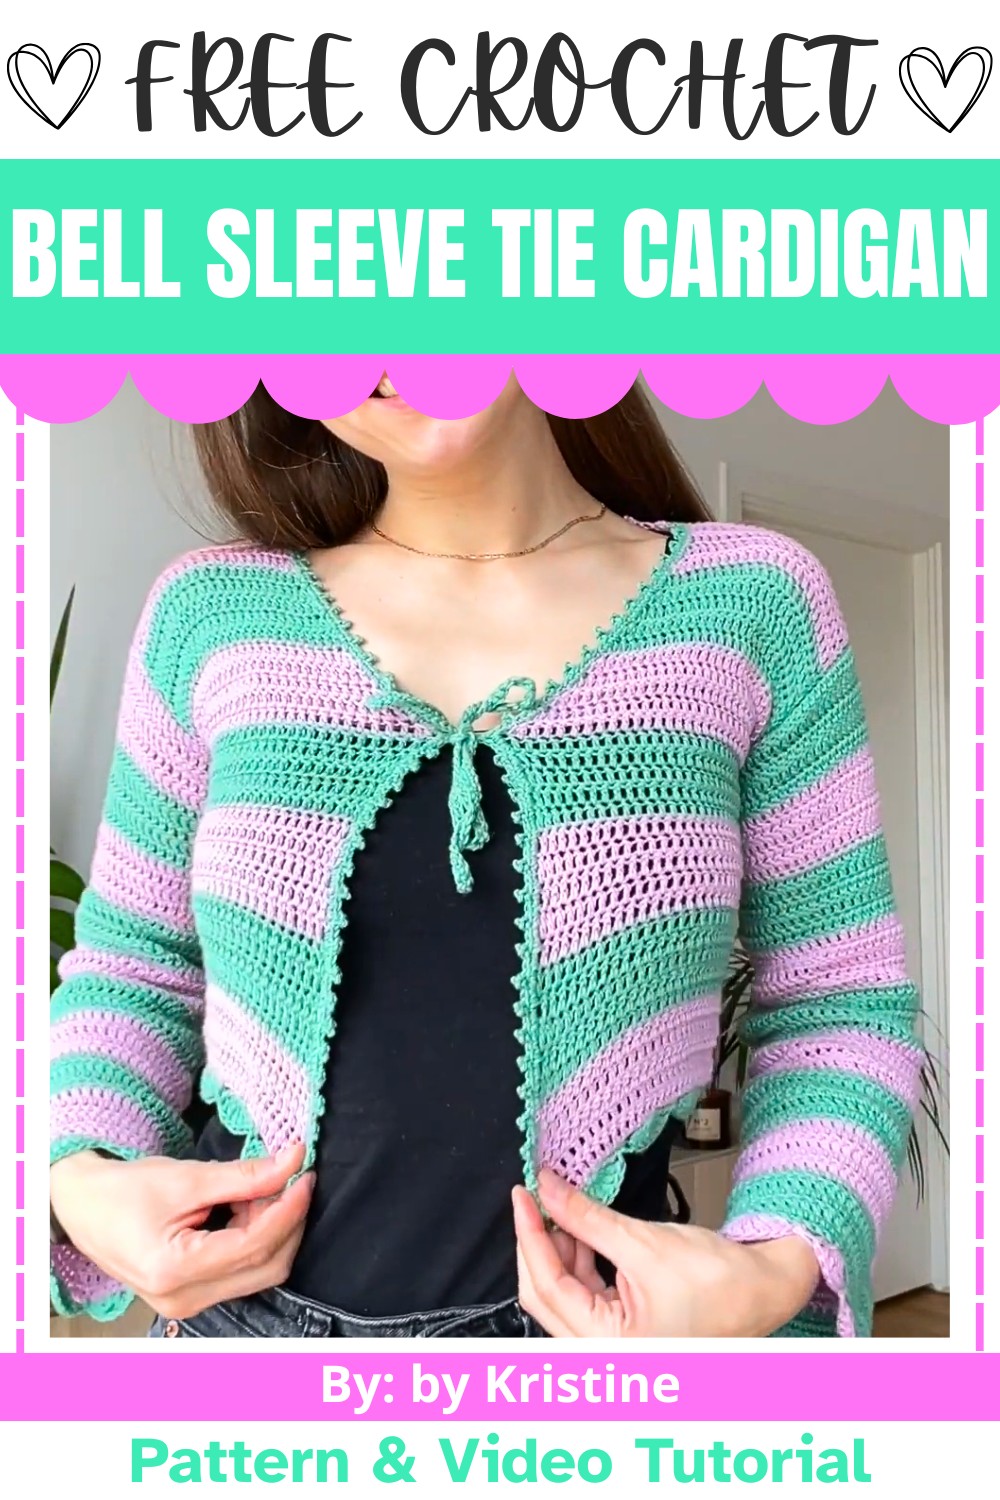
This cardigan is created by first crocheting in separate panels for the front, back, and sleeves. These pieces are then joined together carefully to give a neat and seamless finish. Soft shell stitches are added throughout the design to bring gentle texture and visual depth. The front tie straps not only enhance the style but also provide an adjustable and secure fit. You can also customise it with your favourite yarn colour to match your personal style. Even if you are a beginner, this crochet cardigan stays simple, enjoyable, and rewarding to complete.
Materials & Tools Needed
- Yarn:
- Two colors of 4-ply cotton yarn (or one color if preferred).
- Example: Green & pink.
- Crochet Hook:
- 3.5 mm hook.
- Other Tools:
- Scissors
- Stitch markers (optional, for easier panel alignment).
- Optional: Tape measure for accurate size adjustments.
Finished Size & Customization Ideas
Finished Size:
- Pattern Default: Medium/regular size.
- The back panel width is determined by the number of chains, which can be adjusted to fit your body.
Customization Ideas:
- Adjust Width: Add or remove chains in multiples to customize the width of each panel.
- Adjust Length: Increase or decrease the row count for the back, front panels, and sleeves to modify the overall length.
- Oversized Look: Add more chains for wider panels and bell sleeves for a loose, airy style.
- Color Variations: Use more than two colors to create a unique stripe or patchwork look.
Pattern Abbreviations & Terminology
- ch: Chain
- sl st: Slip stitch
- dc: Double crochet
- tr: Treble crochet
- st(s): Stitch(es)
- rep: Repeat
- YO: Yarn over
- pico: A small bobble stitch made for edging.
Notes:
- The pattern uses US Crochet Terminology.
- Each row begins with a ch 3, which counts as the first dc.
Step-by-Step Detailed Crochet Instructions
PART 1: BACK PANEL
- Foundation Chain:
- Create a slip knot.
- Chain a total of 67 + 3 chains (70 chains) for the starting width.
- Adjust this number to fit from one shoulder to the other.
- Row 1:
- Skip the first 3 chains (these count as the first dc).
- Work 1 dc into the 4th chain from the hook and in every chain across.
- (Total: 68 dc including the initial ch-3).
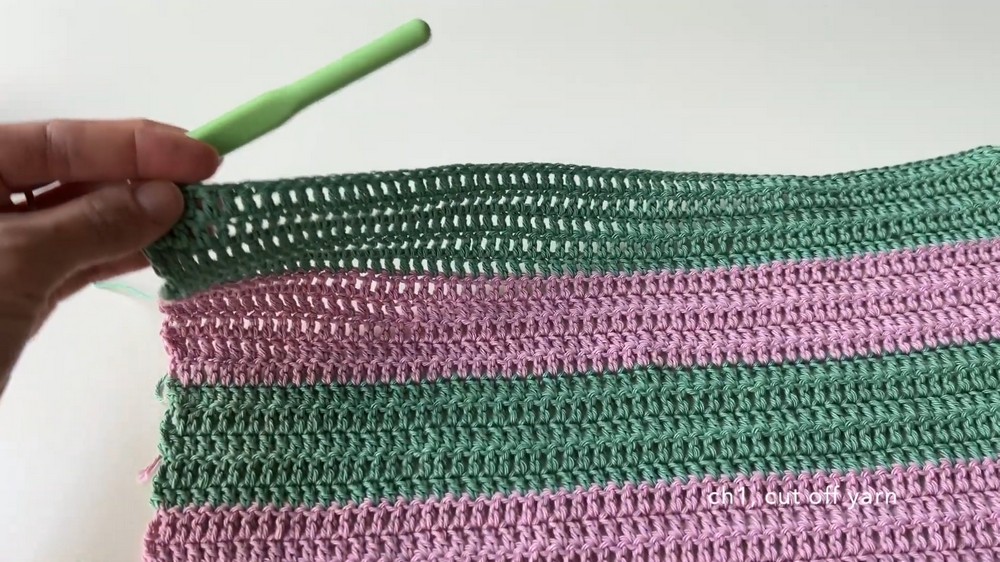
- Rows 2–35:
- Turn your work. Begin each row with a ch 3 (counts as the first dc).
- Skip the first st and work 1 dc in every stitch across.
- Switch colors after every 5 rows. (E.g., Rows 1–5: Green, Rows 6–10: Pink.)
- Fasten Off:
- Once you reach your desired length (e.g., 35 rows for medium size), fasten off the yarn.
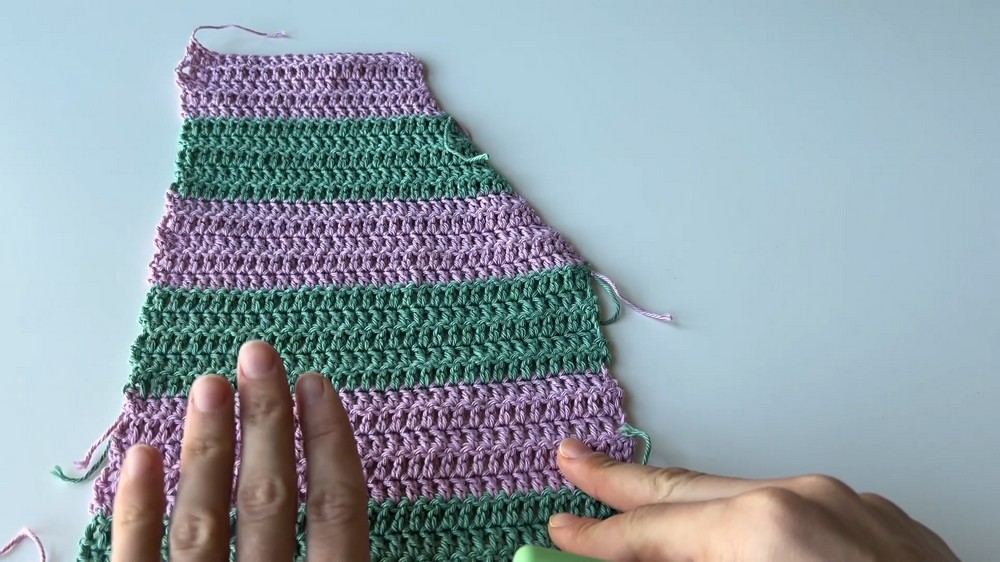
PART 2: FRONT PANELS (Make 2)
- Foundation Chain:
- Using one color (e.g., pink), chain 33 + 3 chains (36 chains) for each panel.
- Rows 1–20:
- Repeat the same process as the back panel for 20 rows.
- Shaping for Neckline:
- For the next 10 rows, decrease 1 stitch at the neckline side per row by working 2 dc together in the first/last stitches on that side.
- End with 5 regular rows (no decreases).
- Fasten Off:
- Once shaped, fasten off. Repeat for the second panel.
PART 3: SLEEVES (Make 2)
- Foundation Chain:
- Begin with 52 + 3 chains (55 chains). Adjust chain count to fit the widest part of your arm.
- Rows 1–20:
- Work regular rows of dc to reach just below the elbow.
- Switch colors after every 5 rows (e.g., Rows 1–5: Pink, Rows 6–10: Green).
- Adding the Bell Shape:
- From Row 21 onward, work increases on the first and last stitch of the row after every 5 rows.
- To increase: Work 2 dc in the first and last stitches of the row.
- Length:
- Continue increasing every 5 rows and add rows until you reach your desired sleeve length. Example: 45 rows.
- Fasten Off:
- Once complete, fasten off. Repeat for the second sleeve.
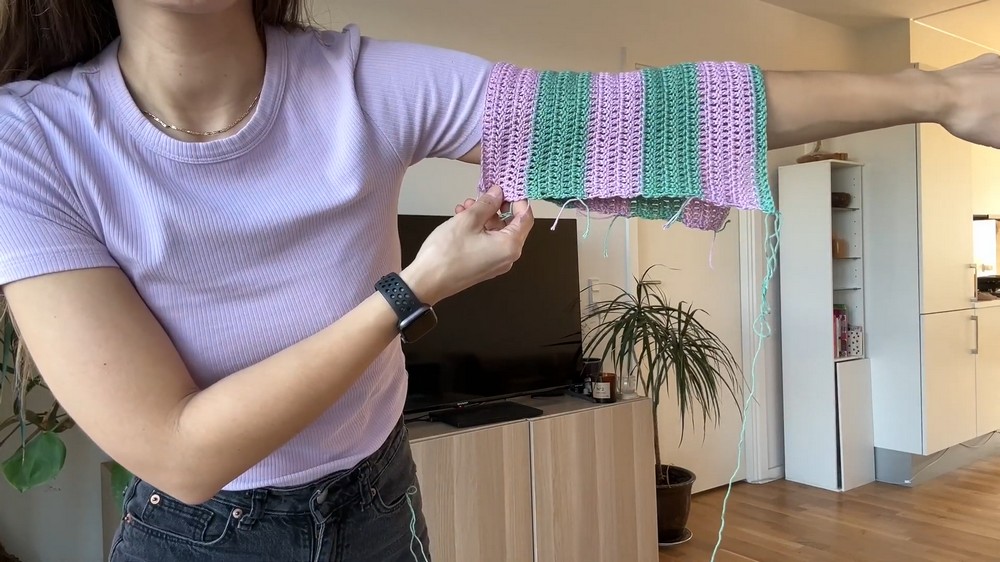
PART 4: ASSEMBLING THE PANELS
- Connecting Shoulder Seams:
- Align the top edges of the front panels with the back panel.
- Use slip stitches to join the shoulder seams.
- Attaching Sleeves:
- Center the sleeve panel along the armhole opening.
- Use slip stitches to join the sleeve to the body, ensuring equal spacing.
- Seam the Sides:
- Fold the cardigan.
- Seam the bottom of the sleeves and the sides of the body using slip stitches.
- Fasten off and weave in any loose ends.
PART 5: EDGINGS AND FINISHING
- Bottom Border:
- Using shell stitching:
- Attach yarn at the bottom corner.
- Skip 3 stitches, and in the 4th stitch, work 7 tr (treble) crochets.
- Skip 3 stitches, then sl st into the next stitch.
- Repeat this shell stitch pattern along the bottom edge of the cardigan.
- Using shell stitching:
- Sleeve Borders:
- Repeat the shell stitch edging along the sleeve openings.
- Inner Border & Ties:
- Work pico stitches along the front edges:
- Single crochet along the edge. After every 3rd single crochet, chain 3 and slip st into the base to create a pico.
- At the neckline on each side (where decreases start), create long ties:
- Chain 50, then single crochet back into each chain for a sturdy strap.
- Work pico stitches along the front edges:
- Weave In Loose Ends:
- Use your crochet hook to hide and secure all loose ends.

Tips for Success
- Adjust Fit Frequently: Measure panels and try them on as you work to ensure a good fit.
- Stitch Placement: When joining stitches to rows (e.g., sleeves to the body), aim for even spacing for a smooth seam.
- Blocking: To improve drape, lightly block your finished cardigan.