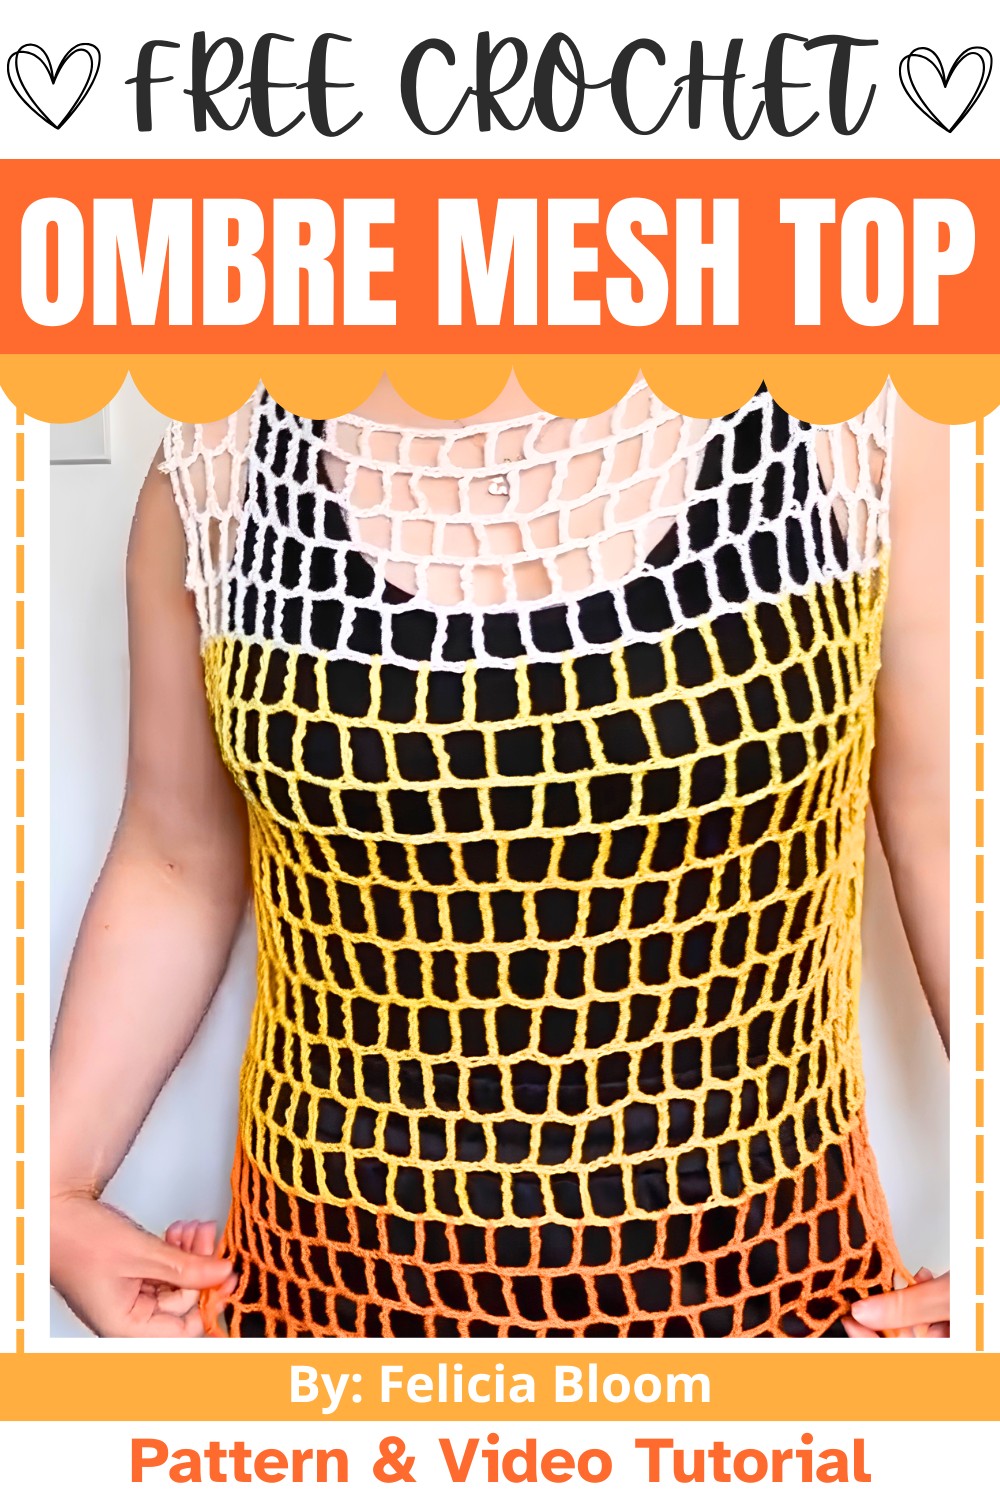
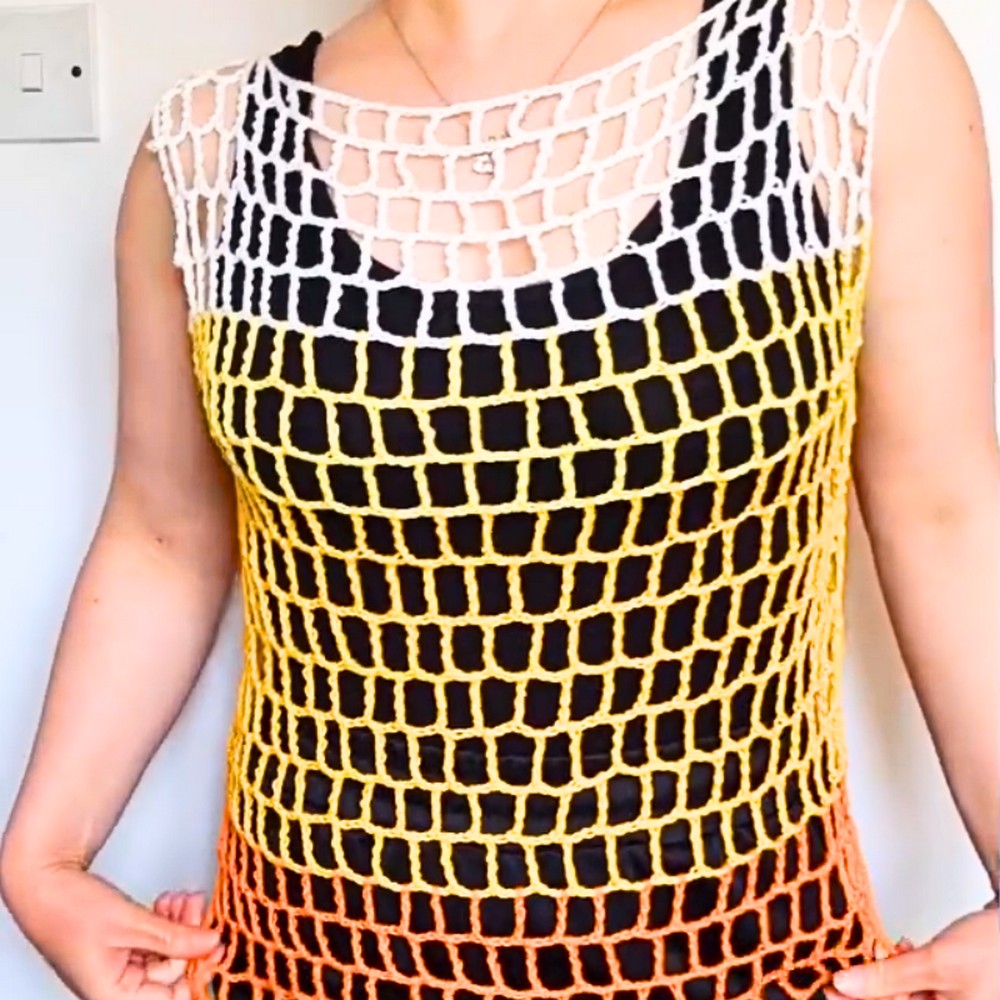
The ombre mesh top is the kind of handmade crochet piece that instantly stands out with its beautiful combination of colors and effortlessly stylish look. It is designed to be comfortable, versatile, and easy to wear with everything from casual jeans and shorts to your favourite beachwear. The airy mesh texture keeps it light and breathable, making it perfect for warm days, while the customizable fit allows you to create a top that feels uniquely yours. Combining simplicity with a modern look, this crochet design is sure to become a favourite in your handmade wardrobe. And what makes it even better is how surprisingly easy this ombre mesh top is to create from start to finish.
Free Crochet Ombre Mesh Top Pattern
To make this ombre top, you will crochet two simple panels using an easy-to-repeat mesh pattern that works up beautifully and keeps the process enjoyable. Because the design is completely made to measure, you can easily adjust the size and fit as you work. Soft cotton yarn is an excellent choice for this crochet piece, and using four shades creates a stunning ombre effect, though a single color can look just as beautiful. Once both panels are complete, they are joined at the shoulder and sides while leaving space for the neckline and arm openings. The construction is straightforward and beginner-friendly, making it a rewarding piece that you can enjoy from the very first stitch.
Credit Felicia Bloom
Materials & Tools Needed:
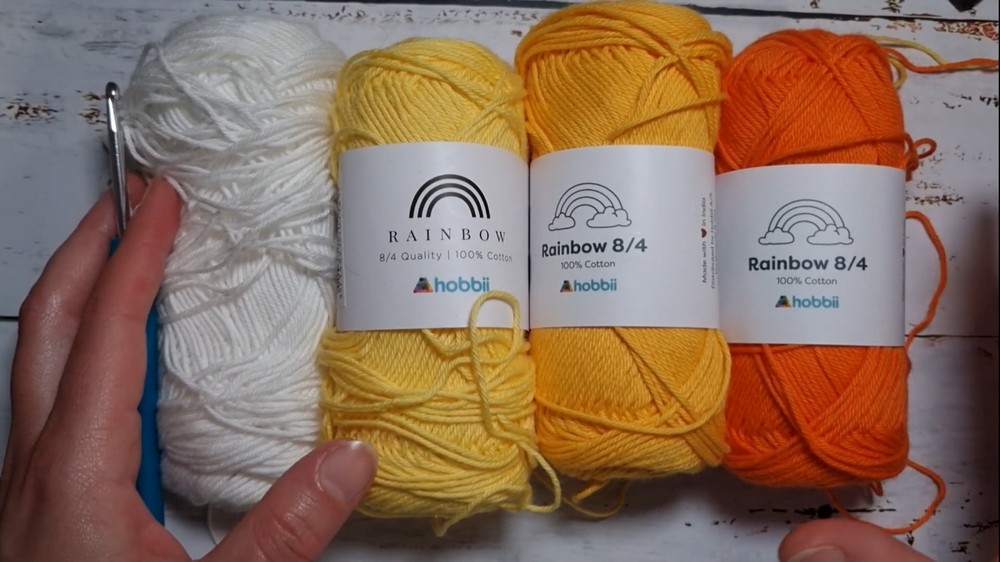
- Yarn: Four colors of your choice, or a single color.
- The tutorial uses Rainbow from Hobbii (100% cotton), 8/4 thickness.
- Suggested Color Palette: Gradient tones for an ombre effect (e.g., white, yellow, orange, etc.).
- Hook: 4.0 mm hook (a 3.5 mm hook is also indicated on the yarn label, but 4.0 mm is used in the video).
- Other Supplies:
- Scissors (or a yarn cutter).
- Measuring tape (since the top is made-to-measure).
- Stitch markers.
- Darning needle (for finishing).
Finished Size & Customization Ideas:
- The top is "made-to-measure," meaning you adjust the size based on your own body dimensions.
- Width: Customize the initial chain to fit the distance from shoulder to shoulder (add a few extra cm if you want an oversized fit).
- Length: Adjust the number of rows for your desired crop or top length. You can even extend it to make a dress.
Customization Options:
- Use solid colors or multicolored yarns.
- Change the width by adjusting the chain length.
- Increase or decrease the rows in each color block to customize the ombre effect.
Pattern Abbreviations & Terminology:
- ch: Chain
- dc: Double crochet
- tr: Treble crochet
- st(s): Stitch(es)
- sp(s): Space(s)
- yo: Yarn over
- sl st: Slip stitch
Skill Level: Beginner-friendly with detailed step instructions.
Step-by-Step Detailed Crochet Instructions:
1. Create the Foundation Chain:
- Start with a slip knot on your hook.
- Ch a long chain that measures from shoulder to shoulder, adding extra for a looser fit.
- Measure this using a measuring tape or directly against your shoulders.
- (Example: 47 cm or ~18.5 inches).
- Count the number of chains and write it down so you can duplicate the second panel.
- Place a stitch marker on the last chain for reference.
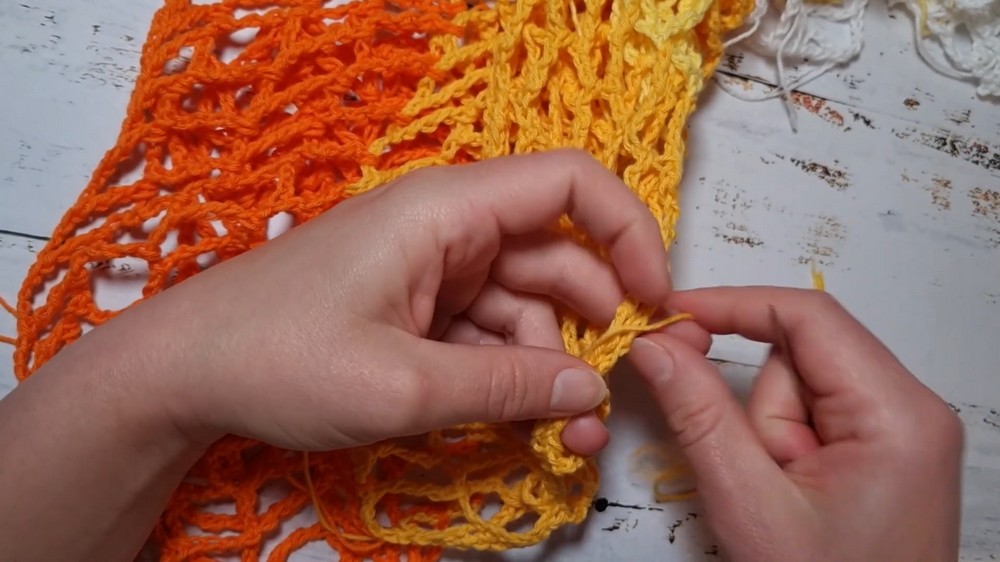
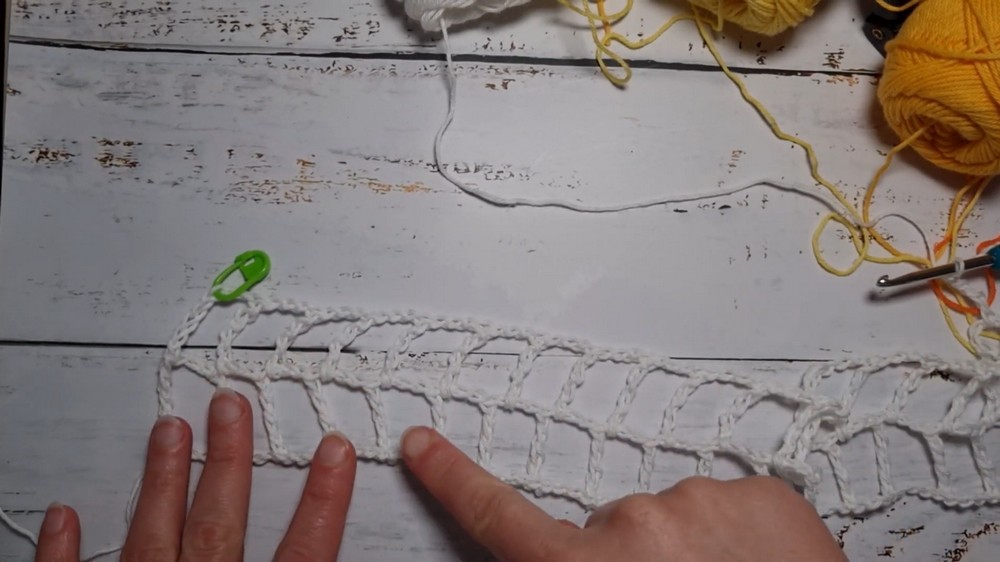
2. Row 1: Begin Mesh Pattern
- Add 3 extra chains to the foundation chain (acts as the first treble crochet).
- YO three times, insert your hook into the marked chain, pull through. Work the treble crochet as follows:
- Pull through 2 loops at a time until 1 loop remains on your hook.
- Ch 3, YO three times, skip 3 chains, and treble crochet into the 4th chain.
- Continue this sequence across the row:
- Ch 3, YO three times, treble into every 4th chain.
- Continue this sequence across the row:
- At the end of the row, if you have extra chains that don’t fit the sequence, simply leave them unworked (you can remove them later).
3. Row 2 & Beyond: Build the Mesh Pattern
- Ch 8 at the start of the row (5 for the treble stitch height, 3 for the gap).
- Turn your work. Insert a stitch marker on the 3rd chain for clarity when working the next row.
- YO three times and treble crochet into the first sp (gap created by the “Ch 3” from the previous row).
- Repeat the sequence across the row: Ch 3, YO three times, treble crochet into each gap.
- At the end of the row, treble crochet into the top of the final stitch in the previous row.
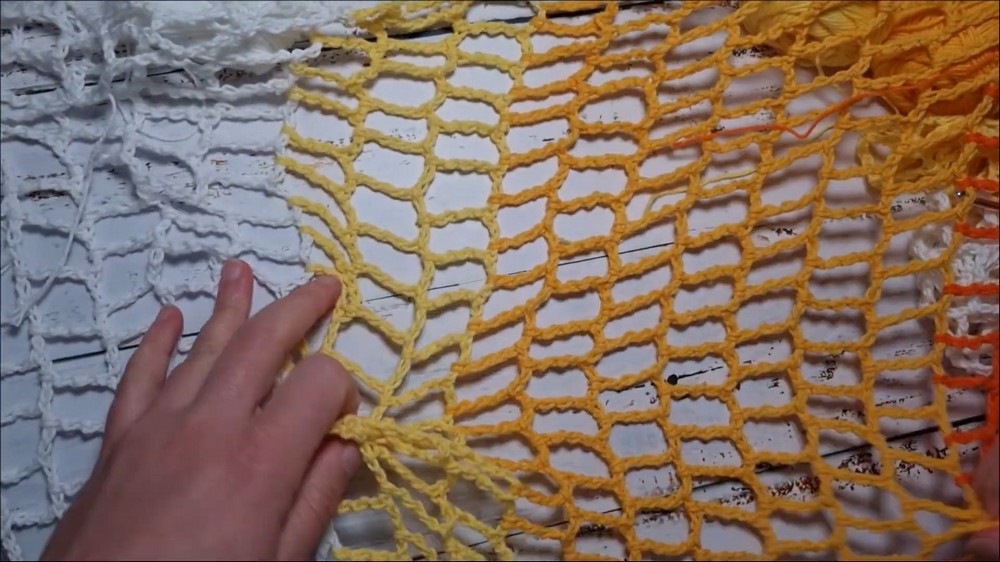
4. Continue & Add Color Changes
- Rows 3-5: Continue in white yarn, following the mesh pattern.
- After completing Row 5, change to the second color.
- In the tutorial, yellow is used next.
5. Switching Colors
- At the end of the row, cut the yarn (leave a small tail). Tie the new color yarn next to it.
- You can tie a simple double knot or use other transitions for a neater join.
- Pull the new color yarn through to start the next row.** Start the row by chaining 8 as usual.**
- Continue the mesh pattern with the new color until you’ve completed the desired number of rows.
Color Pattern from Tutorial:
- Rows 1-5: White yarn
- Rows 6-8: Light yellow
- Rows 9-15: Yellow-orange
- Rows 16-19: Orange (final section)
6. Create Two Panels
- Make a second panel identical to the first using the same stitch and row counts.
7. Assembly
Seaming the Shoulders:
- Align the two panels on top of each other.
- Seam the top edges of each panel together at the shoulders.
- Sew 5 cm (approx. 2 in.) on each side, leaving a large gap for the neckline.
- Use a darning needle and matching yarn for a clean finish.
Seaming the Sides:
- Sew the sides together, starting from the base.
- Leave the armholes open by stopping your seam near the light yellow section (or higher, depending on preference).
- Add reinforcement with double knots and weave in any loose ends using the needle.

8. Finishing Touches:
- Weave in all loose ends into the stitches using a crochet hook or needle.
- Block the top if desired to relax the stitches and even out any tension issues.
Customization Ideas:
- Adjust the Neckline: Leave a larger gap for a wider neckline.
- Ombre Effects: Extend or shorten color sections for a unique gradient.
- Make It a Dress: Add extra rows to your panels for more length.
- Sleeves: Add short or long sleeves using the mesh stitch.