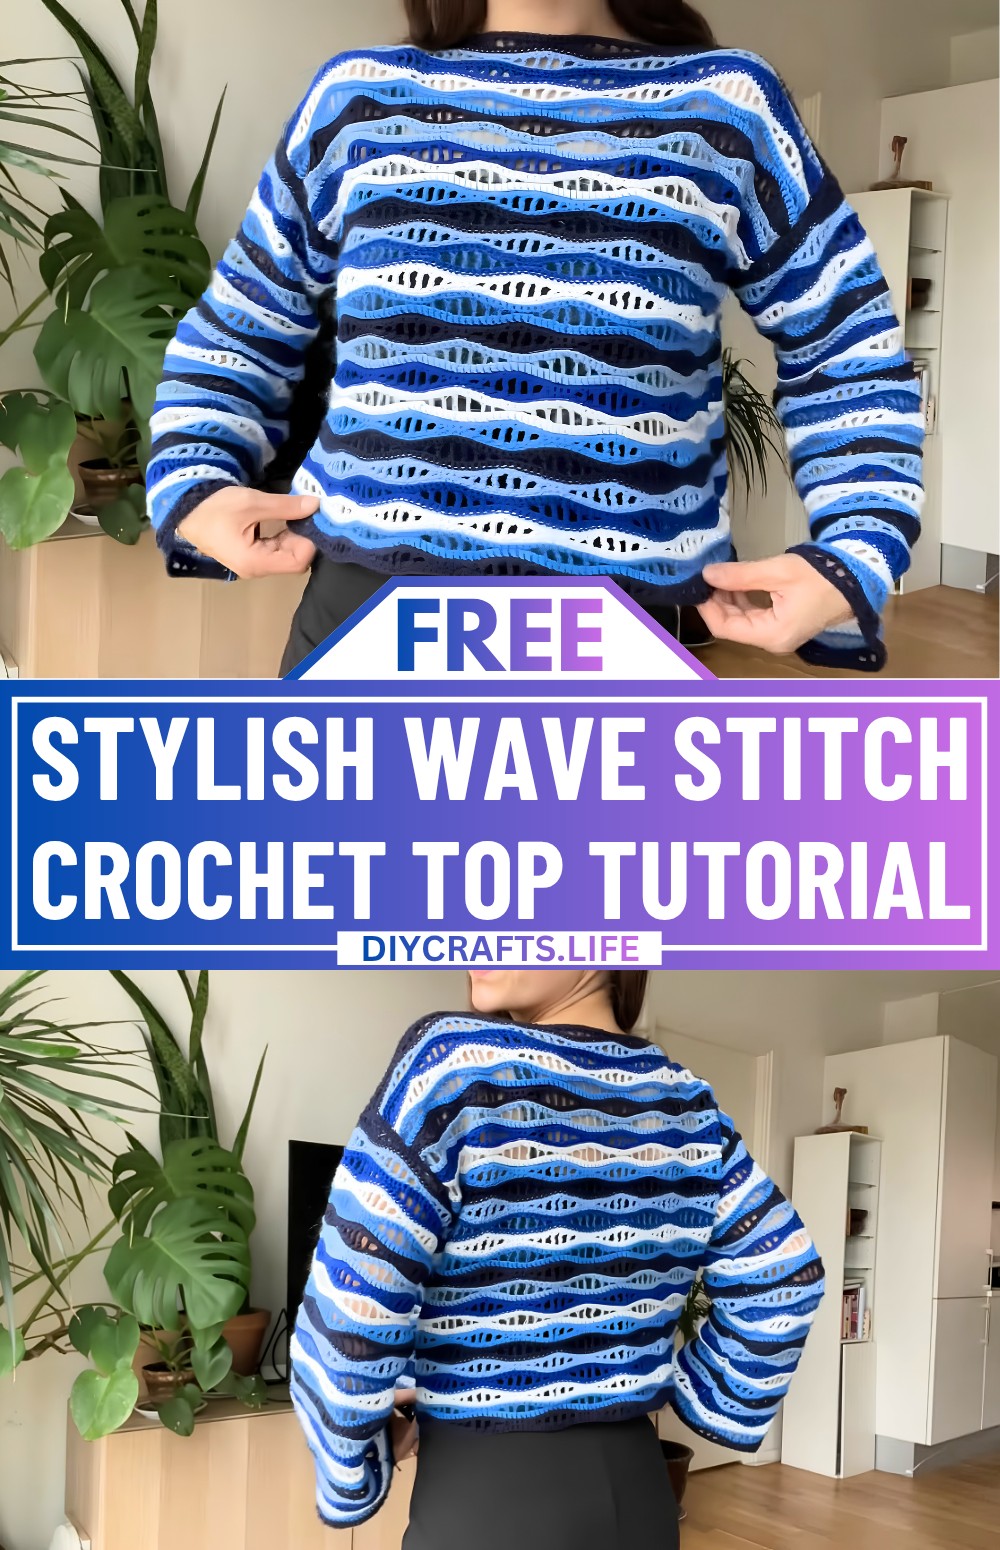
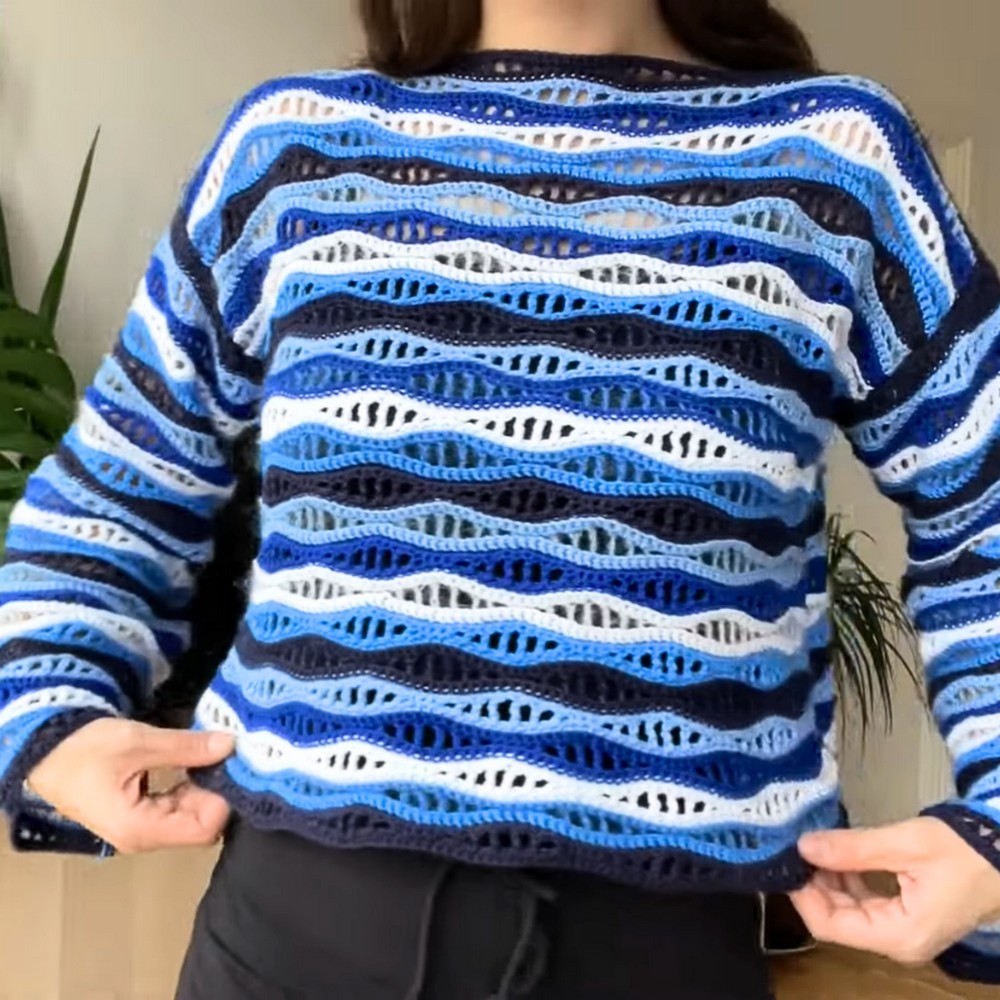
This crochet top is a stylish and versatile wardrobe piece that’s comfortable to wear and easy to pair with jeans, skirts, or shorts. The wave stitch pattern gives it a gorgeous texture and flow, making it unique and elegant. It’s the perfect balance of casual and chic!
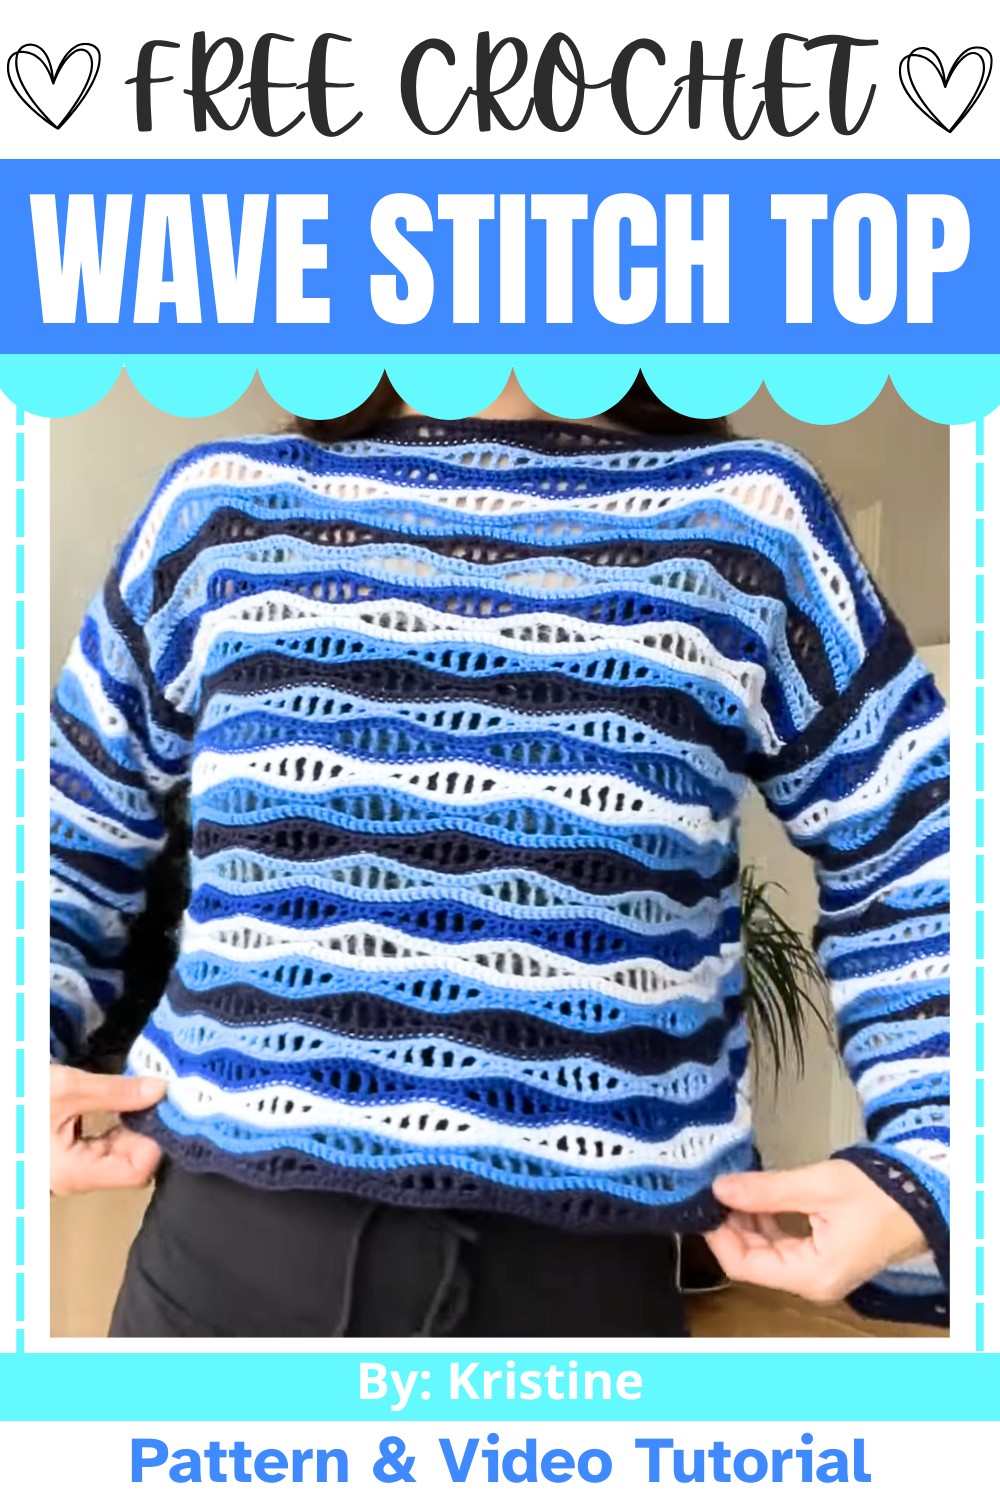
Wave Stitch Crochet Top Pattern Free
The top is worked up using simple shapes and joined together, which means no complicated shaping is required. The standout wave stitch creates a lovely flowing design that looks intricate but is beginner-friendly. You can experiment with colors to create bold or subtle styles to suit your personality.
Credit Kristine
Materials & Tools Needed
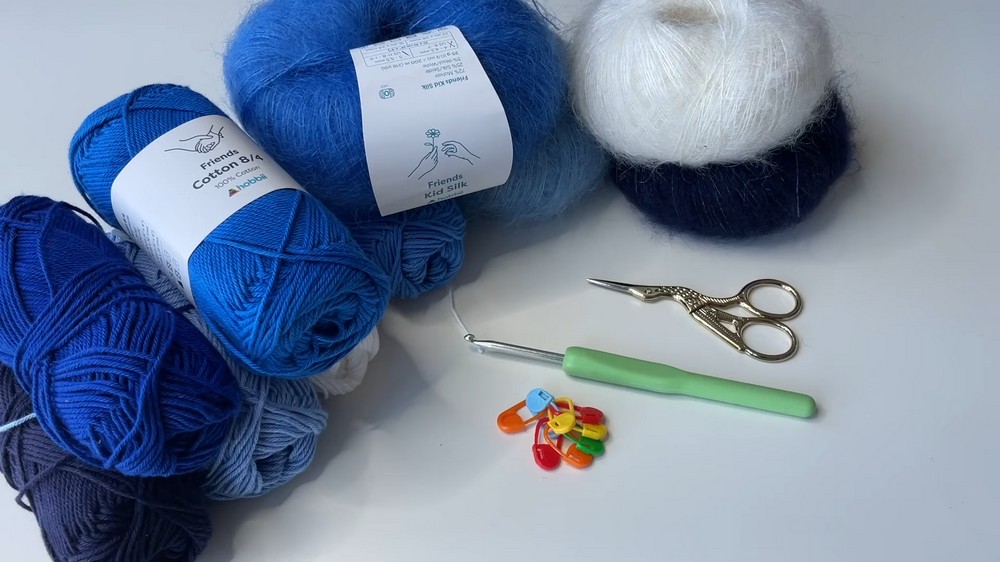
- Yarn:
- 4 Ply Cotton Yarn in different shades (e.g., shades of blue).
- Mohair Blend Yarn in complementary shades.
(Refer to tutorial for specific color scheme and yarn details.)
- Crochet Hook: 3.5 mm.
- Additional Tools: Stitch markers, scissors, measuring tape.
Finished Size & Customization Ideas
- Finished Size:
- The width and length of the panels determine the size of your top.
- Panel sizes explained in the tutorial:
- Body panels worked with 112 + 2 chains.
- Arm panels worked with 80 + 2 chains.
- Customization:
- Adjust the width of the body and arm panels by increasing or decreasing the base chain (multiples of 16 + 2).
- Mix and match colors or yarn types for a unique design (e.g., alternating rows of mohair and cotton).
- Modify the neck width and sleeve length as desired.
Pattern Abbreviations & Terminology
(US Terminology)
- ch: Chain
- sc: Single Crochet
- hdc: Half Double Crochet
- dc: Double Crochet
- tr: Treble Crochet
- trtr: Treble Treble Crochet
- st(s): Stitch(es)
- sl st: Slip Stitch
- RS: Right Side
- WS: Wrong Side
Step-by-Step Wave Stitch Crochet Instructions
1. Body Panels
Row 1: (Base Chain)
- Start with multiples of 16 + 2 chains for your desired panel width.
- Example: For body panels, start with 112 + 2 chains.
- For arm panels, start with 80 + 2 chains.
- Create a slipknot and work your chains.
- Count carefully to ensure multiples of 16 + 2.
- This determines the width of the panel.
Row 2: Foundation Row (Single Crochet)
- Work 1 sc in the 2nd chain from the hook (skip the first chain).
- Continue working 1 sc in each chain across.
- At the end of the row, chain 1, turn your work.
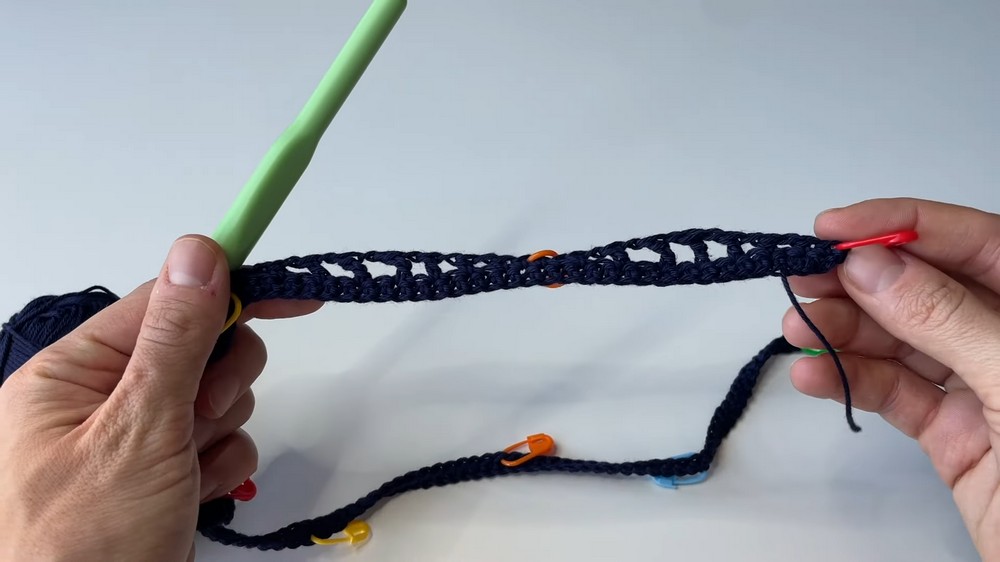
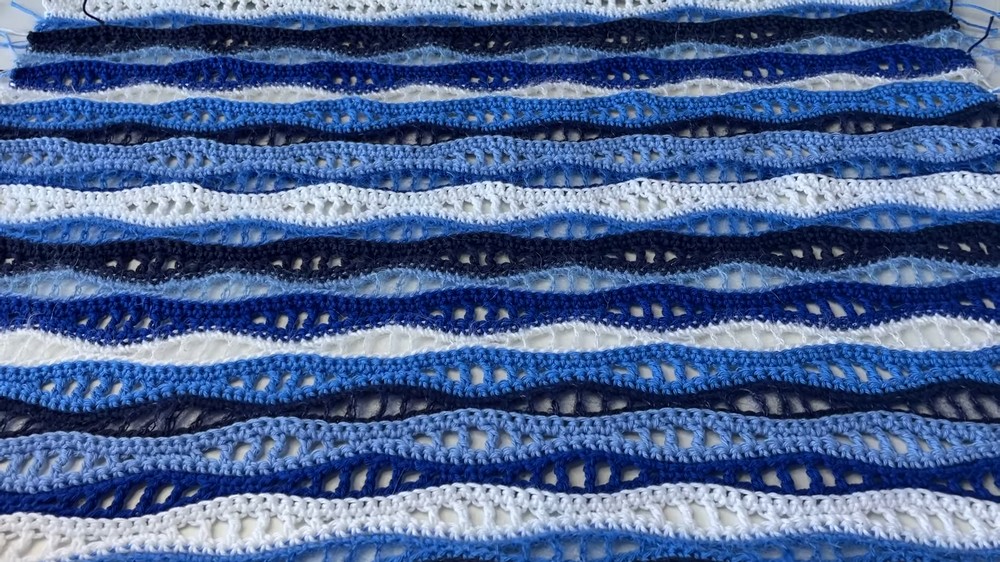
Row 3: Establishing the Wave Stitch Pattern
- Use Stitch Markers: Place markers in the 1st and every 16th stitch to track pattern repeats.
- Follow this pattern for every 16 stitches:
- sc in the 1st stitch. Remove and reposition the stitch marker after finishing this stitch.
- Work 1 sc, then:
- Chain 1, skip 1, hdc in the next stitch.
- Chain 1, skip 1, dc in the next stitch.
- Chain 1, skip 1, tr in the next stitch.
- Chain 1, skip 1, trtr in the next stitch.
- Chain 1, skip 1, trtr in the next stitch (the "peak" of the wave).
- Chain 1, skip 1, dc in the next stitch.
- Chain 1, skip 1, hdc in the next.
- Chain 1, skip 1, sc in the next.
- Work 1 sc in the stitch with the marker.
- Repeat this sequence for the entire row.
- Finish with 1 sc in the final stitch. Chain 1, turn.
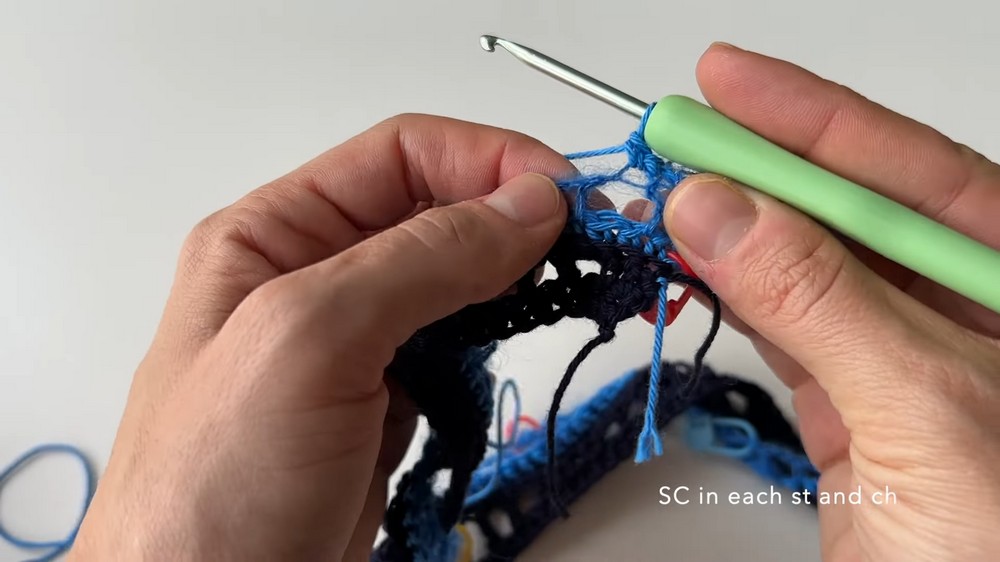
Row 4: Single Crochet Row
- Work 1 sc into every stitch and chain space (following the wave pattern).
- Count stitches between markers to ensure you maintain 16 stitches per section.
- Chain 1, turn.
Row 5: Back Loop Single Crochet
- Work 1 sc in the back loop only of each stitch across the row.
- This creates texture.
- Position stitch markers in the 1st and every 16th stitch for pattern tracking.
- Chain 1, turn.
Row 6: Wave Stitch Repeat Row
Repeat the same steps as performed in Row 3.
This is the wave stitch pattern row you will use regularly.
Row 7: Back Loop Single Crochet
Repeat Row 5 to create texture.
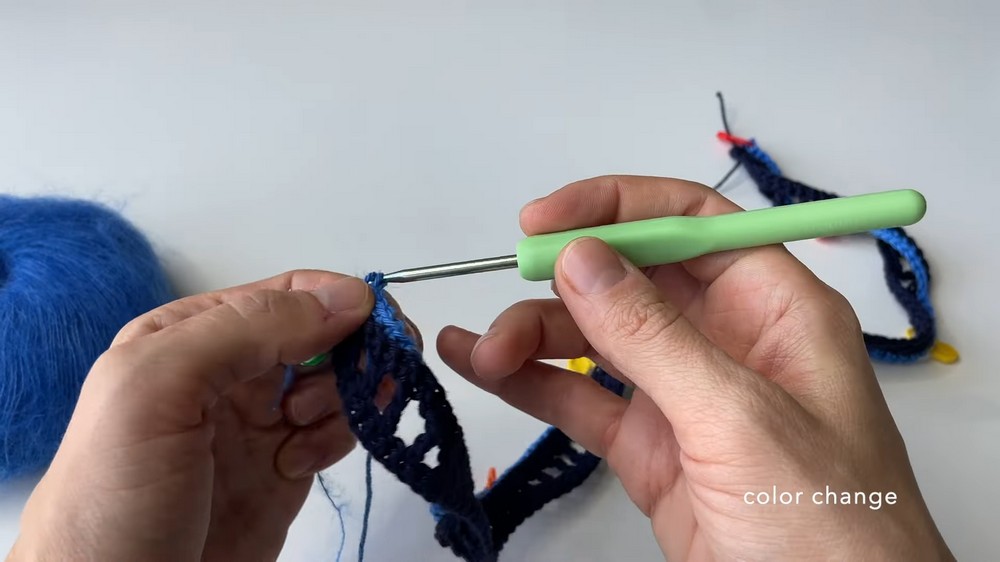
2. Color Changes
- Alternate colors every 3 rows (after completing two wave stitch rows and one back-loop sc row).
- To change colors:
- Stop short of finishing the final stitch of a row.
- Attach the new color and finish the stitch with the new yarn.
- Secure the old color and trim if necessary.
3. Repeat the Pattern
Continue repeating rows 2-7 until the panel reaches your desired length.
4. Arm Panels
- Follow the same steps as the body panels, but with a shorter base chain.
- Example: Start with 80 + 2 chains for arm panels.
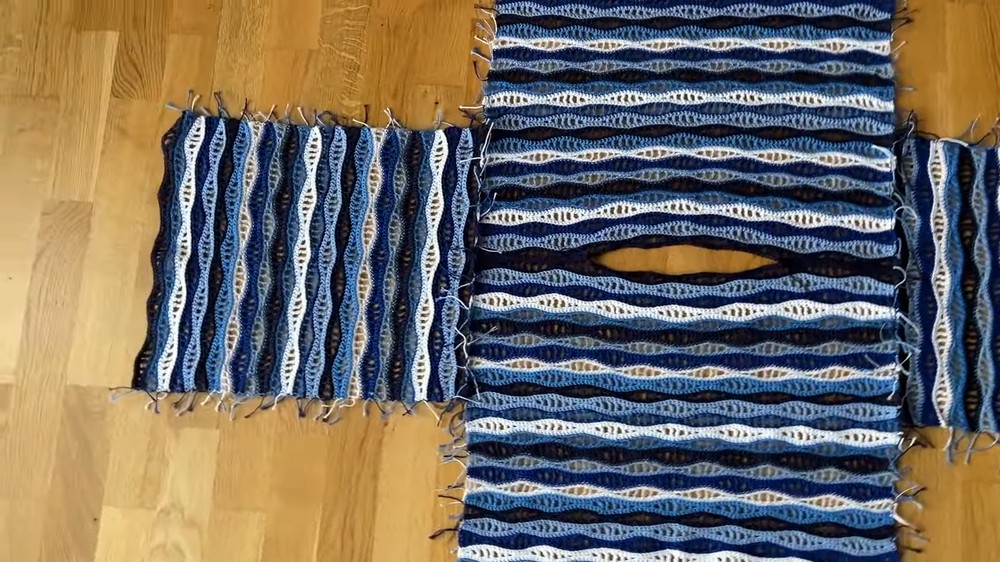
Assembly Instructions
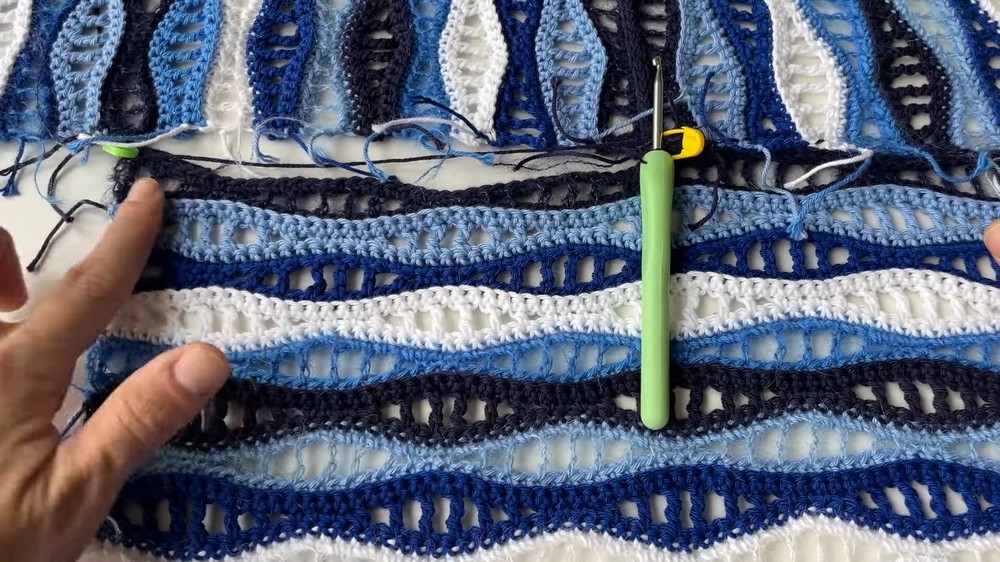
- Connect the Shoulder Panels:
- Lay the panels flat with the RS facing inward.
- Match the top edges of the body panels and stitch together using slip stitches.
- Leave approximately 40 stitches open for the neck hole.
- Attach Sleeve Panels:
- Align the center of each sleeve panel with the side seams of the body panels.
- Use stitch markers to secure evenly.
- Seam the sleeve panels to the body using slip stitches.
- Seam the Sides & Sleeves:
- Fold the work in half (RS facing inward).
- Seam the sides of the body and the bottom of the sleeve panels using slip stitches or a preferred joining method.
Finishing Touches
- Weave in Loose Ends:
- Use a crochet hook or darning needle to hide all loose ends.
- Edge Work or Blocking (Optional):
- Add edging to the neckline, sleeves, or hem to create a polished look.
Tips from the Tutorial
- Use stitch markers to keep track of stitch counts.
- Feel free to mix yarn types (e.g., cotton and mohair) for texture variation.
- Adjust the wave stitch height and spacing to create unique patterns.