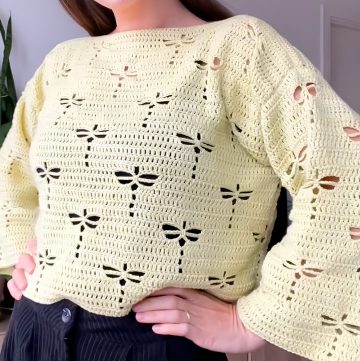
Transform a simple ball of yarn into an effortlessly chic mesh long-sleeve top that redefines handmade fashion. This lightweight and airy design brings a modern twist to traditional crochet, creating a wardrobe piece that is as comfortable as it is elegant. Whether you’re pairing it with jeans for a relaxed day out or layering it over a dress for an evening look, this top is bound to turn heads with its understated charm.

Crochet Mesh Long Sleeve Top
What sets this pattern apart is its perfect balance of simplicity and sophistication. The alternating rows of mesh and solid stitching give it a stylish, textured effect, while the delicate ribbing along the edges adds a polished finish. With endless customization options, including size, color, and sleeve length, this top allows you to put your personal stamp on wearable art that’s both functional and fashionable.
Credit LaDenser Crochets
Materials & Tools Needed
- Medium weight acrylic yarn (color of your choice)
- 5 mm crochet hook
- Measuring tape
- Pair of scissors
- Tapestry (darning) needle
- Stitch markers
Pattern Abbreviations & Terminology
(U.S. Terminology)
- ch = chain
- sc = single crochet
- dc = double crochet
- sl st = slip stitch
- st(s) = stitch(es)
- sk = skip
- sp = space
- RS = right side

Step-by-Step Instructions
This top is constructed in panels (front and back), with optional sleeves.
1. Front/Back Panels
Step 1: Foundation Chain
- Measure your bust size. Divide this measurement by 2 and create a chain that measures half of your bust size.
- Ensure your chain is a multiple of 2.
- Example: If your bust is 36 inches, chain to achieve 18 inches (multiple of 2)—approximately 50 chains.
- Stretch the chain slightly to confirm the measurement matches half your bust size.
Step 2: Row 1 - Single Crochet Row
- Skip the first ch from the hook.
- Work 1 sc into the second ch from the hook.
- Place 1 sc in each ch across the row.
- Count your stitches—ensure it matches (starting chain - 1). For 50 chains, you will have 49 stitches.
- Chain 4 (counts as a dc + ch 1) and turn.

3: Row 2 - Mesh (Double Crochet) Row
- Yarn over, sk the first 2 sts, and work 1 dc into the 3rd st.
- Ch 1, sk the next st, and work 1 dc into the following st.
- Repeat (ch 1, sk 1, dc) across the row.
- At the last 2 sts, ch 1, sk 1, and work the final dc into the last st.
- For the next row, ch 1 and turn.
Step 4: Row 3 - Single Crochet Row
- Work 1 sc into the first dc.
- In the next ch-1 sp, work 1 sc.
- Work 1 sc into the following dc.
- Continue working 1 sc into each ch-1 sp and dc across the row.
- End with 1 sc in the chain-3 turning chain of the previous row.
- Ch 4 (for the next mesh row) and turn.
Step 5: Repeat Rows
Alternate between Row 2 (Mesh Row) and Row 3 (Single Crochet Row) until the panel measures 1 inch less than your desired top length (e.g., for 15 inches total length, stop at 14 inches).
- Example: A total of 29 rows (approximately) will give you a length of 14 inches.

6: Ribbing
- From the bottom edge of the panel, ch 6 for the ribbing.
- Turn and start in the 2nd ch from the hook:
- Work 1 sl st into each of the 5 ch sts (total: 5 sl sts).
- Sl st into the next panel stitch at the bottom edge to attach the ribbing.
- Turn, and in the back loops of the ribbing sts only, work 5 sl sts across.
- Continue this back-and-forth ribbing technique until you’ve covered the bottom edge of the panel.
- Fasten off.
Step 7: Create a Second Panel
Repeat Steps 1–6 to create another identical panel for the back of the top.
2. Joining the Panels
Step 1: Join at the Shoulders
- Lay both panels with the RS facing up.
- Mark the neckline on both panels:
- Find the center stitch using a stitch marker.
- From the center, measure 4 inches outward on both sides for the neckline width.
- Starting at one shoulder, sl st through corresponding sts from each panel up to the neckline marker.
- Repeat for the other shoulder.

Step 2: Join at the Sides (Leaving Armholes)
- From the shoulder seam, measure 8 inches downward for the armhole. Place a marker to mark this spot.
- Starting at the bottom, join the side seams using sc up to the armhole marker.
- Repeat on the other side.
3. Sleeves (Optional)
Step 1: Working the Sleeve Base
- Attach yarn to the armpit seam where the sides of the panels were joined.
- Work sc evenly around the armhole edge:
- Place 2 sc in dc rows and 1 sc in sc rows.
- Ensure the total sc count is a multiple of 2.
- Sl st into the first sc to join the round.
Step 2: Sleeve Length
Repeat the following rows to build the sleeve:
- Row 1 (Mesh Row): Ch 4, sk 1, dc in next st, ch 1, sk 1, dc. Repeat around. Sl st to join.
- Row 2 (Single Crochet Row): Ch 1, sc in first dc, sc in ch-1 sp. Continue around. Sl st to join.
Alternate these rows until the sleeve reaches your desired length (e.g., 48 rows for full length).

Step 3: Sleeves Tapering (Optional)
To taper the sleeve, decrease at the start and end of the mesh row every 6-8 rows.
Step 4: Finish the Sleeve
- At the end of the last row, sc evenly around the sleeve edge to create a clean finish.
- Sl st into the first sc, cut yarn, and fasten off.
Repeat for the second sleeve.
4. Finishing
- Weave in all loose ends with a tapestry needle.
- Block your top if necessary to achieve the perfect shape and size.

Final Notes
- This top design allows for flexibility. You can add decorative stitches or color changes as desired.
- Adjust the neckline or sleeve width as necessary by changing stitch counts.