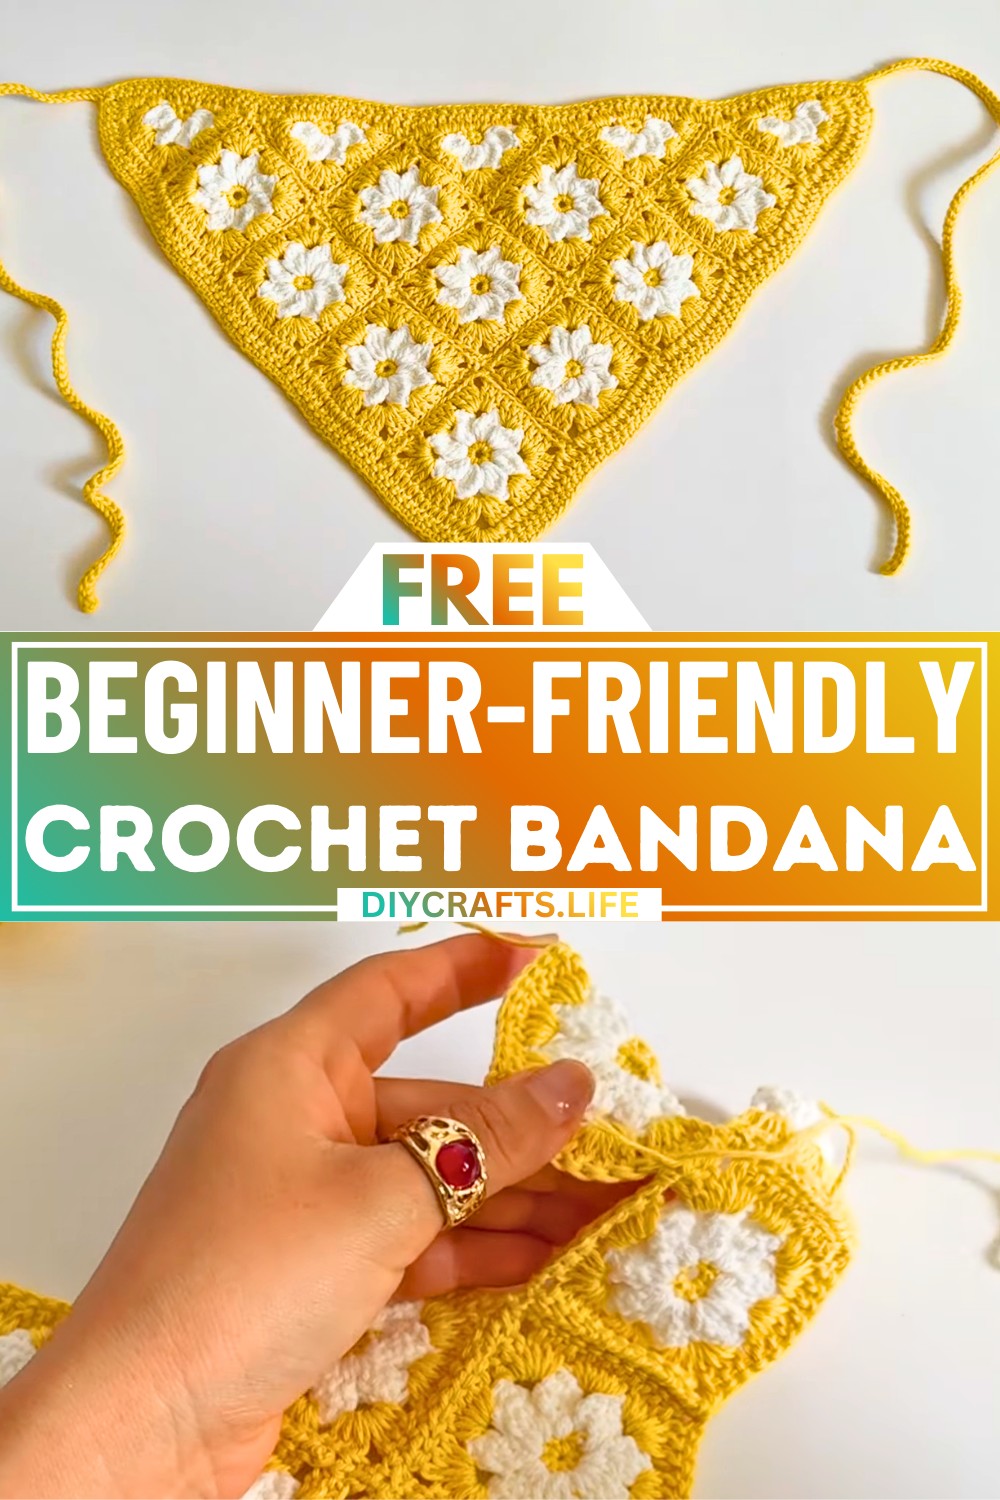
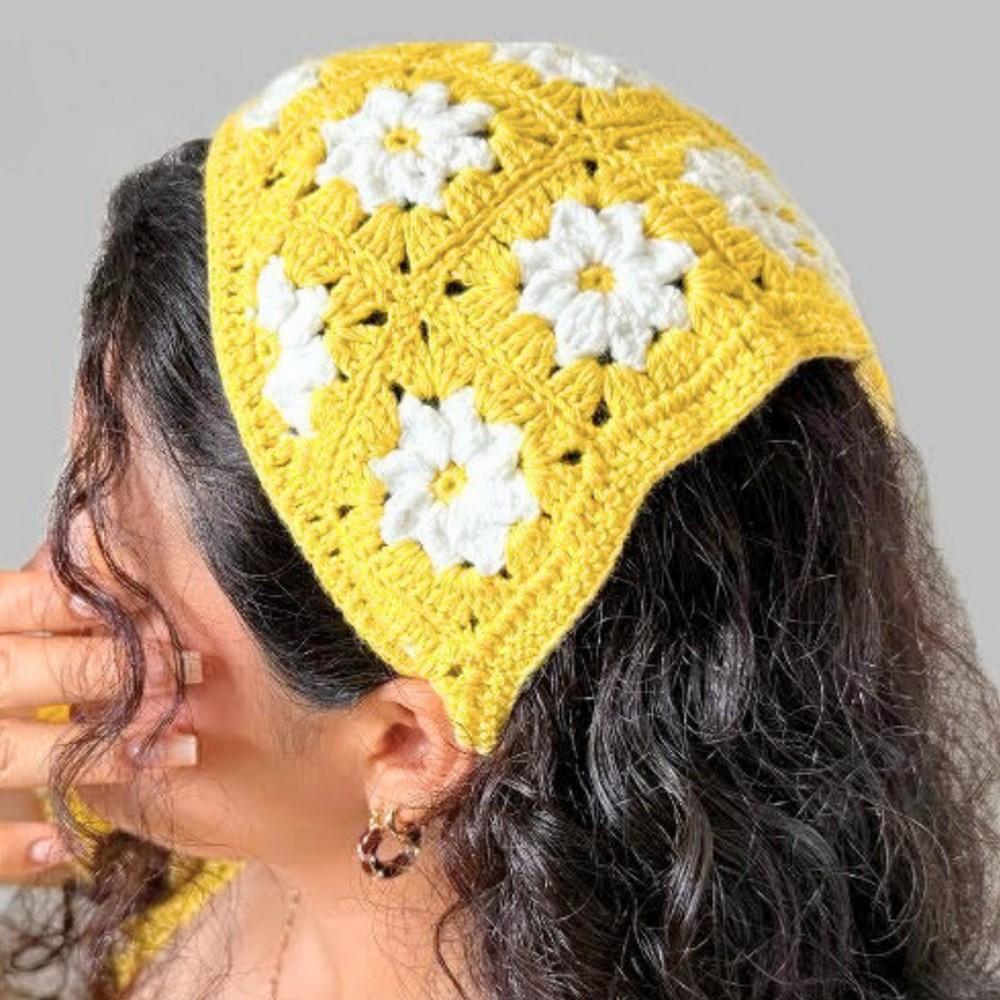
A crochet bandana is a stylish and practical accessory perfect for your hair. This lightweight piece adds charm to any outfit, keeping your hair in place while letting you show off your creativity. Great for sunny days, casual outings, or even gifting to someone special, this crochet bandana stands out with its colorful, intricate design.
Crochet Bandana Tutorial Step-by-Step
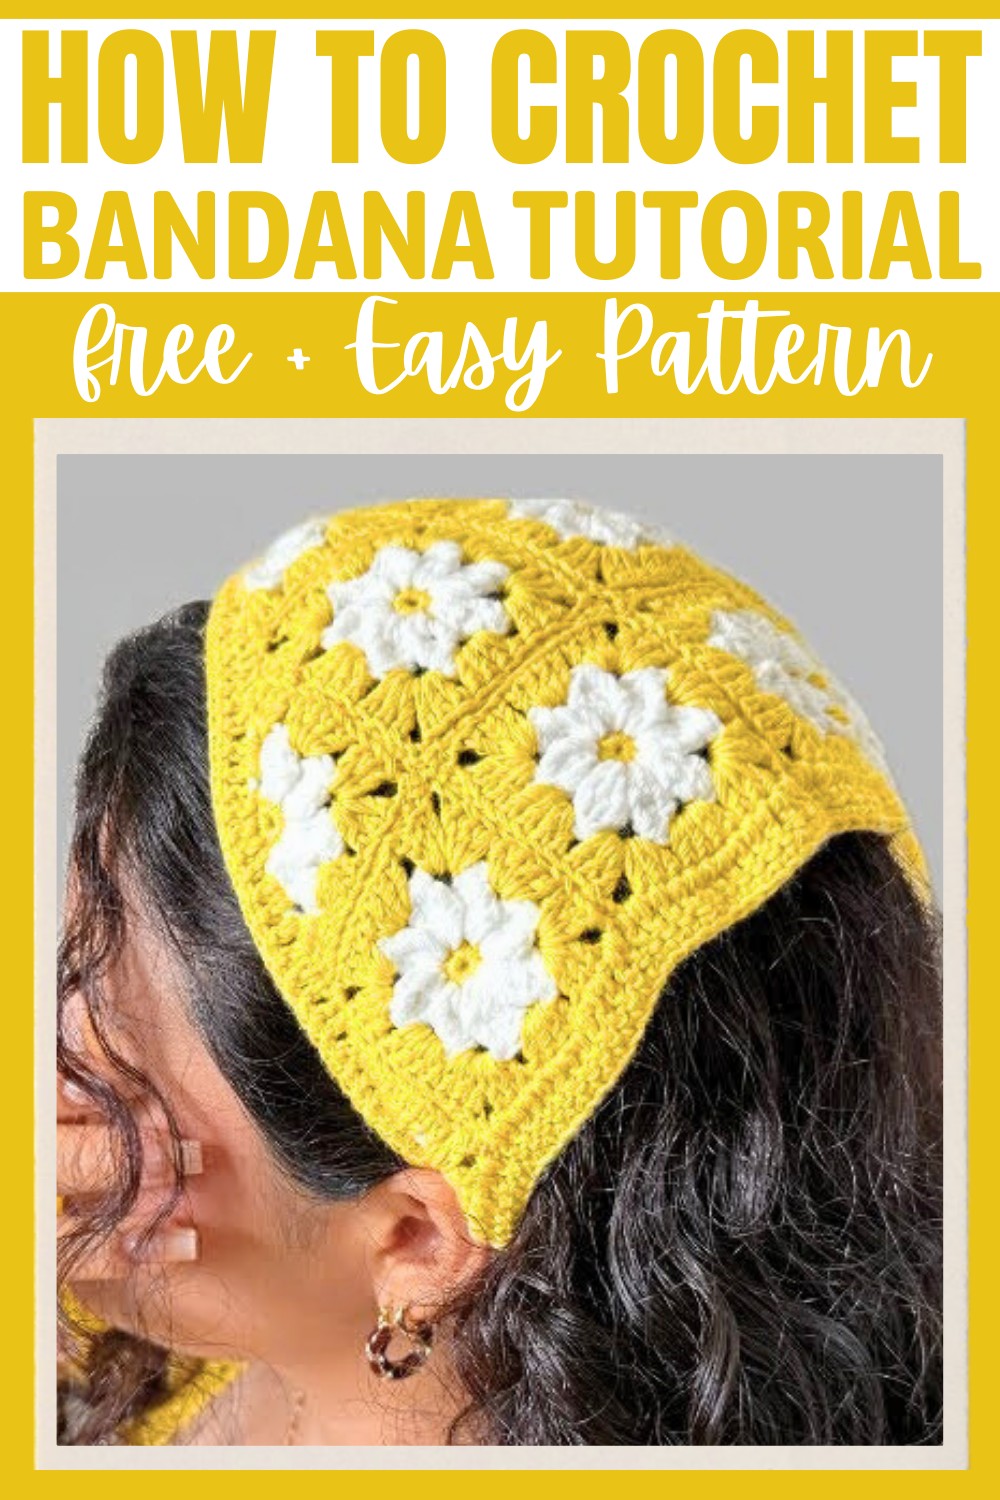
The Crochet Bandana pattern combines squares and triangles, which are carefully joined together to create its unique look. While the process is simple and beginner-friendly, you’ll still enjoy the rewarding satisfaction of making something beautiful with your hands. A neat border and adjustable straps complete the bandana, making it comfortable and easy to wear.
Whether you’re new to crochet or already passionate about it, this pattern is all about having fun while creating a functional piece you can use daily.
Credit Casttañaz Crochets
Materials & Tools Needed
- Yarn in three different colors:
- Main color (for background and joining squares/triangles)
- Secondary color (for petals in square motifs)
- Third color (for the flower center and borders)
- Crochet Hook: Suitable for the yarn you are using (the tutorial assumes a hook size suitable for thin or medium-weight yarn).
- Tapestry Needle: For joining the motifs and weaving in ends.
- Scissors: For cutting yarn between steps.
Finished Size
- Motif Dimensions: Each square measures 5.5 cm x 5.5 cm.
- Bandana Dimensions: Once assembled with 10 squares and 5 triangles, the bandana forms a triangular shape, with adjustable straps.
- Customization Ideas:
- Change the number of squares and triangles for different sizes.
- Use variegated yarn for a multicolored effect.
- Add beads or embellishments to the border for a personalized touch.
Step-by-Step Crochet Instructions
The bandana consists of two main components: squares and triangles, which are then joined together and finished with a border and adjustable straps.
PART 1: Crochet the Squares
The bandana uses 10 squares.
- Round 1:
- Make a magic ring. Alternatively, chain 1 and work into it.
- Chain 1 and work 8 single crochet (sc) into the ring.
- Tighten the magic ring to close the circle.
- Insert the hook into the first single crochet, pull the yarn, and change color. Cut the previous yarn.
- Round 2 (Adding Petals):
- Start with the new color (white in this case). Secure the yarn with a knot and slip stitch into the first single crochet.
- Chain 4. This counts as the first treble crochet cluster base.
- In the same stitch, create 3 treble crochets, keeping the last loop of each on the hook (4 loops on the hook).
- Yarn over and pull through all loops to close the cluster.
- Chain 3, and in the next stitch, repeat the process:
- Work 4 treble crochet clusters finished together (each cluster finished together has 4 loops on the hook before closing).
- Repeat this around to make 8 petals using the same process.
- After the 8th petal, chain 3 and slip stitch into the base of the first petal.
- Cut the yarn and secure the end.
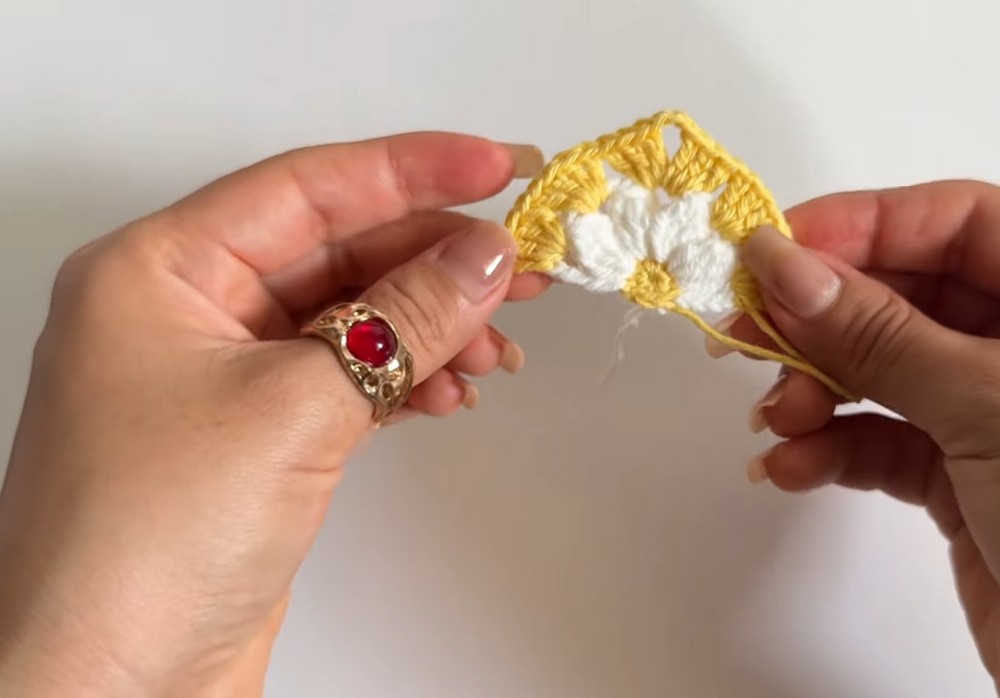
- Round 3 (Forming the Square):
- Change to the third color (yellow in the tutorial).
- Join yarn into the chain-3 space between petals.
- Chain 3 (counts as the first double crochet).
- In the same chain-3 space:
- Work 2 double crochet, chain 3, and 3 double crochet (this creates a corner).
- In the next chain-3 space, work 4 double crochet.
- In the next space, create another corner (3 double crochet, chain 3, 3 double crochet).
- Alternate between 4 double crochet and corners until all four corners are formed.
- After completing the last corner, slip stitch into the top of the starting chain and cut the yarn.
- Repeat this process 10 times to create 10 squares.
PART 2: Crochet the Triangles
The bandana uses 5 triangles.
- Round 1:
- Create a magic ring.
- Chain 1 and work 8 single crochet into the ring. Tighten the ring.
- Change color and secure with a knot.
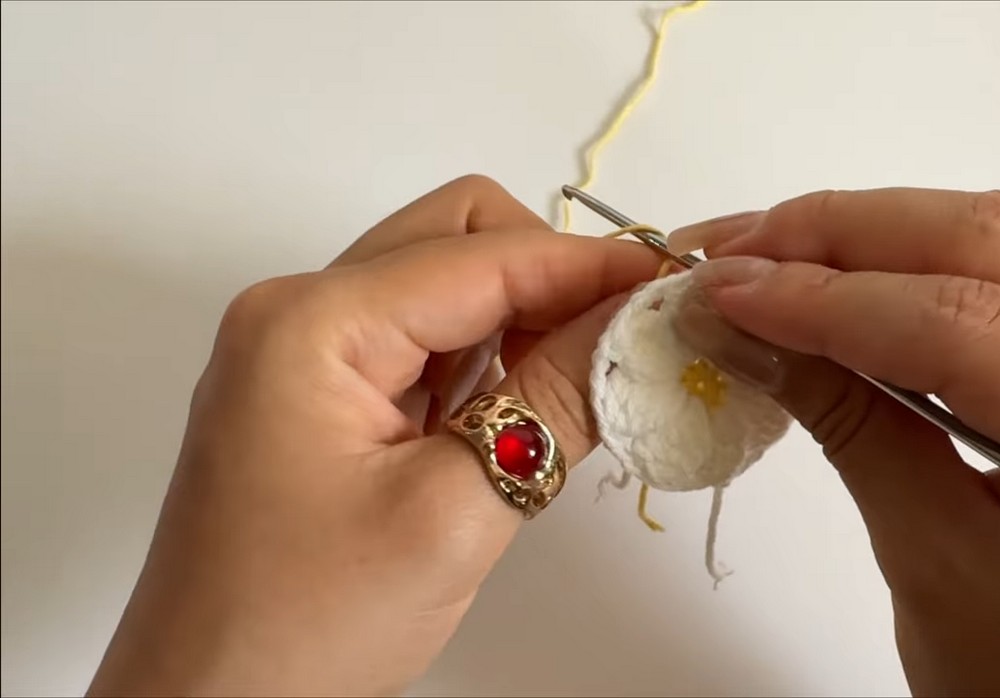
- Round 2 (Creating Petals):
- Secure the new color and chain 4.
- Work 4 treble crochet clusters finished together into the next stitch.
- Chain 3 and repeat the petal process, but work only 4 petals total in this round (instead of the 8 petals in the square).
- After completing the 4 petals, chain 1, and work 1 treble crochet stitch into the last space to create the sharp point of the triangle.
- Slip stitch and fasten off.
- Round 3 (Shaping the Triangle):
- Join the third color at the base of the starting chain.
- Chain 3 to count as the first double crochet.
- Work 3 double crochet stitches between the petals.
- In the corner space, work:
- 3 double crochet, chain 3, and 3 double crochet.
- Continue working double crochet stitches along the remaining spaces, ending with a single double crochet at the tip.
- Slip stitch and fasten off.
- Repeat this process 5 times to create 5 triangles.
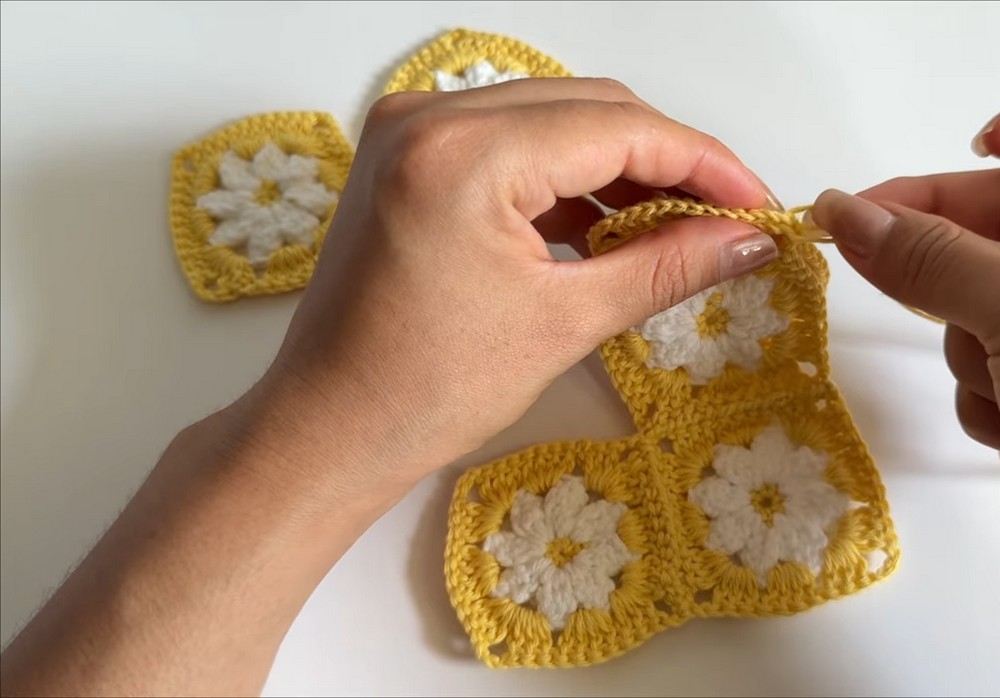
PART 3: Joining Squares and Triangles
- Arrange the 10 squares and 5 triangles into a triangular bandana shape:
- The base of the bandana will have 3 squares joined in a row.
- The middle row will alternate squares and triangles.
- At the top, there will be 2 triangles to complete the triangle.
- Using a tapestry needle:
- Seam the motifs together from the back side.
- Align the edges of two motifs and pick up corresponding loops from the edges, sewing them together to secure.
- Work from one motif to the next until the entire layout is joined.
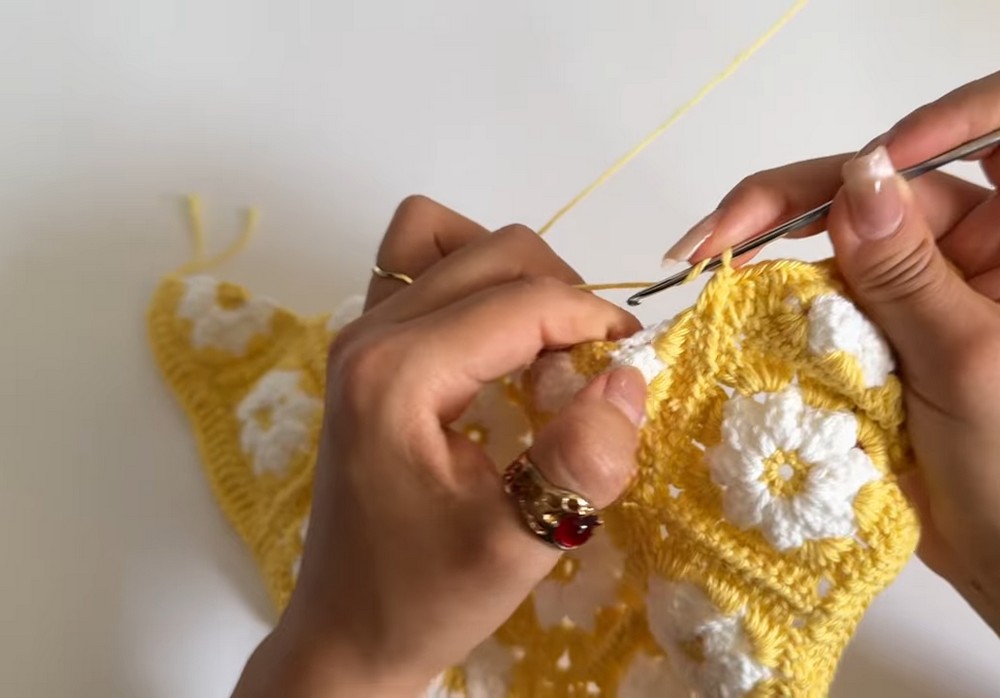
PART 4: Adding the Border
- Double Crochet Border:
- Join the main color at any corner and chain 3.
- Work double crochet stitches evenly along all sides of the bandana.
- At each corner, work:
- 1 double crochet, chain 1, and 1 double crochet to keep the edges sharp.
- Single Crochet Border and Straps:
- Work a round of single crochet along the edge.
- At each corner, extend the crochet to create adjustable straps:
- Chain 100 (or desired length).
- Slip stitch all the way back along the chain to reinforce the strap.
- Resume single crochet along the next edge and repeat at the second corner.
PART 5: Finishing
- Weave in the loose ends using the tapestry needle.
- Adjust the tension of your stitches for a smooth finish.
- Steam-block or lightly press your bandana to set the shape.