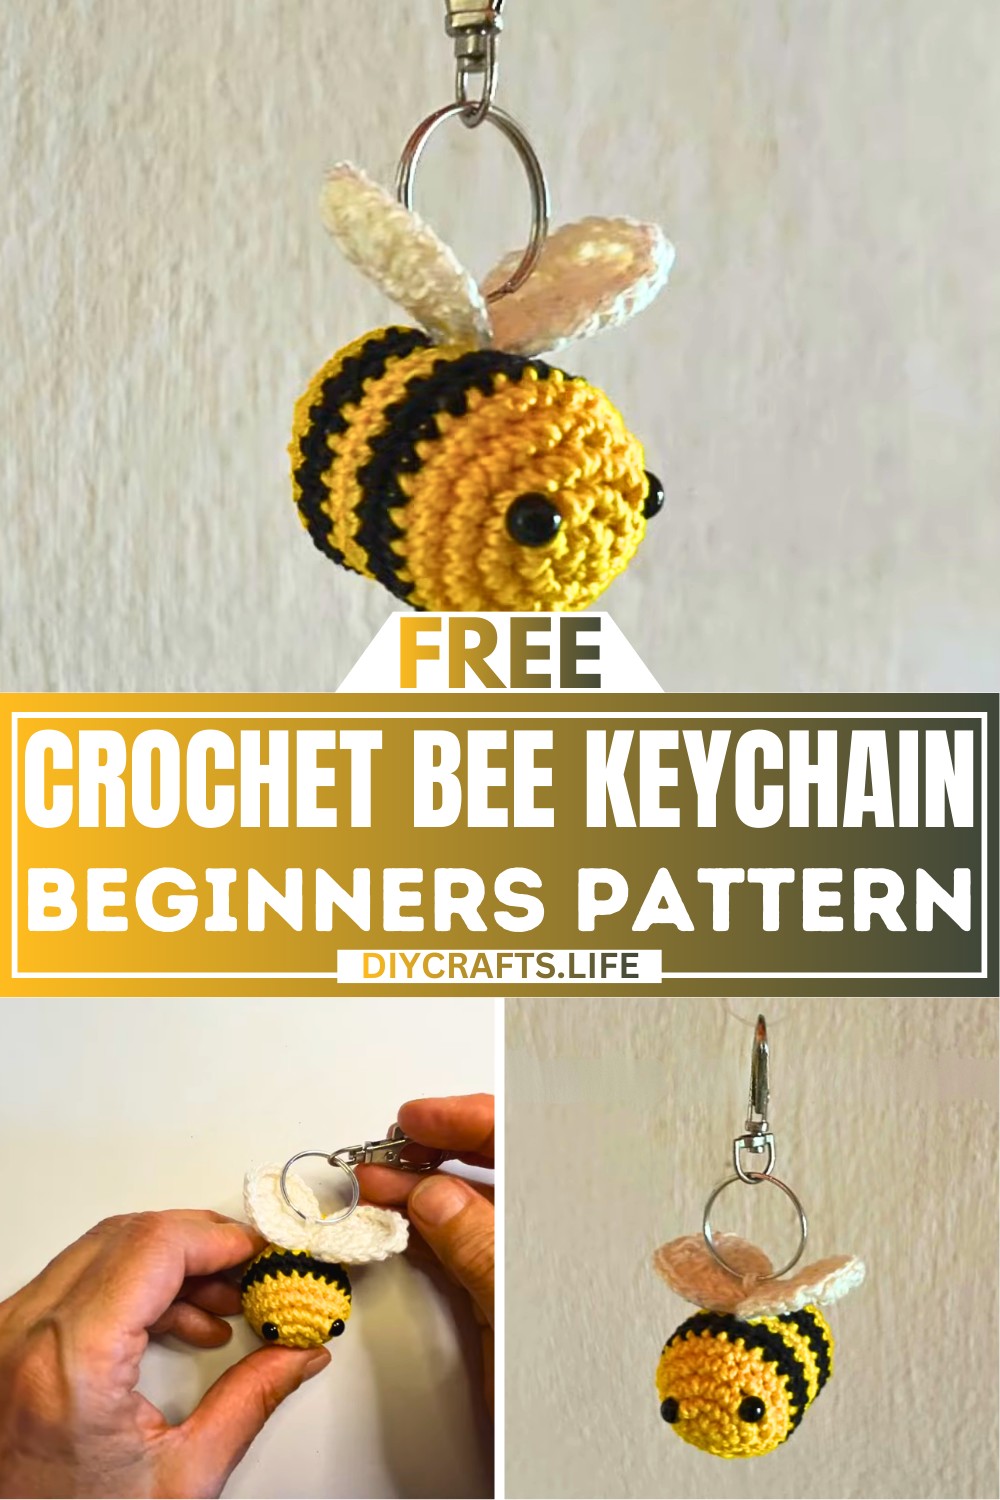
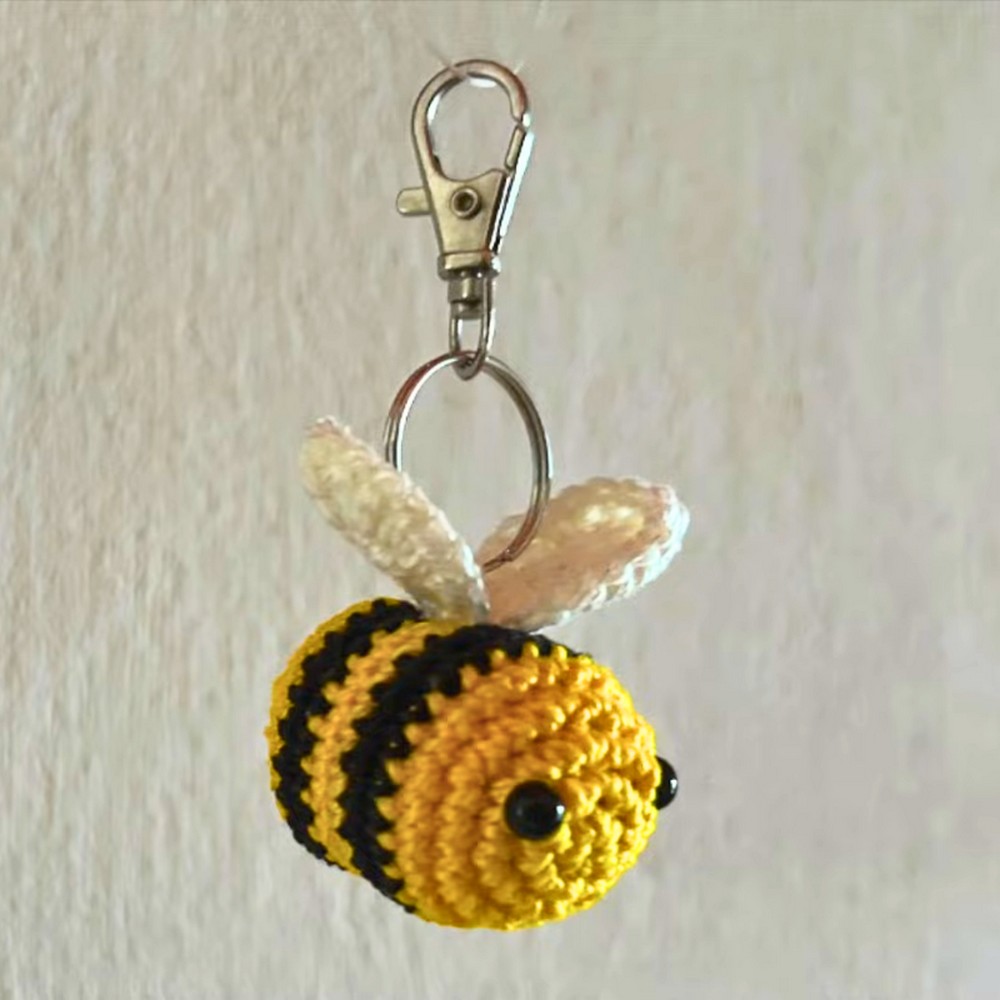
Make your day brighter with this adorable crochet bee keychain! Its cheerful design makes it fun to carry around and adds a playful touch to your bags or keys. Perfect for gifting, decorating, or simply bringing a little buzz of joy to your everyday life, this handmade bee is sure to put a smile on anyone’s face.
Crochet Bee Keychain Tutorial
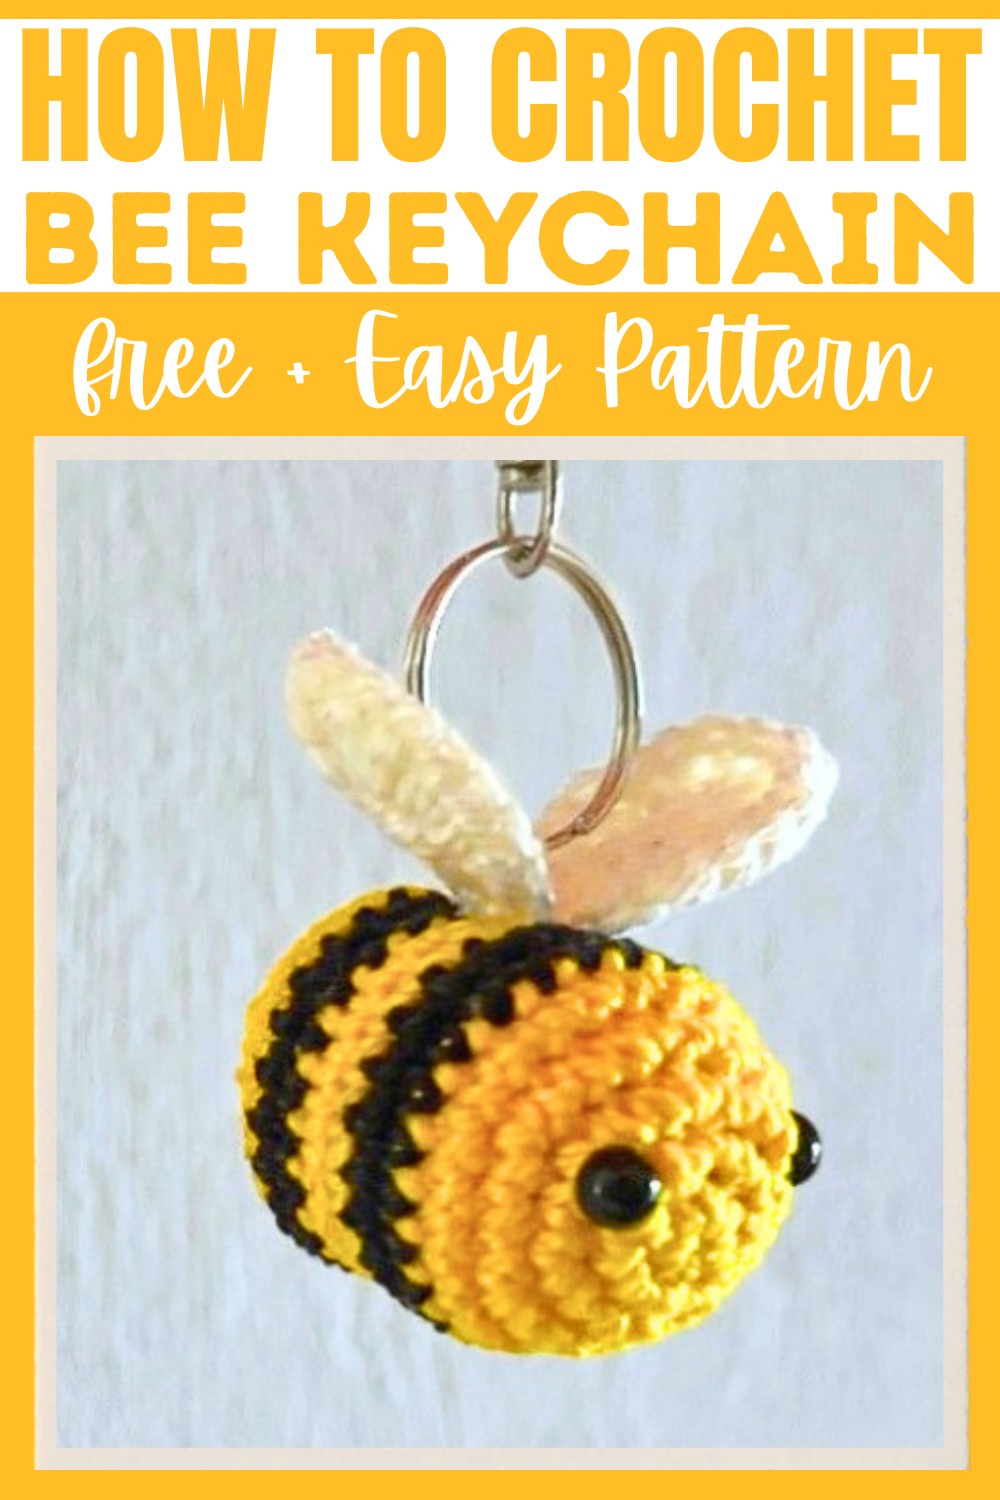
Creating this bee is a simple and exciting activity, ideal for beginners who want to try their hand at crafting. With just a few basic tools—yarn, safety eyes, a hook, and a keyring—you’ll bring this cute design to life. The crochet bee is stuffed with soft polyfill, making it cuddly and lightweight. Adding the wings and attaching the keyring is the final step, turning it into a practical accessory that looks stylish and sweet.
Credit Hook & Loop Crochet Tutorials
Materials & Tools Needed
- Cotton Yarn: Three colors - yellow, black, and white.
- Crochet Hook: 2 mm (adjustable based on your yarn weight).
- Polyfill: For stuffing the bee.
- Safety Eyes: Small size, ensure they fit proportionally to your keychain.
- Keyring: For attaching to the finished bee.
- Stitch Markers: Optional, to mark the beginning of rounds.
- Scissors: For cutting yarn.
- Tapestry Needle: For sewing components and weaving in yarn tails.
Finished Size
The finished bee keychain depends on your yarn weight and hook size. Using a 2 mm hook and fine cotton yarn, the bee typically measures about 2-3 inches long. You can customize the size by using thicker yarn or a larger hook.
Customization Ideas
- Color Variation: Experiment with pastel or neon colors instead of yellow and black.
- Personalize: Embroider small initials or tiny patterns onto the bee wings.
- Accessories: Add a crochet flower charm or small decorative beads to the keychain.
Step-by-Step Crochet Instructions
Follow these detailed steps broken into rounds.
The Bee Body
Round 1:
- Create a magic ring.
- Ch 1 (chain 1) and work 6 sc (single crochet) into the magic ring.
(6 stitches total).
Round 2:
- Work 2 sc into each stitch (increase all around).
(12 stitches total).
Round 3:
- Alternate 1 sc, 2 sc in the next stitch (increase).
(18 stitches total).
Round 4:
- Alternate 1 sc, 1 sc, 2 sc in the next stitch (increase).
(24 stitches total).
Round 5:
- 1 sc in each stitch (no increase or decrease).
(24 stitches total).
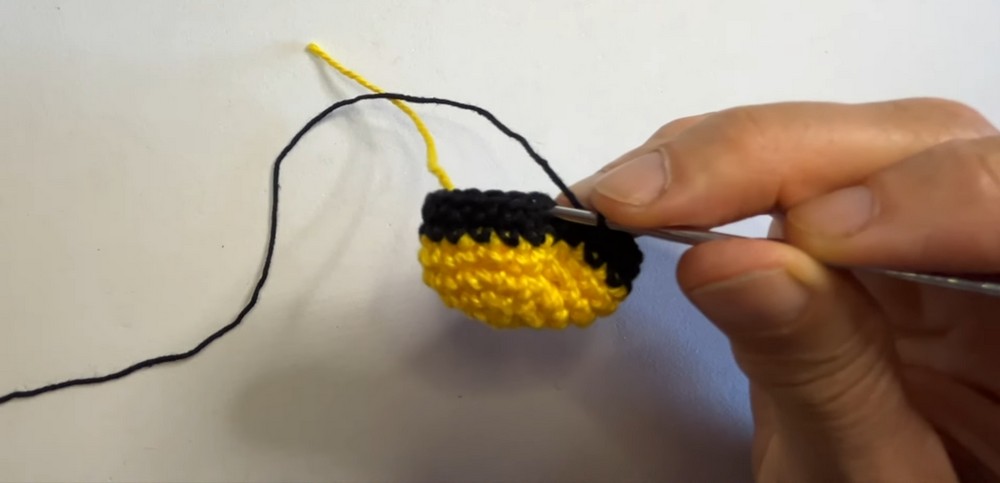
Round 6:
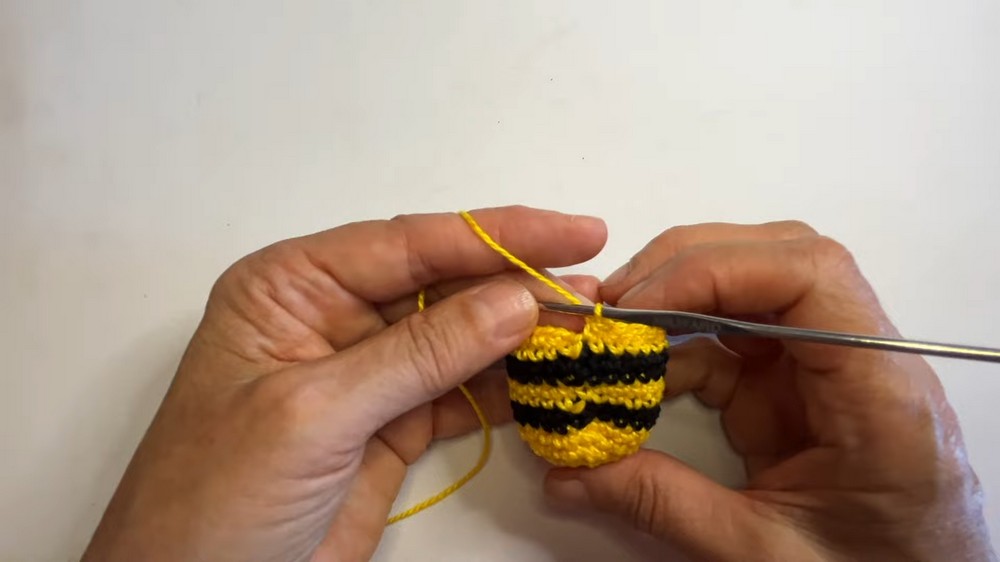
- Switch to black yarn.
- Work 1 sc in each stitch all around.
(24 stitches total).
Round 7:
- Sl st (slip stitch) into the starting stitch from the previous round.
- Ch 1, then work 1 sc in the same stitch.
- Work 1 sc in each stitch all around.
(24 stitches total). - Finish the round with a slip stitch and switch back to yellow yarn.
Round 8:
- Ch 1, then work 1 sc in the same stitch, followed by 1 sc in each stitch all around.
(24 stitches total).
Round 9:
- Start with a sl st, then work 1 sc in the same stitch.
- 1 sc in each stitch all around.
(24 stitches total). - Finish with a slip stitch.
Round 10–11:
- Switch back to black yarn with a sl st.
- Work 2 rounds of 1 sc in each stitch all around.
(24 stitches total).
Round 12:
- Switch back to yellow yarn with a sl st.
- Work 1 sc in each stitch all around.
(24 stitches total). - Sl st into the first sc of the previous round.
Round 13:
- Begin decreasing:
- Alternate 1 sc, 1 sc, 1 sc2tog (single crochet 2 together) around.
(18 stitches total).
- Alternate 1 sc, 1 sc, 1 sc2tog (single crochet 2 together) around.
Round 14:
- Alternate 1 sc, 1 sc2tog (single crochet 2 together) around.
(12 stitches total).
Round 15:
- Start closing the bee:
- 6 sc2tog (decrease all the way around).
(6 stitches total).
- 6 sc2tog (decrease all the way around).
- Pull up a long tail, cut the yarn, and sew tightly around the opening.
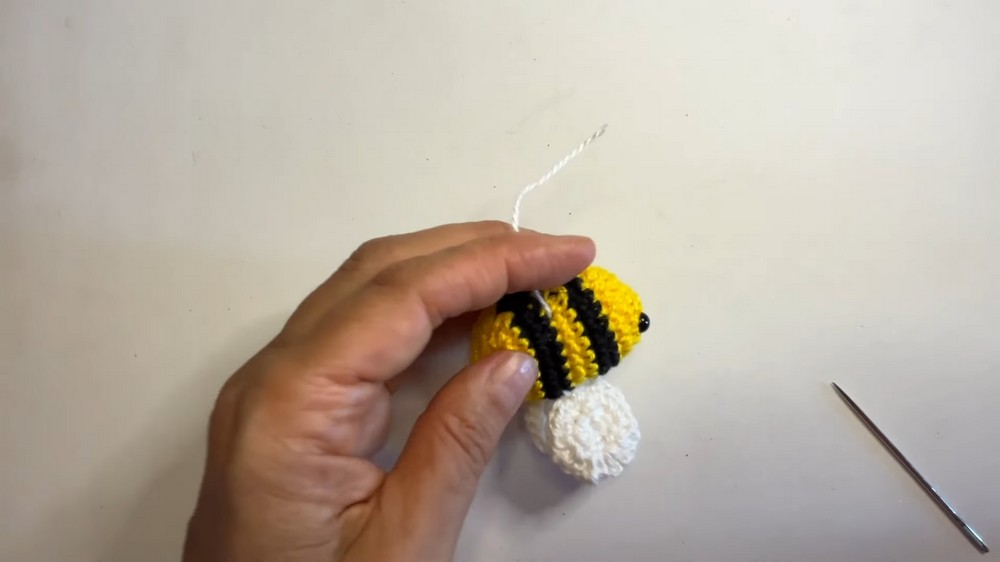
Adding Safety Eyes
Position the safety eyes between rounds 7–10, ensuring the color joins (stripes) are positioned at the back of the bee.
The Wings
Wing Round 1:
- Create a magic ring.
- Ch 1, then work 10 hdc (half double crochets) into the magic ring.
- Sl st into the first hdc to close the round.
Wing Round 2:
- Ch 1, then work:
- 2 hdc in the same stitch.
- 2 hdc in the next 2 stitches.
- 2 dc (double crochets) in the next stitches.
- 2 tr (treble crochets) in the following 2 stitches.
- 2 dc.
- 2 hdc in the next 3 stitches.
- Sl st, Ch 1, pull and cut the yarn, leaving a long tail.
- Weave in tails and repeat the process to make a second wing.
Attach the Wings:
- Sew the wings to the bee’s back using the tapestry needle. Adjust placement carefully for symmetry. If the wings appear too big, consider sewing them slightly closed for a neater look.
Attaching the Keyring
- Use the tapestry needle to loop yarn through the top of the bee.
- Slip the keyring through the loop and secure tightly.
- Weave in any remaining tails.
Your adorable bee keychain is now complete! 🐝🌸
Finishing Notes
- Clean up: Remove all loose ends by weaving them into the project.
- Final touches: Adjust the stuffing to ensure the bee is evenly shaped and plush.