Create a charming crochet pumpkin keychain that blends beauty with practicality. This handmade project is perfect for accessories or seasonal decor. Ideal for autumn lovers, it’s a delightful way to show off your creativity with a functional twist.
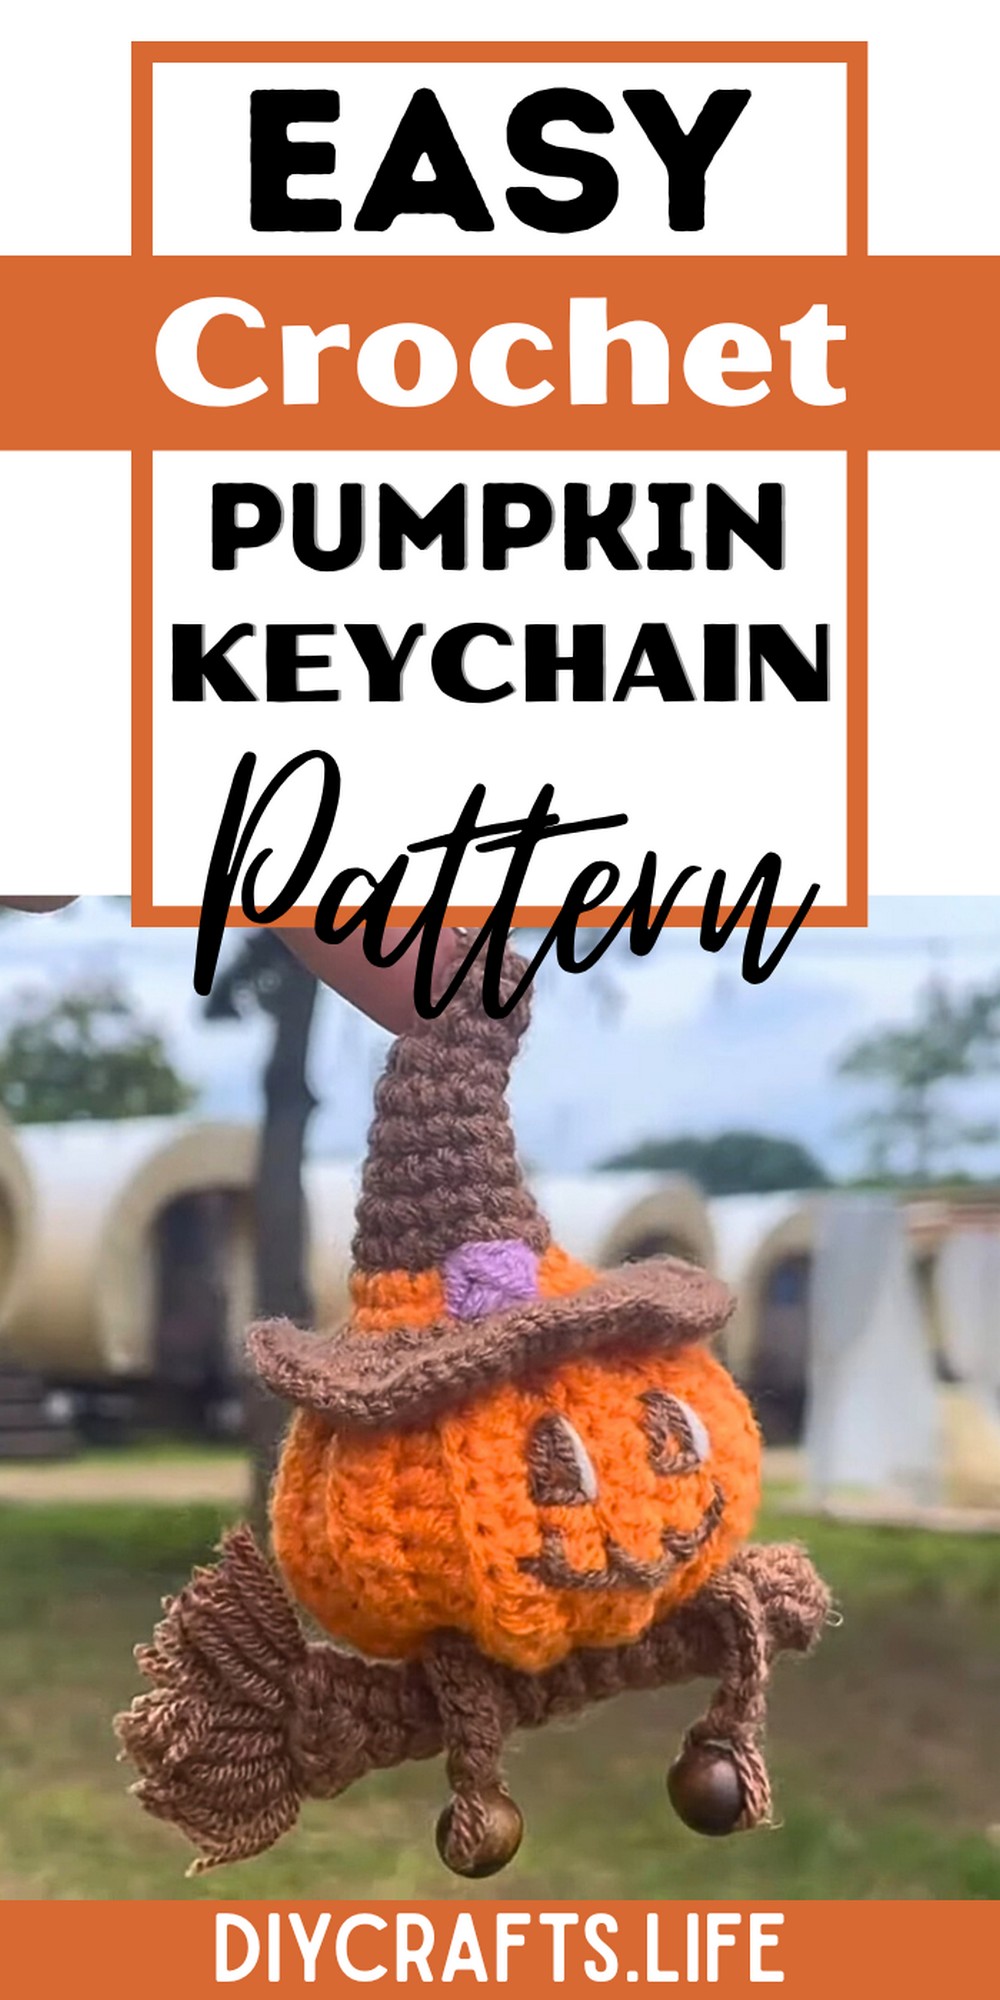
A crochet pumpkin keychain is a durable, lightweight, and easy-to-carry accessory that adds style to your keys, bags, or gifts. Its vibrant design offers a fun seasonal touch while remaining practical and sturdy for day-to-day use. Perfect for personal use or thoughtful handmade gifts!
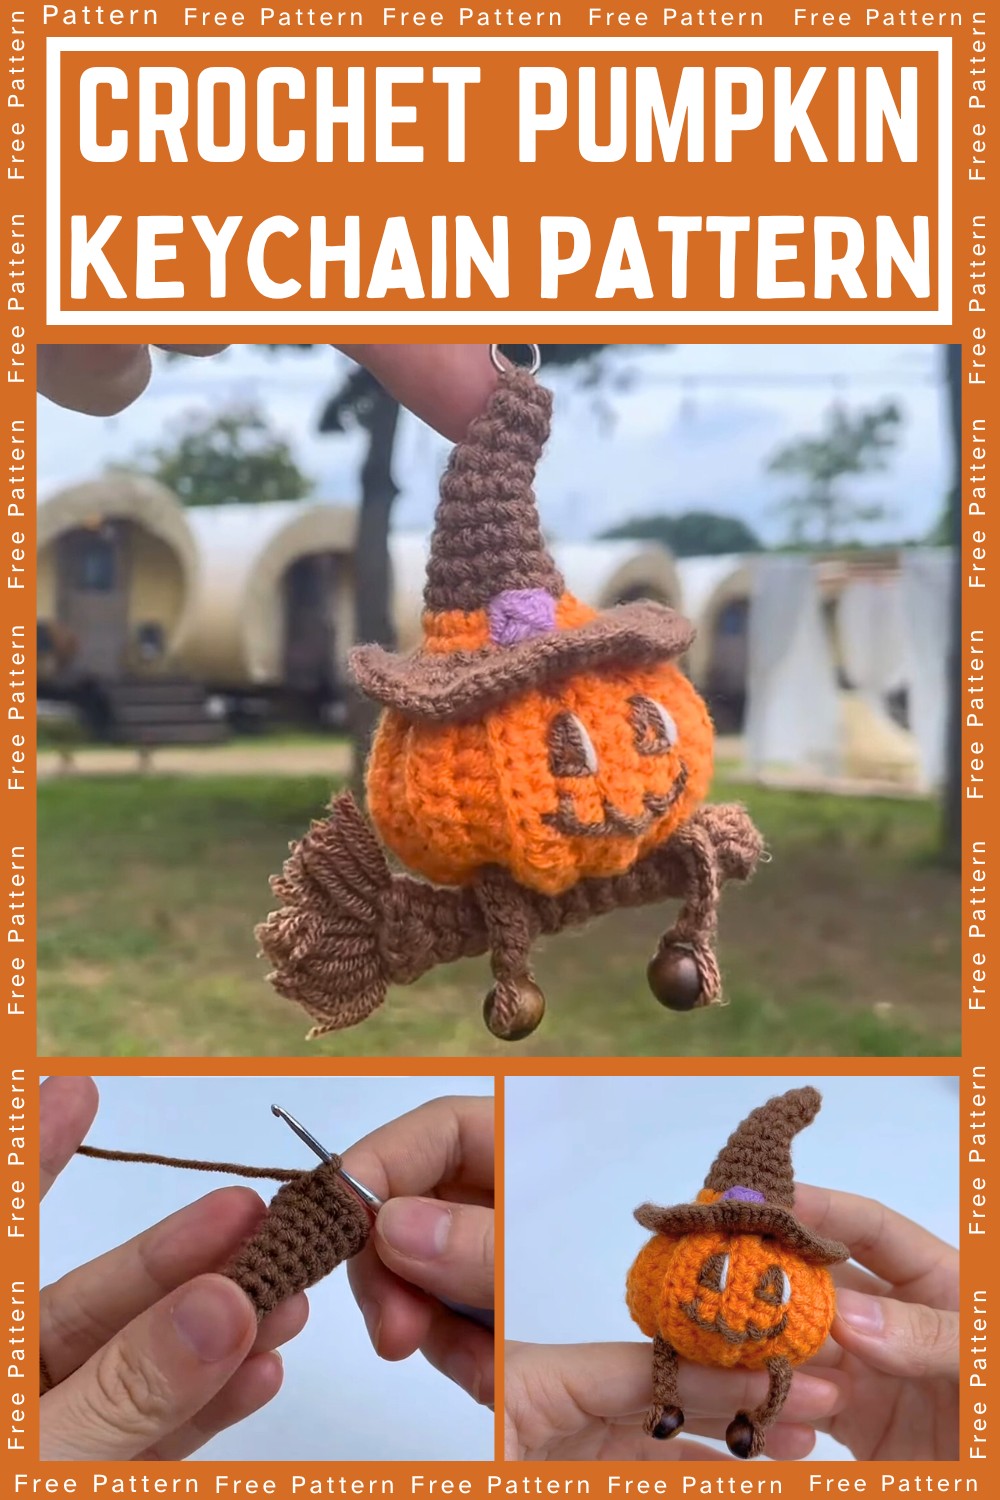
Crochet a Pumpkin Keychain
This crochet pumpkin pattern is beginner-friendly yet exciting for advanced crafters. The design allows for creativity and personalization, whether through custom colors or minor design tweaks. It’s a quick project that sparks joy and showcases your crafting talent.
Materials and Preparation
To crochet a pumpkin keychain, you'll need the following:
- Yarn: Orange worsted-weight yarn for the pumpkin body, green for the stem, and optional brown for details.
- Hook: 3.5 mm (E) crochet hook.
- Stuffing: Polyester fiberfill or cotton filling for shaping the pumpkin.
- Keychain ring: Metal ring or clasp for attaching your keychain.
- Yarn needle: For sewing and weaving in ends.
- Scissors: To cut the yarn neatly.
Abbreviations and Notes
Crochet Abbreviations:
- SC: Single Crochet
- INC: Increase (2 SC in the same stitch)
- DEC: Decrease (single crochet 2 stitches together)
- SL ST: Slip Stitch
- CH: Chain
- FO: Fasten Off

Pattern Tips:
- Work in continuous spiral rounds. Use a stitch marker to keep track of the rounds.
- Adjust the size of the pumpkin by increasing or decreasing the number of rounds or stitches.
- For a textured pumpkin look, crochet into the back loops only during specific rounds.
Gauge, Approximate Size, and Pattern Notes
Gauge:
Gauge is not critical for this project, but keeping consistent tension will help maintain the shaping.
Finished Dimensions:
The completed pumpkin keychain measures approximately 2 inches wide and 2 inches tall (excluding the stem).
Special Techniques:
- Amigurumi stuffing: Ensure your stuffing is firm but don’t overfill, as it may stretch the stitches.
- Attach keychain securely: Make additional stitches to stabilize the pumpkin with your keychain clasp.
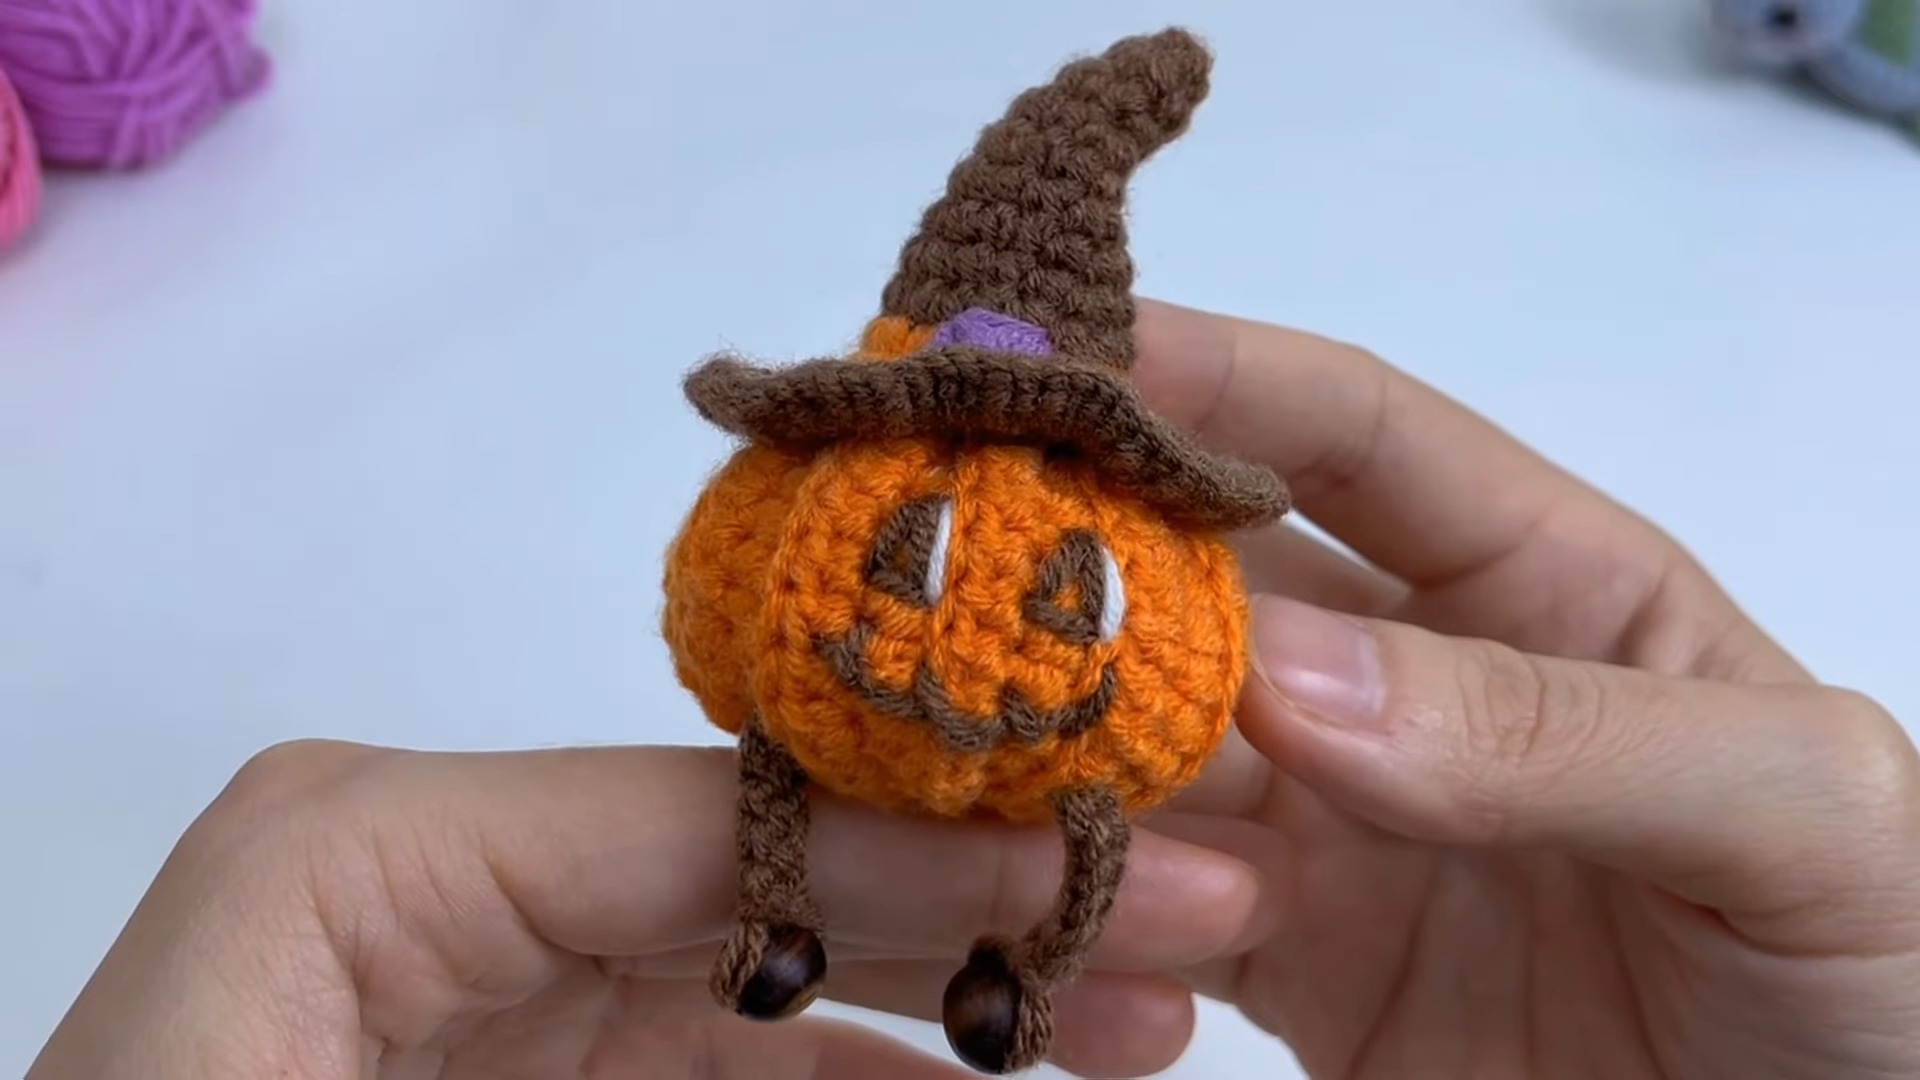
Step-by-Step Pattern
Pumpkin Body:
- Round 1: Using orange yarn, make a magic circle. Work 6 SC into the circle. Pull tight to close the ring. (6 stitches)
- Round 2: INC in every stitch around. (12 stitches)
- Round 3: (SC in next stitch, INC in next stitch) repeat around. (18 stitches)
- Round 4: (SC in next 2 stitches, INC in next stitch) repeat around. (24 stitches)
- Round 5: SC in each stitch around. (24 stitches)
- Rounds 6–7: Repeat Round 5.
- Round 8: (SC in next 2 stitches, DEC over next 2 stitches) repeat around. (18 stitches)
- Round 9: (SC in next stitch, DEC over next 2 stitches) repeat around. (12 stitches)
- Round 10: DEC in every stitch around. (6 stitches)
Stuff the pumpkin firmly with fiberfill before closing.
- Final Step: Weave yarn through the remaining 6 stitches and pull tight to close. FO and weave in loose ends.
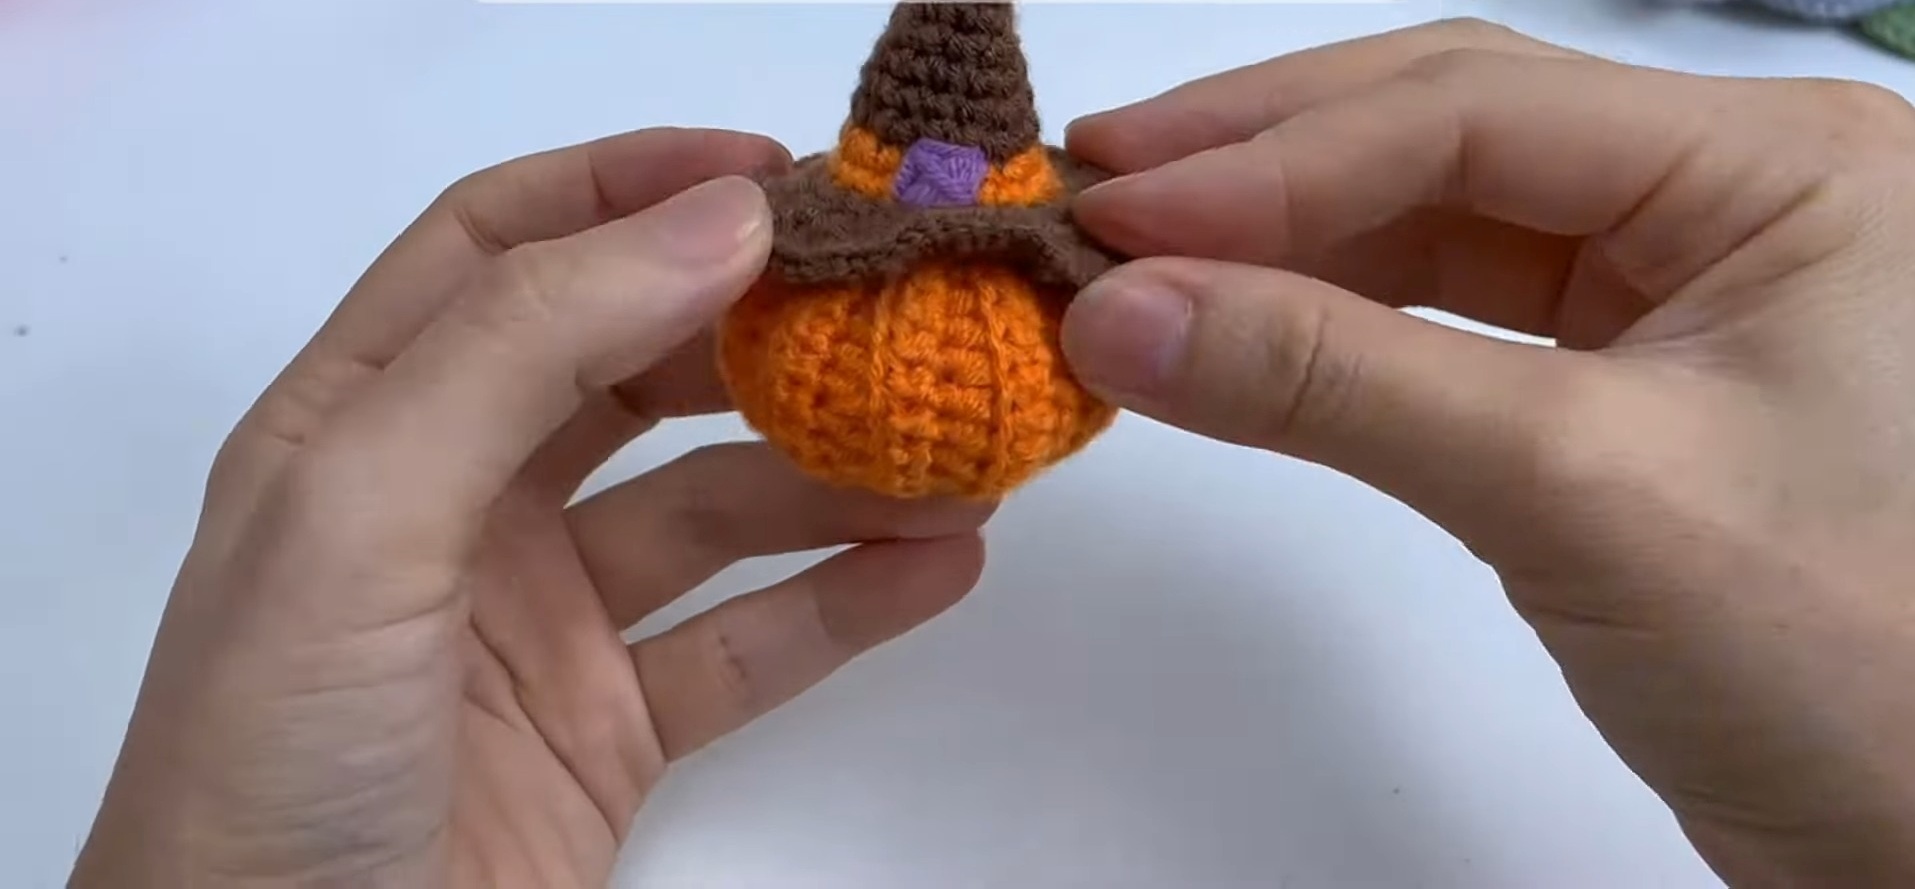
Pumpkin Stem:
- Attach green yarn to the top center of the pumpkin. CH 1.
- SC in a circle to form the stem. Work 2–3 rounds depending on desired height.
- FO and weave in ends.
Keychain Attachment:
- Thread the yarn needle with a piece of orange yarn and stitch firmly to attach the pumpkin to the ring or clasp.
- If desired, crochet a small leaf using green yarn and attach it beside the stem for extra decoration.
Finishing Touches:
Inspect the pumpkin for any loose ends or uneven stuffing. Shape it gently with your hands to create a rounded form. Your pumpkin keychain is now ready to use or gift!
Pattern Question
Question: Can I adjust the size of the pumpkin keychain?
Answer: Yes! You can easily change the size by using different yarn weights and hook sizes. Opt for thinner yarn for a smaller pumpkin or thicker yarn for a larger one.
Conclusion
Crocheting a pumpkin keychain is fun, practical, and rewarding. Whether for seasonal decor, gifts, or personalization, it brings charm and functionality. This project is a great way to enjoy the creative process and make something that stands out.


