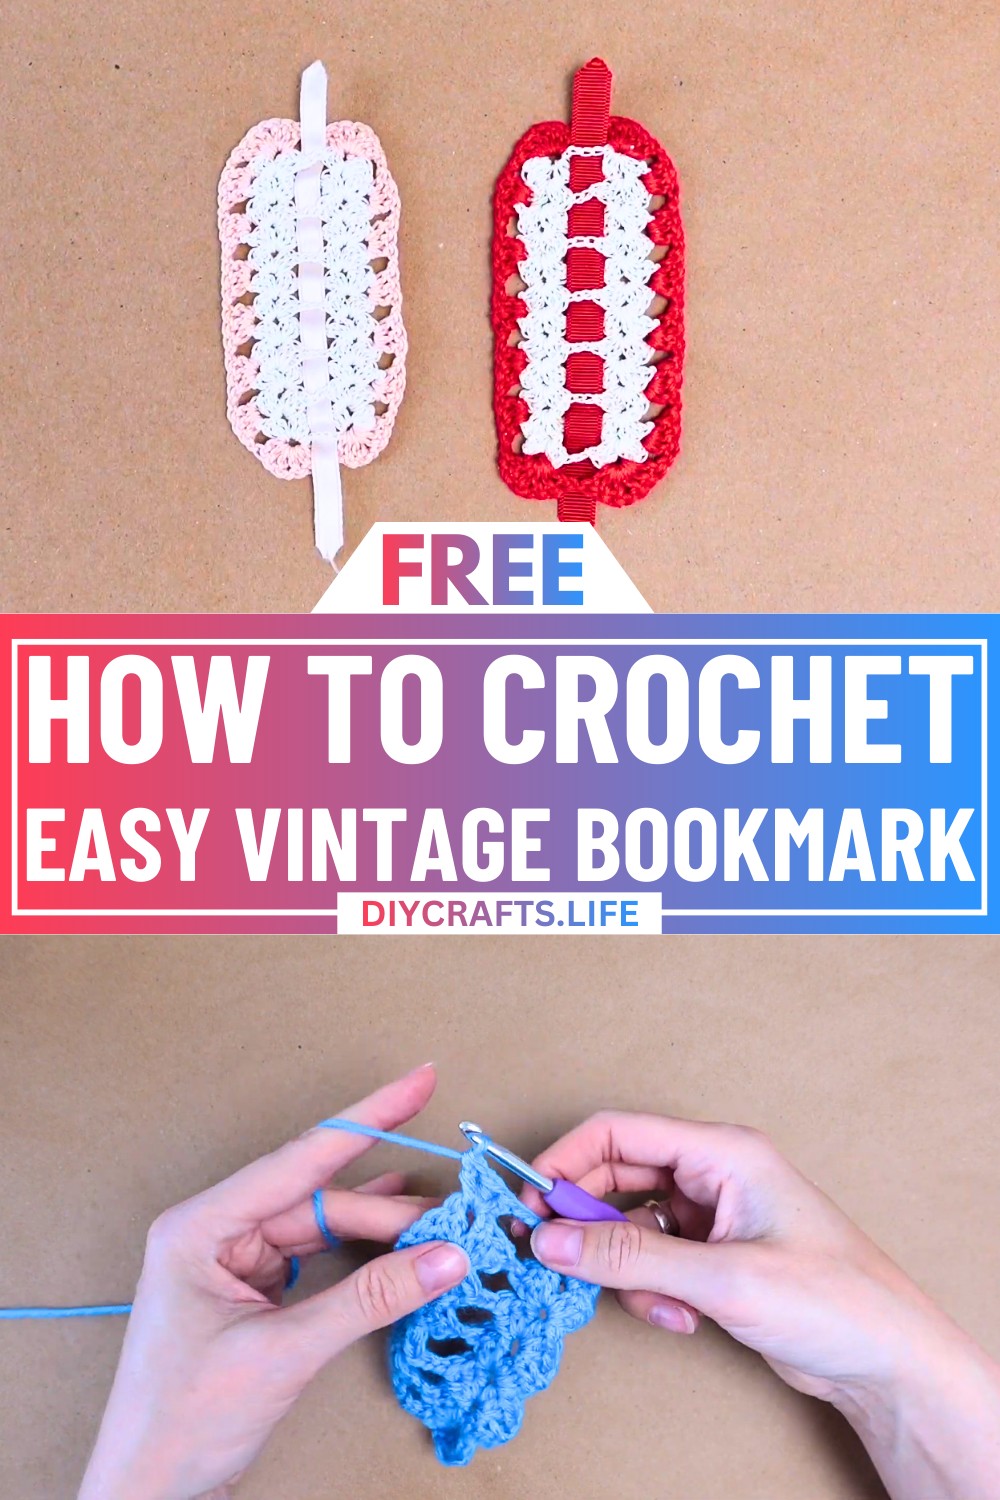
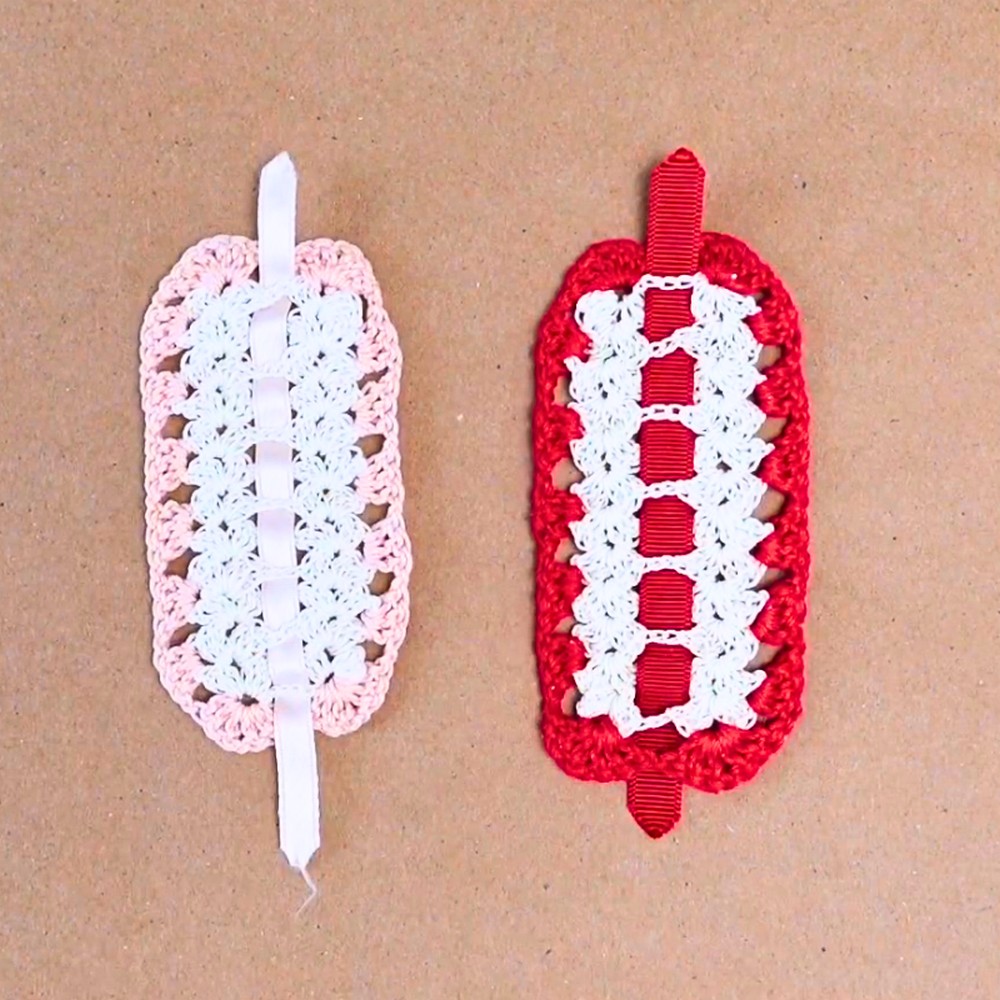
Transform simple yarn into a timeless work of art! This vintage crochet bookmark brings elegance and charm to your reading experience. Its intricate yet minimalist design combines the beauty of classic craftsmanship with practical function, making it more than just a bookmark—it's a keepsake to cherish.
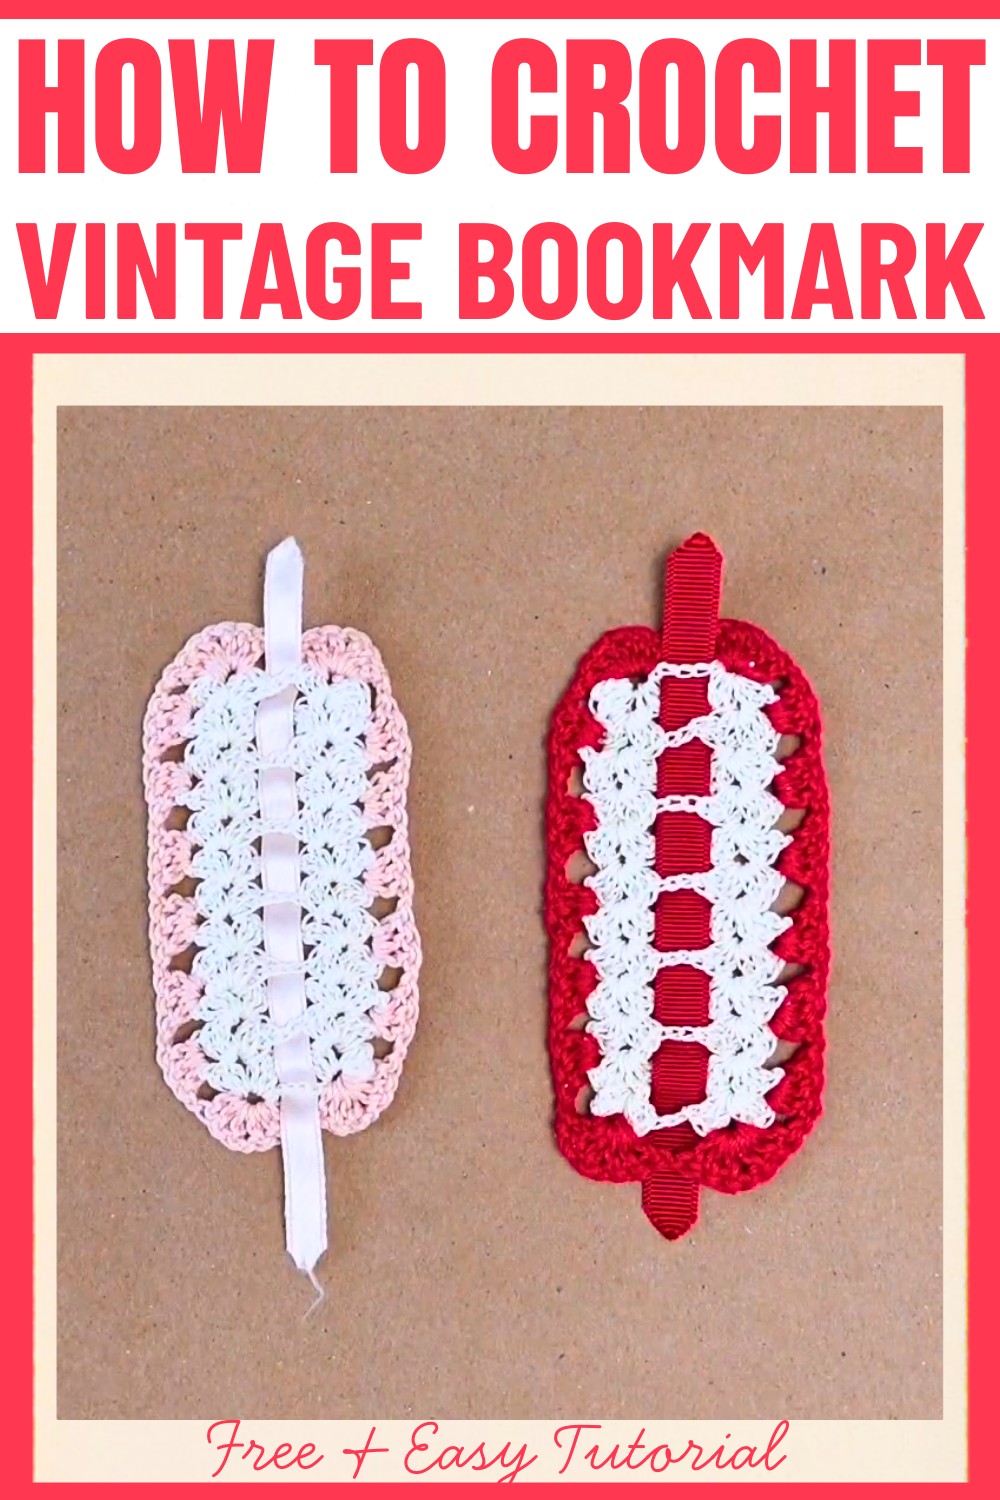
Timeless Vintage Crochet Bookmark
This bookmark features delicate patterns that highlight thoughtful details, from the refined circular motifs to precise stitches that mimic the art of lacework. Light, compact, and versatile, it can be customized to match your favorite colors or gifted as a heartfelt handmade treasure. Perfectly blending timeless artistry with personal creativity, this design is ideal for crochet enthusiasts of any skill level.
Credit Made by Phia
Materials Needed
- 2.0mm crochet hook
- Four strands of milk cotton yarn (main body & different colors if needed)
- Non-woven fabric (7 mm in diameter)
- 4 mm plastic eyes
- Lobster buckle (for the pendant)
- Scissors for trimming
- Needle for sewing
Step-by-Step Crochet Instructions
Part 1: The Head
- Round 1:
- Start with a chain stitch.
- Make 6 short stitches into the loop.
- Pull the loop tight and complete the round with a pull-out stitch.
- Round 2:
- Start with a chain stitch.
- Make 6 short stitches. On the 6th stitch, change the yarn color if needed.
- Complete the round with a pull-out stitch.
- Round 3:
- Start with a chain stitch.
- Make 6 short stitches in sequence.
- Complete the round with a pull-out stitch.
- Round 4:
- Start with a chain stitch.
- Alternate between 1 short stitch and an increase stitch.
- Repeat the pattern 3 times. You’ll have 9 short stitches.
- Complete the round with a pull-out stitch.
- Round 5:
- Start with a chain stitch.
- Follow the pattern: 1 short stitch, 1 increase stitch, 1 short stitch.
- Repeat the pattern 3 times for 12 short stitches.
- Complete the round with a pull-out stitch.
- Round 6:
- Start with a chain stitch.
- Alternate between 3 short stitches and an increase stitch.
- Repeat this pattern 3 times, making a total of 15 short stitches.
- Finish with a pull-out stitch.
- Rounds 7 to 8:
- Continue the same format, increasing stitches per round. End with 18 short stitches in Round 7 and 21 short stitches in Round 8.
- Rounds 9-11:
- Maintain 21 short stitches for these rounds with no increases. Finish each round with a pull-out stitch.
- Round 12:
- Decrease stitches by alternating 5 short stitches with 1 decrease stitch. End with 18 short stitches.
- Round 13:
- Alternate: 1 short stitch, 1 decrease stitch. End with 12 short stitches.
- Round 14:
- Make 6 decrease stitches in sequence. End with 6 short stitches.
- Enlarge the loop and break the thread. Stuff the head and hide the thread ends.
Part 2: The Ears
- Outer Ear:
- Make 6 short stitches with a chain stitch to start (same pattern as Round 1 of the head).
- Add increases in Round 2 (12 short stitches total).
- Inner Ear:
- Repeat the process with a different yarn color.
- Align the inner and outer ear and crochet 12 stitches together for Round 3.
- Pull out the loop, sew, and leave a thread tail.
- Make a total of 2 ears using this method.
Part 3: The Body
- Rounds 1-3:
- Follow a similar process as the head (starting with 6 stitches and increasing to 12, then 18).
- Rounds 4-5:
- Maintain 18 stitches in Round 4.
- Decrease stitches in Round 5 using the pattern: 4 stitches, 1 decrease stitch (total 15 stitches).
- Rounds 6-8:
- Continue decreasing by alternating short stitches and decrease stitches (down to 6 stitches in Round 8).
- Stuff the body and leave thread tails for sewing.
Part 4: Hands and Feet
- Basic Hand/Foot:
- Start with 5 chain stitches.
- Work 4 pull-out stitches back along the chain. Enlarge the loop and break the thread.
- Make 4 pieces total (2 hands, 2 feet).
Part 5: Tail
- Chain Stitch:
- Make 11 chain stitches.
- Pull-out stitches back along the chain to create the tail.
- Sew the tail piece to the body.
Part 6: Assembly
- Attach the ears, hands, feet, and tail to the body securely using a needle.
- Insert the plastic eyes into the head and sew or glue in place.
- Add non-woven fabric where needed for reinforcement or design.
- Attach the lobster buckle to make it into a pendant.
Final Touch
- Hide any remaining thread ends by sewing them into the fabric.
- Adjust pieces as needed for symmetry.
- Your minimalist and charming little mouse is ready!