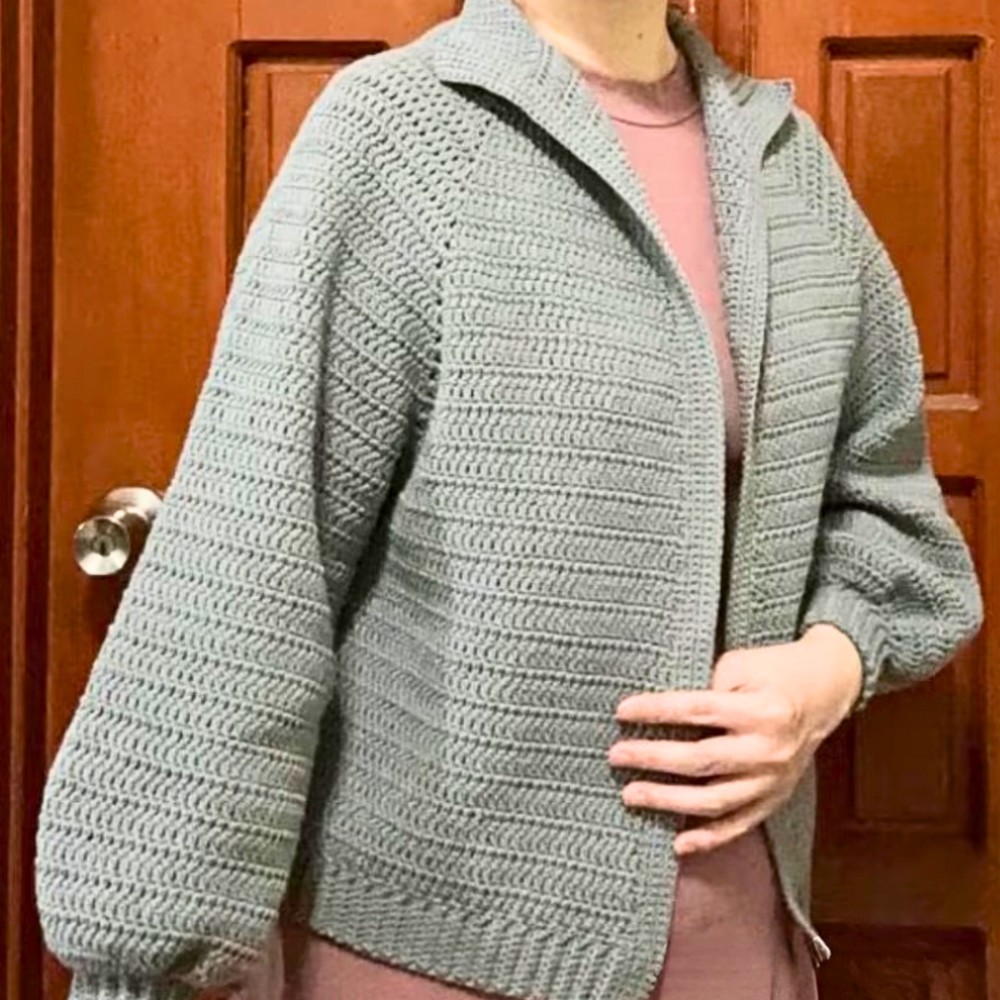
The top-down crocheted Cardigan is a soft, comforting layer you can slip into on quiet mornings or cool evenings. Lightweight and gentle on the skin, it stays comfortable all day while keeping its cozy, effortless charm. Its timeless, simple crocheted design blends naturally with everyday outfits, giving a clean and polished look without trying too hard. Whether you are relaxing at home, stepping out for a short walk, or meeting someone casually, it adds a subtle warmth and graceful touch to your style. This crochet top-down cardigan leaves a quiet feeling behind that slowly turns into curiosity, making you want to understand how something so simple can hold such thoughtful detail.
Crochet Top-down Cardigan Pattern

What makes this top-down crocheted Cardigan pattern truly special is the way it comes together step by step. Starting from the neckline and working downward, each row gradually reveals the crochet cardigan shape in a smooth and satisfying flow. Neat ribbing on the cuffs, hem, and neckline provides a refined finish. Flexibility lets you easily adjust the length and sleeve so you can create a piece that perfectly matches your style and comfort, especially in a handmade crocheted cardigan. And just when you think you've seen the full beauty of it, there is still more detail waiting for you.
Credit Simplicity
Materials & Tools Needed
- Yarn: Alize Cotton Gold, Color 87 (4 skeins; lightweight cotton blend yarn)
- Crochet Hooks:
- 3.75 mm (Body)
- 3.25 mm (Cups, Ribbing, Sleeves)
- Alternatively, smaller hooks like 3 mm or 3.5 mm may be used for ribbing.
- Stitch Markers: (optional, to help track rows and sections)
- Scissors
- Yarn Needle: For weaving in ends
Finished Size
-
Body:
- Width: 18.5 inches (47 cm)
- Length: 21 inches (53 cm)
-
Sleeves:
- Width: 7.5 inches flat (19 cm)
- Length: 22 inches (55.5 cm) from the neckline to cuff
Customization Ideas:
- Adjust the starting chain count, panel lengths, or armhole width for a tailored fit.
- Add more rows for variations in body or sleeve length (e.g., cropped, long styles).
- Experiment with color changes for stripes or multi-color effects.
Pattern Abbreviations & Terminology
- Ch: Chain
- SC: Single Crochet
- DC: Double Crochet
- SLST: Slip Stitch
- V-Stitch: (DC, Ch 1, DC in the same stitch)
- St/s: Stitch/es
- R: Row
- BLO: Back Loop Only
U.S. Crochet Terminology is used in this pattern.
Step-by-Step Detailed Crochet Instructions
1. Starting Your Cardigan
- With the 3.75 mm hook, Ch 68 + 1 (total 69 chains).
- Skip the first chain, and SC into the second chain. Work one SC in each chain across.
- Stitch Count: 68 SC.
2. Foundation Row Setup (Row 1)
Divide stitches:
- Front Panel: 11 DC
- Sleeve: V-Stitch, 10 DC
- Back Panel: 22 DC
- Sleeve: V-Stitch, 10 DC
- Front Panel: 11 DC
- Begin with stacked SC (used instead of Ch 2 or Ch 3) to create seamless edging.
- Working across the row:
- 11 DC into the front panel stitches.
- In the next stitch, create a V-Stitch (DC, Ch 1, DC in the same stitch).
- 10 DC into sleeve stitches.
- V-Stitch in the next stitch.
- 22 DC into the back panel stitches.
- V-Stitch in the next stitch.
- 10 DC into sleeve stitches.
- V-Stitch in the next stitch.
- 11 DC into the remaining front panel stitches.

3. Row Repeats
- Turn after each row, flipping your work like pages of a book.
- Start every row with stacked SC as your first DC.
- Increase at the V-Stitch spaces for every row:
- Create a new V-Stitch in each existing V-Stitch space.
- The front panel increases by 1 stitch per row.
- The shoulders and back panel increase by 2 stitches per row.
- Repeat rows until reaching R28, ensuring consistent increases at V-Stitch spaces.
4. Joining Sleeves
- At R29, join the armholes:
- Work DC into the V-Stitch space.
- Ch 4 to create a wider armhole.
- Skip stitches between the panels and connect to the next V-Stitch with a DC.
- Repeat for both sleeves.
- This creates the armhole separation.
- Continue working DC across for the body portion only, back-and-forth, up to R50 (or desired length).
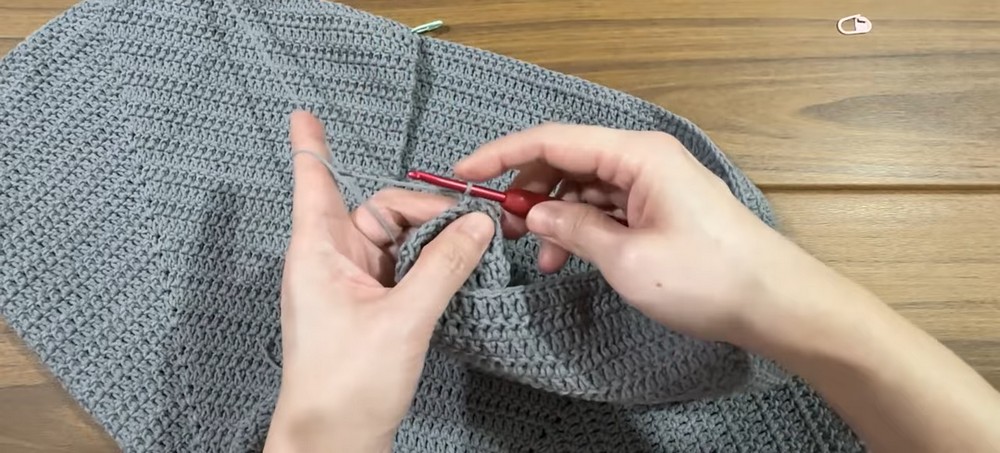
5. Ribbing (Bottom Hem)
- Switch to a 3.25 mm hook.
- Attach yarn at the base of the cardigan.
- Ch 10 for the ribbing.
- Skip the first chain and SC into BLO for the remaining 9 stitches.
- SLST into the next 2 stitches of the body, then turn.
- Repeat the ribbing rows:
- Work BLO SC stitches for 9 sts, slip stitch into the next 2 stitches, turn.
- Continue until ribbing is complete at the bottom hem.
6. Sleeves
- Switch back to the 3.75 mm hook.
- Begin at the underarm Ch 4 space.
- Attach yarn and Ch 2 to start.
- Work DC around the sleeve, incorporating decreases:
- DC2Tog at the underarm corners to taper the width.
- Alternate turn direction every round (wrong side/right side).
- Once the desired sleeve length is reached, transition to ribbing:
- Reduce circumference (e.g., SC2Tog).
- Create smaller ribbing for the cuff, similar to the hem.

7. Collar & Front Trim
- Use the 3.25 mm hook for ribbing around the neckline:
- Ch 12, skip first chain, and work SC BLO for 11 stitches.
- Attach using SLST to the next 2 stitches, turn, and repeat rows.
- For the front trim, evenly work 5 rows of SC along the edges.
- Insert hook into both loops for sturdier stitching.
8. Finishing
- Weave in all ends using a yarn needle.
- Block the cardigan if desired for more polished edges.

Additional Notes
- Seaming Ribbing: Ribbing ends can be connected using SLSTs through the loops of both layers.
- Stretch Adjustments: For cuffs and neckline ribbing, work exclusively into BLO to increase elasticity.
Customization Ideas
- Oversized Fit: Add more rows and widen ribbing sections.
- Contrasting Edges: Use a different yarn color for ribbing or trim for added flair.
- Textured Look: Experiment with puff or cross-stitch patterns in substitution for DC panels.