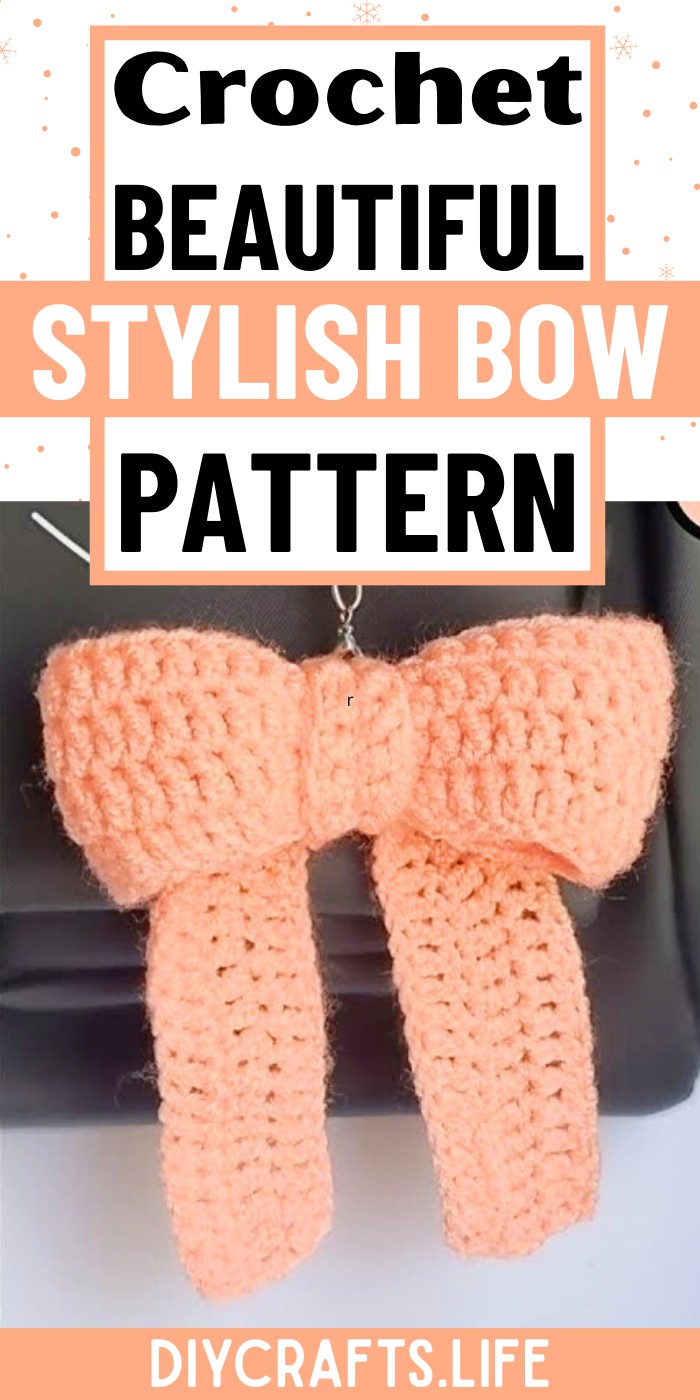
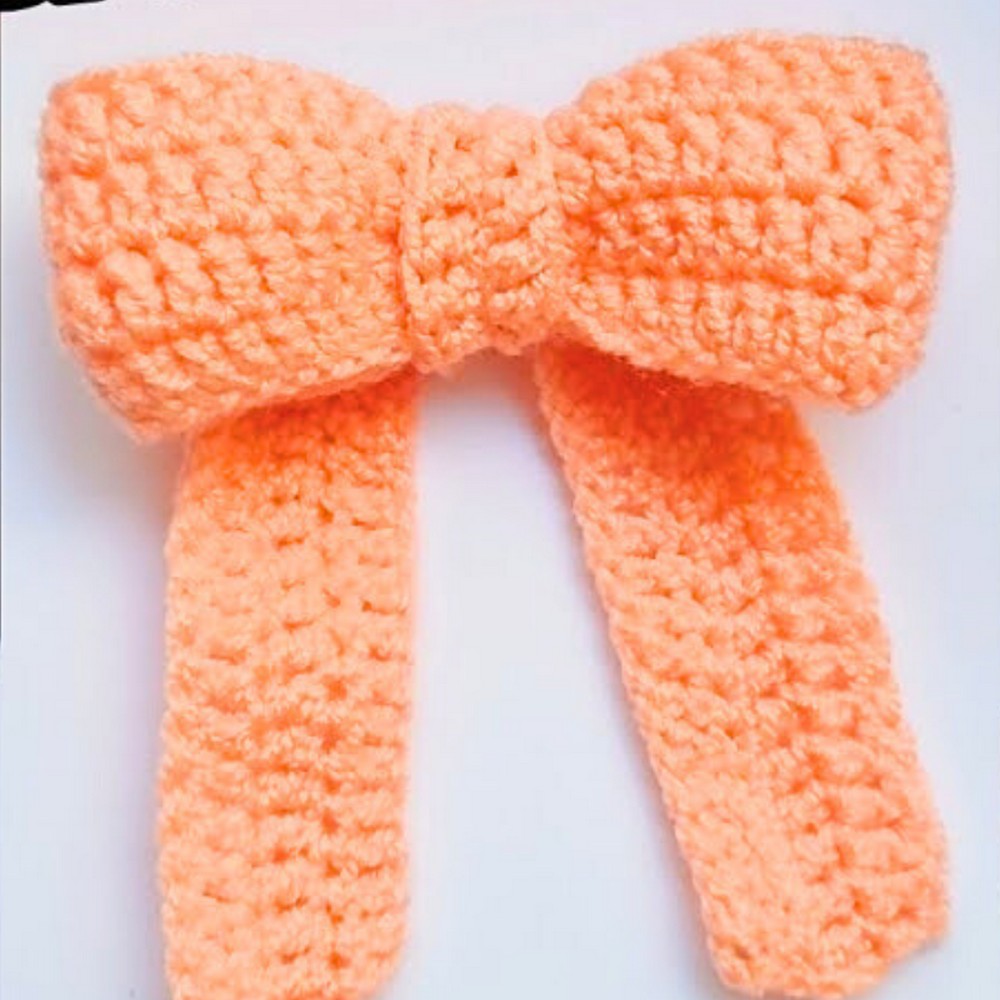
Add a charming touch of elegance to your fashion or decor with this simple yet striking crochet bow design. Whether you're dressing up kids’ accessories, crafting embellishments for home decor, or adding a unique detail to a gift wrap, this bow is the perfect creative solution. Its clean, polished look will give any project a playful yet refined finish, making it an instant favorite.
Crochet Bow Tutorial
This bow stands out with its classic shape and structured design. The soft stitches create smooth lines, giving it a neat and stylish appearance, while its compact size makes it wonderfully versatile. From hair ties and headbands to brooches and gift decorations, the possibilities are endless. You can easily adjust the color and size, allowing you to tailor it to your unique ideas. This crochet bow blends simplicity and sophistication, making it ideal for any occasion.
Credit Furry Yarn
Materials & Tools Needed
- Yarn:
- Use any type of yarn you prefer—lighter weights (e.g., cotton or acrylic fingering yarn) for smaller, delicate bows or medium-weight yarn for larger, sturdier bows.
- Solid or colorful yarns will work great depending on your desired style.
- Crochet Hook:
- Choose a hook size appropriate for your yarn weight to achieve the correct tension. (e.g., 4 mm hook for medium-weight yarn).
- Scissors:
- To cut your yarn neatly.
- Tapestry Needle:
- For finishing and weaving in loose ends.
Finished Size & Customization Ideas
- Approximate Size:
When made with medium-weight yarn and a 4 mm hook, the finished bow is approximately 2–3 inches wide, depending on your tension. - Customization Ideas:
- Size Adjustment:
- For smaller bows, use thinner yarn and a smaller hook, and reduce the number of starting chains. For larger bows, use heavier yarn and a larger hook, and increase the starting chains.
- Color Changes:
- Use contrasting colors for the bow body and the central wrap for a striking effect.
- Add Straps:
- If you’d like to attach the bow as an accessory, crochet straps to turn it into a hairband, a bracelet, or as a decorative tie.
- Layered Look:
- Make two bows in different sizes and layer them together for added texture and dimension.
- Embellishments:
- Add beads or sequins for an extra flourish.
- Size Adjustment:
Pattern Abbreviations & Terminology
This pattern uses US crochet terminology, with these abbreviations:
- CH: Chain
- DC: Double Crochet
- SL ST: Slip Stitch
- YO: Yarn Over
Step-by-Step Crochet Instructions
Body of the Bow
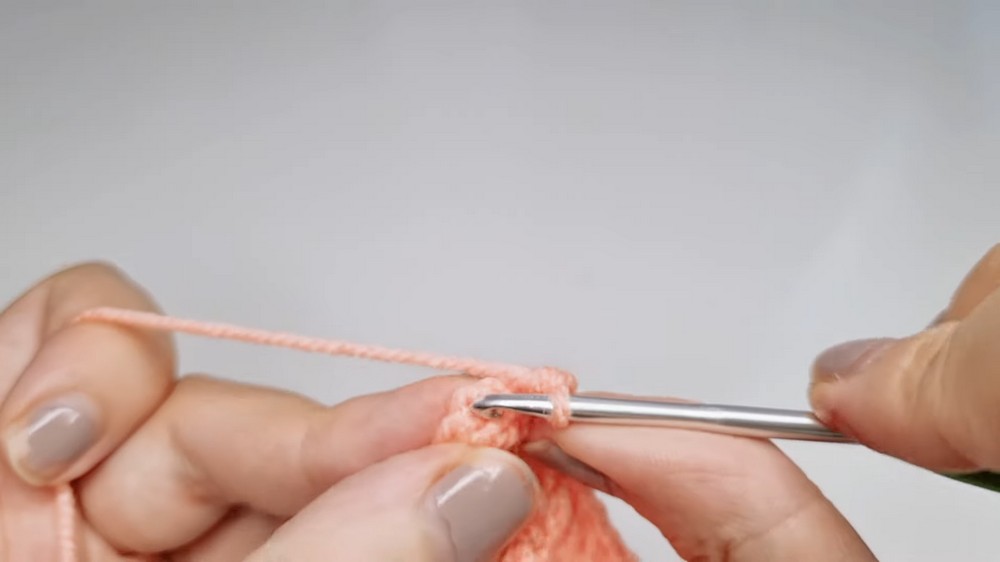
- Slip Knot Start:
- Create a slip knot by pulling the yarn around your finger, inserting your hook, YO, and pulling through.
- Foundation Chains:
- Make 40 chains (or adjust for a larger or smaller bow).
- Secure by turning your work.
- Row 1 - Double Crochet Across:
- YO, and starting in the first chain, insert your hook, YO, and pull up a loop.
- YO and pull through two loops. YO and pull through the remaining two loops (DC made).
- Repeat 1 DC in each chain across for a total of 40 DCs.
- At the end of the row, SL ST into the last stitch to secure. Chain 2 and turn your work.
- Rows 2–4 - Double Crochet All Across:
- Repeat the exact steps as Row 1, working 1 DC in each stitch across.
- At the end of Row 4, CH 1, tighten, and tie off your yarn, leaving a long thread for assembly.
Second Layer of the Bow (Optional for Contrast Layer)
- Foundation Chains:
- Make 42 chains (for a slightly larger layer).
- Begin double crochets starting from the third chain from the hook.
- Double Crochet Across:
- For Rows 1-3, work 1 DC in each stitch across.
- At the end of Row 3, tie off your yarn and leave a long tail for sewing.
- Layering the Bow Pieces:
- Place the smaller bow body on top of the larger layer (optional).
Bow Center Wrap
- Foundation Chains:
- Make 14 chains.
- Row 1 - Tiny Wrap:
- Skip the first 2 chains, and begin working 1 DC in each chain across (total of 12 stitches).
- At the end of the row, CH 2, turn your work.
- Rows 2-3 - Narrow Wrap:
- Work DC stitches in each stitch (12 stitches per row).
- After Row 3, tie off your yarn and leave a long thread for securing.
Assembling the Bow
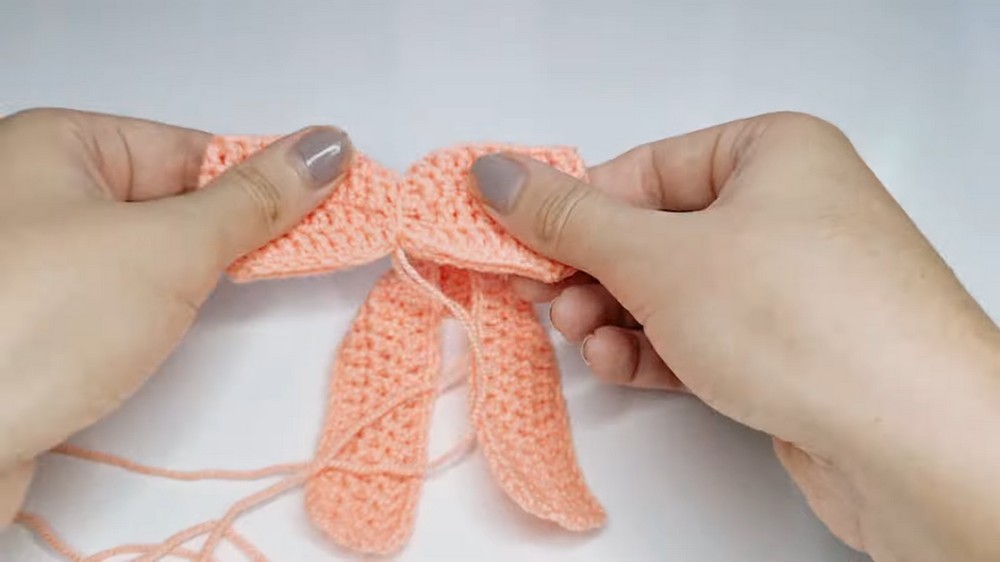
- Shape the Bow:
- Fold the rectangular bow body (and optional second layer) accordion-style in the middle.
- Secure the Fold:
- Using the long tail from the center wrap, wrap the narrow band tightly around the center of the folded bow.
- Tie and Weave Tails:
- Tie the yarn securely at the back of the bow, ensuring the tight center shape is maintained.
- Attach the yarn tails by weaving them into the wrap using a tapestry needle.
Finishing
- Final Shape:
- Fluff the edges of the bow by hand until you’re happy with its look.
- Optional Enhancements:
- Secure the bow to a clip, headband, or strap for wearability.
Customization Notes
- If you’re new to crochet, stick to fewer rows for simplicity.
- Play around with textures by using novelty yarns like velvety or sparkly yarn.