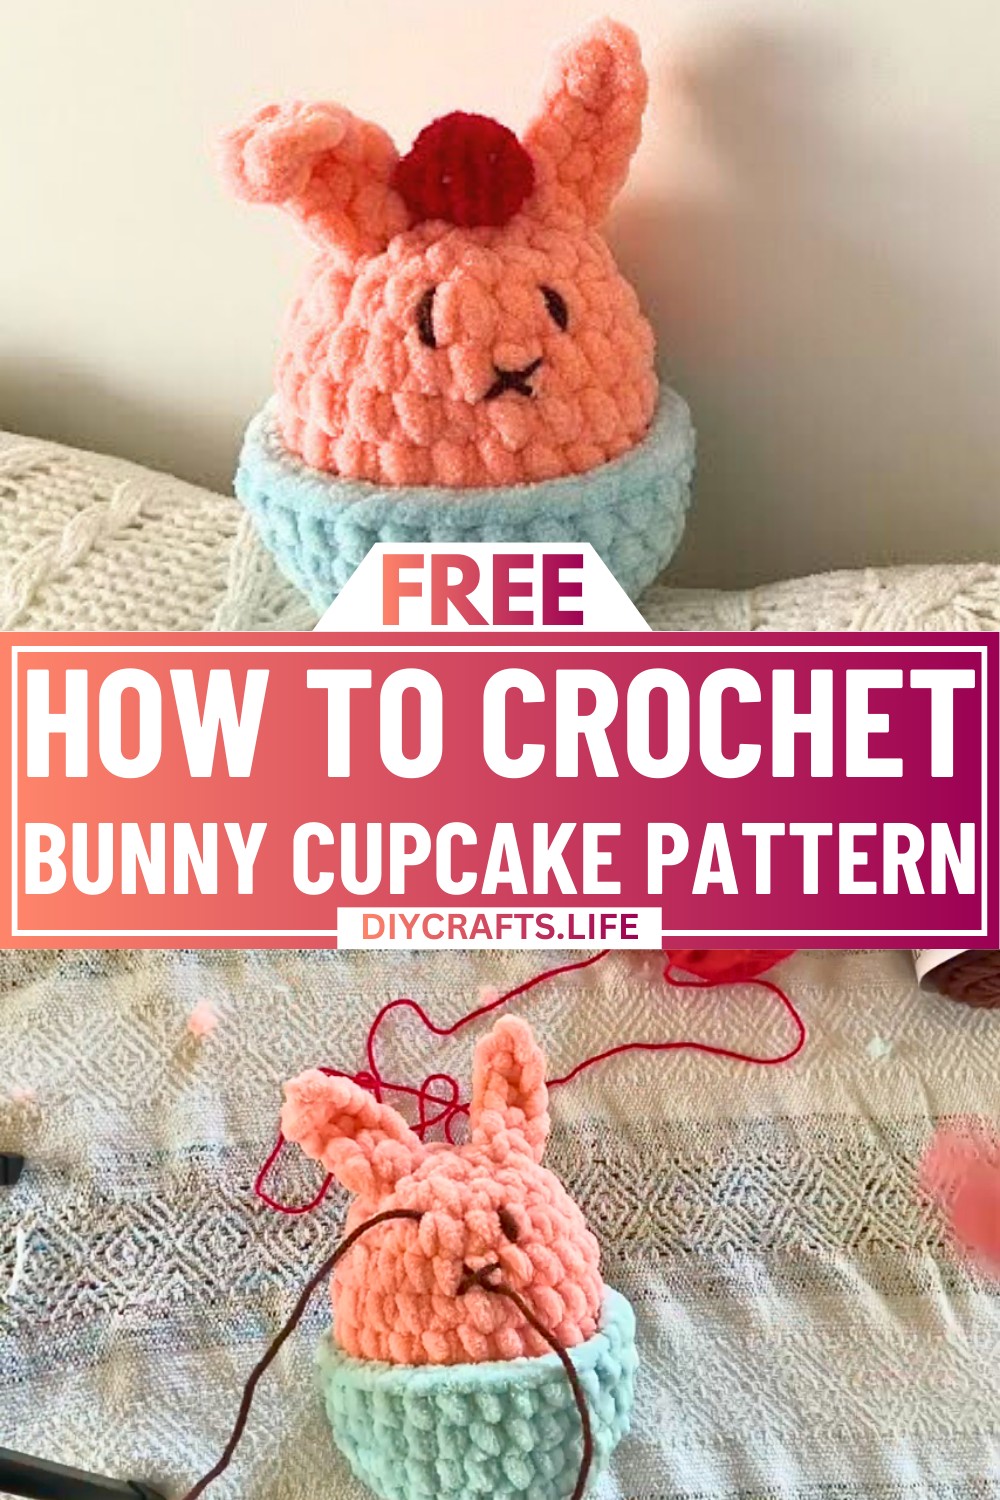
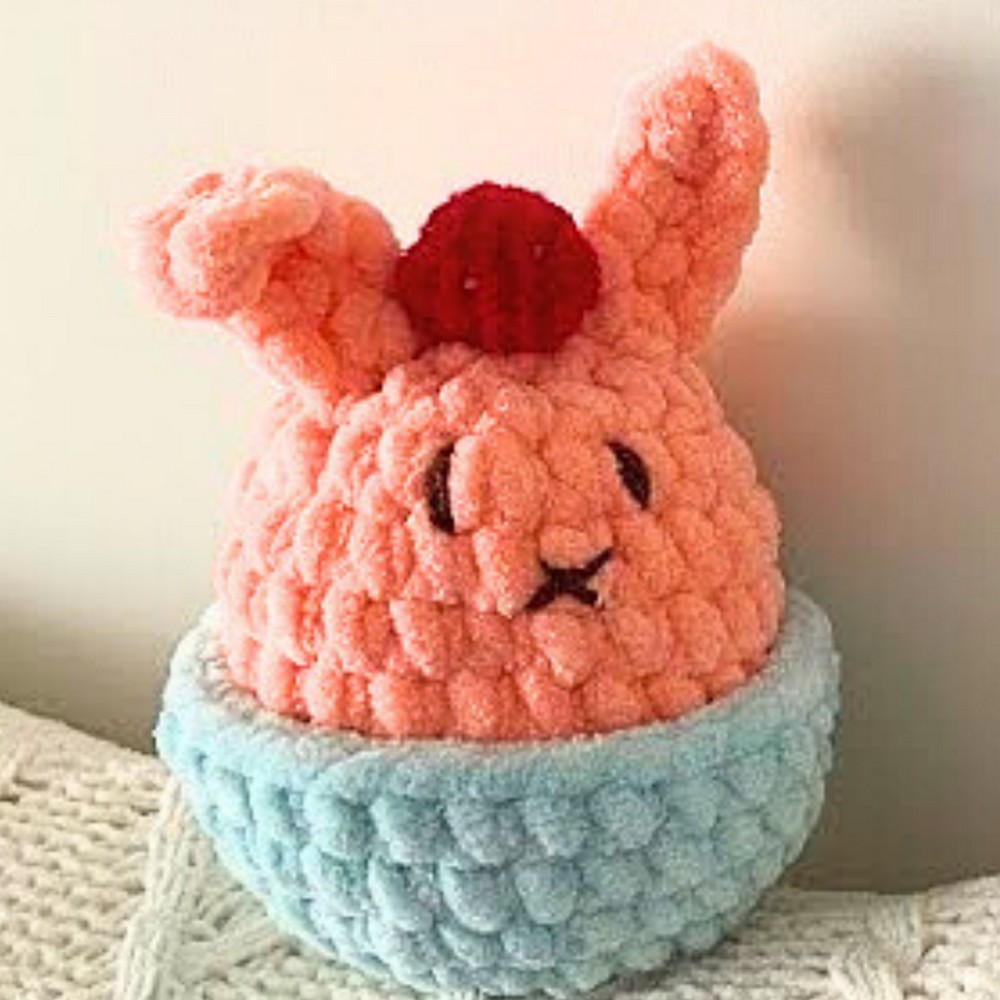
This adorable Bunny Cupcake is a fun and unique crochet item perfect for adding a touch of cuteness to your space! It’s a bunny designed to sit snugly inside a cupcake liner, with delightful features like a strawberry or cherry topper, floppy bunny ears, and a charming little face. Whether you use it as a playful desk decoration, a small toy, or a heartfelt handmade gift, this Bunny Cupcake will bring smiles to everyone who sees it.
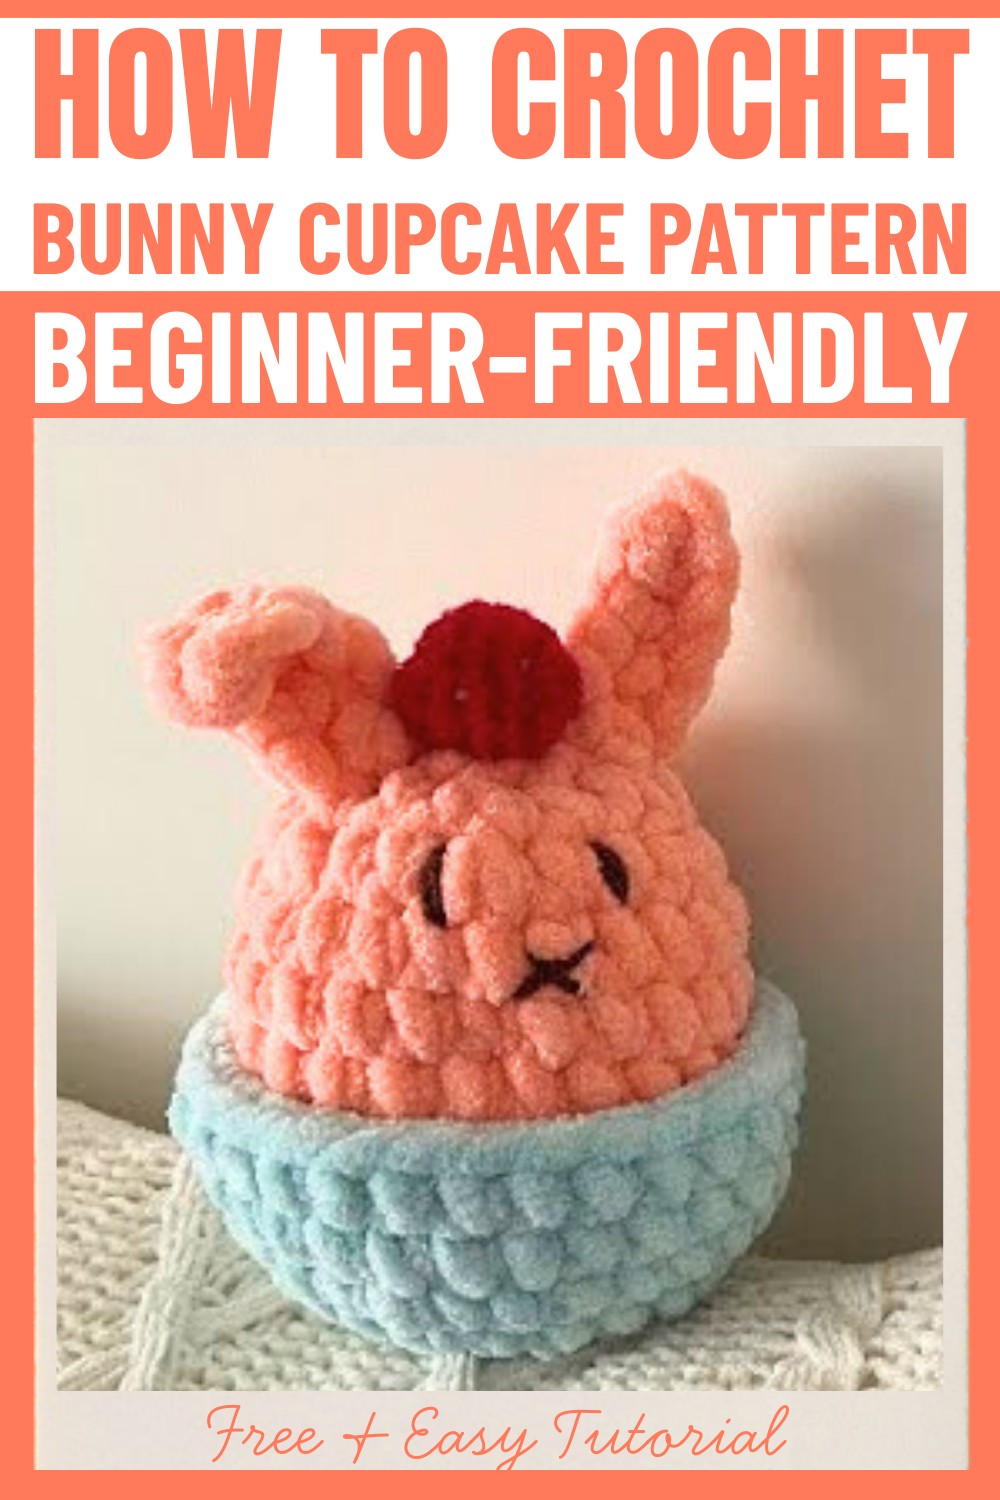
Creating this bunny is simple and beginner-friendly, making it great for anyone just starting to crochet. The piece uses basic techniques such as single crochet stitches and a straightforward shaping process. While the instructions cover essentials, like making the bunny’s body, liner, ears, and topper, you can freely customize colors and sizes to suit your style! Use pastel yarn for an extra sweet look or adjust the size to make it a cuddly creation or smaller keepsake. It’s beginner-friendly but feels unique and fun to make.
Place the finished bunny cupcake on a shelf, use it to brighten up a party table, or gift it as an adorable handmade surprise. This cute piece is a fun way to play with colors, and its small size makes it quick to complete without needing much yarn or time.
Credit Frayed KnotCo Tutorials
Materials & Tools Needed
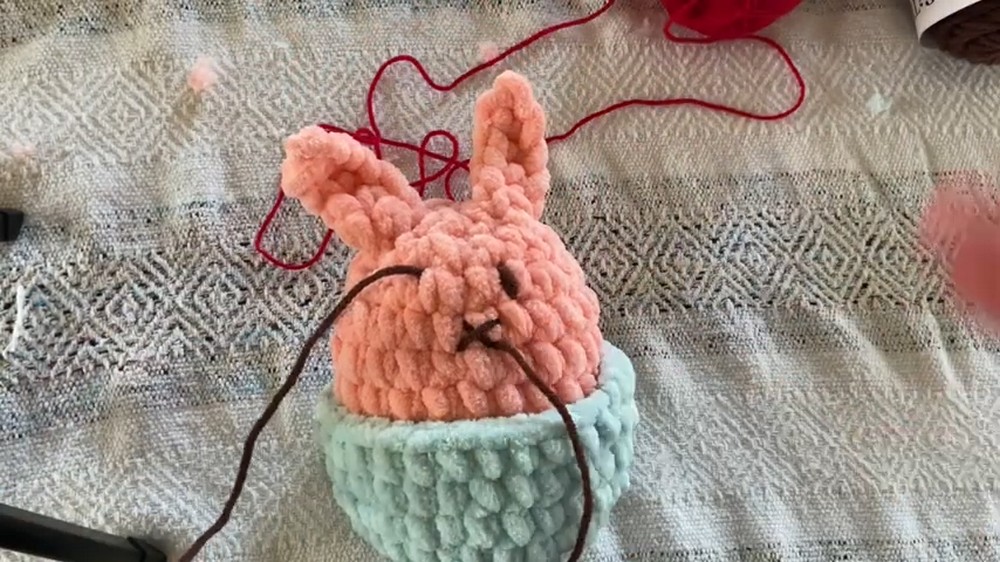
- Yarn: Loops & Threads Sweet Snuggles or other super bulky yarn; suggested pastel colors for a whimsical cupcake vibe.
- Cupcake body & ears: Peachy coral-like pastel yarn (or any cupcake color you prefer).
- Cupcake liner: Minty blue color.
- Strawberry (or cherry): Cherry red acrylic yarn.
- Embroidery details: Brown yarn for the bunny face.
- Optional stuffing: Leftover scrap yarn (or polyfill).
- Crochet Hook: 7 mm hook (slightly smaller hook for tight stitches).
- Other Tools:
- Yarn needle for sewing components and weaving in ends.
- Stitch markers for tracking rounds.
- Scissors.
Finished Size & Customization Ideas
- Approximate Finished Size: About small plushie size, ideal for beginners to complete quickly. Exact dimensions will vary depending on yarn type, hook size, and individual tension.
- Customization Ideas:
- Use different yarn weights for smaller/larger cupcakes. Bulky yarn ensures plush, soft results, while thinner yarn offers finer detail.
- Swap coral for various pastel shades to represent different cupcake "flavors."
- Add sprinkles or frosting embroidery onto the body for extra detail.
- Adapt the "cherry" into a strawberry with green embroidery or skip for a minimal look.
Pattern Abbreviations & Terminology
- SC: Single Crochet
- Inc: Increase (2 SC in the same stitch)
- Dec: Decrease (combine two stitches into one)
- Ch: Chain
- MR: Magic Ring
- St/Sts: Stitch(es)
Note: The pattern uses beginner-friendly single crochet and simple shaping techniques (increase/decrease).
Step-by-Step Crochet Instructions
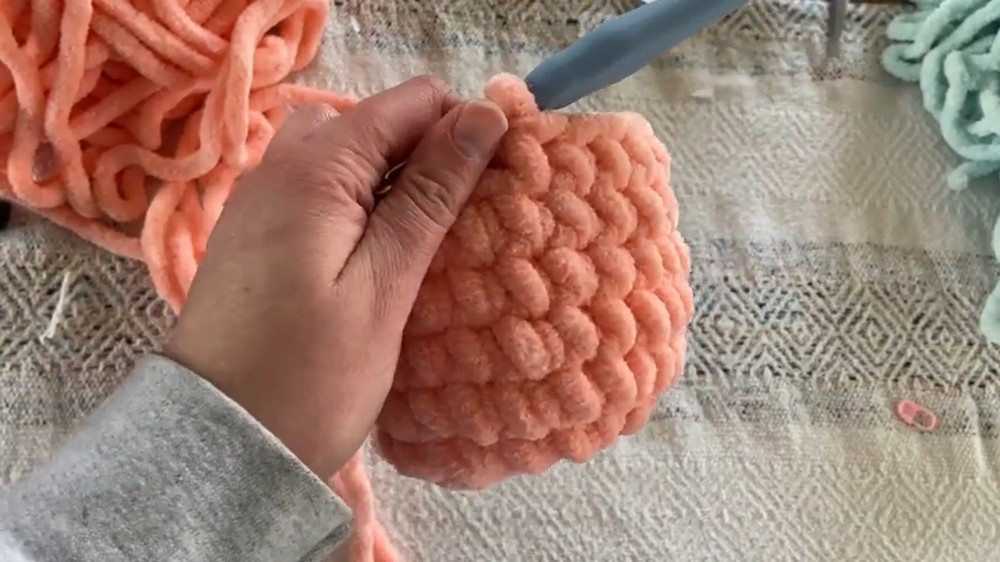
Body of Bunny Cupcake
- Start:
- Option 1: Magic ring (MR), 6 SC into the ring. (Total = 6 sts)
- Option 2: Chain 4, connect the ends to form a circle, and work into the center of the loop.
- Round 1: (Increase Round)
- 2 SC in each stitch around. (Total = 12 sts)
- Round 2: (Increase Round)
- 2 SC in next st, 1 SC in next st, repeat around. (Total = 18 sts)
- Round 3: (Increase Round)
- 2 SC in next st, 2 SC in next stitches, repeat around. (Total = 24 sts)
- Rounds 4-7: (Even Rounds – No Increase)
- 1 SC in each stitch. (Total = 24 sts per round)
- Begin Decreases:
- Round 8: Dec 2 into 1, 2 SC single stitches, repeat around.
- Round 9: Dec 2 into 1, 1 SC single stitch, repeat around.
- Final Round:
- Dec into every st, until the cupcake top closes.
- Leave a small hole for stuffing (optional), then sew shut by weaving the yarn tail.
Ears
- Start:
- Chain 5.
- Skip the first chain closest to the hook; SC in the next 4 chains.
- Fasten off and leave a long tail for sewing.
- Sew the ears symmetrically on the bunny head, allowing slight droop for added cuteness.
Cupcake Liner
- Start:
- Option 1: Magic ring, 6 SC into the ring.
- Option 2: Chain 4, connect the ends to form a circle, and work into the center of the loop.
- Round 1: (Increase Round)
- 2 SC in each stitch around. (Total = 12 sts)
- Round 2:
- 2 SC in the next st, 1 SC in next st, repeat around. (Total = 18 sts)
- Round 3:
- 2 SC in next st, 2 SC in next stitches, repeat around. (Total = 24 sts)
- Round 4 (Increase to Fit Bunny):
- 2 SC in next st, 3 SC in next stitches, repeat around. (Total = 30 sts)
- Rounds 5-7:
- 1 SC in every stitch to build liner height.
Face Embroidery
- Embroidery:
Use brown yarn to create:- Simple "X"-shaped nose and mouth overlapping one another.
- Embroider small round eyes over the edges of the mouth or use safety eyes (if preferred beforehand).
Strawberry/Cherry Top
- Base:
- Magic ring, 6 SC into the ring.
- Round 1:
- 2 SC in each stitch around. (Total = 12 sts)
- Rounds 2-3:
- 1 SC into each stitch around to form a rounded shape.
- Round 4:
- Begin decreasing – Dec two stitches into one, repeat around. Stuff lightly if desired.
- Embroidered Green Leaves (Optional for Strawberry):
Using scrap green yarn, embroider an "X" or spike shapes around the top to mimic strawberry leaves. Alternatively, skip this step for a cherry version. - Sew the strawberry (or cherry) securely on top of the bunny cupcake's head.
Finishing Techniques
- Assembly:
- Attach the ears by sewing them evenly onto the head of the cupcake.
- Sew the completed bunny into the cupcake liner, making sure to fasten securely.
- Add the strawberry/cherry topper using the tail yarn leftover.
- Final Touches:
- Weave in all loose ends neatly.
- Adjust face embroidery if necessary or add blush embroidery/details for added personality.
- Optional Customizations:
- Use leftover yarn for decorative sprinkles or frosting swirls.