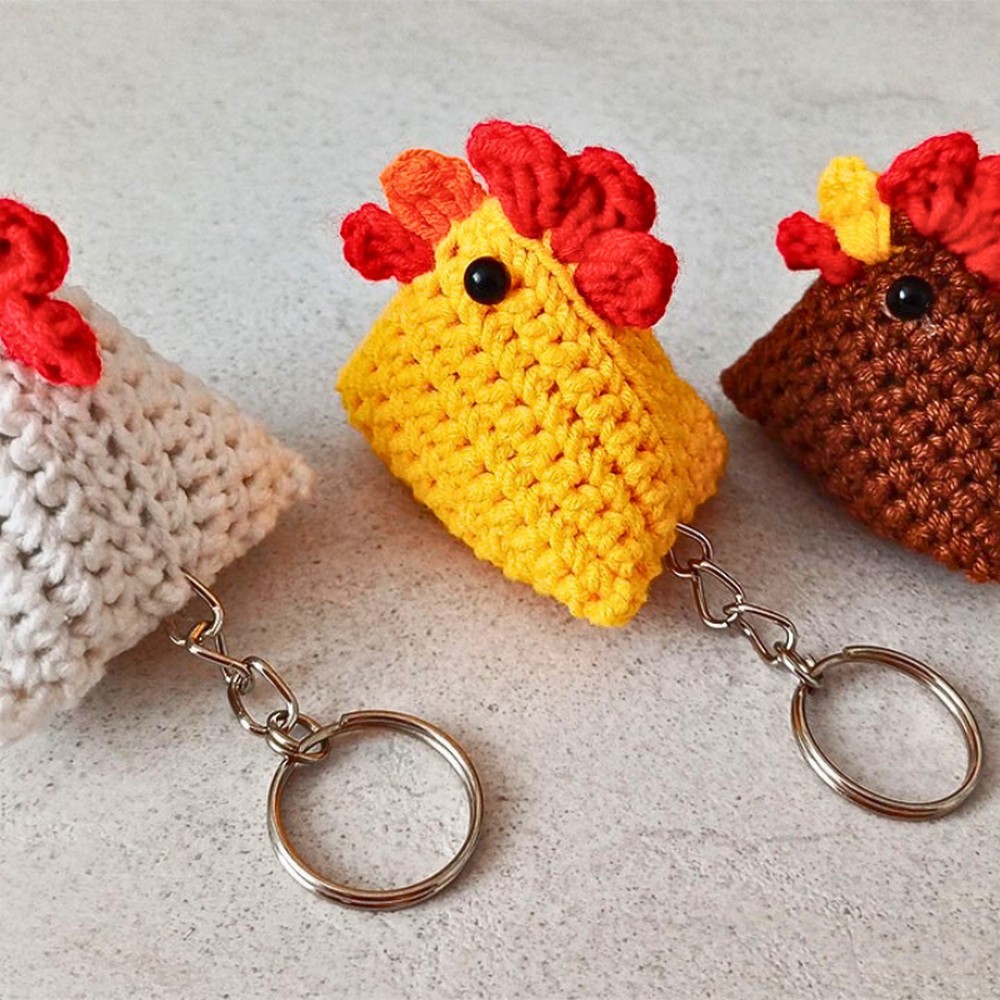
Crochet chicken keychains are small, cheerful creations that are perfect for adding a pop of fun to your keys, bags, or even as cute decor. These tiny chickens are not only lovable but also practical — small enough to carry everywhere yet big enough to spread smiles. With their vibrant design and soft texture, they can brighten up your day or make for a thoughtful handmade gift for friends and family.
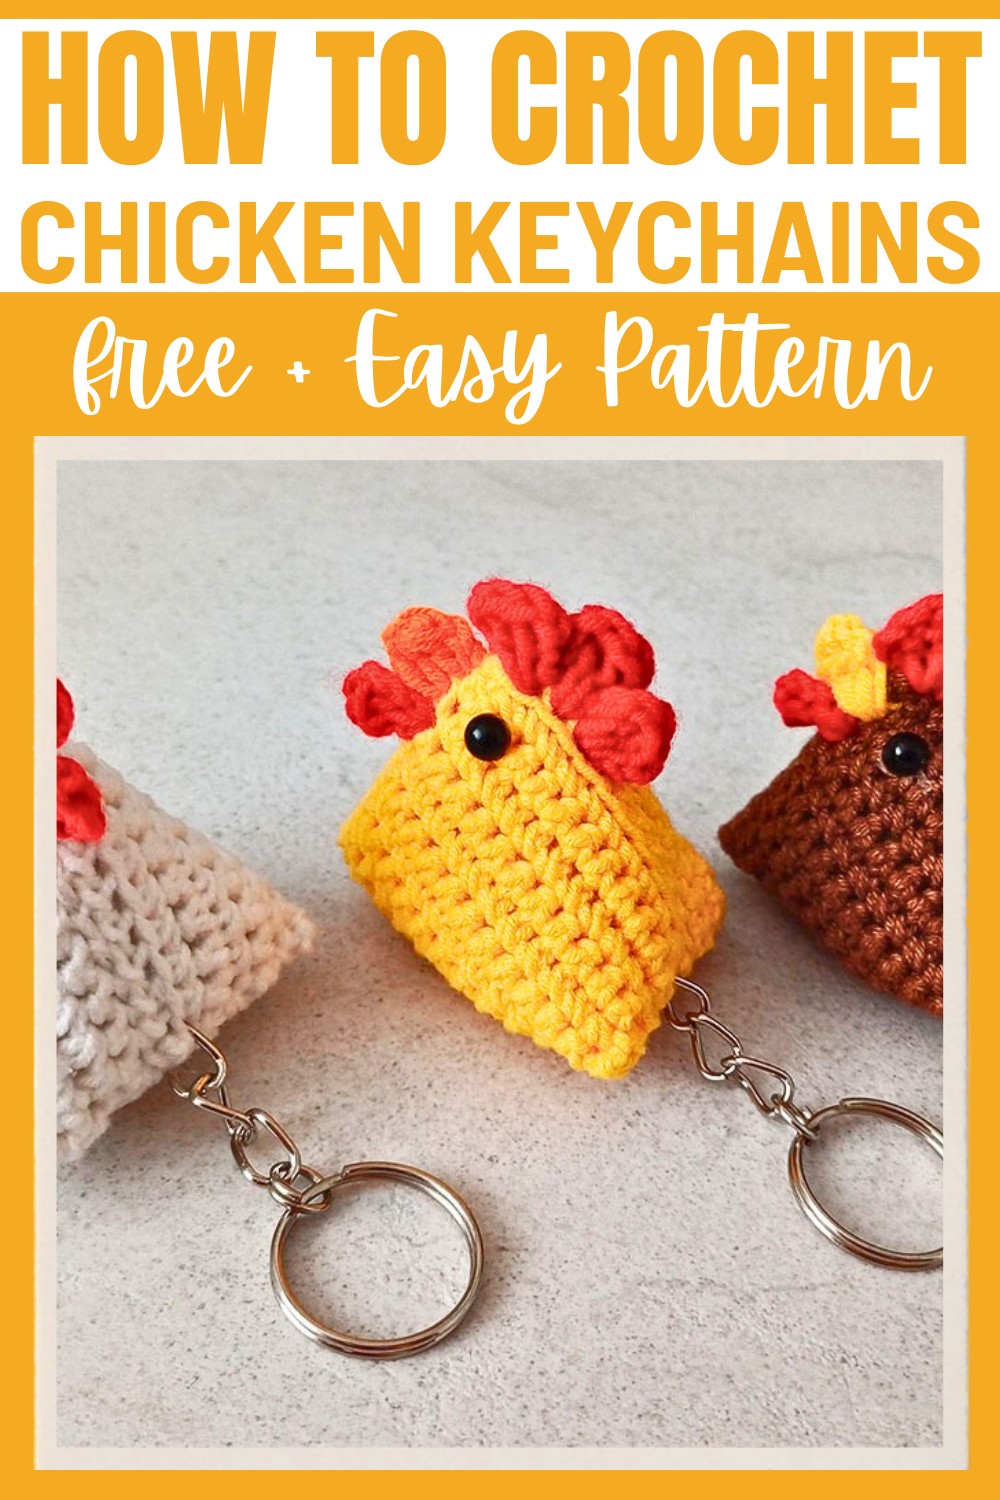
Making these keychains uses simple crochet techniques, giving you room to play with colors and patterns to make them uniquely yours. By creating rows of stitches and combining creative details like double crochets and slip stitches, you’ll end up with an adorable chicken that’s lightweight and versatile. Whether placed in a bag, hung on a zipper, or clipped to a backpack, these crochet chickens are designed to spread joy.
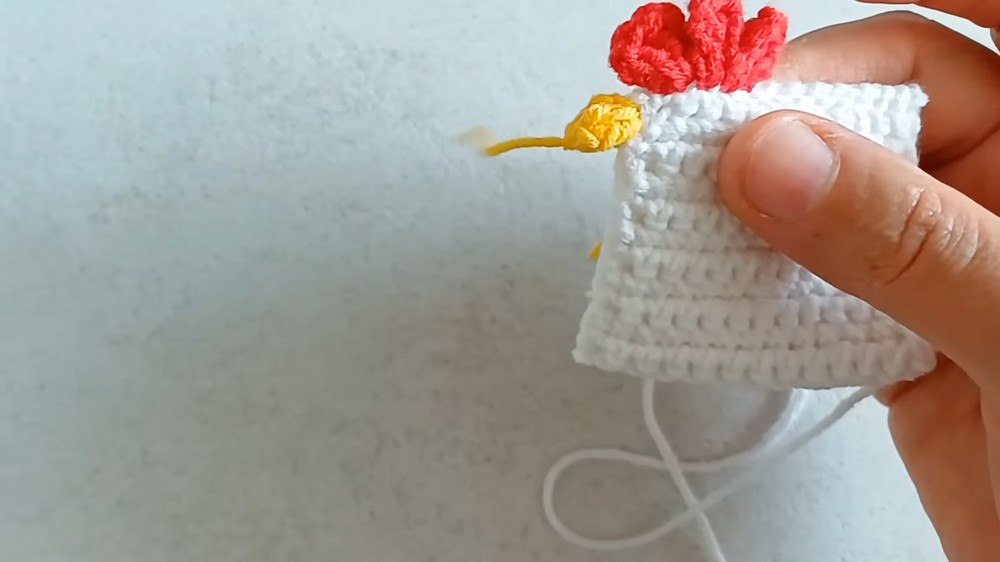
Credit Poplar Crochet
Materials & Tools Needed
- Hook: 3mm crochet hook
- Yarn: Acrylic yarn (in desired chicken colors, such as white, yellow, red, etc.)
- Extras: Stuffing material (fiberfill or similar) for body; keychain ring
- Tools: Scissors, yarn needle (for sewing and weaving in ends)
Finished Size
The chicken measures approximately 11 cm tall, as described.
Customization Ideas
- Create chickens in different yarn colors for variety (pastel colors make cute options).
- Add embellishments like mini bows, beads, or tiny felt shapes for personality.
- Attach safety eyes or small buttons for the eyes if not stitching them with yarn.
Pattern Abbreviations & Terminology
Here are standardized abbreviations based on common crochet practices:
- ch = chain
- sc = single crochet
- dc = double crochet
- hdc = half double crochet
- sl st = slip stitch
- st(s) = stitch(es)
Step-by-Step Crochet Instructions
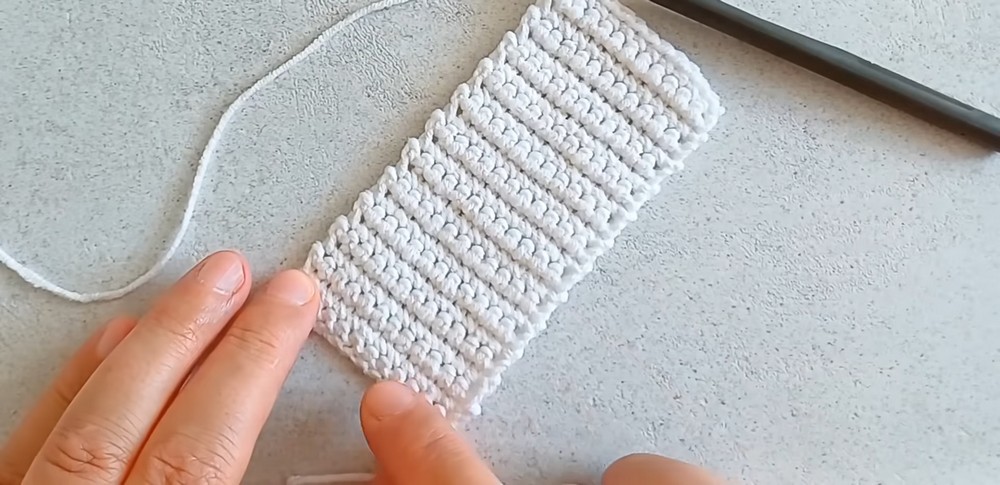
BODY
- Chain 13.
- Begin working 1 single crochet (sc) into each chain stitch (total 13 sts).
- Chain 1, turn your work, and repeat single crochet across for 12 rows total. This piece should measure approximately 11 cm in height.
- Repeat the entire rectangular piece 3 times to create sections for the body.
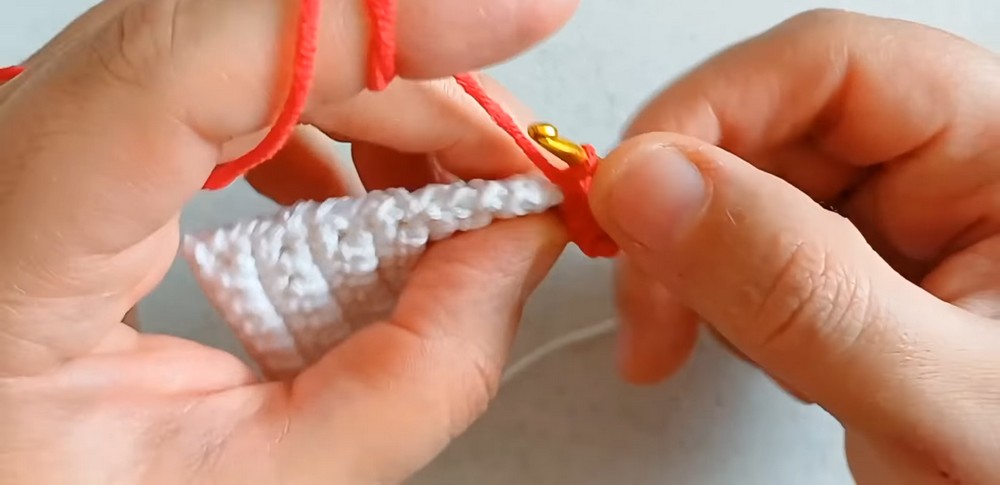
COMB (on head of the chicken)
- Attach red yarn and work as follows:
- Start with 3 chains, then into the same st work 2 double crochet (dc), followed by another 3 chains.
- Add 1 slip stitch (sl st) to secure the loop.
- Repeat the above pattern around the top edge to shape the comb.
BEAK
- Using yellow or orange yarn:
- Chain 1, then 2 chains to start.
- Work 3 half double crochet (hdc) into the same stitch.
- Chain 3, then work 1 double crochet (dc) into the same base.
- Finish with a 3-chain slip stitch and 1 chain for a sharp triangular shape.
FINISHING UP
- Attach all completed components (body, comb, and beak) by sewing them together with the yarn needle.
- Stuff the body sections lightly before completely closing the seams around the chicken.
- Weave in all loose ends.
- Attach a keychain ring at the top and secure it tightly. Optionally, add eyes by sewing small beads or stitching black yarn.
Optional Color Changes & Enhancements:
- You can alternate yarn colors for different rows to create patterns such as stripes or spots.
- Embroider features like wings using simple stitches on the sides of the body.


