Create a festive touch this holiday season with the Crochet Christmas Bubble! This stunning decoration is both charming and functional, adding a handmade, personalized feel to your tree or space. Its versatility makes it perfect for gifting or as a delightful keepsake you'll cherish year after year.

The Crochet Christmas Bubble stands out as a versatile ornament, ideal for decorating your tree or accenting other home spaces. Its detailed design combines durability with elegance, making it reusable for years. Customize it with your favorite colors to match any theme while enjoying its festive appeal.
Crochet Christmas BUBBLE
Crafting the Crochet Christmas Bubble is an enjoyable task suitable for beginners and seasoned crocheters alike. Its straightforward pattern is easily customizable, allowing room for creativity with colors and details. This engaging project is not just fun—it’s a wonderful way to spread holiday cheer through handmade decor.
Credit Vima's Crochet
Materials and Preparation
Here’s what you’ll need to create this adorable Christmas Bubble:
Materials:
- Red Christmas yarn: 4-medium weight
- Hook size: 4.5 mm for the main bubble (use 3.5 mm for thinner yarn sections)
- Yellow yarn for the cap: 3-ply (or any color of your choice)
- White yarn for the star detailing: Lightweight
- Stuffing: Polyester fiberfill or scraps to stuff the bubble for shaping
- Bigger eye needle: To sew together thicker yarn components
- Thinner needle: For stitching finer details (optional)
- Beads or decorations: Small golden or glitter beads for star embellishments
- Fabric glue (or glue gun): For attaching beads
- Beaded chain (optional): For decorating the cap
- Stitch marker: To mark the start of each round
- Scissors: For cutting yarn
Optional Variations:
- Experiment with different yarn weights to create bubbles of various sizes.
- Use two strands of different yarn colors to achieve a unique blended effect.
Abbreviations and Notes
Abbreviations:
- CH: Chain
- SC: Single Crochet
- SL ST: Slip Stitch
- ST: Stitch
- INC: Increase (two SC in the same stitch)
- DEC: Decrease (join two stitches together using the front loop)

Notes:
- Work in rounds, making sure to join each round with a SL ST and begin with CH 1.
- Use a stitch marker to track the start of each round, particularly as you work through increases and decreases.
- Adjust the hook size if using thinner or thicker yarn to maintain the proper shape and tension.
Gauge, Approximate Size, and Pattern Notes
- Gauge: Gauge isn’t essential for this pattern, but you want to achieve a tight stitch density to hold the stuffing securely. Make a small test swatch if you’re unsure about your hook size.
- Finished Size: Approx. 3 inches (using medium-weight yarn). Size will vary depending on the yarn and hook you use.
- Special Techniques:
- Magic ring (or adjustable loop) to create a tight foundation.
- Invisible decrease: Using only the front loops of two stitches to achieve a seamless look.
Step-by-Step Pattern
1. Base Bubble (Main Body)
- Round 1: Start with a magic ring, CH 1, and make 6 SC into the ring. Pull the tail to close the circle and SL ST into the first SC. (6 ST total)
- Round 2: CH 1. 2 SC into each ST around (increase in every stitch). SL ST to join. (12 ST total)
- Round 3: CH 1. 1 SC in the first ST, INC in the next ST. Repeat this pattern around. SL ST to join. (18 ST total)
- Round 4: CH 1. 2 SC across two ST, then INC in the next ST. Repeat this pattern around. SL ST to join. (24 ST total)
- Rounds 5-7: Continue rounds of increases by adding 1 more SC between increases in each round until you end with 5 SC between increases. (Final count = 42 ST total)
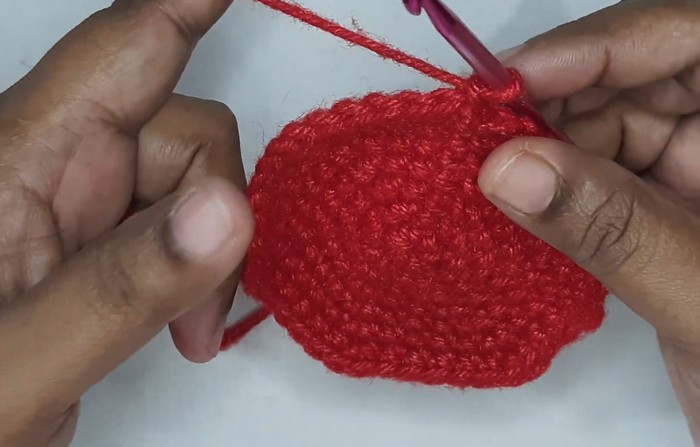
Tip: Count your stitches after every round to ensure accuracy.
- Round 8-12 (Height): SC evenly around (no increases). Use a stitch marker to track your rounds. (42 ST per round)
- Decrease Rounds:
- Round 13: 5 SC, DEC (decrease over two ST). Repeat around and SL ST to join. (36 ST)
- Round 14: 4 SC, DEC. Repeat around. (30 ST)
- Round 15: 3 SC, DEC. Repeat around. (24 ST)
- Round 16: 2 SC, DEC. Repeat around. (18 ST)
- Round 17: SC, DEC. Repeat around. (12 ST)
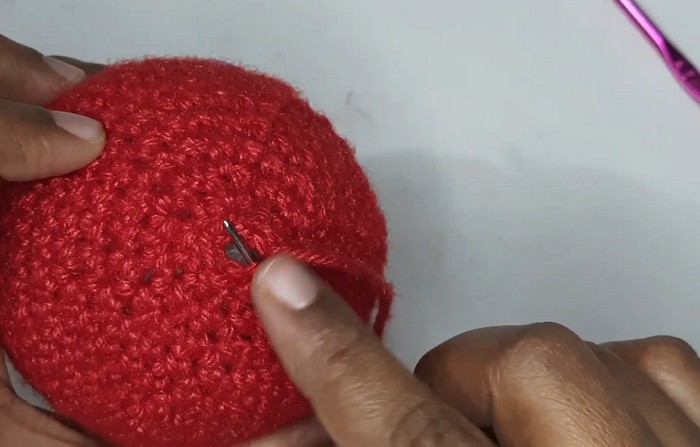
- Finishing the Bubble: Stuff your bubble with fiberfill, being careful not to overstuff. End with one final round of DEC in every stitch to close the top. Secure with a SL ST, cut the yarn, and sew the remaining small hole shut.
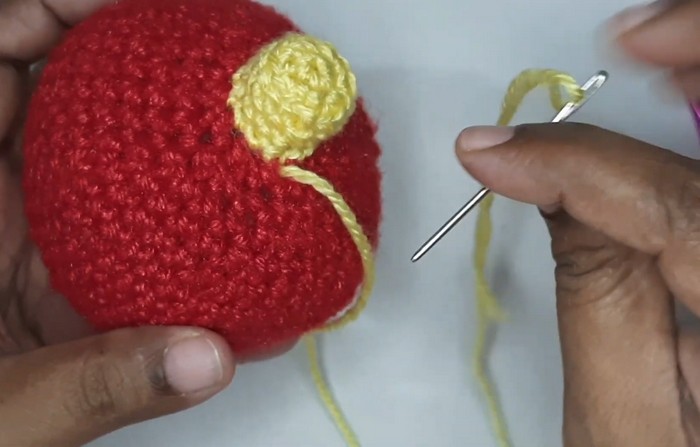
2. Cap
- Round 1: With yellow yarn, start with a magic ring and CH 1. Make 6 SC into the ring. SL ST to join. (6 ST)
- Round 2: CH 1. 2 SC in each ST. SL ST to join. (12 ST)
- Round 3: CH 1. Work 1 SC into the back loop only (BLO) of each stitch. SL ST to join. (12 ST)
- Rounds 4-5: SC evenly around for 2 additional rounds. SL ST to join.
- Add a small amount of stuffing to the cap. Attach the cap to the top of the bubble using the yarn tail and a needle. Sew securely and weave any loose ends inside.
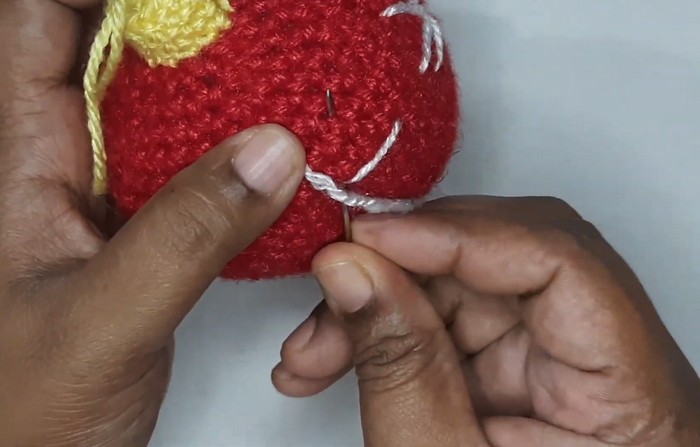
3. Star Decoration
- Thread the white yarn and bring the needle through the surface of the bubble (starting on the third row of SC rounds).
- Stitch a star by skipping two stitches and pulling the yarn through the center of your stitch. Continue this pattern until you’ve created an eight-point star design. Secure the yarn tail.
Tip: Use a stitch marker to position the points evenly!
- Add golden beads to the center of the star using fabric glue for an extra festive touch.
4. Finishing Touches
- Beaded Chain: Secure the beaded chain around the cap with fabric glue or glue gun. Alternatively, glue beads around the cap for extra embellishment.
- Hanging Loop: Create a loop using yarn or a thread and attach it to the top of the cap. Adjust the length based on how you want the bubble to hang.
- Fluff and shape your bubble. You’re done!
Final Notes
🎄 Your Crochet Christmas Bubble is now complete! Make multiple bubbles in various colors and sizes to decorate your tree or as a special handmade gift. Don't forget to share your creations with friends or on social media to spread the festive cheer.
Pattern Question:
Question: Can I adjust the size of the Crochet Christmas Bubble?
Answer: Yes! You can adjust the size by using different yarn weights and hook sizes. A larger hook and thicker yarn will create a bigger bubble, while thinner yarn and a smaller hook will make it more delicate.
Conclusion:
The Crochet Christmas Bubble is a delightful, festive project that combines simplicity and charm. Perfect for all skill levels, it’s a satisfying way to craft personalized decor, share handmade gifts, or bring holiday joy into your home. There’s no better way to celebrate the season than through creativity!


