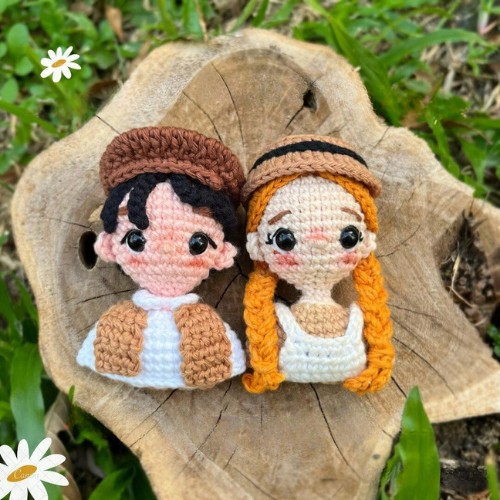
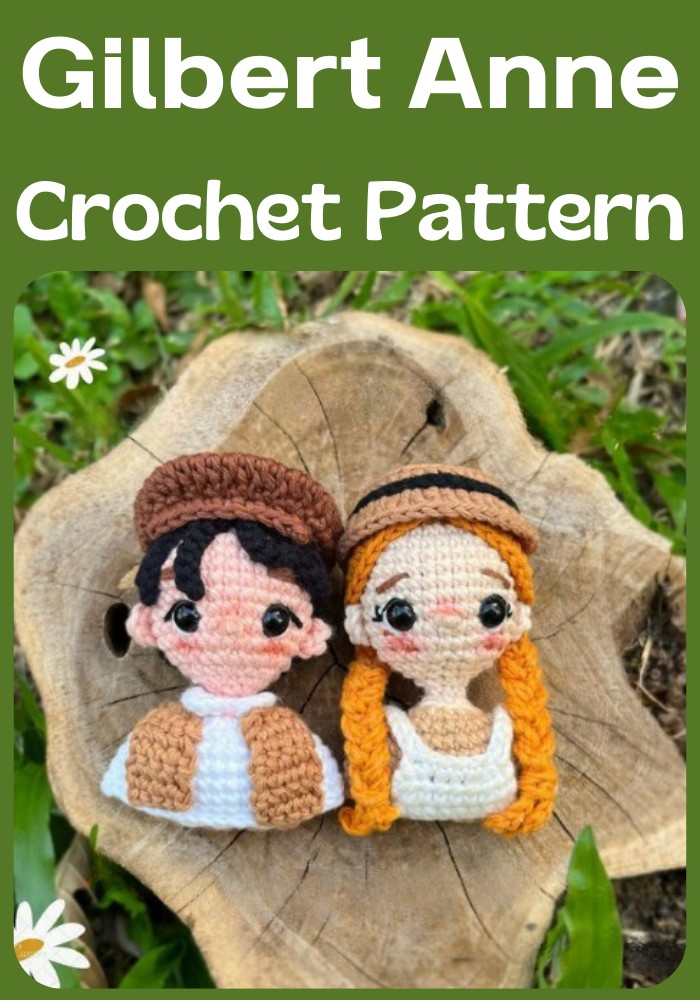
Creating a crocheted version of Gilbert Blythe from "Anne with an E," inspired by "Anne of Green Gables," vividly brings the beloved series characters to life. Meticulously crocheted, this pattern uses vibrant colors and expressive details to capture the essence of Gilbert with precision. Each stitch is designed to highlight the characters’ distinctive features, from Gilbert’s charming outfit to his signature hairstyle, reflecting the heartwarming and spirited atmosphere of the series in a unique, tangible form.
Materials Needed:
- cotton yarn [skin color, brown, beige, white, black]
- 2mm crochet hook
- 6mm eyes
- fiber fillings
- wire
- Note; you can use any type of yarn you like with the corresponding hook size
Crochet Abbreviations:
- mr - magic ring
- ch - chain
- Sc - single crochet
- slst - slip stitch
- hdc - half double crochet
- dc - double crochet
- dc inc - double crochet increase
- inc - increase
- dec - decrease
Step By Step Pattern
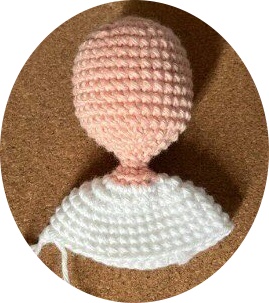
Head and Shoulder:
- R1 6sc in mr [6]
- R2 6inc [12]
- R3 (Isc, 1inc)×6 [1]
- R4 (2sc, linc)×6 [24]
- R5 (Isc, linc, 1sc)x8 [32]
- R6-13 32sc [32]
- R14 (1sc, 1dec, 1sc)×8 [24]
- R15 (2sc, 1dec)x6 [18]
- -stuff the head
- R16 (1sc, 1dec)x6 [12]
- R17 6dec [6]
- R18 6sc [6]
- R19 BLO 6inc [12], change into white
- R20 In white, (1sc, 1inc)x6 [18]
- R21 5inc, 8sc, 5inc [28]
- R22 (Isc, 1inc)x5, 8sc, (1sc, 1inc)×5 (38]
- R23-26 38Sc [38]
- R27 9sc (you don't finish this round) and crochet two sides together with 18slst and stuff the body.
Ears: (make 2)

- 4sc in mr [4]
- insert eyes on row 11 & 12 with 5st apart
- embroider the eyelashes, nose and eyebrows as shown in pictures
- attach the ears at 4 stitches apart from the eyes
Collar:
- Insert your hook into the middle stitch of the FLO of the R19, and (3ch, 1dc) 1hdc, 8sc, 1hdc, (1dc, 3ch, slst)
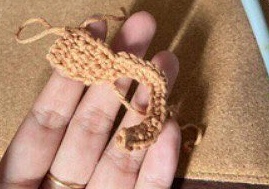
Coat:
R1 14ch, (1inc, 1sc)x6, 1inc, TURN R2 1inc, 2sc, TURN
- R3-6 4sc, cut the yarn. (pic 1)
Insert the yarn at 11th stitch and
- R1 1inc, 6sc, 1inc, TURN
- R2-6 10sc, cut the yarn. (pic 2)
Insert the yarn at the side stitch as in pic 3 and
- R1 1inc, 2sc, TURN
- R2-6 4sc, cut the yarn. (pic 4)
Hair Wig:
- R17sc
- R2 7inc
- R3 (1sc, 1inc) *7
- R4 (2sc, 1inc)*7
After R4, we no longer work in rounds, we will turn at the end and crochet in rows
- R5-8 Turn, 17sc
- R9 Turn, 1dec, 13sc, 1dec
- R10 Turn, 15sc
- R11 Turn, 1dec, 11sc, 1dec
- R12 Turn, 1dec, 9sc, 1dec
Cut the yarn, leaving a long tail. You can either sew or glue the wig.
Hair Strands: (abbreviation - H)
- H1 13ch, 6slst, skip 1 stitch and 1slst
- H2 8ch, 7slst, skip 1 stitch and 1slst
- H3-4 7ch, 6slst, skip 1 stitch and 1slst
- H5-6 8ch, 7slst, skip 1 stitch and 1slst
You can style this hair as shown in the photos below or style any way you like. I use glue and pins to style the hair.
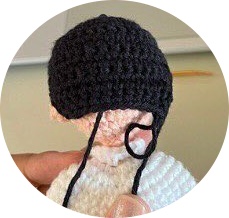
Hat:
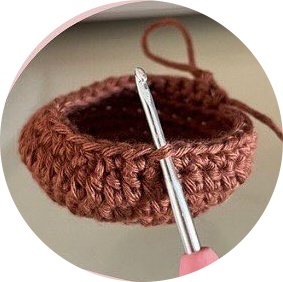
*Connet with slst after every round!
- R1 ch1, 10hdc into mr, 1slst
- R2 ch1, 10 hdc inc, 1slst
- R3 ch1, (1hdc, 1hdc inc)*10, 1slst
- R4 ch1, 12hdc, 6hdc inc, 12 hdc, 1slst
- R5 ch1, 36hdc, 1slst
- R6 ch1, 12sc, 6dec, 12 sc, 1slst
cut the yarn and weave in the ends insert your hook into the 10th stitch of the last round and in FLO, make 10 sc. Cut the yarn and weave in the ends.
Designer: Ash_does On Instagram