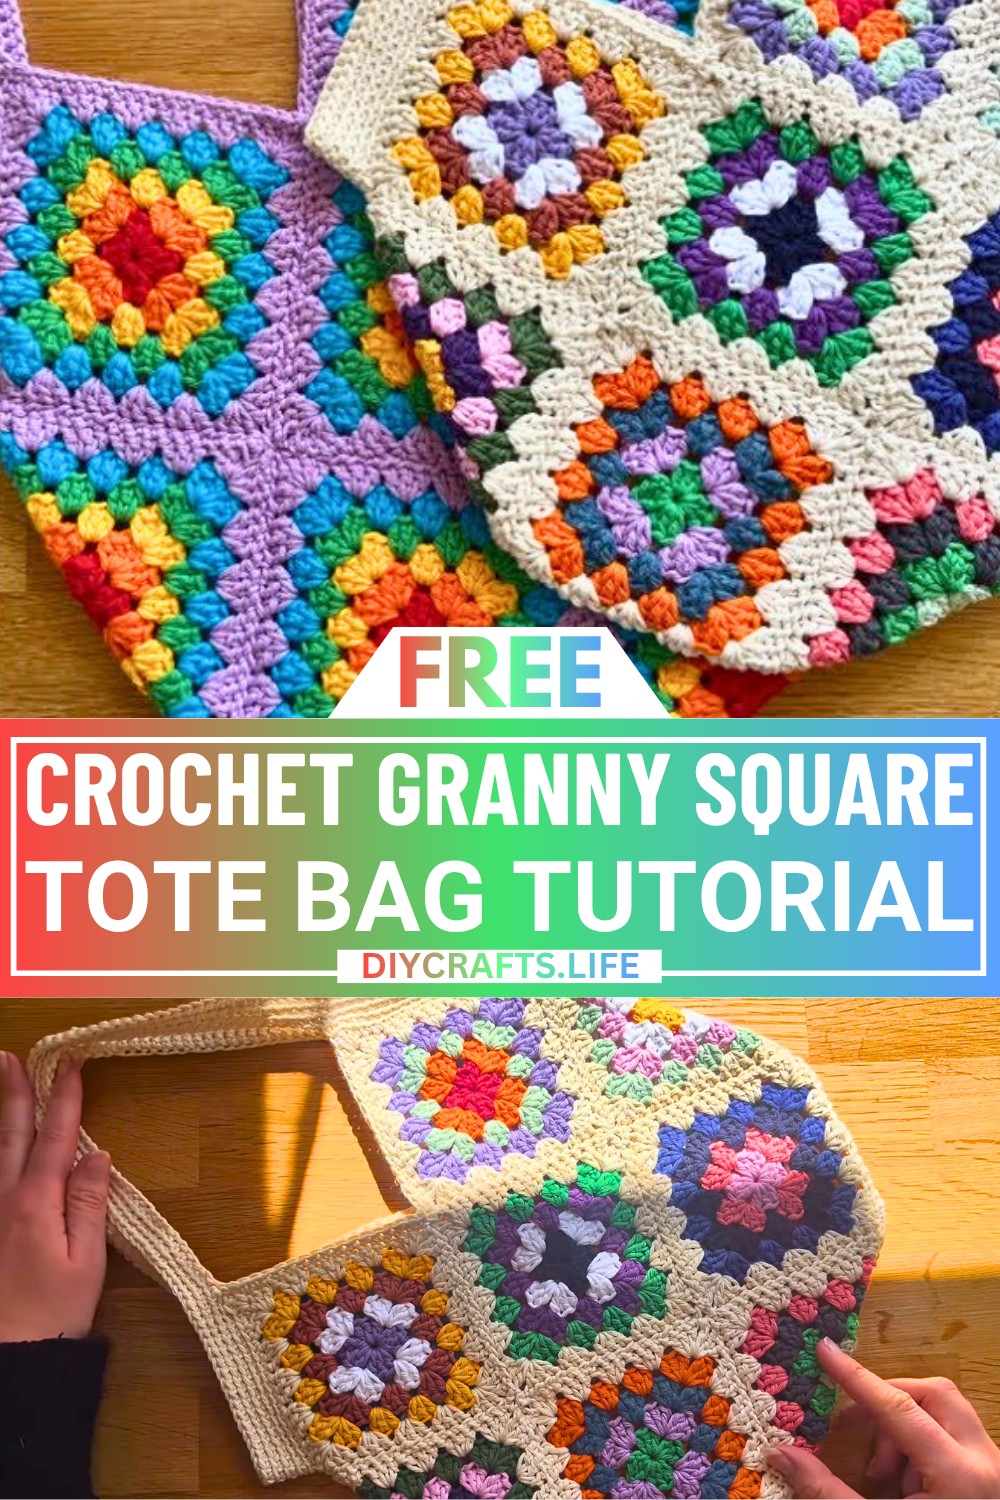
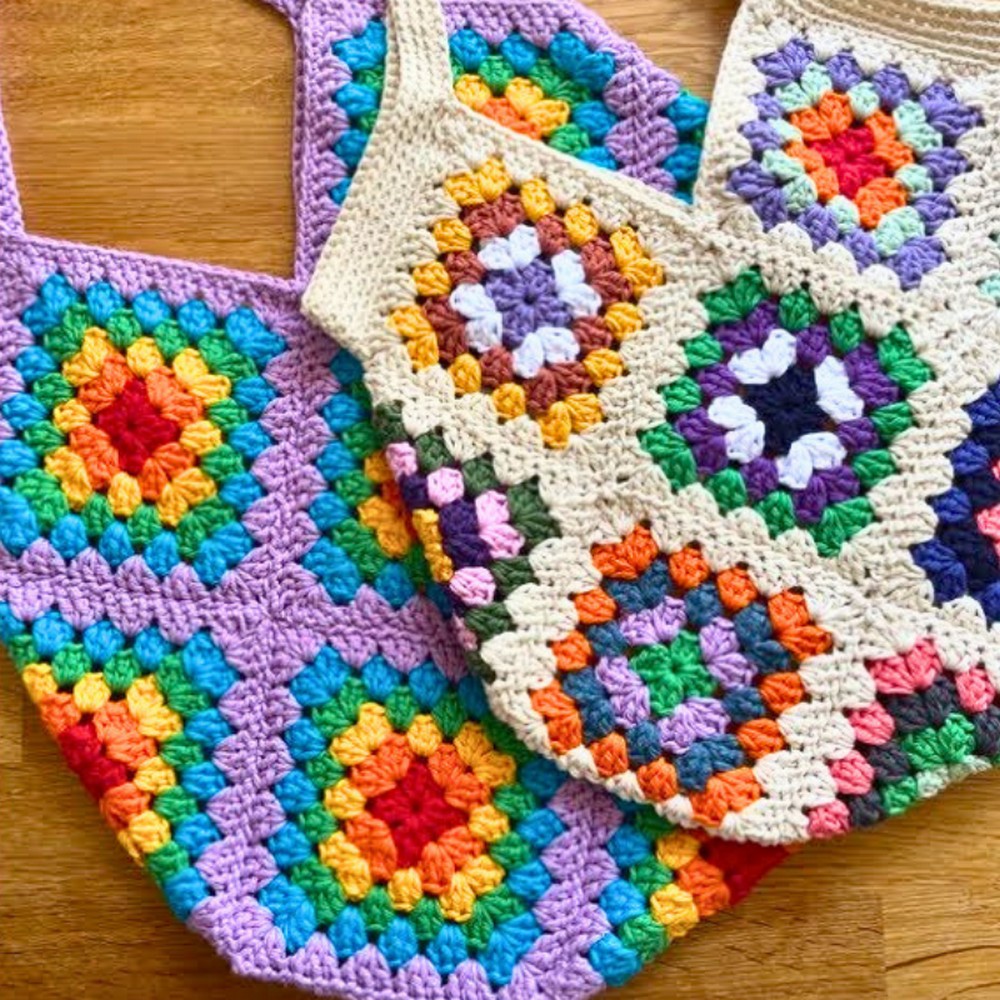
Looking for a fun and useful crochet idea? The Granny Square Tote Bag is the perfect mix of style and practicality. It's made using colorful granny squares stitched together beautifully. This tote bag stands out, whether you're using it to carry books, groceries, or even as a playful accessory for a day out. It’s small and charming, making it unique for all ages.
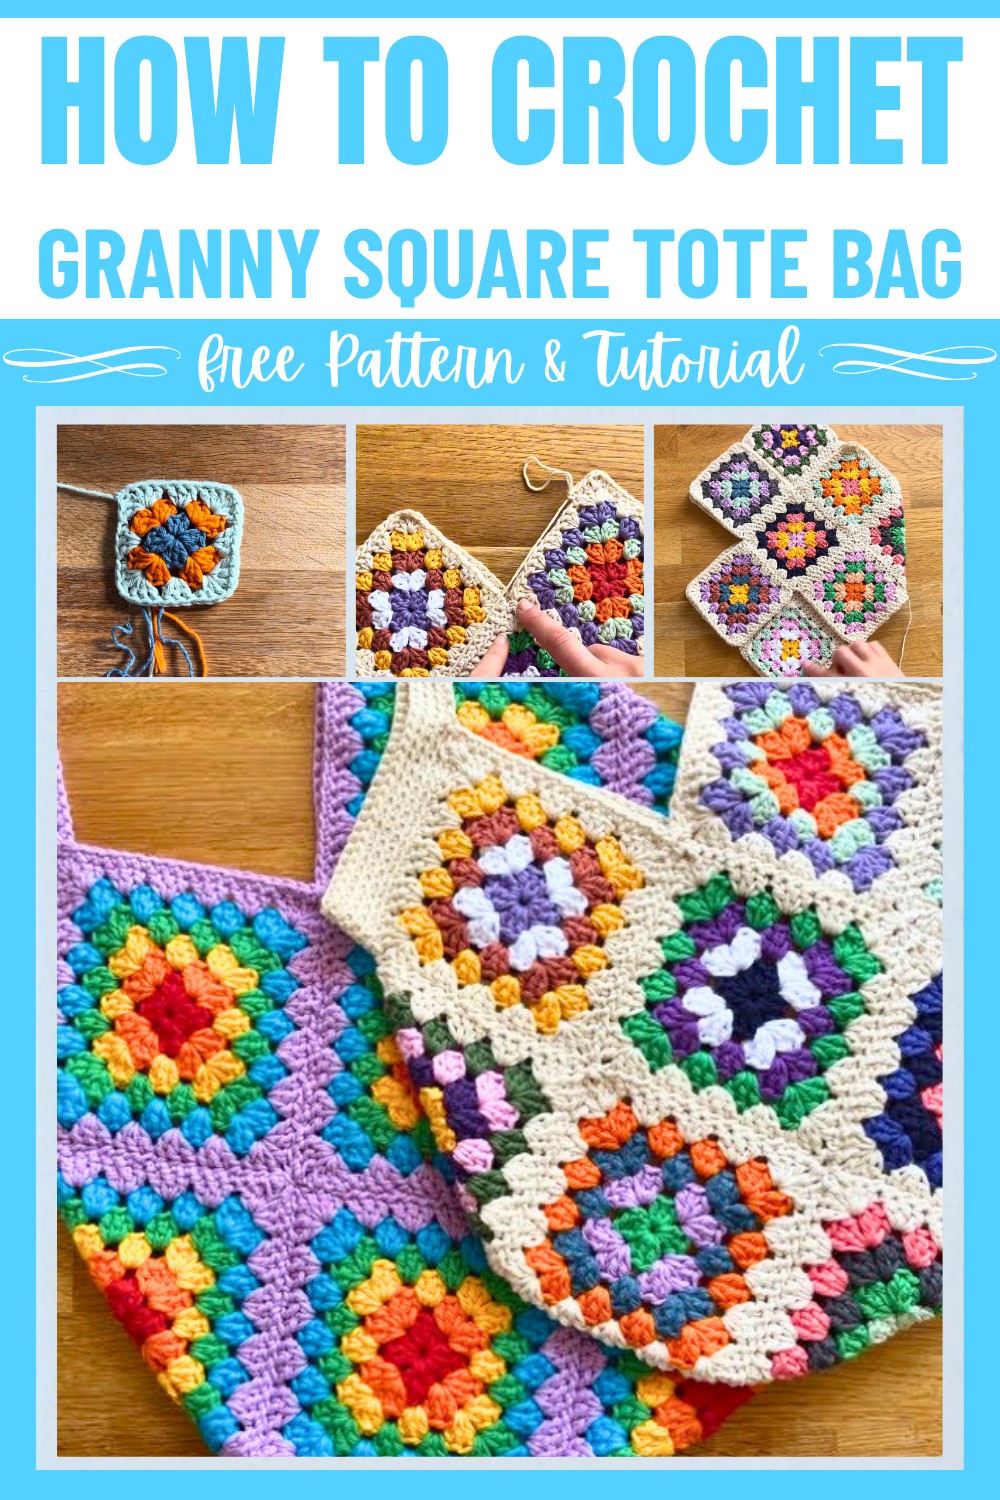
What makes this even more exciting is its flexibility. You can use your favorite shades, from scrappy yarns to a harmonious rainbow palette. The size is adjustable too, you can make smaller or larger squares depending on your yarn choice. The handle is delicately added, making it easy and comfortable to carry. This is not just a tote bag, it’s something personal that you create and can show off wherever you go.
Credit Crafted by Cat
1. Materials & Tools Needed
Materials
- Yarn: Scrappy cotton Aran weight yarn (or any preferred yarn). If using a different weight, adjust size accordingly.
- Optional: Cream-colored yarn for joining and borders (as used for accented rounds).
Tools
- 5 mm crochet hook (adjust according to yarn weight).
- Darning needle (for weaving in ends and sewing squares together).
- Scissors.
2. Finished Size & Customization Ideas
- Finished Size: Approximately 12 inches x 12 inches, not including the handle. Each granny square is about 5 inches across (depending on yarn and tension).
- Customization Options:
- Create a scrappy, multi-colored bag using leftover yarns.
- Make a rainbow version by coordinating colors in sequence.
- For a larger bag, increase the size of each square by adding more rounds, or increase the number of squares used.
3. Pattern Abbreviations & Terminology
Abbreviations are in US terms:
- Ch - Chain
- Sl st - Slip stitch
- Sc - Single crochet
- Dc - Double crochet
- St(s) - Stitch(es)
- YO - Yarn over
4. Step-by-Step Detailed Crochet Instructions
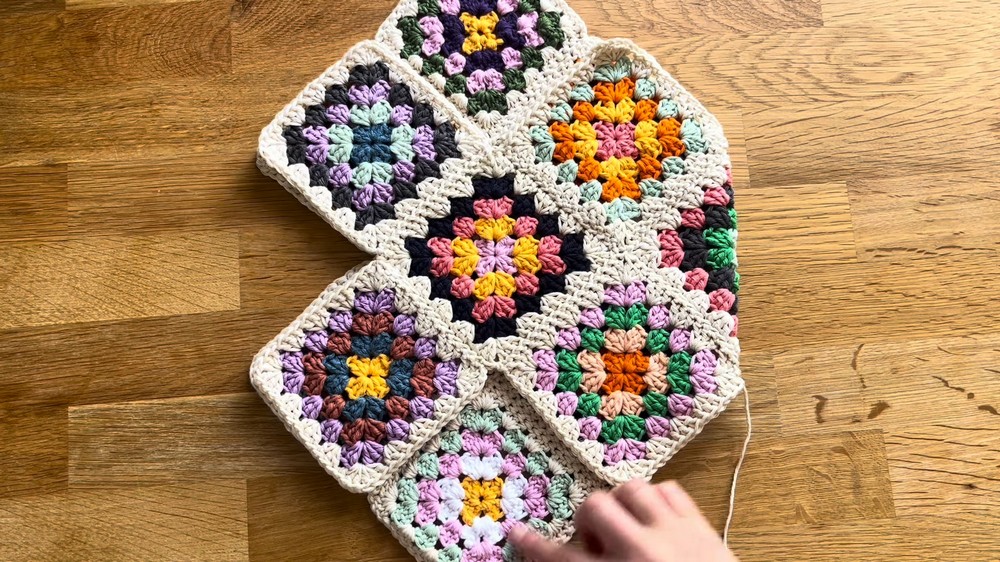
This tutorial consists of making 13 granny squares, joining them into the tote bag layout, and finishing with the handles and edging. Follow detailed steps below.
4.1. The Granny Squares
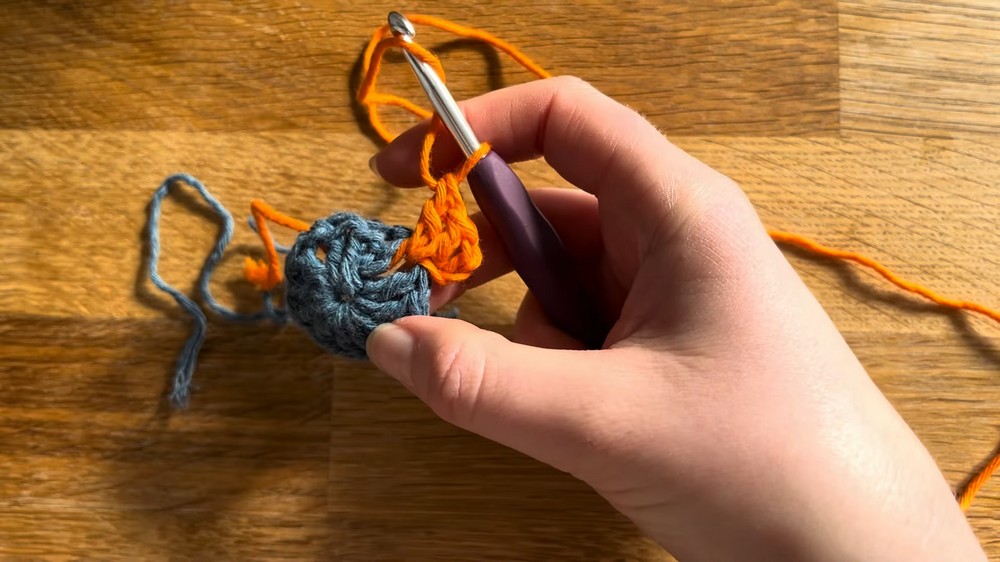
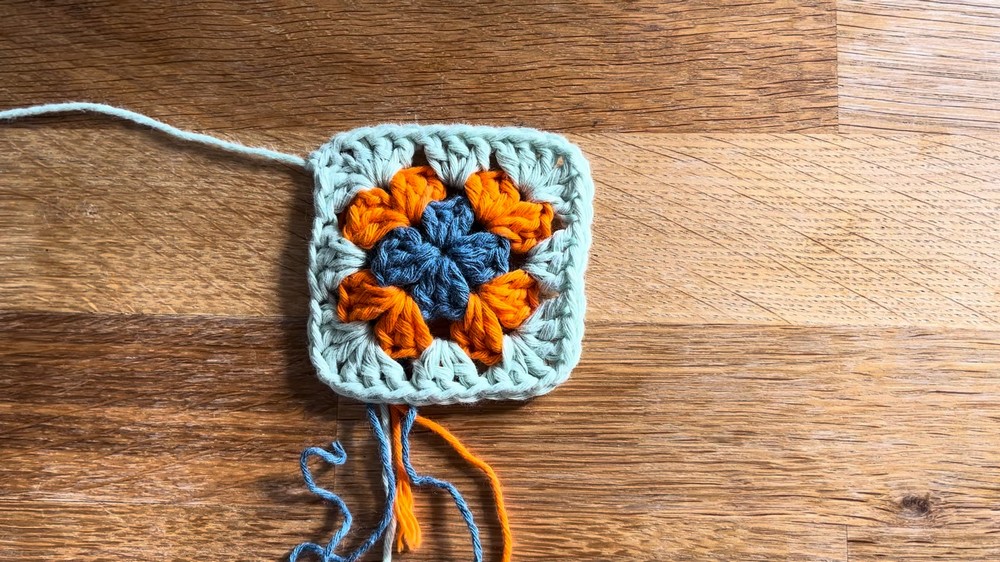
Round 1:
- Create a magic ring (refer to magic ring instructions if needed).
- Ch 3 (counts as 1st dc).
- Work 2 more dc into the ring.
- Ch 1. Work (3 dc, ch 1) 3 more times into the ring. You should have 4 sets of (3 dc) separated by ch-1 spaces.
- Pull the magic ring tight to close.
- Sl st to the top of the starting ch-3 to close the round. Fasten off and leave a long tail for sewing.
Round 2:
- With a new color, join yarn in any ch-1 space from the previous round.
- Ch 3 (counts as 1st dc). Work 2 more dc into the same space.
- Ch 1, then [3 dc, ch 1, 3 dc] in the next ch-1 space (this forms a corner).
- Repeat step 3 for the 3 remaining ch-1 spaces.
- Complete the first corner by working 3 dc in the starting ch-1 space.
- Sl st to the top of the starting ch-3 and fasten off.
Round 3 (and onwards):
- Join yarn in any corner ch-1 space.
- Ch 3 (counts as 1st dc). Work 2 more dc into the same space.
- Work 3 dc in each space between clusters from the previous round.
- In each corner ch-1 space, work [3 dc, ch 1, 3 dc].
- Continue this pattern around.
- Sl st to the top of the starting ch-3 to close the round, and fasten off.
Notes for Square Size:
- Work 4 total rounds for each square with individual colors.
- For the 5th round, use cream yarn (or another border color) and repeat the same stitch pattern.
Make 13 granny squares total.
4.2. Weaving in Ends
- Use a darning needle to weave in the loose ends.
- Securely fasten off by threading the ends through the stitches and trimming the excess.
4.3. Joining Granny Squares
Layout:
- Arrange the 13 squares in the tote bag layout provided in the video (6 on the front, 6 on the back, with 1 square as the base).
Seaming:
- Lay two squares with the right sides facing out.
- Use a darning needle and the whipstitch method to sew the edges at the back loops of the stitches. Alternatively, slip stitch or single crochet can be used for joining.
- Seam as per the layout, working row by row, until all squares are attached in the desired arrangement.
- Fold and seam the side edges: Fold the bottom base up and sew the side squares together to form the bag shape.
4.4. Edging & Base of Bag
After joining, add a neat border:
- Start in any corner of the bag.
- Work sc in each stitch around the edges of the bag. For sharper corners, place 3 sc in the corner stitches.
- Complete one round of sc and join with a sl st.
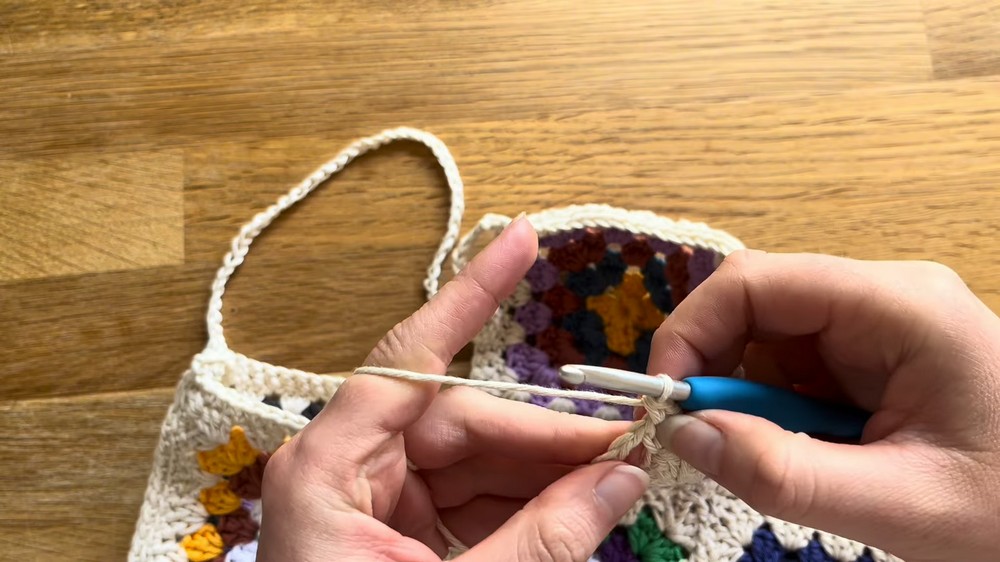
4.5. Handles
Step 1: Attach Handle Base
- Join yarn at the peak of the bag (side edge at the top middle granny square).
- Work sc around the edge until you create a flat foundation.
Step 2: Chain Handle
- At the peak, chain 55 stitches (or desired handle length).
- Skip the other side’s peak and attach directly with an sc into the second peak’s stitch.
Step 3: Reinforce Handle
- Work back loop sc into each handle chain and around the bag for reinforcement.
- Repeat one additional round for a sturdier handle.
5. Final Steps
- Fasten off yarn and weave in all remaining ends.
- Block your tote bag if needed to set the shape.
- Your Granny Square Tote Bag is complete!