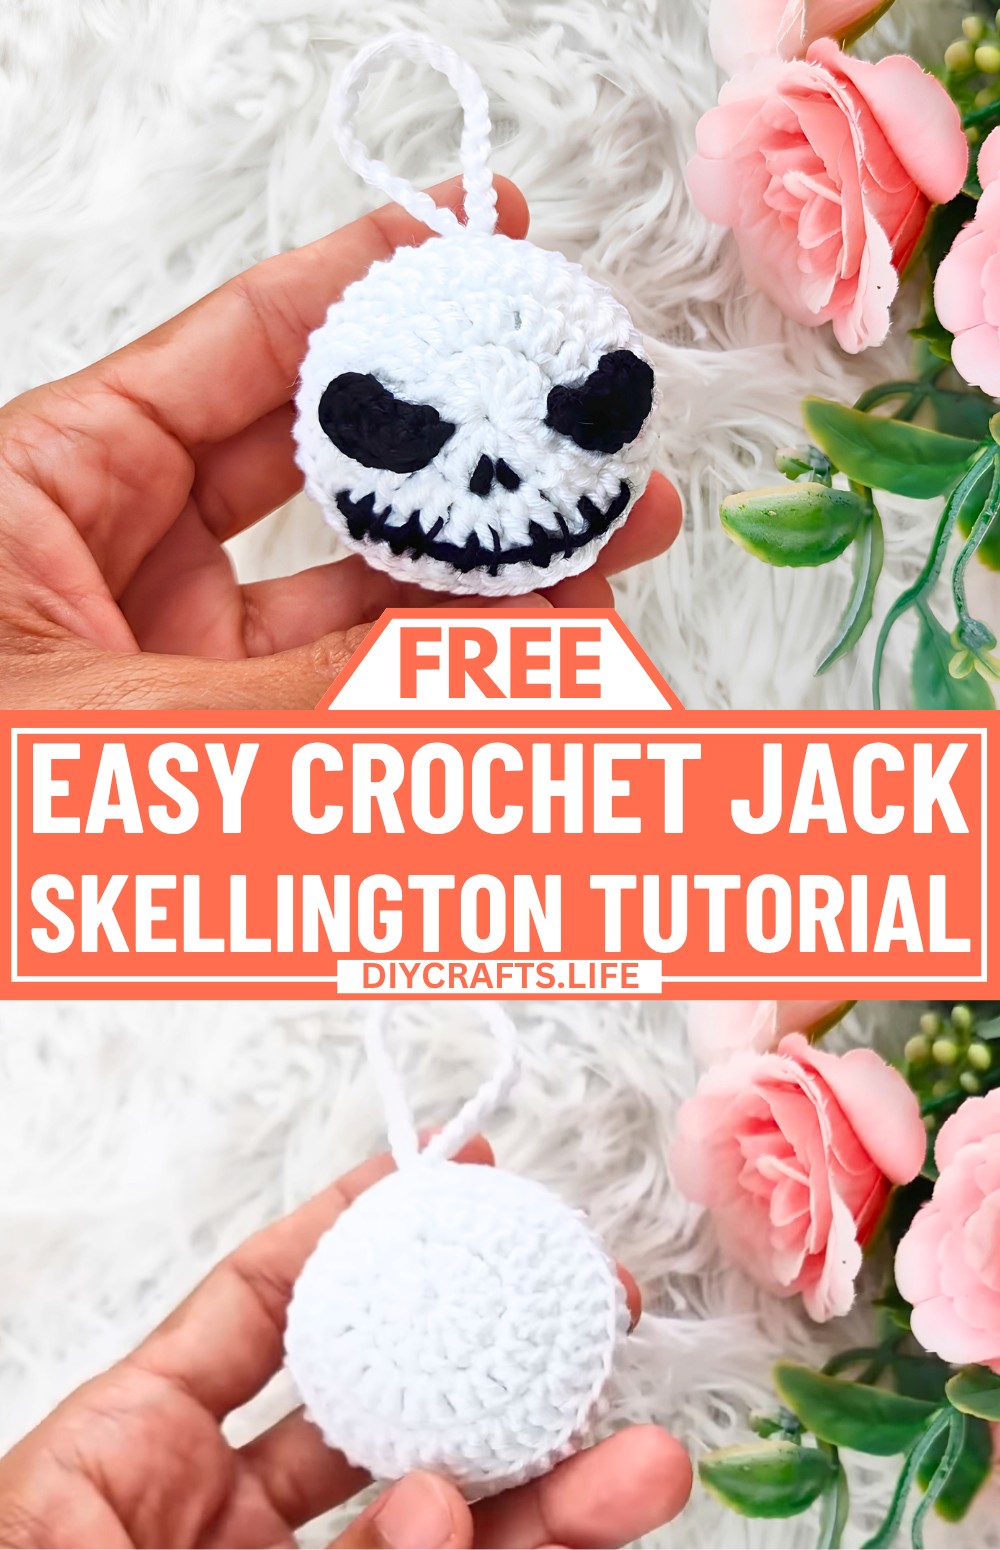
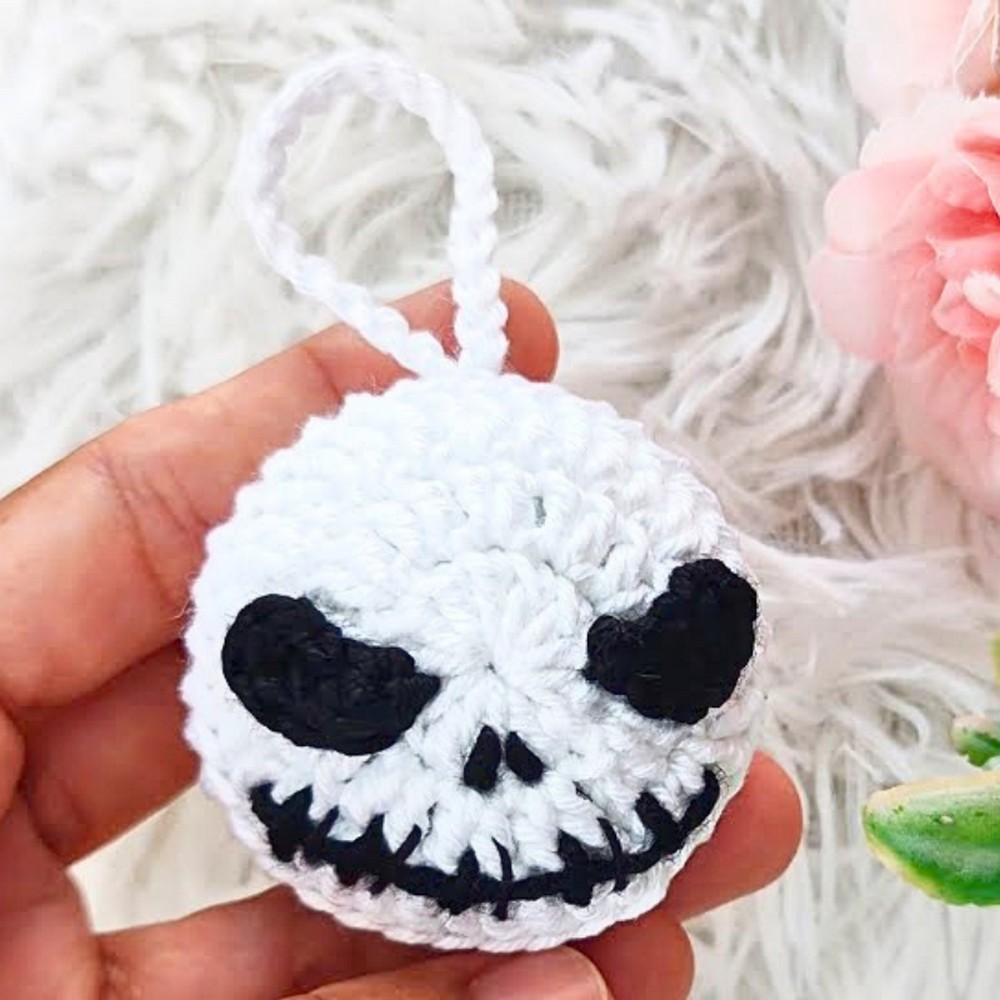
Jack Skellington is the ultimate spooky yet charming character for Halloween. This crochet version of him brings that timeless character to life in a soft, handmade design. Perfect as a decoration for your Halloween setup, a unique gift, or even a playful toy, this creation is full of character and warmth. Its cute details make it stand out, bringing a touch of creativity to any space.
Crochet Jack Skellington Tutorial
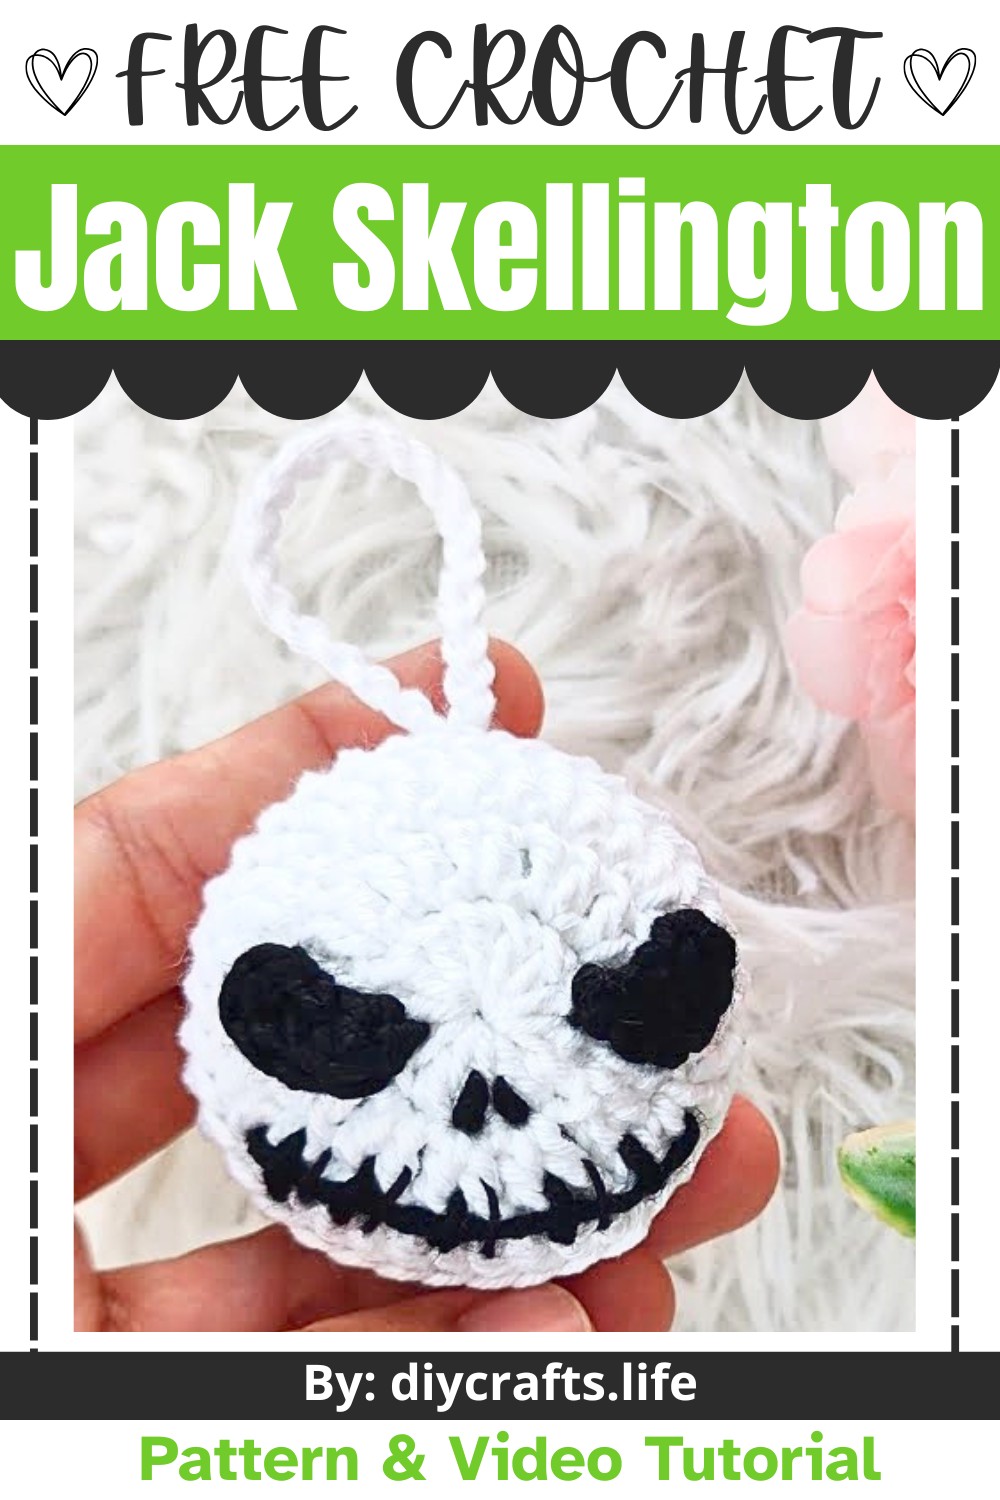
The crochet tutorial uses simple techniques to create every detail, from Jack’s face to the embroidered smile. You can customize the yarn colors and use stuffing to give him a plump, lovable look. Beginners can follow along easily with clear steps, while experienced crocheters can enjoy adding their personal flair. By the end, you'll have your very own Jack Skellington, ready to brighten up your Halloween season.
Credit Aquele Crochet
Materials and Tools Needed
- Yarn: Two colors:
- White (for the head and primary body)
- Black (for facial details and eyes)
- Optional: Thinner black yarn (for subtle details like the mouth outline)
- Crochet Hook: 2.20 mm (or size appropriate for your yarn)
- Scissors
- Stuffing: Polyester fiberfill or cotton for stuffing the head
- Yarn Needle: For sewing pieces and embroidery
- Glue (optional): For attaching the eyes if not sewn
Finished Size
The final size will vary slightly depending on your yarn and tension, but should be approximately 6–8 cm (2.5–3 inches) tall with a puffy, decorative appearance—perfect for Halloween décor!
Customization Ideas
- Add a loop at the top of the head for use as a keychain or ornament.
- Use glow-in-the-dark white yarn for a fun, spooky effect.
- Adjust yarn types and hooks for a larger or smaller version.
Pattern Abbreviations and Terminology
- MR: Magic Ring
- ch: Chain
- st: Stitch
- sl st: Slip Stitch
- dc: Double Crochet
- sc: Single Crochet
- inc: Increase (2 stitches in the same st)
- BLO: Back Loop Only (for joining parts together)
Terminology is in US crochet terms.
Step-by-Step Detailed Instructions
This pattern is divided into parts: the head (two bases), the chain detailing, the eyes, embroidery, and final assembly.
Part 1: Jack Skellington’s Head
- Round 1:
- Create a Magic Ring (MR).
- Work 2 chains (counts as the first dc).
- Crochet 12 dc inside the MR (including the beginning ch).
- Close the MR tightly and secure the round with a sl st in the first dc.
[12 stitches]
- Round 2:
- Start with 2 chains (counts as the first dc).
- In the first st, work 2 dc (inc).
- Continue working 2 dc in each stitch around.
- Close the round with a sl st in the first dc.
[24 stitches]
- Round 3:
- Start with 2 chains (counts as the first dc).
- In the first st, work 1 dc. In the next st, work 2 dc (inc).
- Repeat the pattern 1 dc, 1 inc around.
- Close the round with a sl st in the first dc.
[36 stitches]
- Base & Chain Decoration:
- After completing Round 3, work 20 chains.
- Attach the chain back to the same stitch as the starting point with a sl st.
- Cut the yarn, leaving a long tail for sewing.
Make another base WITHOUT chains. This second base will simply follow Rounds 1–3 and then be finished off.

Part 2: The Eyes
- Use black yarn to crochet two eyes:
- Eye 1:
- Start with a slip knot. Chain 4.
- Skip the first chain. In the 2nd chain, work 1 sl st.
- In the 3rd chain, work 2 sc.
- In the 4th chain, work 3 sc.
- Finish off and leave a long tail or a short end (if gluing).
- Eye 2:
- Start with a slip knot. Chain 4.
- Skip the first chain.
- In the 2nd chain, work 3 sc.
- In the 3rd chain, work 2 sc.
- In the last chain, work 1 sl st.
- Finish off as before.
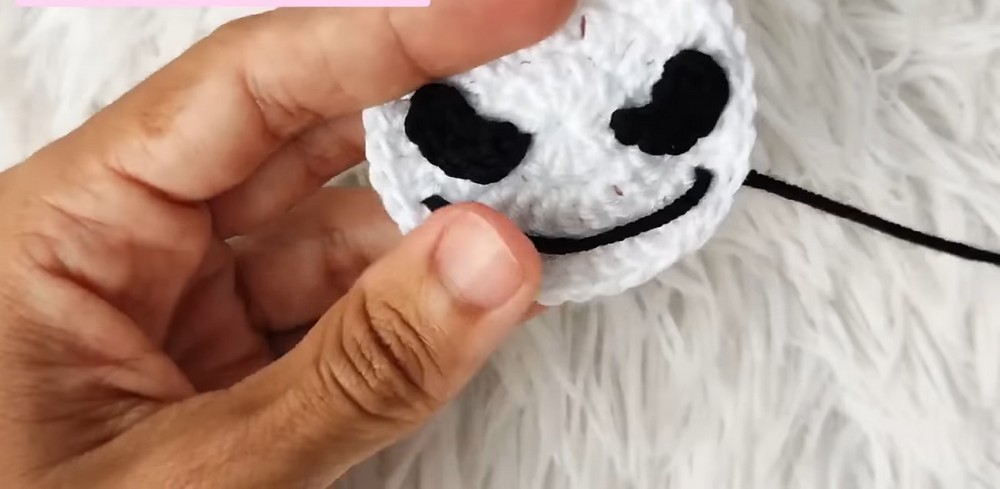
Part 3: Embroidered Face Details
- Using black yarn, embroider the mouth.
- Follow the curve of the head and create stitches that mimic Jack's iconic smile with vertical dashes.
- Embroider the nose:
- Make two small lines or dots for nostrils.
- For additional detail, use thinner yarn to outline the mouth or to emphasize any details.
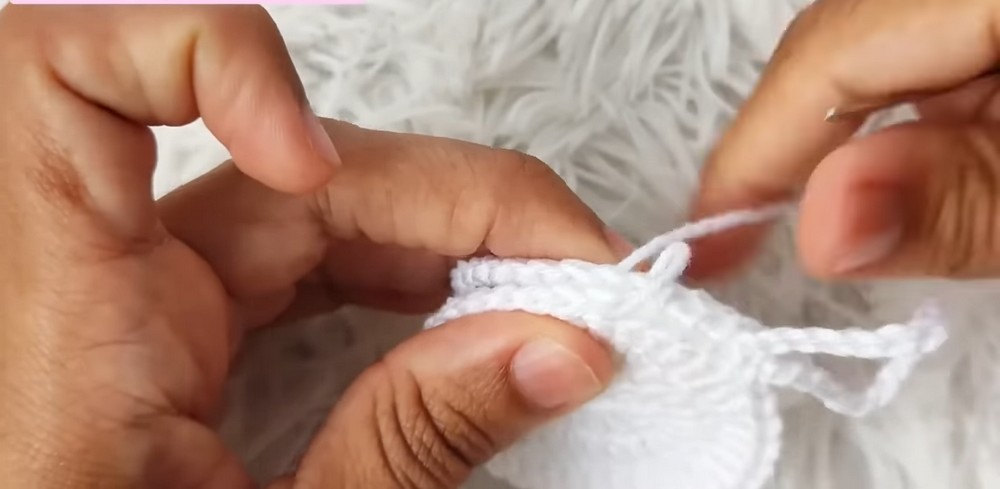
Part 4: Joining the Pieces
- Place the two circular head bases together, with the chain decoration of one base centered at the top of the face.
- Sew the two bases together:
- Use a yarn needle to sew only the back loops of each stitch.
- Work neatly, keeping the chain loop positioned properly at the top.
- Before completing the sewing, insert stuffing to give the head a plush appearance.
Part 5: Final Assembly
- Position the eyes on the head using glue or by sewing them on with the remaining yarn tails. Adjust their placement to mimic Jack Skellington’s face.
- Do any final touch-ups or trims to ensure a clean, spooky finish.
Tips & Notes
- If the stuffing shows through the stitches, consider using a tighter gauge or switching to a smaller size crochet hook.
- If using glue for the eyes, make sure they are firmly positioned and allow the glue to dry completely before handling.
- Have fun with the embroidery to create unique expressions!