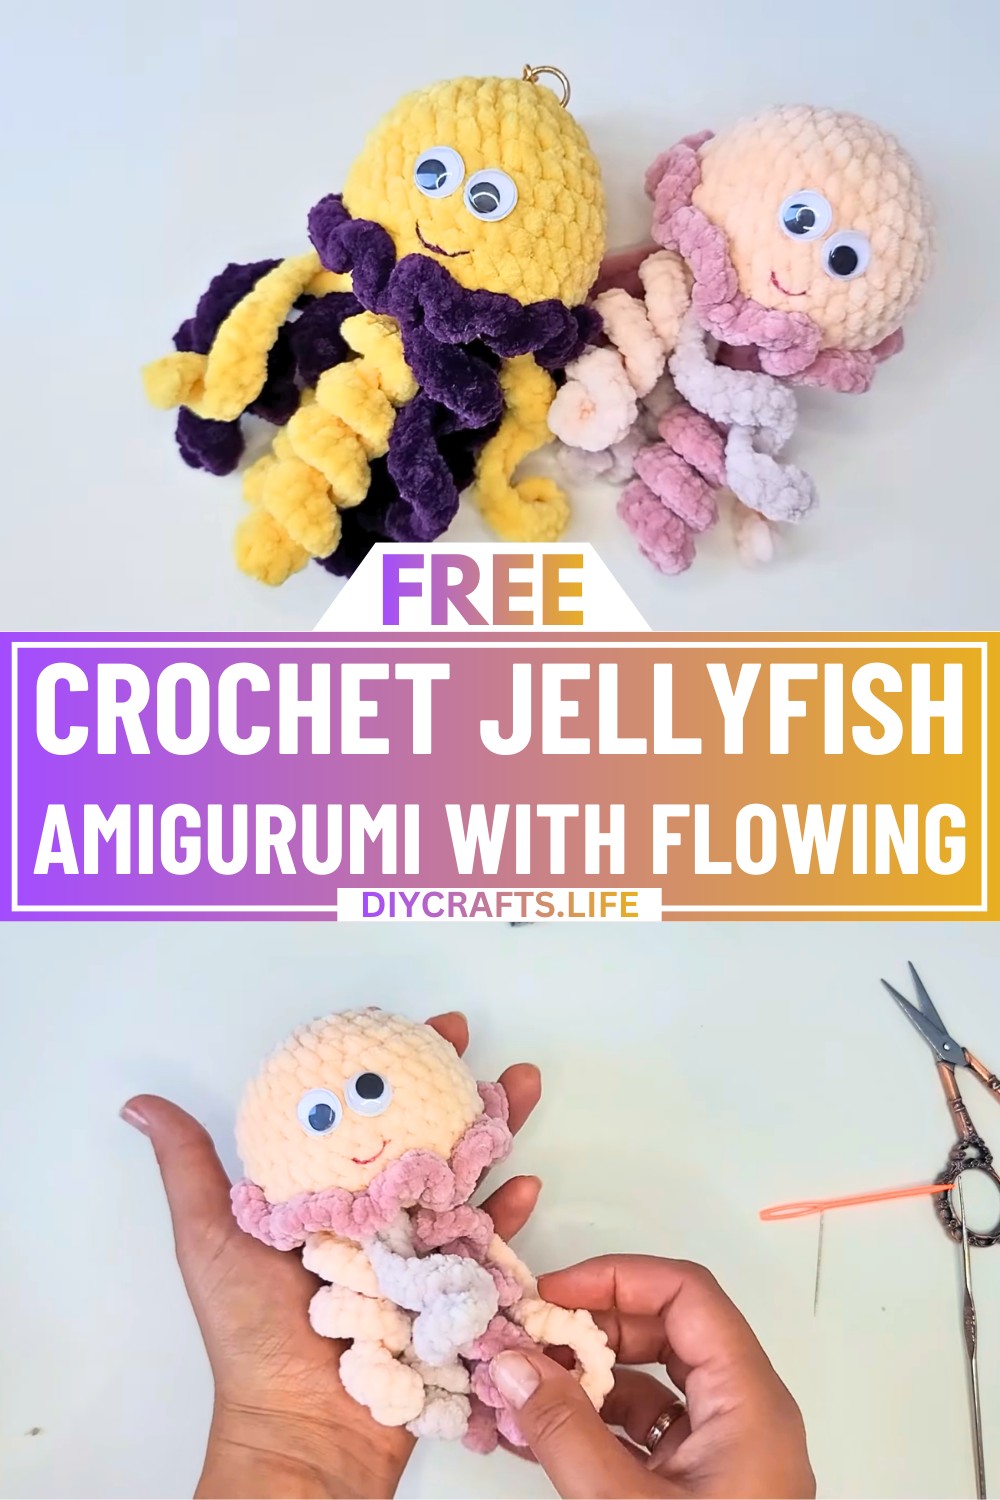
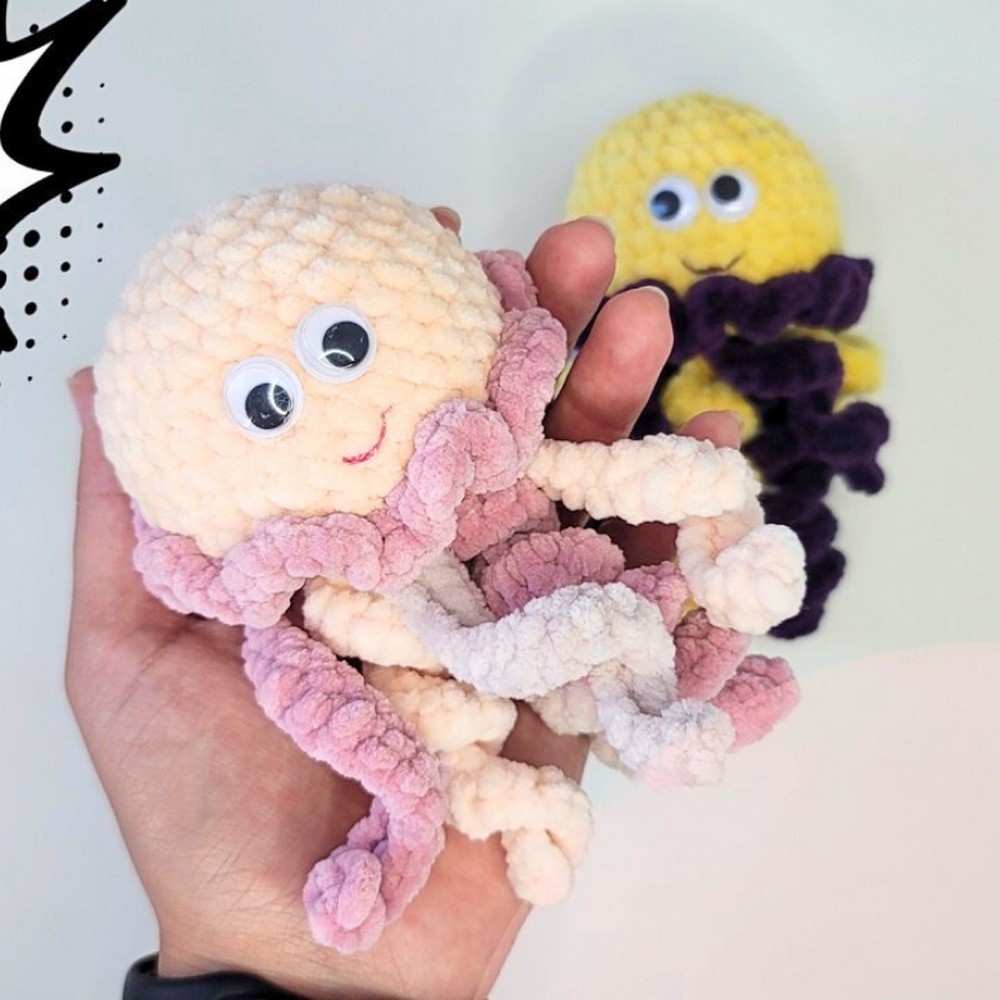
Bring the magic of the ocean into your hands with this adorable crochet jellyfish! Perfectly playful and full of charm, this little sea creature will brighten any space. Whether it’s hanging in your room or sitting on a shelf, its sweet tentacles and soft body make it look like it’s floating right out of an underwater dream.
Crochet Jellyfish Beginner-Friendly Amigurumi
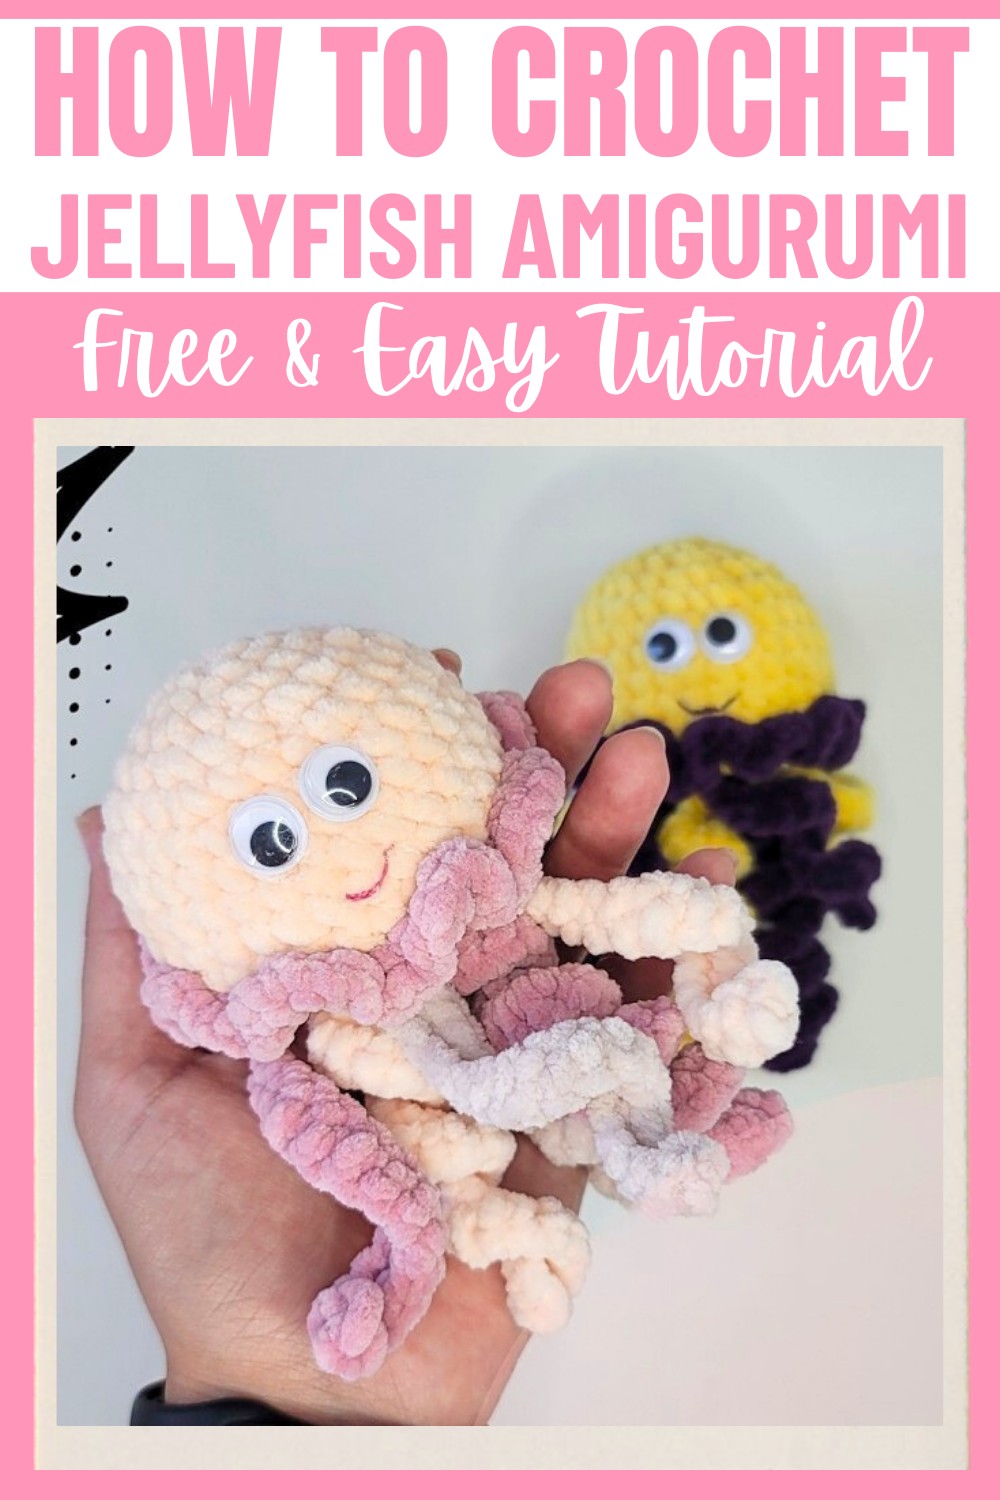
This design is special because it’s more than just crochet—it's a mix of fun and creativity. The jellyfish features curly, flowing tentacles that add movement and life to the design, while the cute rounded top is easy and fun to shape. The pattern is versatile, letting you use your favorite yarn colors to create something truly personal. Make it for yourself, as a gift, or even as a joyful decoration for kids—it’s simple to create and makes everyone smile!
Credit DidyToys
Materials & Tools Needed
- Plush yarn in two colors (use leftover yarn if you have it).
- 4 mm crochet hook for the jellyfish base.
- 0.75 mm crochet hook for smaller details like the smile if desired.
- Wide-eyed sewing needle for attaching parts and finishing off.
- Scissors.
- Fiberfill, for stuffing the jellyfish.
- Amigurumi safety eyes or googly eyes, with transparent glue to secure them in place.
- Contrasting color thread marker to mark the beginning of rounds.
- Embroidery floss (optional) for adding a smile.
Finished Size & Customization Ideas
- Approximate size: When using the materials listed, the jellyfish will be approximately 4–6 inches tall, depending on how tightly you crochet.
- Customization Ideas:
- Experiment with different yarn textures or colors.
- Add more or fewer tentacles or even a bow to personalize your jellyfish.
- You can create various facial expressions by adjusting the smile or adding eyebrows.
Pattern Abbreviations & Terminology
- sc – Single Crochet
- ch – Chain
- sl st – Slip Stitch
- inc – Increase (2 sc in one stitch)
- dec – Decrease (crochet two stitches together using front loops only)
- BLO – Back Loops Only
- FO – Fasten Off
This pattern uses U.S. crochet terminology.
Step-by-Step Crochet Instructions
The Jellyfish Head/Body
1. Start the Base:
- Begin with 2 chain stitches (ch).
- Crochet 6 single crochet (sc) stitches into the first chain. (6 stitches)
- Mark the start of the rounds.
2. Increasing to Shape:
- Round 2: Make 6 increases (2 sc into each stitch). (12 stitches)
- Round 3: (1 sc, inc) repeat 6 times. (18 stitches)
- Round 4: (2 sc, inc) repeat 6 times. (24 stitches)
- Round 5: (3 sc, inc) repeat 6 times. (30 stitches).
3. Crochet Even Rounds:
- Rounds 6–10: Crochet 5 rounds of 30 sc. Work in continuous rounds (no increases or decreases).
4. Create the Skirt Base:
- Round 11: Work 30 BLO sc (back loops only). This leaves the front loops for decoration later.
5. Decreasing the Body:
- Round 12: (3 sc, dec) repeat 6 times. (24 stitches)
- Round 13: (2 sc, dec) repeat 6 times. (18 stitches)
- Round 14: (1 sc, dec) repeat 6 times. (12 stitches)
- Round 15: (dec all stitches) for a total of 6 decreases. (6 stitches).
6. Finish the Head:
- Cut the thread and pull it through the last loop. Leave enough yarn to sew and tighten the opening. Stuff the head with fiberfill before closing.
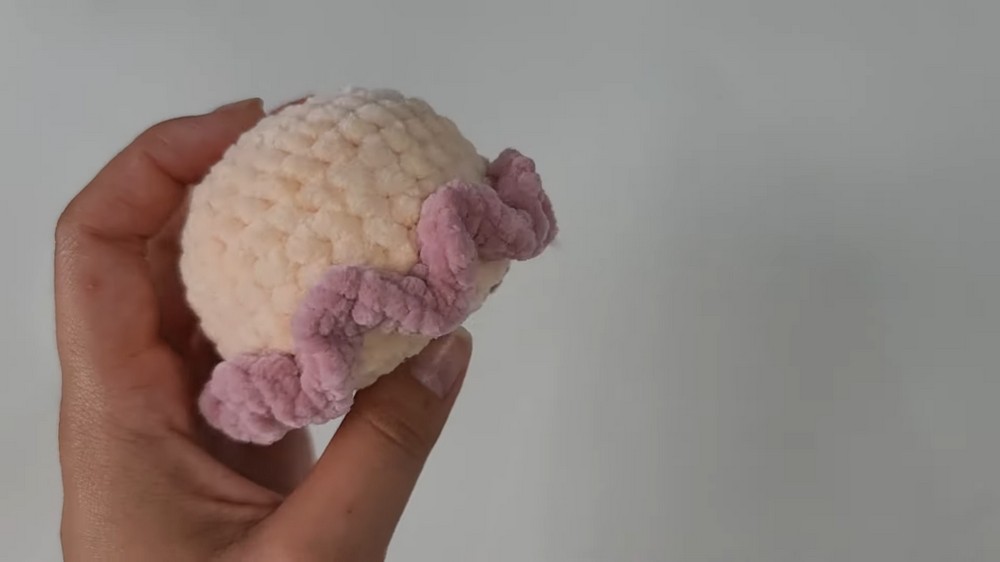
Decoration – Skirt
- Attach the contrasting colored yarn to the front loops left in Round 11.
- Start with one ch stitch, then crochet 3 sc in each stitch around the round. This creates a ruffled "skirt" for the jellyfish.
- Cut the yarn, pull it through the loop, and fasten off.
Tentacles
You’ll make 6 tentacles using 3 variations.
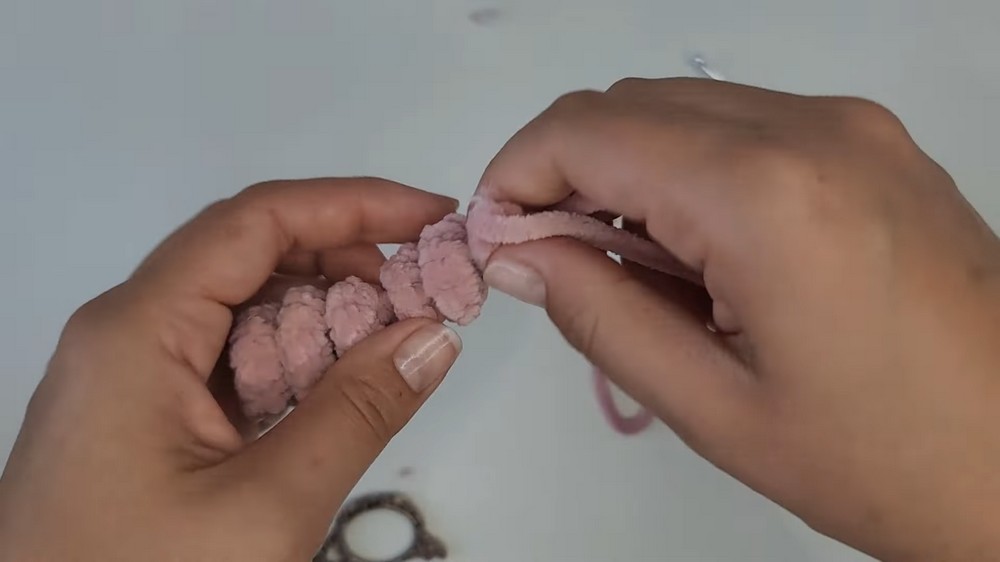
1. Thick Curl Tentacle:
- Crochet 20 chain stitches (ch).
- Work 3 sc in each chain starting from the second chain from the hook.
- Cut the thread, pull it through, and leave a tail for sewing.
2. Medium Curl Tentacle:
- Crochet 20 chain stitches (ch).
- Work 2 sc in each chain starting from the second chain from the hook.
- Cut the thread, pull it through, and leave a tail for sewing.
3. Thin Tentacle:
- Crochet 20 chain stitches (ch).
- Work 1 sc in each chain starting from the second chain from the hook.
- Cut the thread, pull it through, and leave a tail for sewing.
4. Attach the Tentacles:
- Arrange the tentacles on the underside of the jellyfish head. Attach the thicker ones in the middle and thinner ones on the edges for a natural look.
- Use a needle and the yarn tails to sew them on, securing well.
Face & Finishing Touches
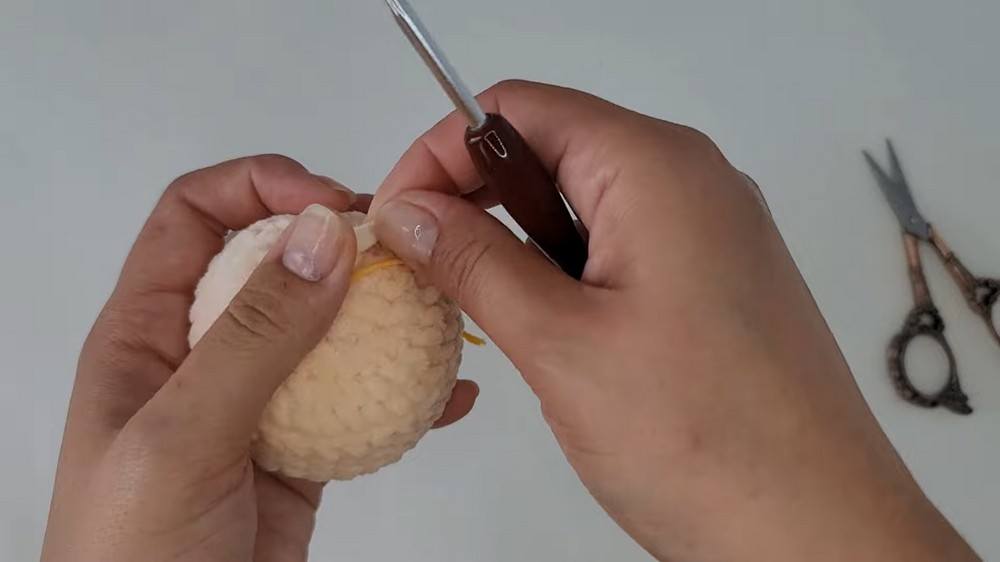
1. Attach Eyes:
- Use amigurumi safety eyes or glue on decorative eyes with transparent glue. Press gently to secure, and let dry.
2. Add a Smile (Optional):
- Use embroidery floss and a thin crochet hook to create a 10 chain stitch chain.
- Arrange the chain on the jellyfish head like a smile, adjusting the size as needed.
- Sew it onto the head using the tail left at the end of the chain.
3. Finishing Details:
- Weave in any remaining tails using your needle.
- Trim excess threads and make sure everything is securely attached.
Your Jellyfish is Ready! 🎉
You’ve now completed your cute crochet jellyfish! Feel free to experiment with colors, different tentacle styles, or additional embellishments to create your own unique sea creature.