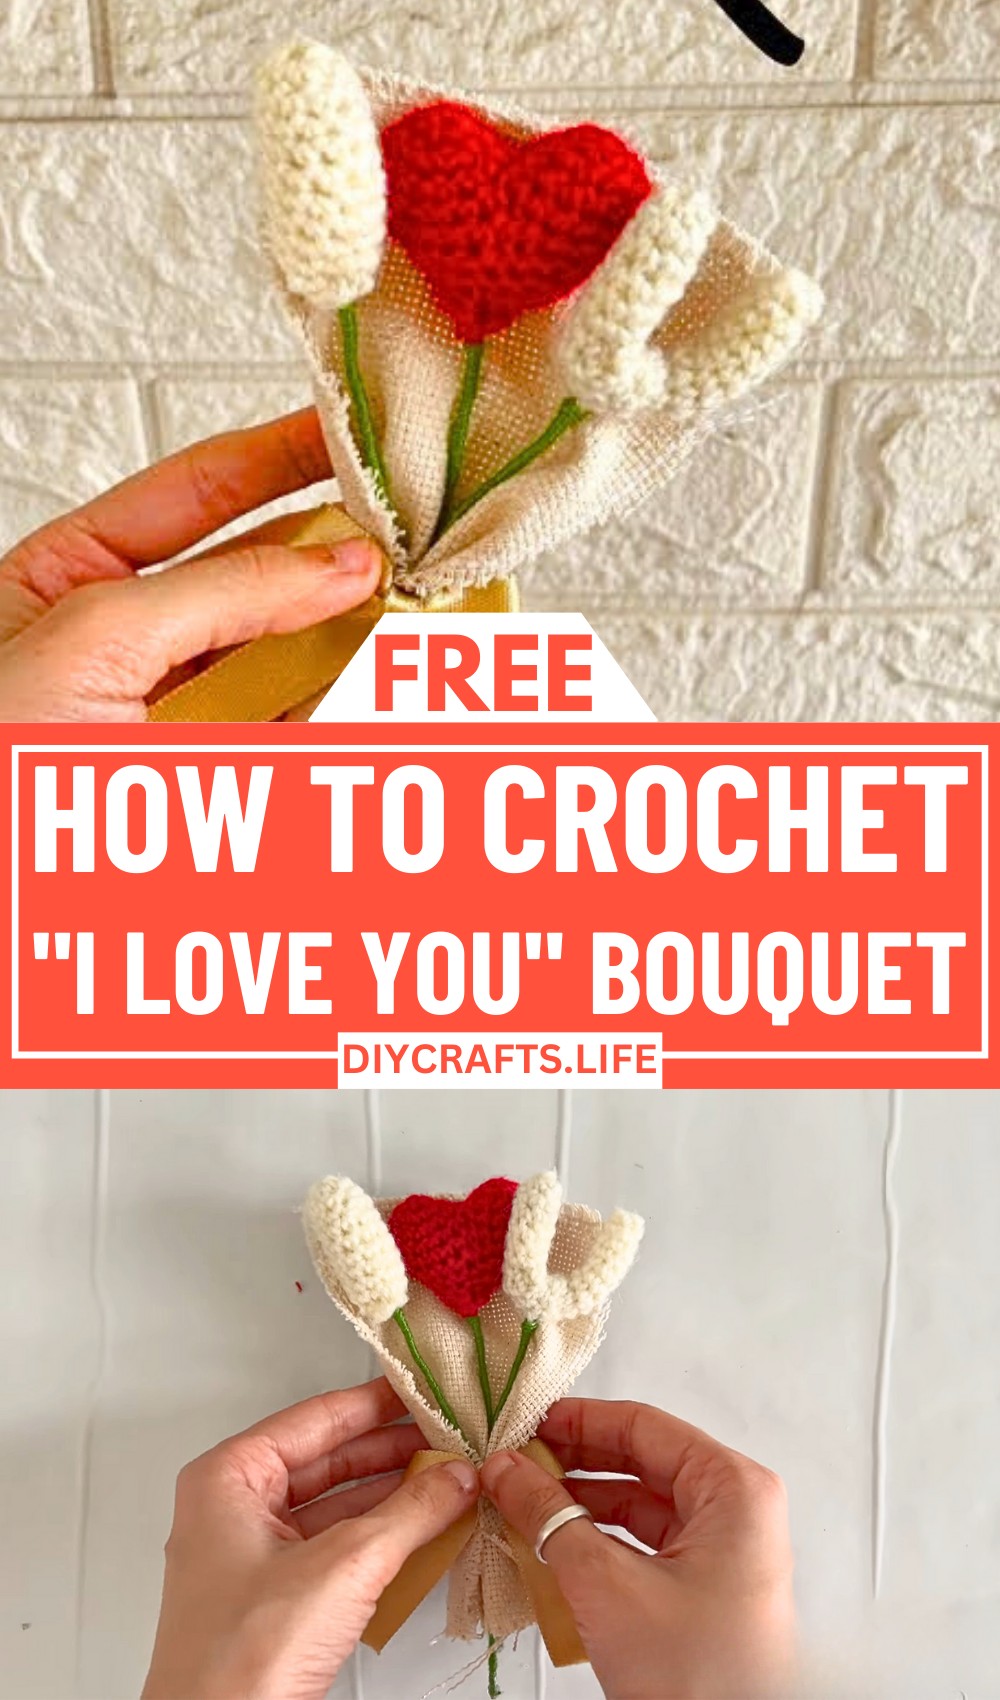
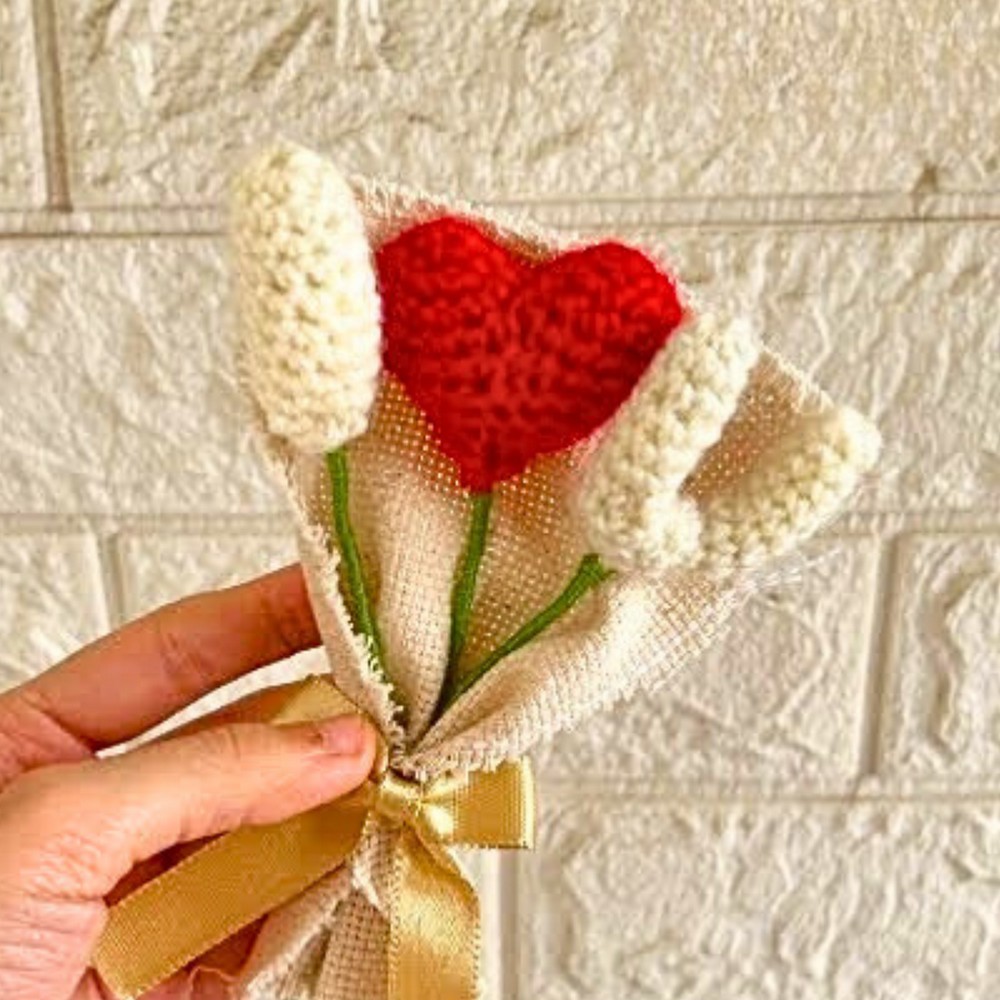
Love comes in many forms, but there’s something magical about giving a handmade bouquet that will never wither. This crochet mini “I Love You” bouquet is the perfect combination of thoughtfulness and creativity. With its delicate stitching and charming details, it tells a story of care and affection, making it a keepsake to cherish forever.
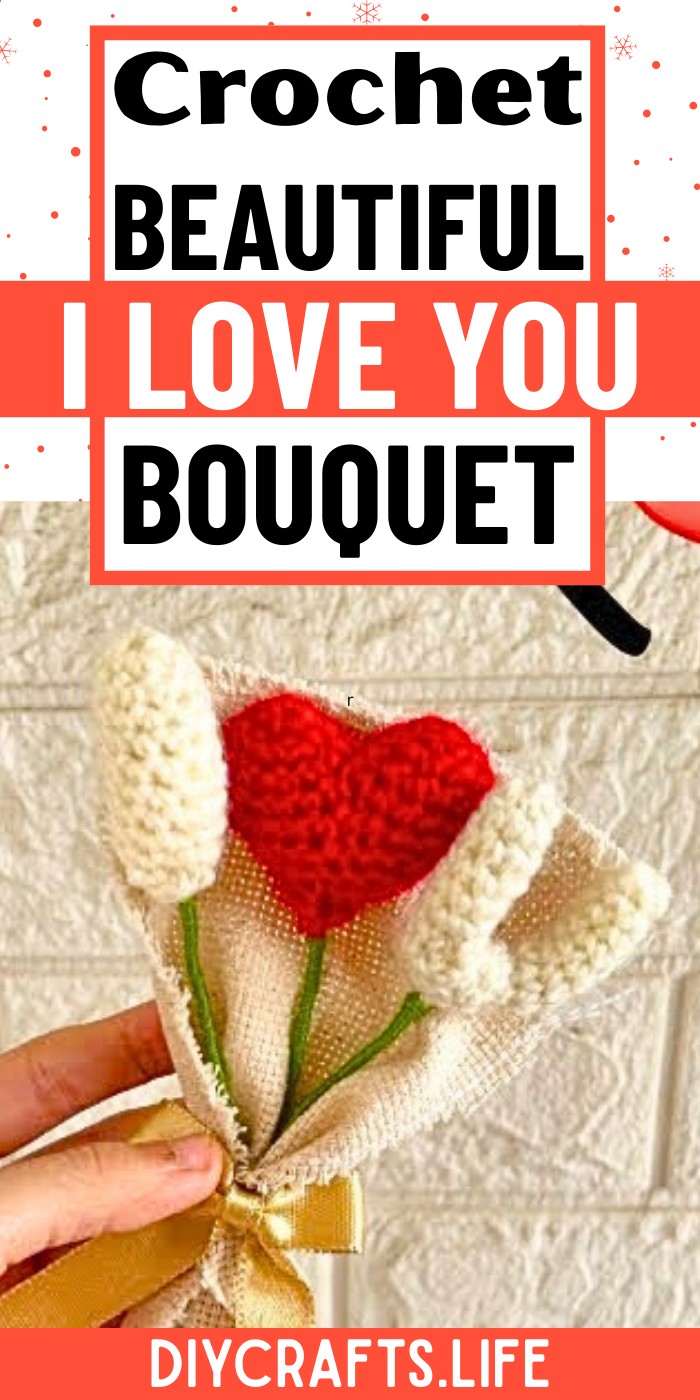
Crochet Mini "I Love You" Bouquet
This design features a petite arrangement of crochet flowers that beautifully capture the essence of love. The bouquet’s fine texture, soft colors, and thoughtful size make it ideal for heartfelt gifts, personal decorations, or even unique wedding accents. The pattern is designed to balance beauty and simplicity, allowing crafters to add their personal flair and create something truly memorable. Whether you're expressing love, gratitude, or simply enjoying the art of crochet, this mini bouquet is a lovely project to craft and share.
Credit Plakshi Jain | Crochet
Materials & Tools Needed
- Yarn:
- Acrylic Yarn (3-ply): Preferably in red for the heart, a neutral color for the letter "I" and "U," or any color according to your preference.
- Hook Size:
- 3mm Crochet Hook for working with 3-ply yarn.
- Filling:
- Fiberfill stuffing for letters and heart.
- Stem/Stick:
- Thin sticks to act as stems for the heart and letters. Wooden or plastic sticks work well.
- Glue:
- Craft glue or a hot glue gun to help attach stems.
- Tapestry Needle:
- For sewing closed and finishing edges.
- Scissors:
- For cutting yarn.
Finished Size & Customization Ideas
- Approximate Finished Size:
- Letters and heart are small-sized miniatures (exact size may depend on your yarn tension).
- Height of the bouquet, including stems, is approximately 4–6 inches depending on stem length.
- Customization Ideas:
- Yarn Weight: Try using a thicker yarn (e.g., 4-ply or bulky yarn) with a larger hook to create a bigger bouquet.
- Color Choices: Add variety by using gradient or multicolor yarn or using different colors for the "I," heart, and "U."
- Extra Details: Add embellishments like ribbons or beads for decoration.
- Longer Display Stems: Use longer stems or embellish the stems by wrapping them in ribbon.
Pattern Abbreviations & Terminology
The following abbreviations are based on US crochet terminology:
- ch: Chain
- sc: Single Crochet
- sl st: Slip Stitch
- MR: Magic Ring
- dec: Decrease - crochet two stitches together
Step-by-Step Detailed Crochet Instructions
Below is a breakdown of how to crochet each part of the bouquet:
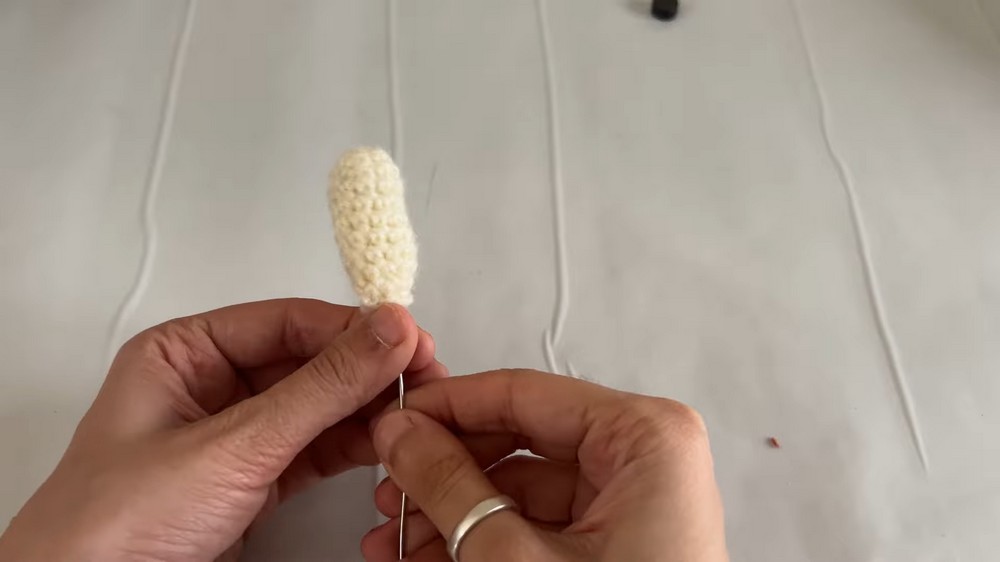
Part 1: Letter "I"
- Start with a Magic Ring (MR).
- Round 1: Work 8 single crochets (sc) into the MR. Pull the ring tight. Sl st. Chain 1.
- Turn and make 8 sc evenly around again in each round. Continue this for 10 rounds to achieve the desired length.
- After completing, lightly stuff the tube with fiberfill and insert a stick into the center.
- Cut the yarn, leaving extra for sewing. Fasten off and sew the top of the letter "I" closed neatly.
- Trim any excess thread.
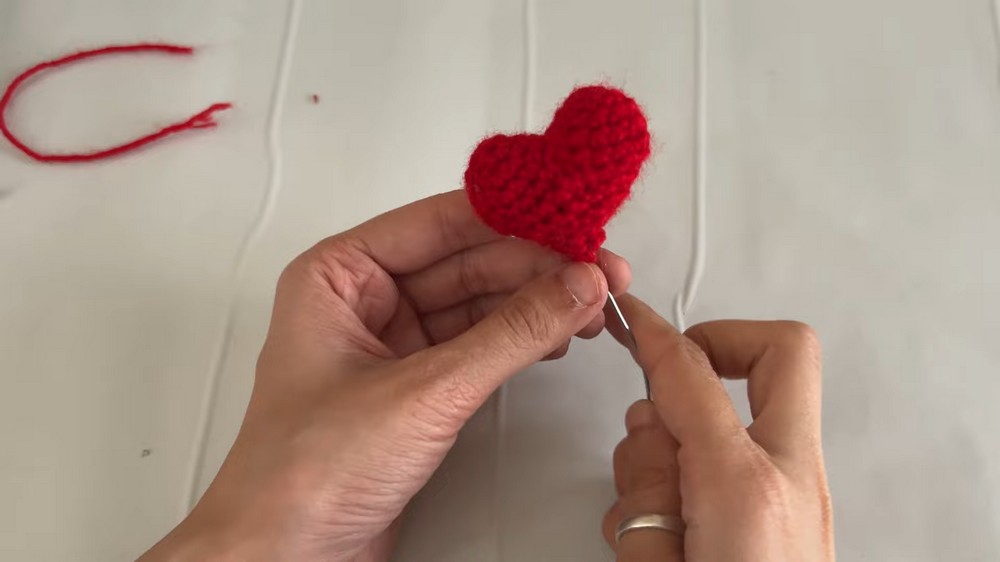
Part 2: The Heart
- Start with a Magic Ring (MR).
- Round 1: Work 6 sc into the MR and pull tight. Sl st.
- Round 2: Work 6 increases (2 sc in each sc from the previous round). Total = 12 sc. Fasten off this piece. This will be the first half of the heart.
- Repeat Steps 1–3 to create a second half of the heart, but do not fasten off after completing it.
- Join the two half-heart pieces together by inserting your hook into the first stitch of the second piece, working 12 sc around each piece (24 sc total).
- Work the following rounds for shaping:
- Round 1: 24 sc evenly.
- Round 2: 4 sc, 2 decreases (dec), 8 sc, 2 dec, 4 sc [Total = 20 sc].
- Round 3: 3 sc, 2 dec, 6 sc, 2 dec, 3 sc [Total = 16 sc].
- Round 4: 2 sc, 2 dec, 4 sc, 2 dec, 2 sc [Total = 12 sc].
- Round 5: 6 decreases to close the top [Total = 6 sc].
- Fasten off, leaving a long tail for sewing. Insert stuffing into the heart before fully closing.
- Insert the stick into the center of the heart, glue it into place, and sew the heart fully closed.
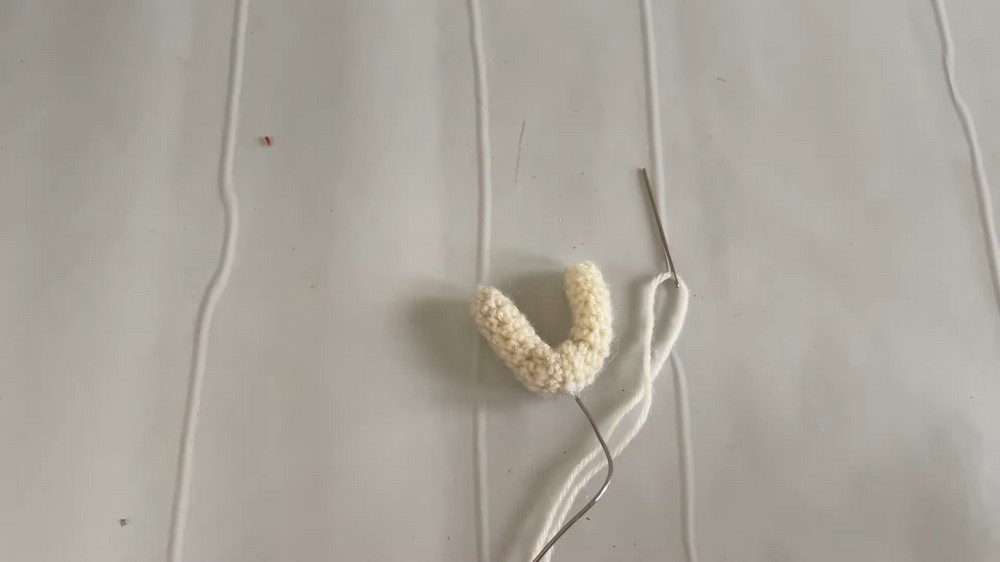
Part 3: Letter "U"
- Start with a Magic Ring (MR).
- Round 1: Work 6 sc into the MR. Pull tight. Sl st. Chain 1.
- Round 2: Work 6 sc evenly around. Sl st. Chain 1.
- Continue working 6 sc per round, lightly stuffing as you go, until you complete 20 rows (or your desired length).
- Fold the crocheted tube into a "U" shape. Insert fiberfill into the tube as needed.
- Insert a stick at the base of the "U" shape and glue into place.
- Sew the open ends of the tube closed and secure the "U" shape by stitching at the ends to maintain the curvature.
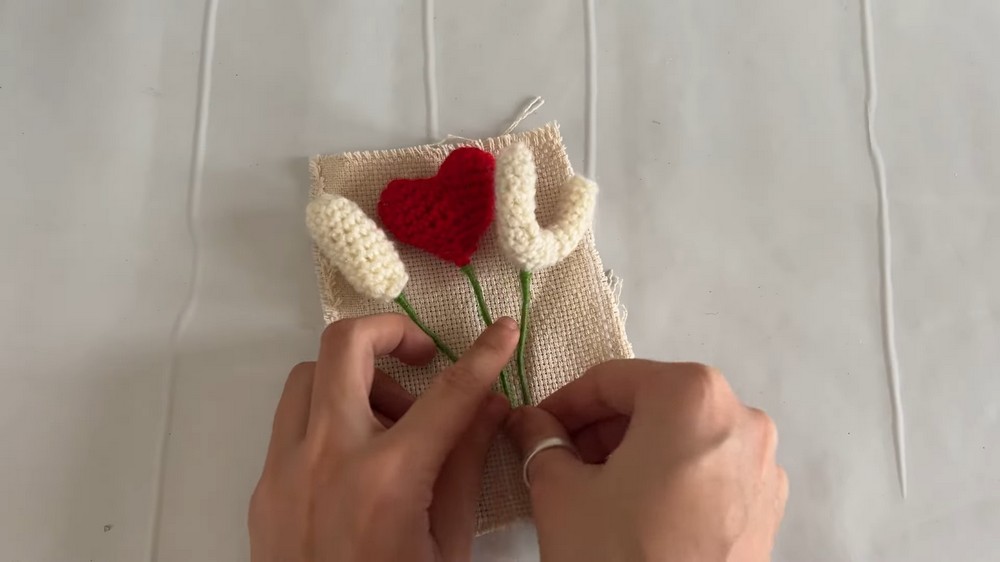
Assembly & Finishing
- Once the letters "I," "U," and the heart are complete, arrange them into a bouquet shape.
- Tie or glue all stems together. Embellish the bouquet with ribbons or additional decorations as needed.
- (Optional) Mount the bouquet in a small vase or wrap tissue paper around the bottom for an added presentation effect.
Additional Tips
- For beginners, take extra care with small, tight rounds (like for the heart tip or decreases). It’s okay to use stitch markers to keep track.
- Make sure to evenly stuff the pieces, especially the letters, to achieve a solid form.