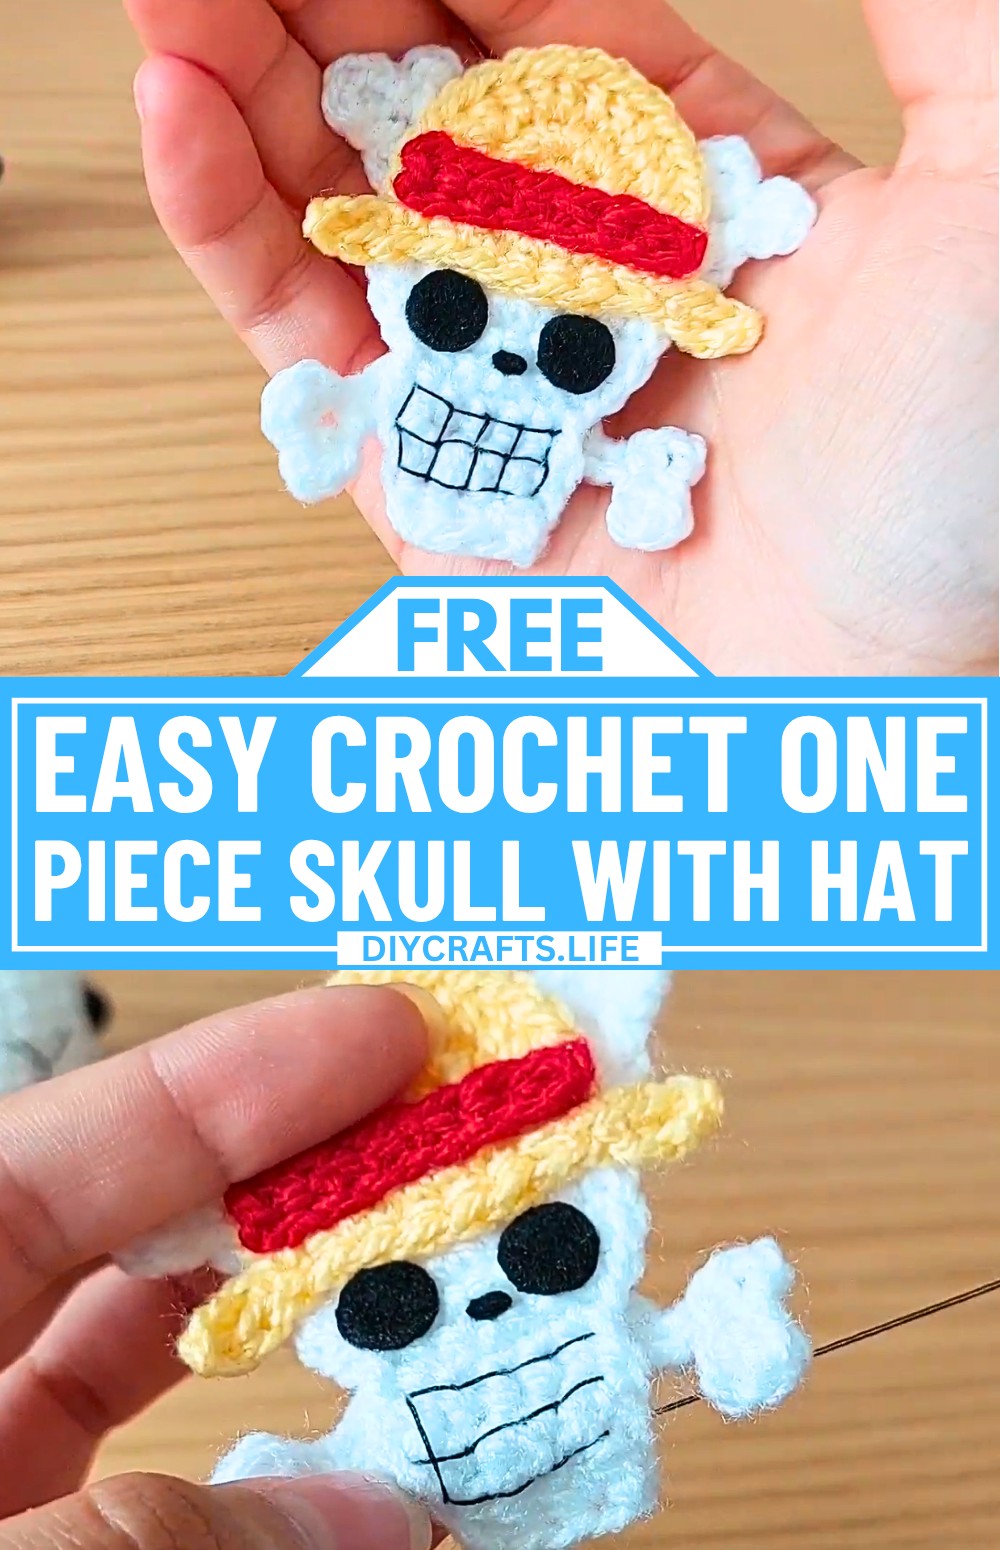
This crochet skull is a creative design inspired by One Piece, perfect for fans of the series or those who want quirky decor. Perfect as decor for your room, a custom collectible, or even a fun gift for fans of the series, this skull includes all the charming details: a bold white bone frame, a pirate hat, and a red headband. It’s small, adorable, and packed with character.
Crochet One Piece Skull

You’ll use just a few colors: white, black, red, and yellow yarn, plus a 3mm hook. The process involves crocheting individual pieces, like the skull, the crossbones, and the bright pirate hat, then assembling them easily with silicone glue. You can even adjust the size by using thicker or thinner yarn and hooks. Get ready to bring pirate vibes to your home by crocheting this cute skull. It’s a fun way to express creativity and make something unique.
Credit Catartist MX
Materials & Tools Needed
- Yarn Colors:
- White (for the skull and bones)
- Yellow (for the hat)
- Red (for the bandana)
- Black Thread or Fabric: For facial details (eyes and nose)
- Crochet Hook: 3mm
- Black Felt (Optional): For eyes and nose if not using thread
- Silicone Glue or Fabric Glue: For attaching components
- Scissors
- Tapestry Needle: For sewing facial features and assembling elements
Finished Size
- The completed One Piece Skull measures approximately 6 centimeters in height.
- Customization Tips:
- Use a smaller or larger hook and yarn thickness to scale the size up or down as needed.
- Customization Tips:
Pattern Abbreviations & Terminology
(All stitches are in US Crochet Terminology)
- MR: Magic Ring
- ch: Chain
- sc: Single Crochet
- sl st: Slip Stitch
- hdc: Half Double Crochet
- inc: Increase (2 stitches in the same stitch)
- dec: Decrease (combine two stitches into one)

Step-by-Step Crochet Instructions
Skull Base
- Start with white yarn: Create a magic ring (MR) with 7 single crochet (sc).
- Pull the ring closed and join the round with a sl st to the first sc.
- Round 2:
- Ch 1 (does not count as a stitch).
- Make an inc (2 sc in one stitch) in each sc around.
- Total = 14 stitches.
- Round 3:
- Repeat the pattern: 1 sc, inc around (7 times).
- Total = 21 stitches.
- Round 4:
- Repeat the pattern: 2 sc, inc around (7 times).
- Total = 28 stitches.
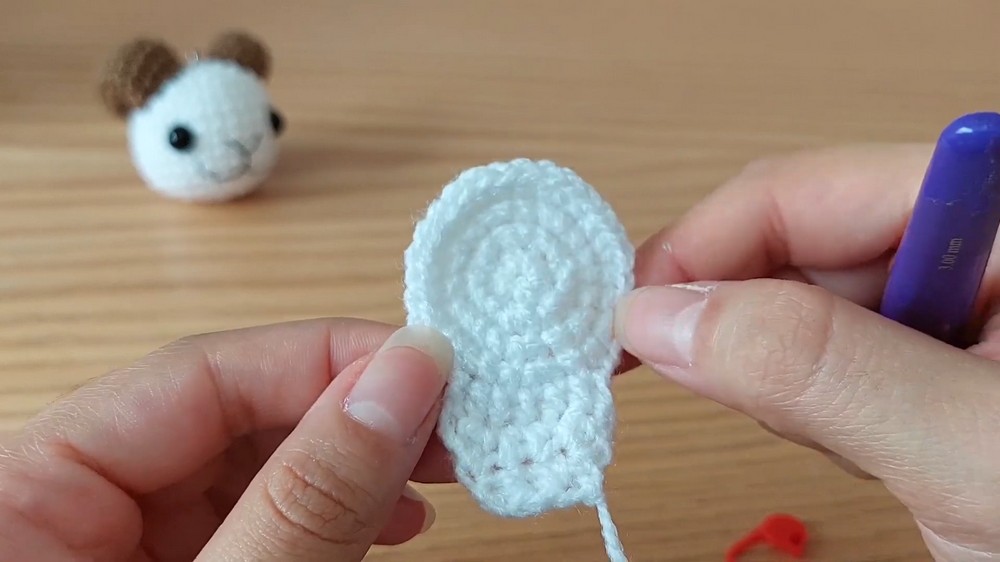
Top of Skull
- Ch 2 and begin working in hdc.
- Make 6 half double crochet (hdc) around the circle. Ch 2 and turn.
- Row 2: Begin with a decrease (dec) in hdc, followed by 2 hdc, and end with another dec.
- You will now have 4 hdc total.
- Row 3: Ch 2, make 1 hdc, a dec, and one last hdc.
- You will now have 3 hdc total.
- Fasten off, cut, and close.
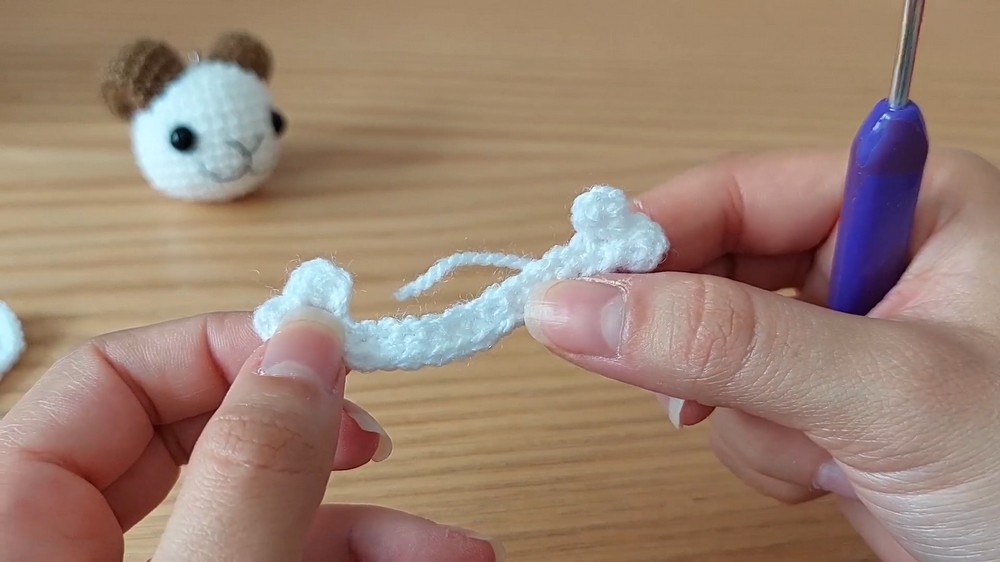
Bones (Make 2)
- Start with white yarn and create 14 chains (ch).
- Add 2 extra ch to turn the fabric.
- Work the following pattern on the last ch (14th):
- 1 hdc, ch 1, and sl st into the same stitch.
- Repeat:
- Ch 2, 1 hdc into the same stitch, ch 1, sl st into the same stitch.
- On the other side of the chain, work 12 sc across until you reach the last stitch.
- On the last stitch:
- Work the same pattern again: Ch 2, 1 hdc, ch 1, sl st.
- Fasten off and repeat to create the second bone.
Hat
- Start with yellow yarn and create a magic ring (MR) of 8 single crochet (sc).
- Pull the ring closed and mark the first stitch.
- Round 2: Work an inc (2 sc in each stitch) all the way around.
- Total = 16 stitches.
- Work 1 hdc in each stitch for three rows to create a half-circle shape.
- Brim of the Hat:
- Ch 3, then create three single crochet (sc) into the chains.
- Attach the brim to the curved part of the hat:
- Do this by slip stitching it to the edges of the existing fabric.

Bandana
- Using red yarn, create 7 chains (ch).
- Add 1 extra ch to turn the fabric.
- Work 1 sc in each ch across (7 sc).
- Fasten off and trim.

Assembly
- Bones:
- Apply silicone glue to the center of the bones.
- Attach them to the back of the skull at an angle.
- Hat:
- Apply glue sparingly along the bottom edge of the hat (do not glue the edges).
- Attach the hat to the top center of the skull, aligning it slightly above the face.
- Bandana:
- Attach the red bandana carefully, gluing it atop the hat’s brim.
Facial Features
- Eyes and Nose:
- Cut two small black circles for the eyes from felt.
- Add a single smaller black oval or dot for the nose.
- Attach these with glue to the front of the skull.
- Mouth:
- Use black thread and a needle. Start stitching from the lower edge of the skull’s face.
- Embroider three straight horizontal lines for the teeth.
- Add a curved outline to the mouth by stitching along the edge of the horizontal lines.
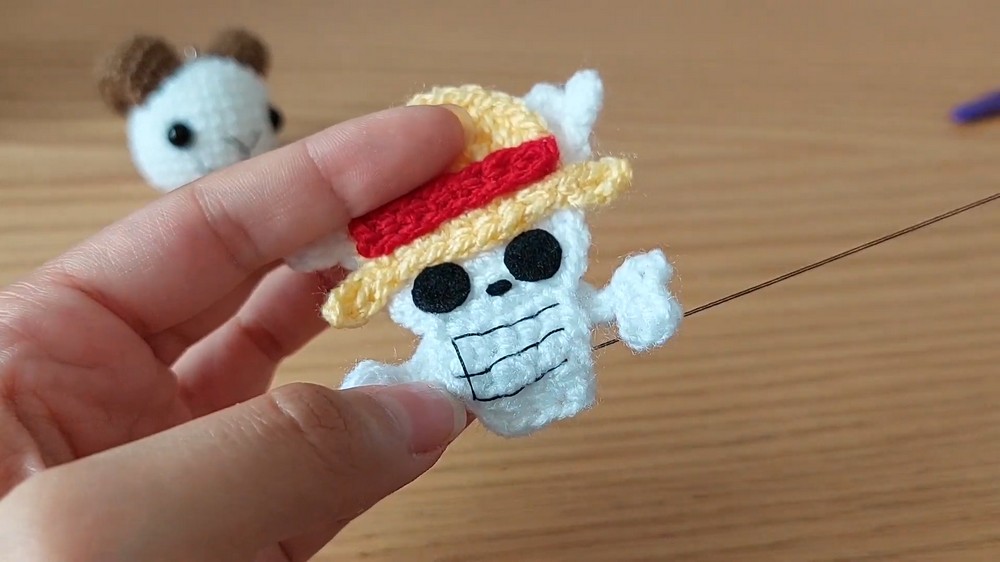
Finishing Touches
- Check all pieces to ensure they’re securely glued or stitched together.
- Trim any excess yarn or fabric, and your One Piece Skull is complete!