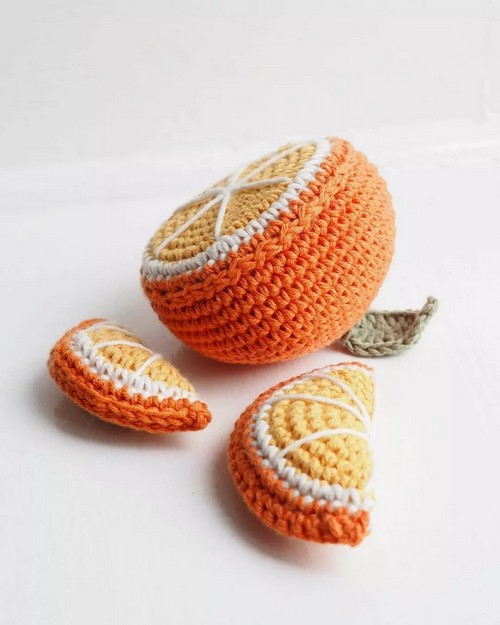
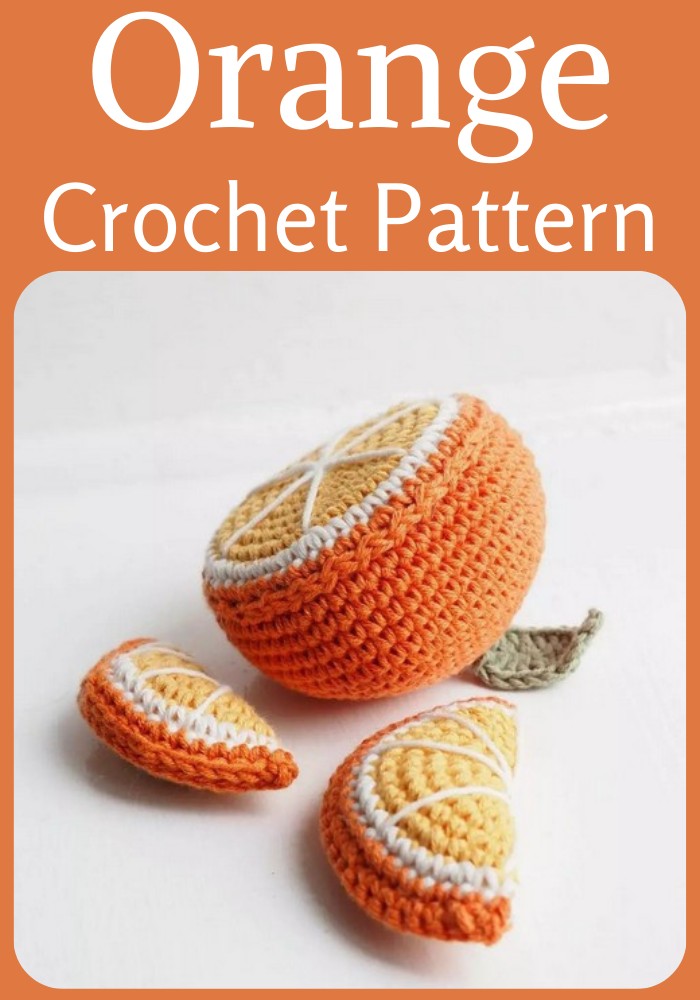
The Crochet Orange Pattern is an excellent choice for craft enthusiasts who enjoy creating unique and visually appealing projects. This pattern guides you through the process of crafting a splendid half-cut orange, complete with two realistic slices and a finely detailed leaf.
Crochet Orange Pattern
The design employs a carefully selected combination of orange, white, and yellow colours to create a vivid and lifelike fruit. In contrast, the addition of green colour to the leaf adds a touch of freshness and naturalness to the overall design. This Crochet Orange Pattern is perfect for adding a new and exciting element to any space, and it is sure to impress anyone who appreciates the art of crochet.
Can beginners try making this crochet orange pattern?
Yes, beginners can follow this pattern with basic crochet skills and enjoy creating a vibrant, realistic piece.
Materials
- Teddy bear stuffing, e.g. a cardboard box
- Thick cardboard from 8/4 cotton yarn
- (weight/length: 50 g = approx 160 m)
Abbreviations (US TERMS)
- Ch - Chain
- Ss - Slip stitch
- Sc - Single crochet
- Hdc - Half double crochet
- DC - Double crochet
- ** - Repeat the sequence
Step By Step Pattern
Leaf
Yarn: Green
- Chain 10 and start in the second loop:
- Crochet: 1 ss, 1 ss, 1 sc, 1 hdc, 1 dc, 2 dc in the same stitch, 2 dc in the same stitch, 1 hdc, 3 hdc in the same stitch.
- Continue on the other side of the chain. You now have 8 loops to crochet the following: 1 hcd, 2 dc in the same stitch, 2 dc in the same stitch, 1 dc, 1 hdc, 1 sc, 1 ss, 1 ss.
- Cut the yarn and leave a long tail. Sew the yarn down through the leaf. You can pull a little to adjust the appearance of the leaf. Make two or three.
Orange
The orange consists of a top and a bottom. Now, you have to make the first part of the orange:
Yarn: Yellow
- 1.rd: Start with 6 sc in the magic ring (6)
- 2.rd: *1 inc* x 6 (12)
- 3.rd: *1 sc, 1 inc* x 6 (18)
- 4.rd: *2 sc, 1 inc* x 6 (24)
- 5.rd: *3 sc, 1 inc* x 6 (30)
- 6.rd: *4 sc, 1 inc* x 6 (36)
- 7.rd: *5 sc, 1 inc* x 6 (42)
now, Yarn: White
- 8.rd: *6 sc, 1 inc* x 6 (48)
Yarn: Orange
- 9.rd: *7 sc, 1 inc* x 6 (54)
Cut the yarn, fasten all ends and sew on the white details.
Now you have to make the bottom, which will become the other half part of the orange:
Yarn: Orange
- 1.rd: Start with 6 sc in the magic ring
- 2.rd: *1 inc* x 6 (12)
- 3.rd: *1 sc, 1 inc* x 6 (18)
- 4.rd: *2 sc, 1 inc* x 6 (24)
- 5.rd: *3 sc, 1 inc* x 6 (30)
- 6.rd: *1 sc in each stitch* (30)
- 7.rd: *4 sc, 1 inc* x 6 (36)
- 8.rd: *5 sc, 1 inc* x 6 (42)
- 9.rd: *6 sc, 1 inc* x 6 (48)
- 10.rd: *7 sc, 1 inc* x 6 (54)
- 11.-15.rd: *1 sc in each stitch* (54)
Cut the yarn and leave a long string. Use this to sew the top and bottom together.
First, sew the leaves to the bottom. I usually do it through the magic ring. When done, fill the bottom with teddy bear stuffing. Cut a cardboard disc of approx. 6-6.5 cm in diameter and glue it to the top. This should make sure to keep the flat shape and keep the teddy bear filling in place. Put the two parts together. Now sew through the front loop on the bottom part and both loops on the top.
Designer: Bomuldskys On Instagram


