Elevate your handmade creations with a versatile crochet tassel crafted from durable T-shirt yarn. Perfect for accessorizing bags, home decor, or even keychains, this project is quick, beginner-friendly, and endlessly customizable. Get creative while adding a chic touch to your crafts!
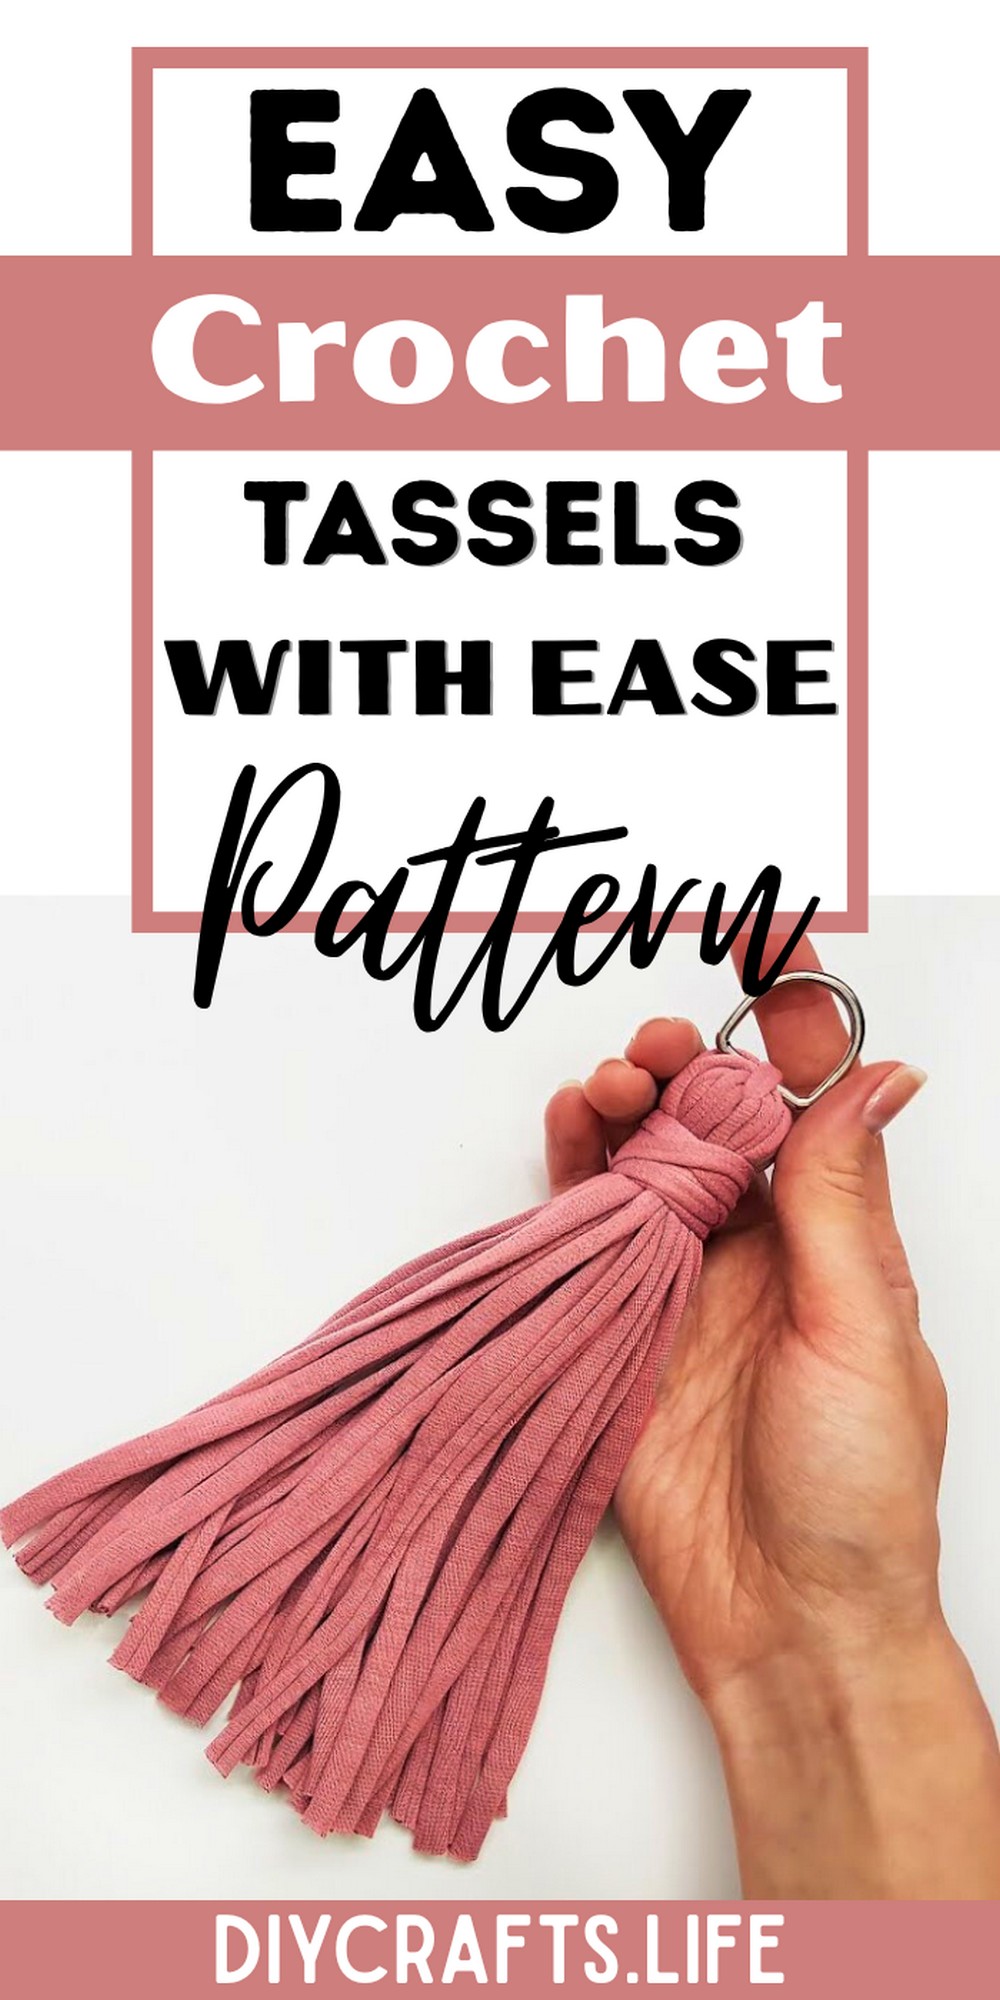
T-shirt yarn tassels are sturdy, stylish, and practical. Attach them to bags for added flair, use them as boho-inspired home decor, or add them to accessories for a playful vibe. Their durability and craftable sizes ensure they accommodate various uses while staying beautiful and resilient.
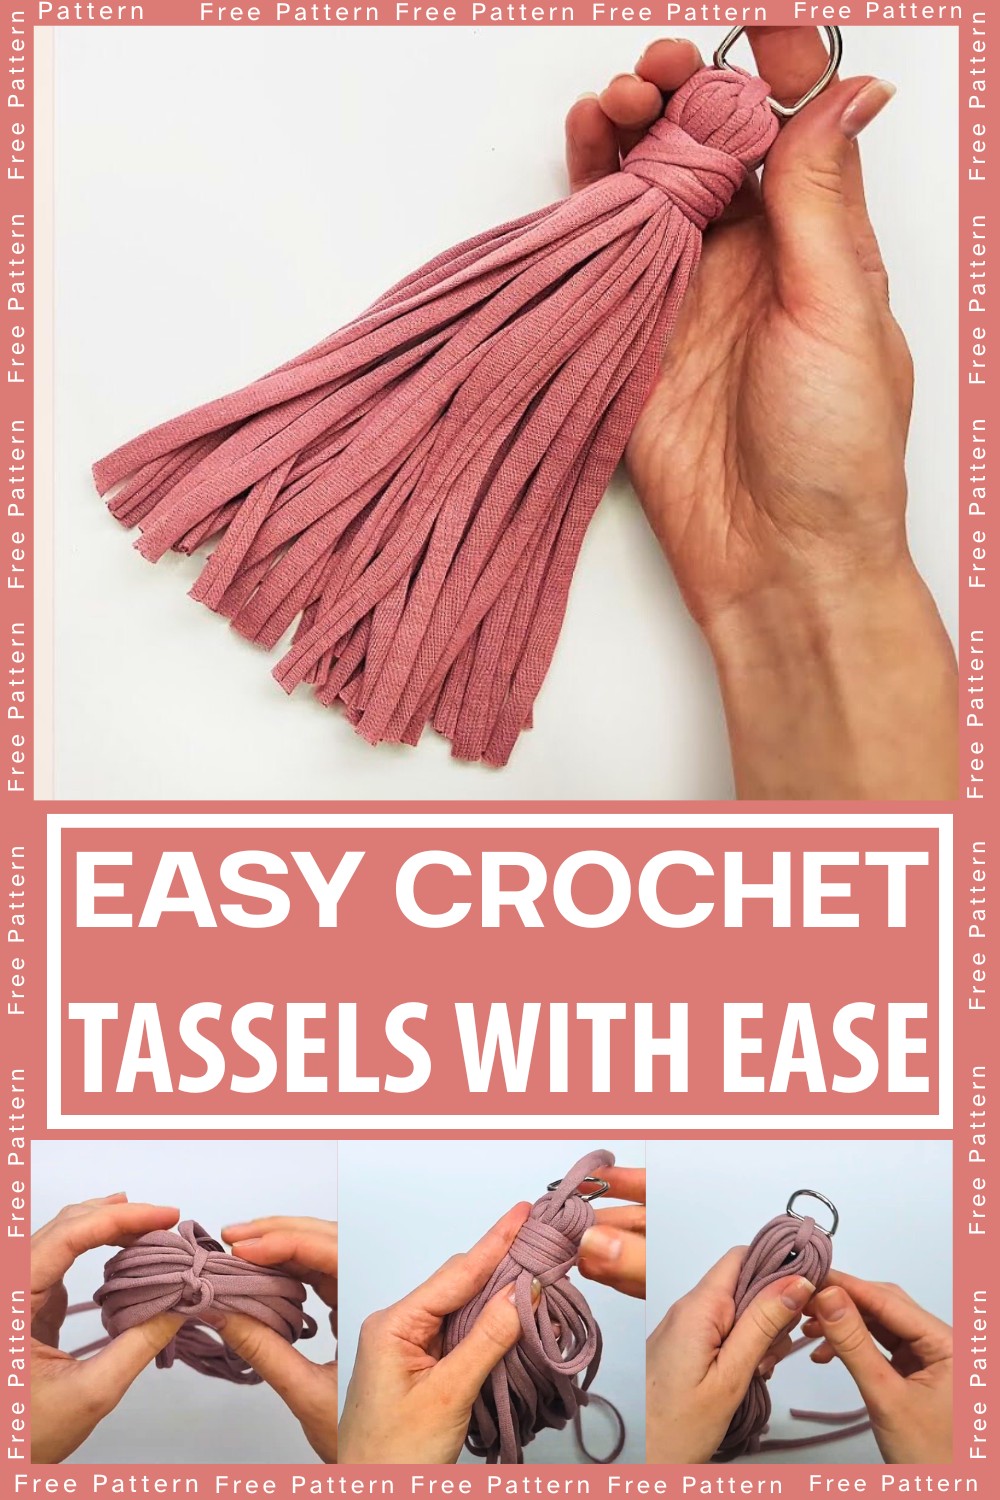
Crochet Tassels with Ease
Creating a tassel with T-shirt yarn is straightforward and fun, making it suitable for all levels of crochet enthusiasts. With easy steps and creative freedom on colors, sizes, and embellishments, you'll craft unique tassels that perfectly suit your style. Get ready to explore your creativity!
Materials and Preparation
Required Materials:
- T-shirt Yarn: Any color or weight that suits your project.
- Piece of Cardboard: Approx. the size of the desired tassel length. Alternatively, you can use a book or any sturdy object.
- Metal Half-Ring or Carabiner: For attaching the tassel to bags or other accessories.
- Crochet Hook: (Optional) Used to tuck the tip of the yarn neatly into the tassel.
- Scissors: For trimming yarn ends and creating even lengths.
Abbreviations and Notes
Abbreviations:
While this project doesn’t involve traditional crochet stitches, you’ll work with simple techniques:
- Slip Knot: A basic knot used to secure yarn threads.
Notes/Tips Before Starting:
- Ensure the cardboard or sturdy object is the right size for the tassel length.
- Work tightly when winding the yarn around the tassel to create a dense and polished look.
- Be careful when trimming yarn ends to achieve even lengths without cutting too short.
Gauge, Approximate Size, and Pattern Notes
Gauge:
Gauge is not applicable for this tassel project, as the process is freeform and based on personal preferences for size and density.
Finished Dimensions:
The finished tassel size depends on:
- The size of the cardboard (or object) used for winding.
- The number of yarn loops wound around the object.
Typical tassels range from 3–6 inches in length.
Special Techniques:
- Hidden Knot: A technique is used to secure the wrapped yarn neatly by tucking the knot under the wound thread.
- Yarn Layer Winding: Ensuring consistent yarn tension while winding is key to a symmetrical, full tassel.

Step-by-Step Pattern
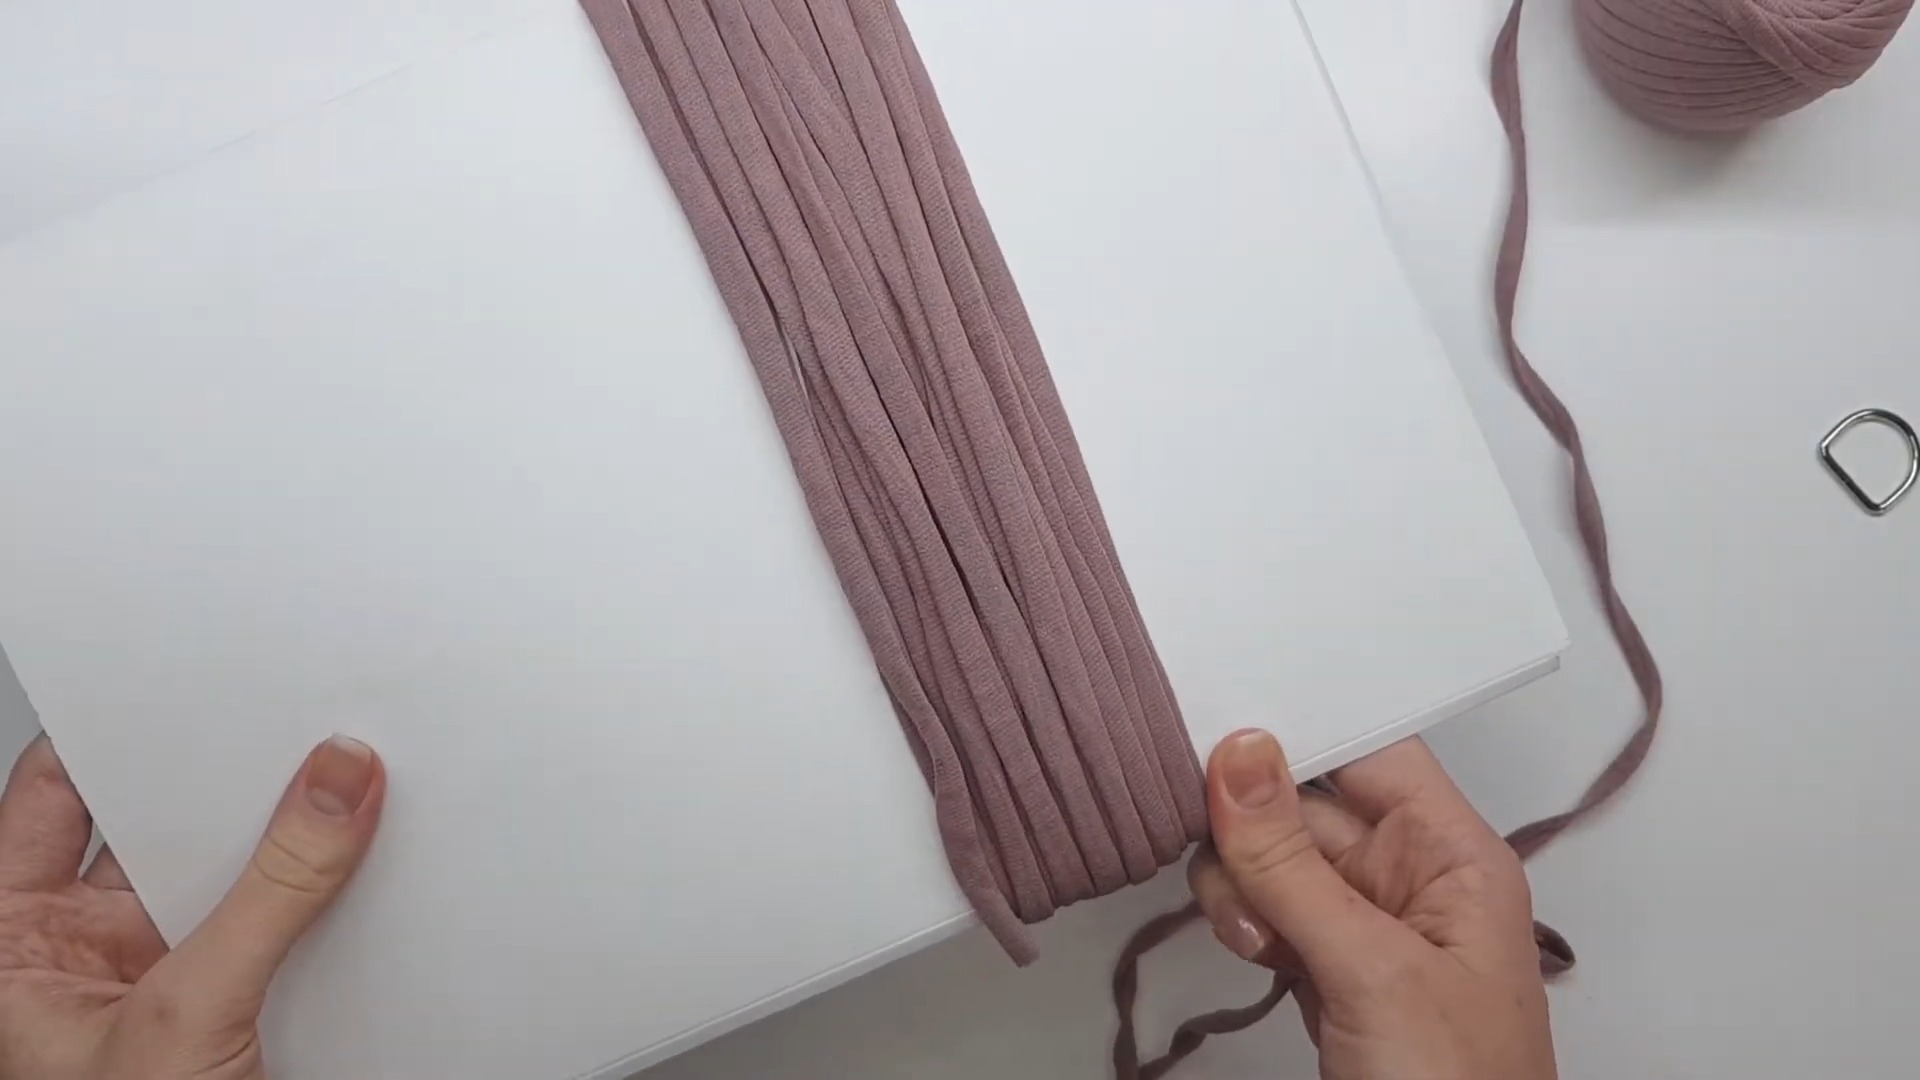
Step 1: Prepare the Base
- Choose a piece of cardboard (or book) as a base for winding the tassel.
- Begin winding the T-shirt yarn tightly around the cardboard (or chosen object), ensuring the yarn lies flat and evenly.
- Continue winding until the desired thickness and volume are achieved for the tassel.
Step 2: Secure the Tassel Top
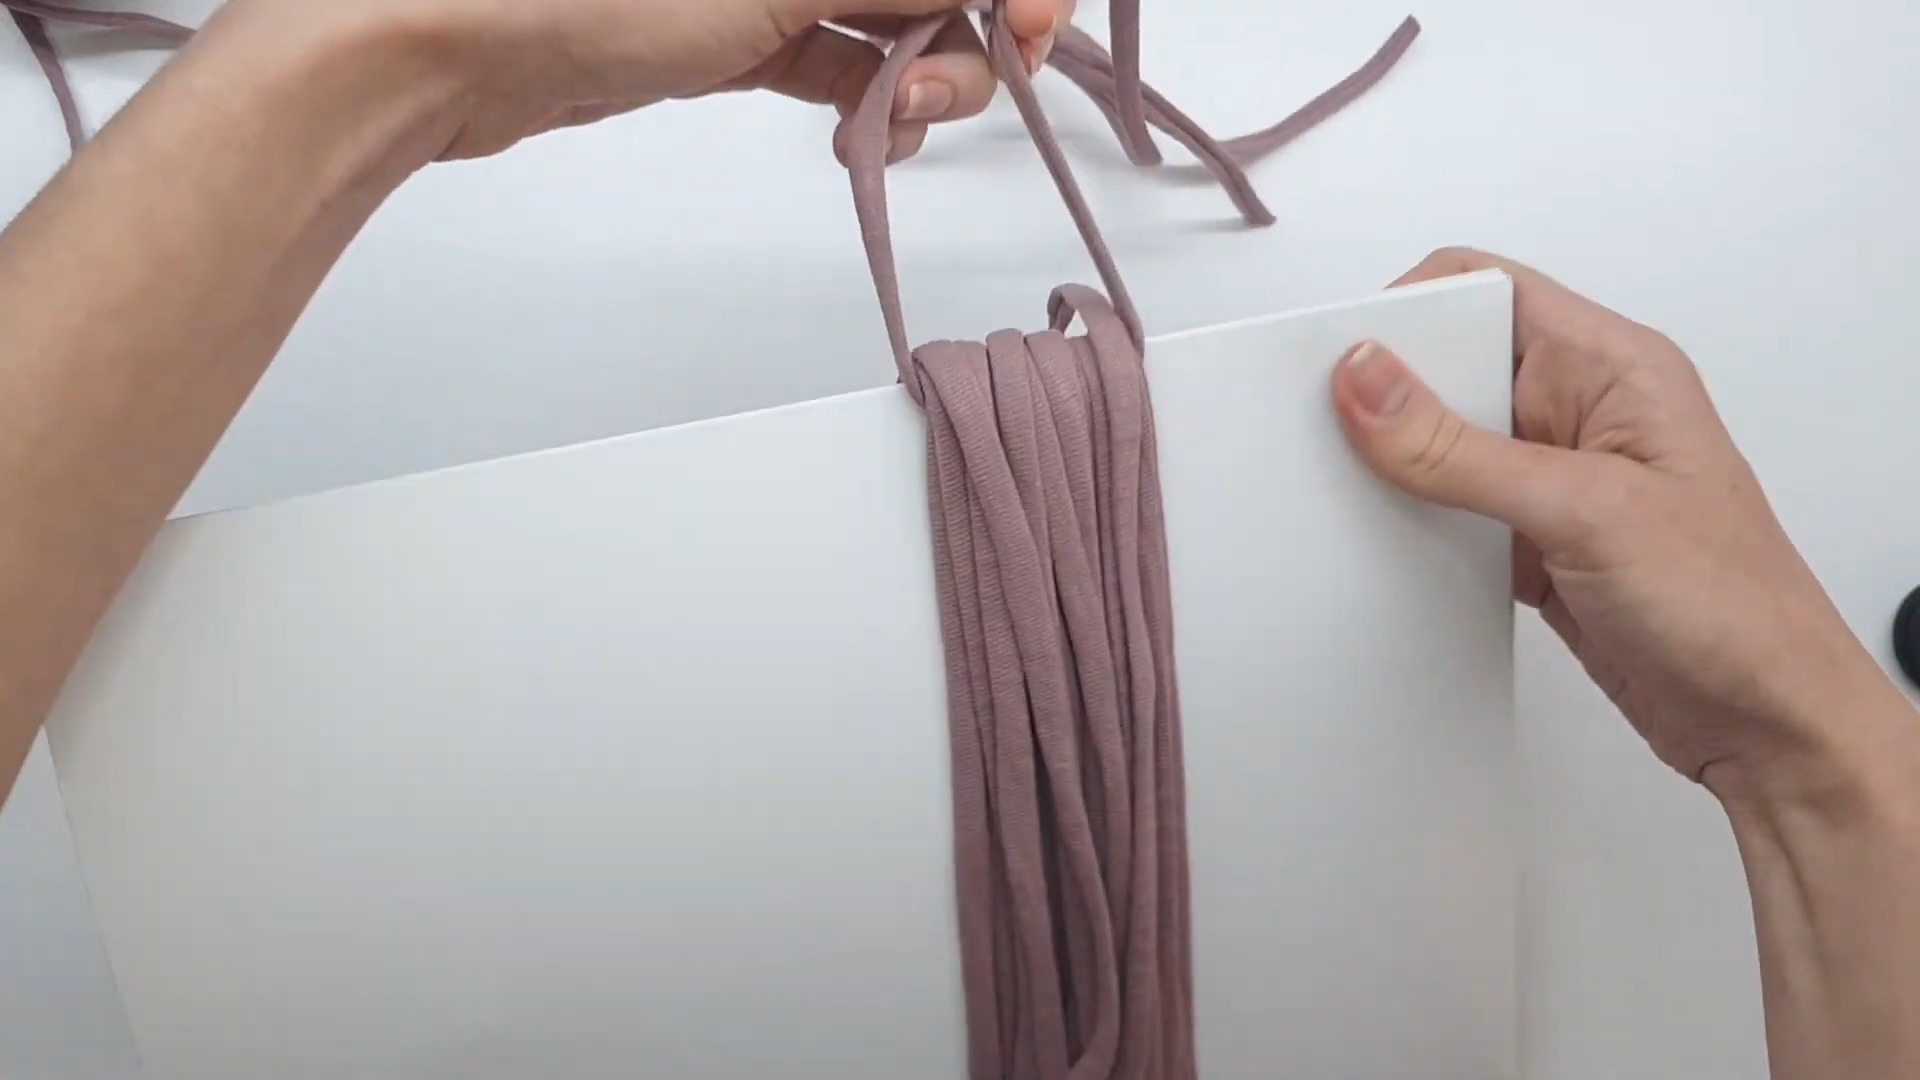
- Cut the yarn at the bottom of the cardboard, leaving the loops intact.
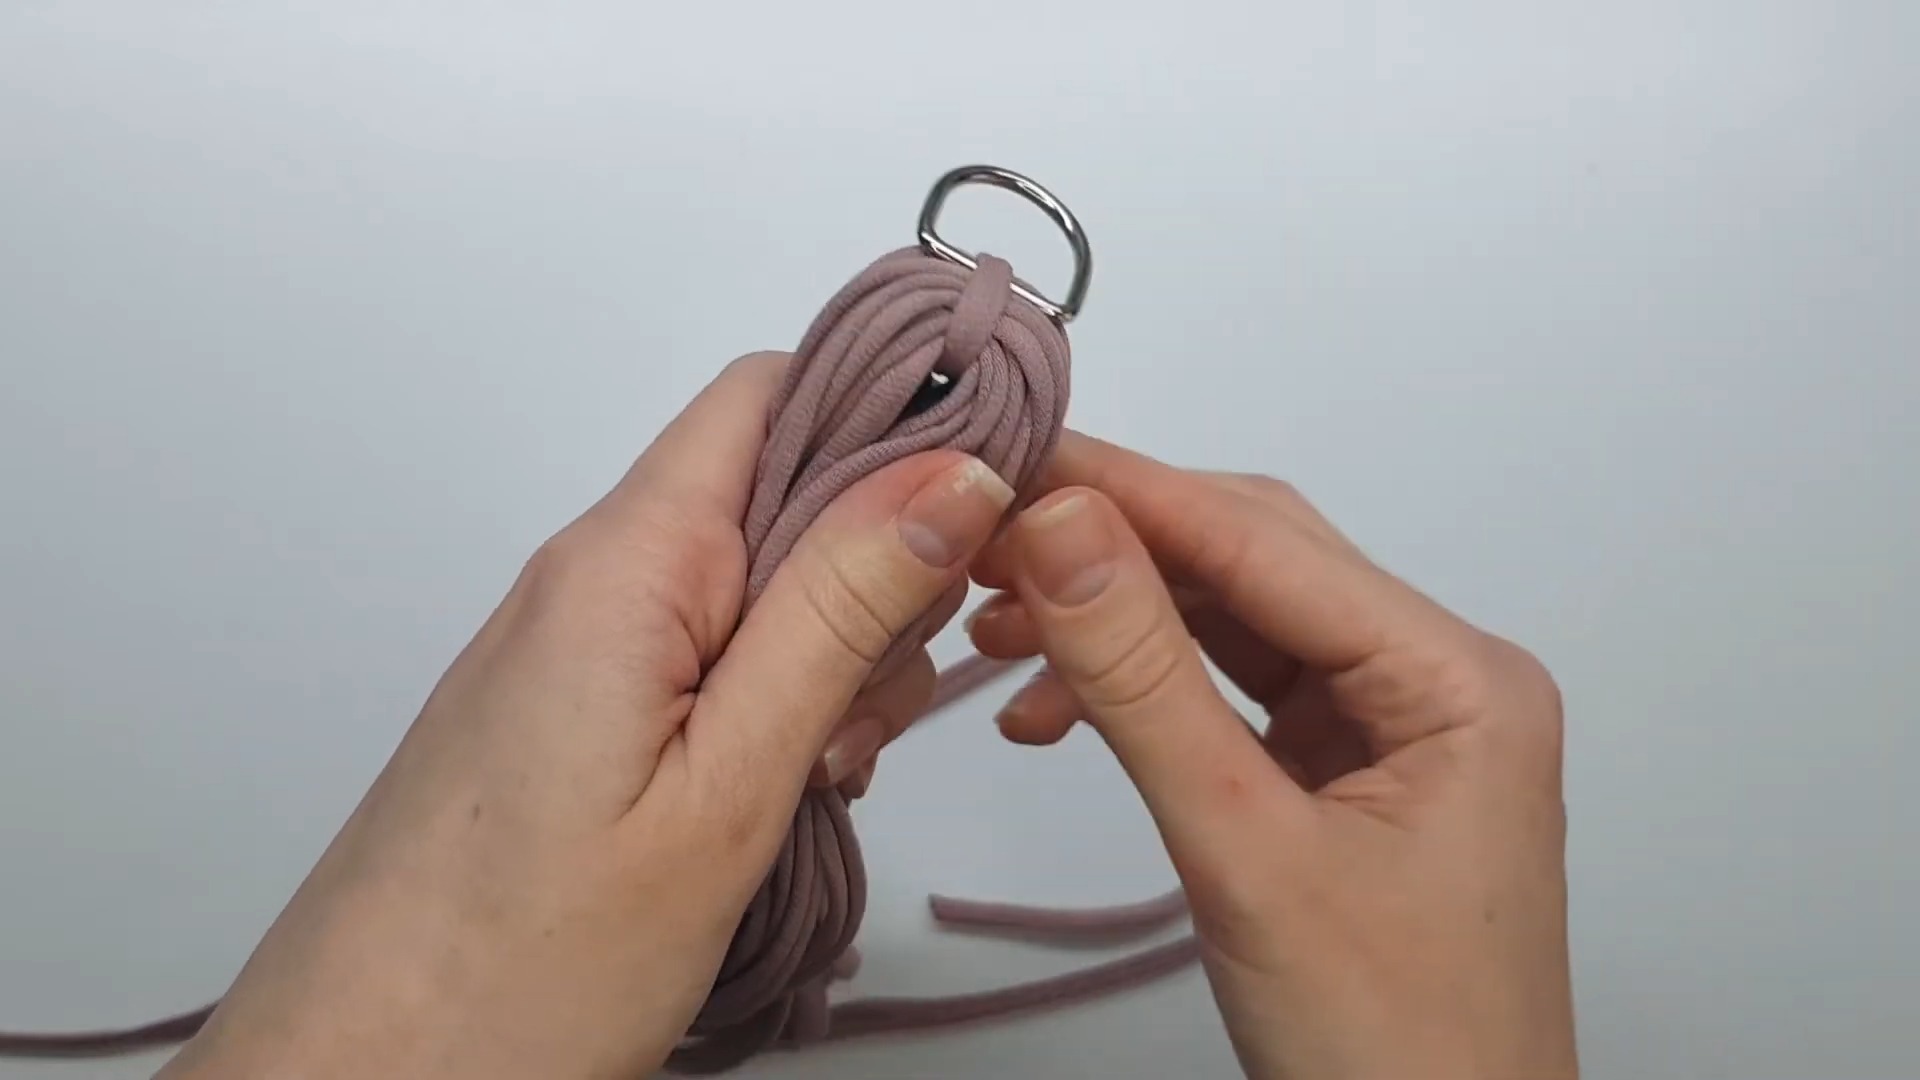
- Take a separate piece of yarn (approx. 2 lengths of the cardboard) and thread it through a metal half-ring or carabiner.
- Slide this yarn under the entire yarn layer wound around the cardboard.
- Pull the yarn to the top of the wound yarn and tie securely in the center. Use a couple of tight knots to keep it in place.
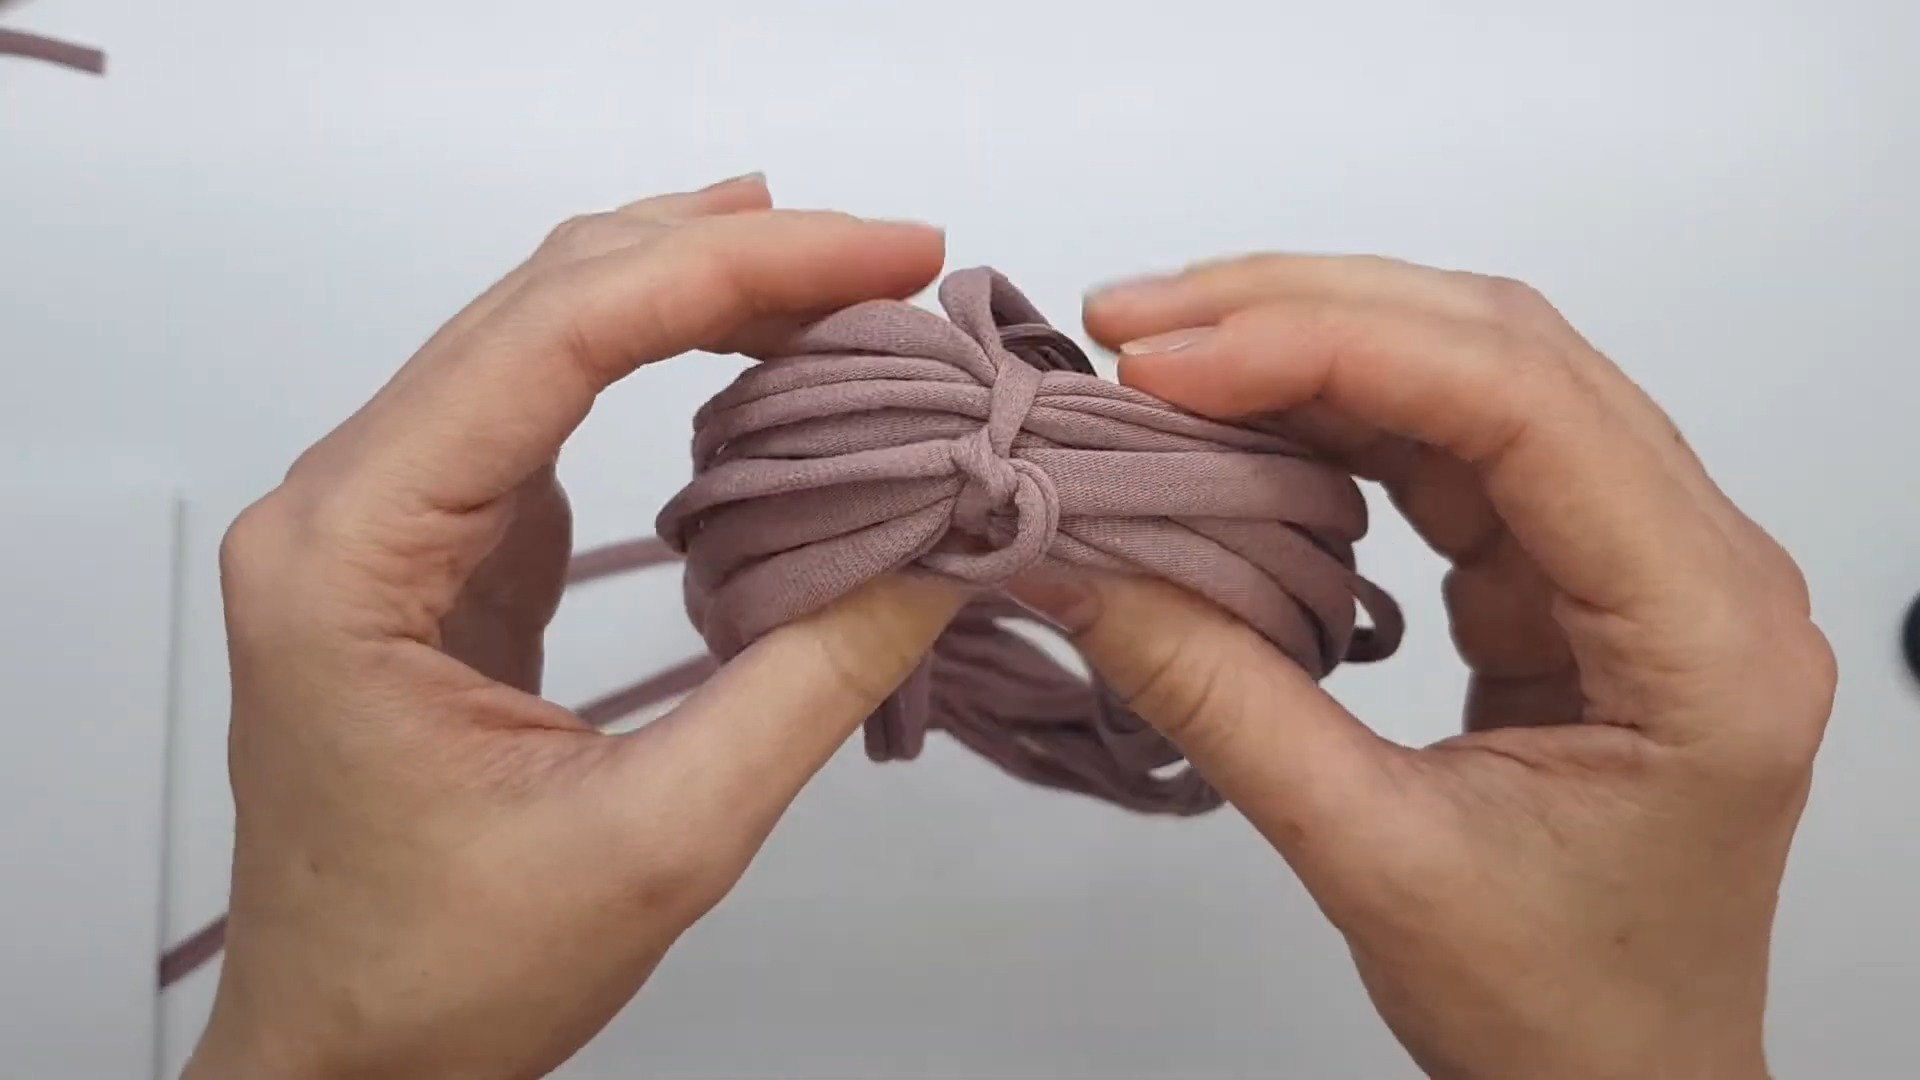
Step 3: Remove the Tassel from the Base
- Carefully slide the yarn loops off the cardboard or book and turn the tassel inside out.
- The tied section at the top should form the base handle of the tassel.
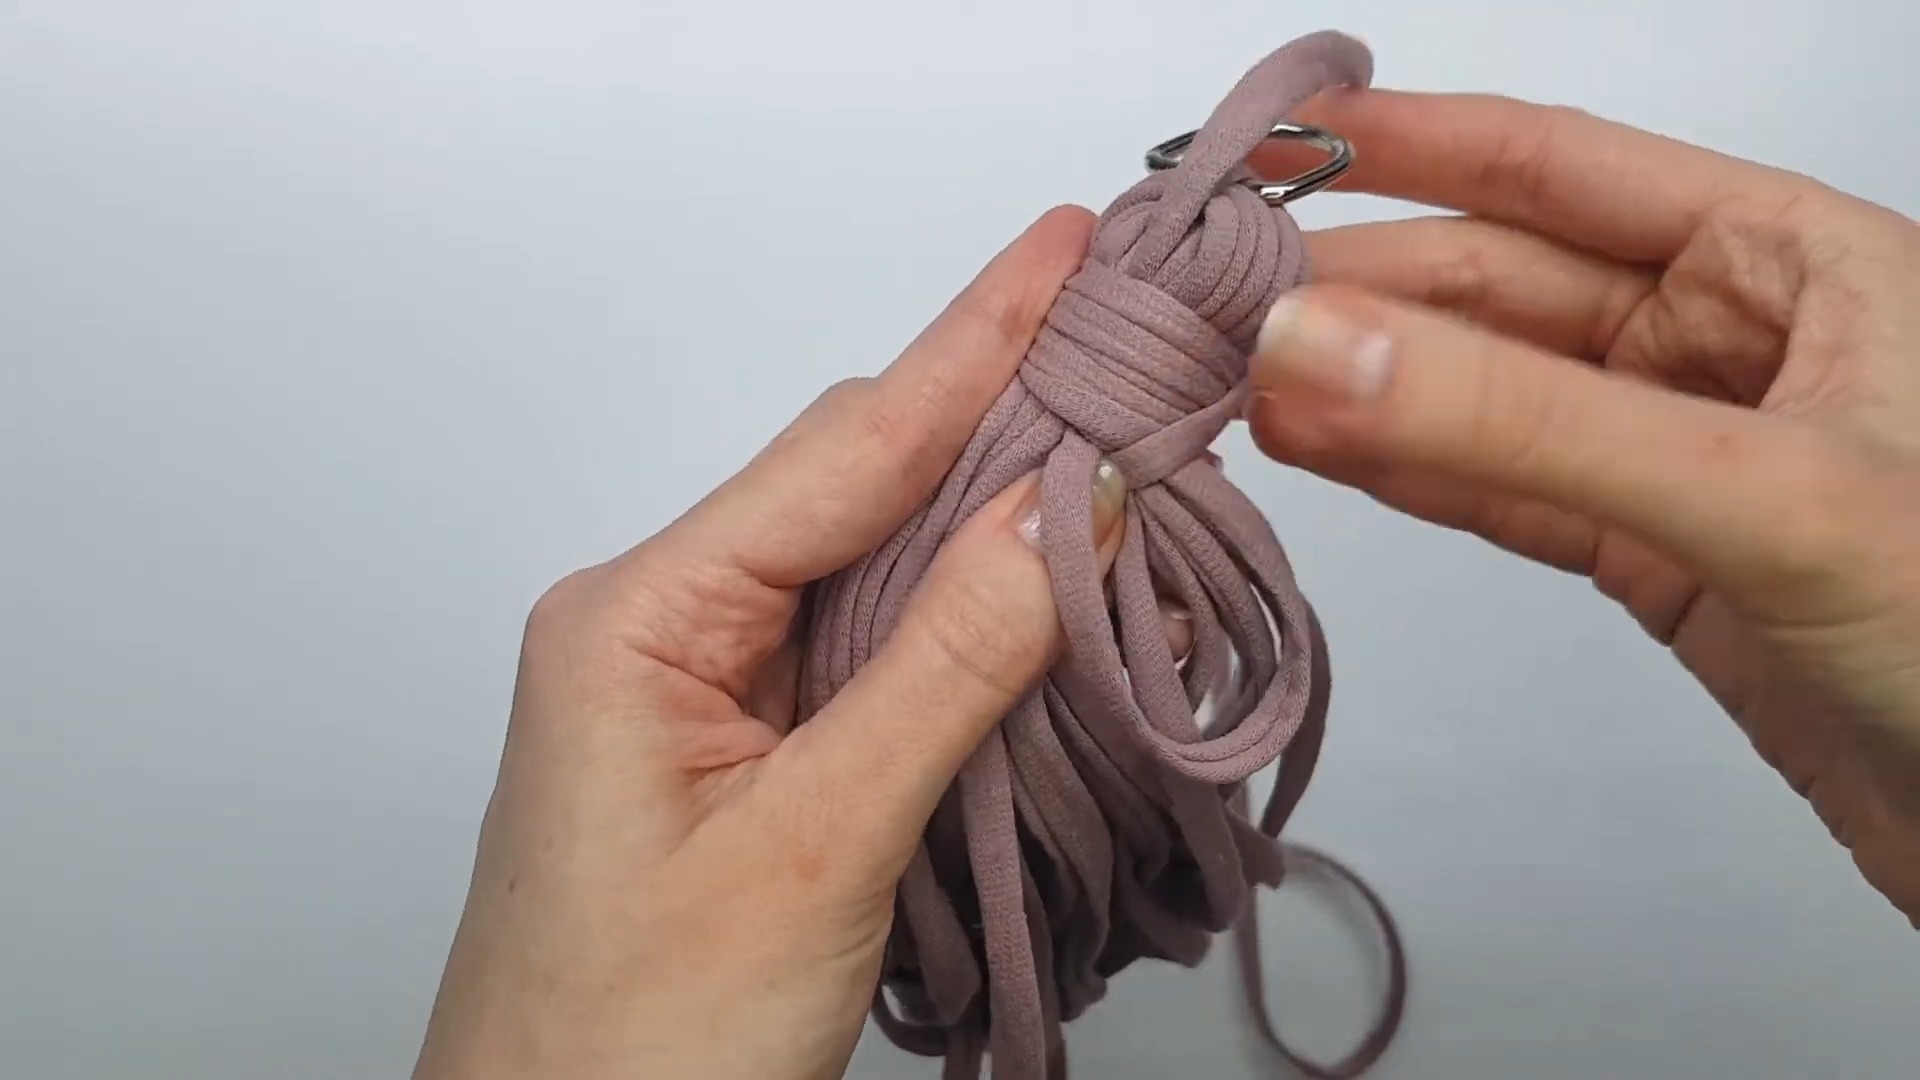
Step 4: Wrap the Tassel Neck
- Take another piece of yarn approx. 3–4 lengths of the tassel and lay it over the tassel.
- Create a small loop at the top as you begin to wind the yarn tightly around the tassel neck to secure the layers.
Step 5: Secure the Neck Wrap
- After finishing the winding, insert the loose yarn tip into the loop left earlier.
- Hold this tip and pull the opposite tip tightly. This action hides the knot under the wound yarn.
- Use a crochet hook to tuck the tip through the tassel neck and pull it down to the tassel's body.
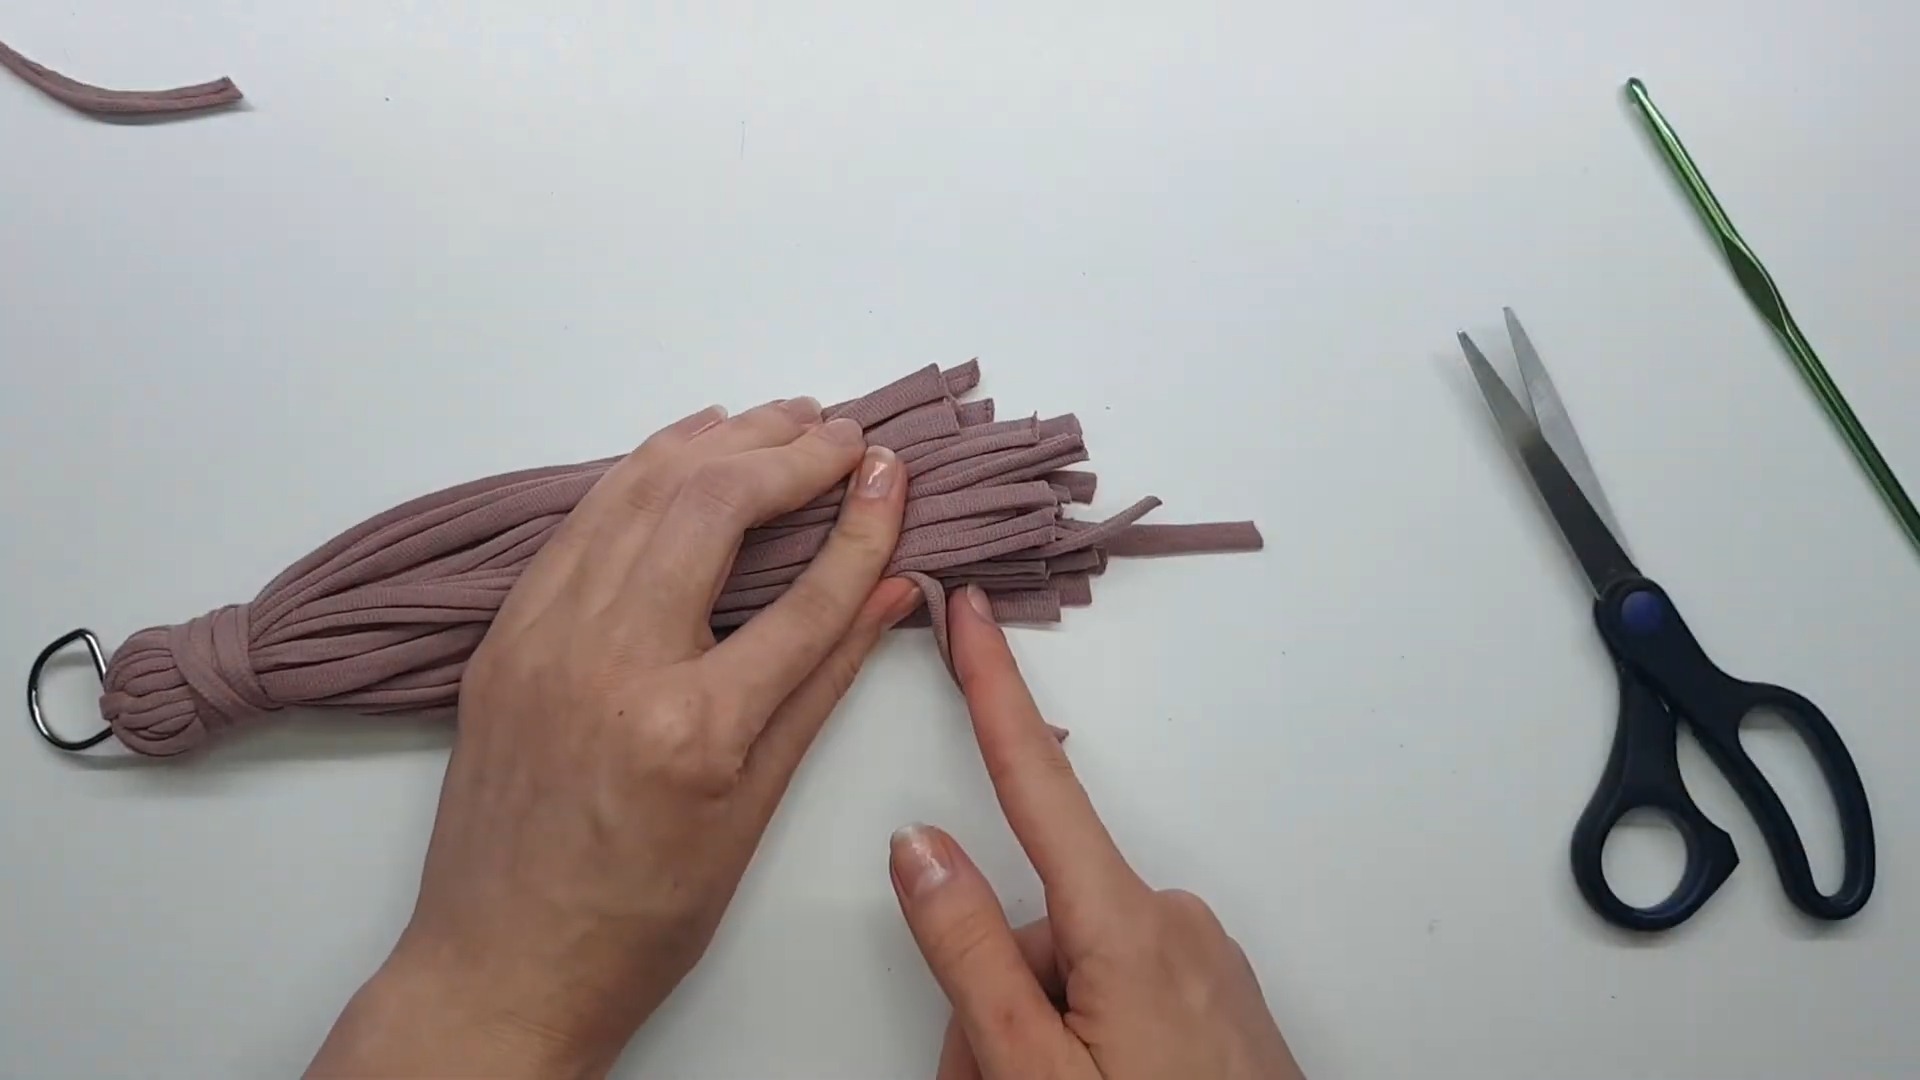
Step 6: Trim the Tassel Ends
- Use scissors to cut the loops at the bottom of the tassel, creating individual strands.
- Evenly trim all yarn threads to achieve a uniform length.
Step 7: Final Touch
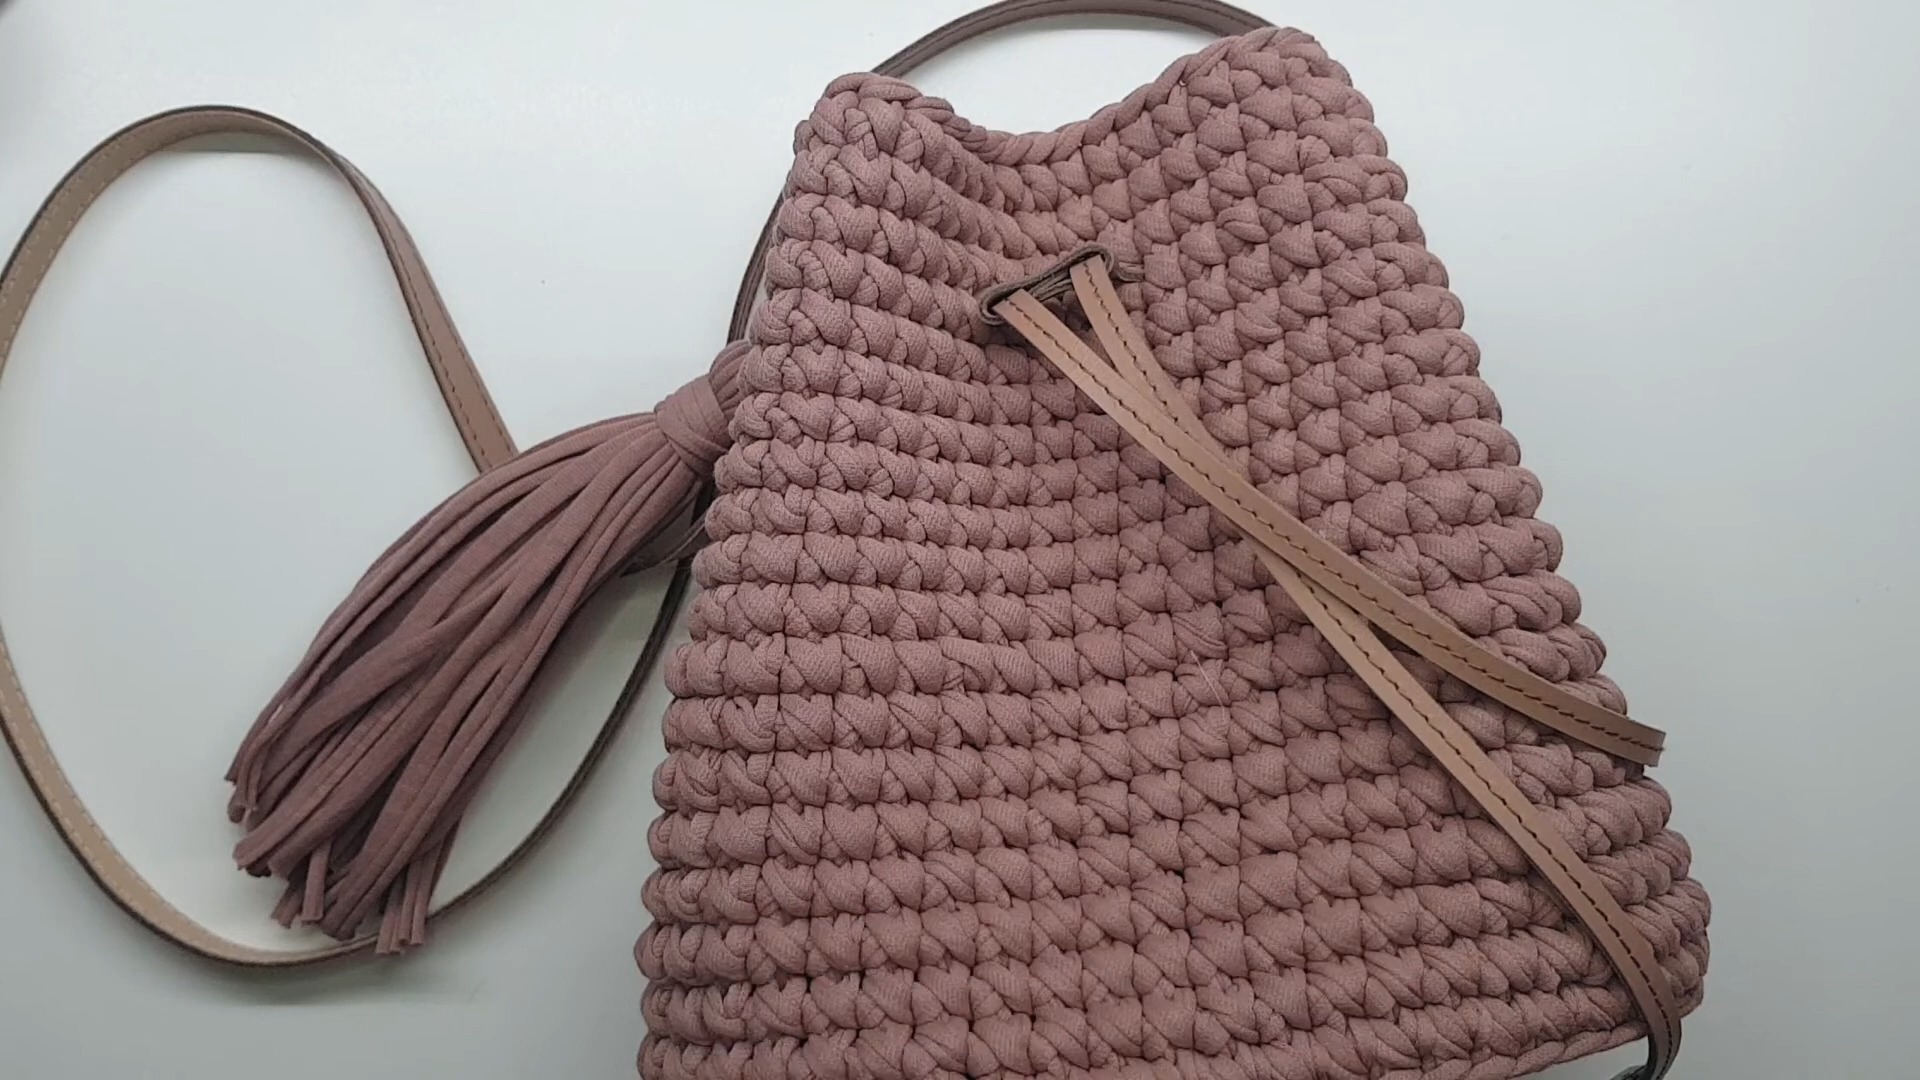
- Attach the tassel to your crocheted bag or other accessories using the half-ring or carabiner.
Conclusion
Your T-shirt yarn tassel is ready to shine as an accessory! If you enjoyed this tutorial, consider subscribing to the YouTube channel for more fun and creative projects. Don't forget to give the video a thumbs up and activate notifications to stay tuned for future tutorials.
Pattern Question:
Question: Can I use any type of yarn for this project instead of T-shirt yarn?
Answer: Yes, you can use other yarn types, but T-shirt yarn offers a thicker, sturdier finish perfect for durable tassels. Adjust the number of wraps to achieve your desired volume when using thinner yarns.


