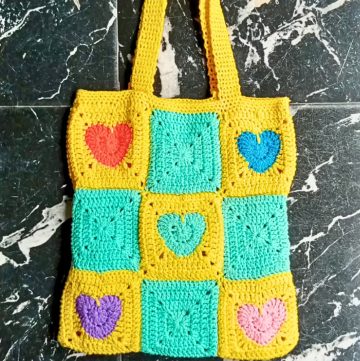
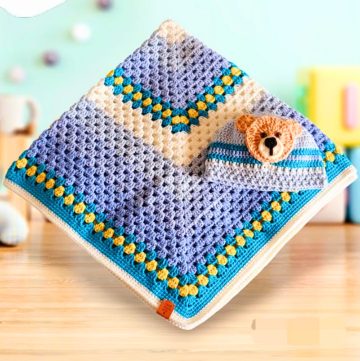
A crochet heart granny square is a simple yet charming way to add a personal touch to almost anything. Why is it special? It combines the timeless beauty of a granny square with the sweet design of a heart. It’s perfect for expressing love and warmth. You can make this square to decorate your home, add it to larger crochet creations like blankets, or turn it into fun accessories like bags or cushions.

Making one is straightforward and satisfying. A heart is crocheted at the center, surrounded by neat square edges, creating a balance between softness and structure. Anyone can have fun crocheting it, even beginners! Watching the tutorial will guide you step by step, making it easy and enjoyable. You’ll have your finished square in no time, ready to brighten up any space or gift to someone special.
Credit Playful Regal
Materials & Tools Needed
- Yarn: Size 3 acrylic yarn
- Crochet Hook: Size 3.5 mm.
- Scissors
- Tapestry Needle for weaving in ends.
Pattern Abbreviations & Terminology
This pattern uses US Terminology.
- ch = Chain
- sl st = Slip Stitch
- sc = Single Crochet
- hdc = Half Double Crochet
- dc = Double Crochet
- tr = Treble (Triple) Crochet
- yo = Yarn Over

Step-by-Step Detailed Crochet Instructions
Heart Component (Rounds 1-2)
Round 1: Foundation Circle
- Begin with a slip knot, then chain 4 (ch 4).
- Form a ring by making a sl st into the first chain.
- All the stitches for this round will be worked into the center of the ring:
- Ch 3 (counts as the first dc).
- Work 11 dc into the ring. (12 stitches total, including the initial ch-3).
- Join with a sl st into the third chain of the starting ch-3.
Round 2: Form the Heart Shape
- Skip the first ch-3 and the first dc.
- In the next stitch, work 7 tr (all 7 treble crochets go into the same stitch).
- In the next stitch, make 1 dc.
- In each of the next 2 stitches, work 2 dc into each (a total of 4 dc across these two stitches).
- At the next stitch:
- Make 2 dc, then pull up a loop in the front loop of the last dc.
- Yarn over and pull through to secure the tip.
- Work 2 more dc into the same stitch.
- In the next 2 stitches, work 2 dc into each (a total of 4 dc across these two stitches).
- In the next stitch, make 1 dc.
- In the next stitch, work 7 tr (all 7 treble crochets go into the same stitch).
- Skip the next stitch and finish by making a sl st into the third chain of the starting ch-3.Heart Tip: To secure the shape, bring the loop to the back and insert the hook from behind into the space between the last dc and the starting ch-3. Hook the loop, pull it through, and chain 1 to fasten off.
Your heart is now complete!

Square Component (Rounds 3-5)
Round 3: Square Foundation
- Change to the second yarn color and begin with a slip knot.
- Insert your hook into the space between the starting ch-3 and the last dc of the heart. Work an extended sc in this space:
- Pull up a long loop, then yo and pull through both loops on your hook.
- Pull tight, then ch 2.
- Begin shaping the square:
- In the first tr stitch of the heart, work 1 hdc.
- In the next 2 stitches, make 1 sc in each.
- In the next stitch: Work 1 hdc, ch 2, 1 hdc (this creates your first corner).
- In the next 3 stitches, make 1 sc in each.
- In the next stitch: 1 hdc.
- In the next 2 stitches, work 1 dc in each.
- In the next stitch: Work 1 tr, ch 2, 1 tr (this creates a second corner).
- Repeat this pattern around the remaining edges of the heart. Add corners as described in the corresponding positions.
- After completing the final stitch, join with a sl st into the first hdc of the round.
Round 4: Square Expansion
- Ch 1 (does not count as a stitch).
- In the same stitch, work 1 dc.
- Work 1 dc in each stitch across until the corner ch-2 space.
- At the corner: Work 2 dc, ch 2, 2 dc in the ch-2 space.
- Continue around, working 1 dc in each stitch and adding corner stitches (2 dc, ch 2, 2 dc) in each corner ch-2 space.
- At the end of the round, finish with a sl st into the first dc.

Round 5: Final Round
- Repeat the steps for Round 4, working 1 dc in each stitch and adding corner stitches in each corner ch-2 space (2 dc, ch 2, 2 dc).
- Make sure to pull corners to reveal all stitches to avoid accidentally skipping.
- Finish with a sl st into the first dc of the round.
Counts: By the end of this round, you should have 16 stitches between each corner ch-2 space.

Finishing Techniques
- After completing the final slip stitch, fasten off by pulling the yarn through the loop.
- Weave in all loose ends on the back of the square using a tapestry needle.