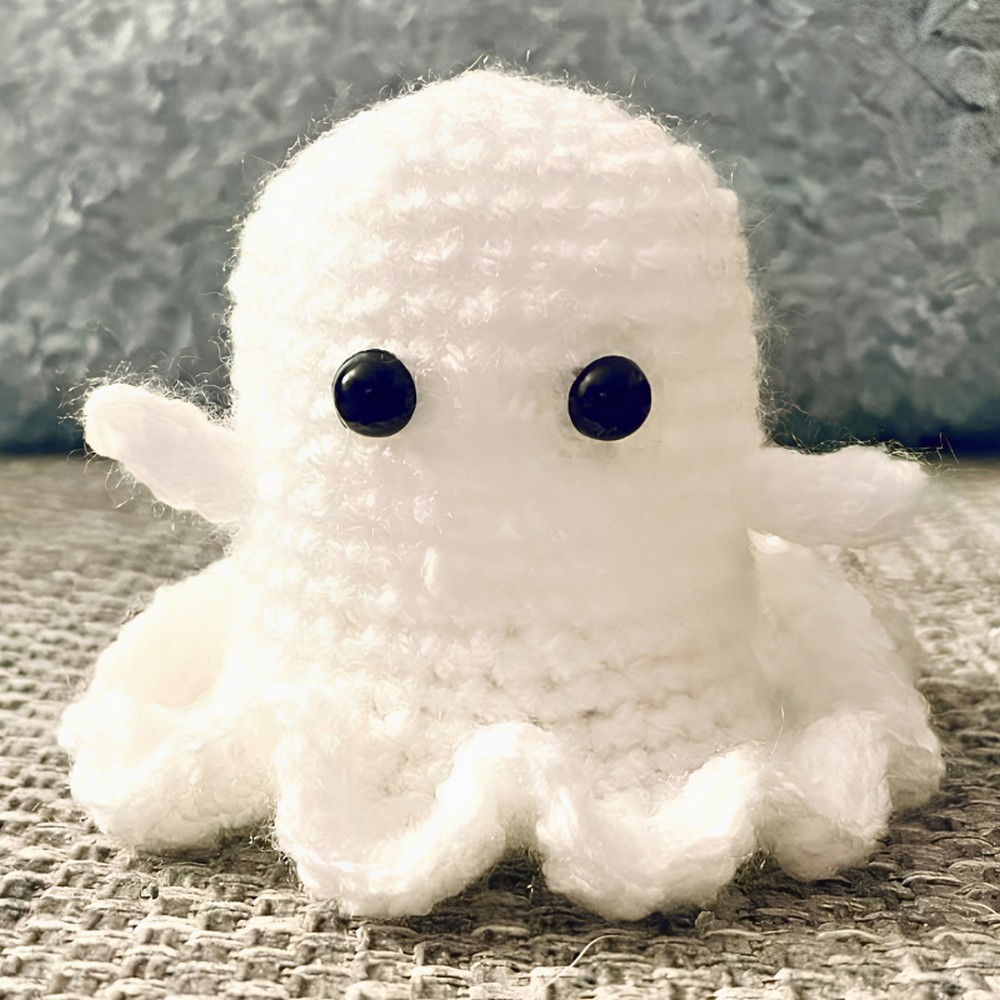
This crochet ghost is both adorable and functional, making it a perfect decoration for Halloween. You can use it as a freestanding piece or pair it with an LED tealight to create a soft glow that brings your ghost to life. Whether sitting on a shelf or glowing on your table, it’s sure to add a charming touch to any spooky setup.
Crochet Halloween Ghost Tutorial

Making this ghost is easy, requiring basic materials like double-knit yarn, a crochet hook, and simple safety eyes or embellishments you choose. The crochet design helps beginners practice basic techniques, gradually shaping the ghost’s smooth body and wavy bottom. Adding little arms and safety eyes gives it personality, while the glow feature makes it a standout decoration. Whether it's for your table, mantel, or room decor, this crochet ghost adds a touch of playful fun to the season.
Credit Make, Do & Craft - Crochet
Materials & Tools Needed:
- Yarn: Ordinary double-knit yarn in white (or desired ghostly color).
- Safety Eyes: Approx. 5 mm (or customize with felt, buttons, or embroidery).
- Hook: 3 mm crochet hook.
- Other Tools:
- Stitch markers (optional, for keeping track of rounds).
- Scissors.
- Yarn needle (for weaving in ends).
- LED tealight (optional, for display purposes).
Finished Size & Customization Ideas:
- Size: The size depends on your yarn and hook, but the ghost fits perfectly as a freestanding decoration or as a cover for an LED tealight.
- Customization Ideas:
- Use glow-in-the-dark yarn for a spooky effect.
- Embroider a mouth for added personality.
- Experiment with different yarn colors or embellishments like tiny bows or sequins.
Pattern Abbreviations & Terminology:
- The pattern uses US crochet terms:
sc = single crochet (UK equivalent: double crochet)
inc = increase (2 single crochets in the same stitch)
sl st = slip stitch
st = stitch
ch = chain
rnd = round
Step-by-Step Crochet Instructions:
Body and Base (Rounds 1-18)
Round 1:
- Begin with a magic ring. (Refer to the video tutorial playlist on "YouTube Basics" for help creating this.)
- Work 6 sc into the magic ring.
- [Total: 6 stitches]
Round 2:
- Work 2 sc in each stitch (inc in each st) around.
- [Total: 12 stitches]
Round 3:
- (1 inc, 1 sc) – Repeat around (6 times).
- [Total: 18 stitches]
Round 4:
- (1 inc, 2 sc) – Repeat around (6 times).
- [Total: 24 stitches]
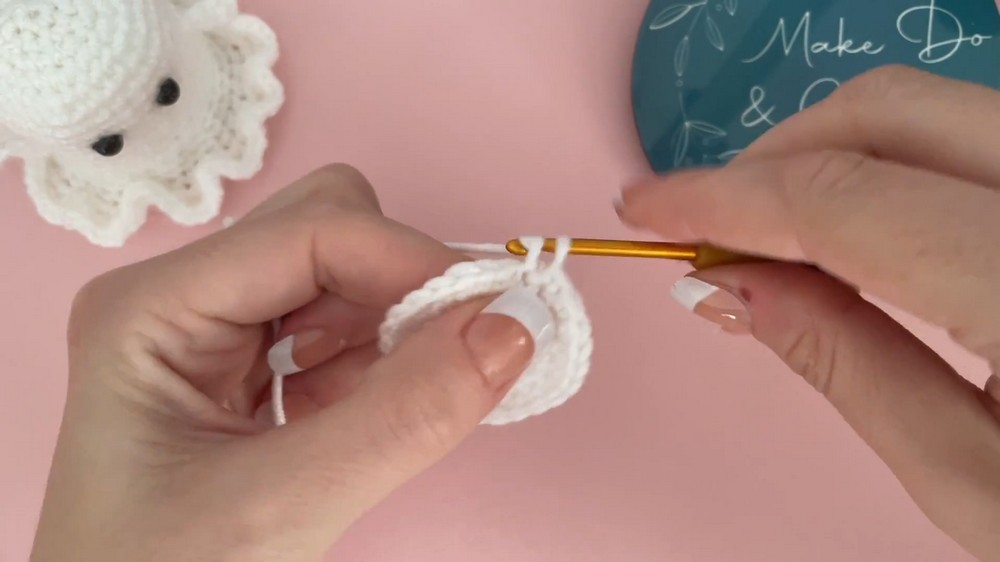
Round 5:
- (1 inc, 3 sc) – Repeat around (6 times).
- [Total: 30 stitches]
Rounds 6-15:
- Work 1 sc in each stitch around for 10 rounds.
- [Total: 30 stitches per round]
At the end of Round 15, you should have a tall, cylindrical tube resembling a marshmallow.
Round 16:
- (1 inc, 4 sc) – Repeat around (6 times).
- [Total: 36 stitches]
Round 17:
- Work 2 sc in each stitch (inc in every stitch) around.
- [Total: 72 stitches]
This increases the base to create the beginnings of the ghost’s skirt.
Round 18 (Final Round for the Body):
- (1 sc, 1 inc) – Repeat around.
- [Total: 108 stitches]
At this point, your ghost's body should have a wavy, frilly edge for its "skirt."

Finishing the Ghost’s Body:
- Slip Stitch into the first stitch of the round to minimize the step between rounds.
- If you want more pronounced "waves" in the ghost's skirt, gently pull on the rippled edges to better shape them.
Arms
- Cut two long lengths of yarn (about 8-10 inches each).
- Locate arm placement: Starting from the top, count down to Rounds 11-12. Insert your hook through a hole between stitches in this area.
- Pull a yarn strand through, leaving a tail inside the ghost.
- Tie a double knot (or triple knot for security) to anchor the yarn inside.
- Insert the hook through the arm starting point again and pull up a loop to begin chaining:
- Chain 5.
- Work 4 sc back down the chain, starting in the second chain from the hook.
- Secure the arm by pulling the yarn back into the body, knotting the starting and ending tails on the inside.
- Repeat the steps for the second arm.
- Space the arms evenly by counting 15 stitches around from the first arm’s position.
Optional: Adjust arm placement based on personal preference.
- Space the arms evenly by counting 15 stitches around from the first arm’s position.

Eyes
- Use 5 mm safety eyes, buttons, or embroider facial features.
- For safety eyes: Position them approximately 2 rows above the arms and roughly 4 stitches apart.
- Adjust positioning as needed to create your desired facial expression. You can test placements before fully securing the eyes.
Finishing Touches
- Weave in any remaining ends inside the body.
- If using an optional LED tealight, ensure the ghost sits evenly on top.
- Optional: Use embroidery or embellishments to give the ghost a mouth or decorations.
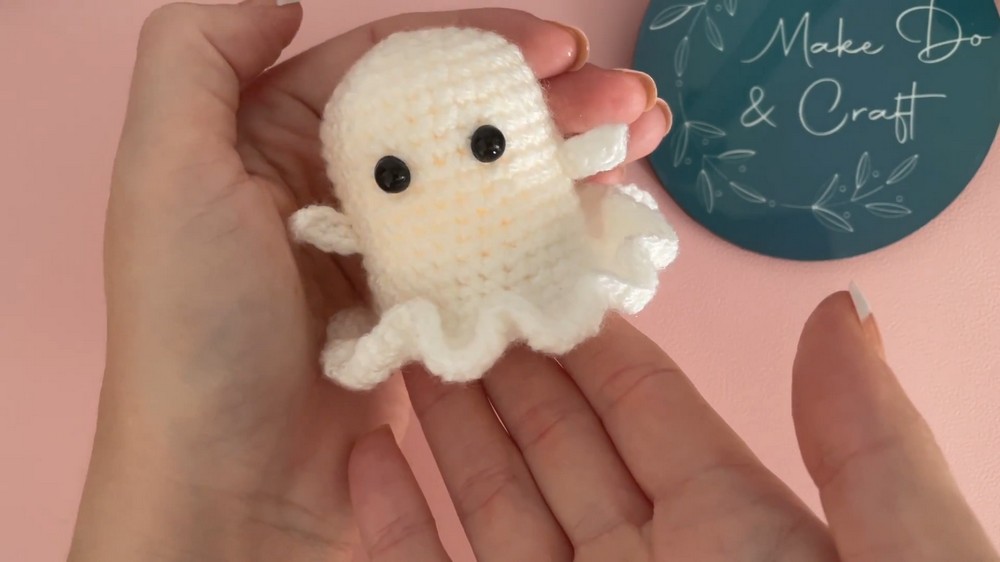
Display
- The ghost is designed to glow charmingly when placed over an LED tealight in a dim or dark environment. Enjoy your festive Halloween decoration and customize it further based on the occasion!